
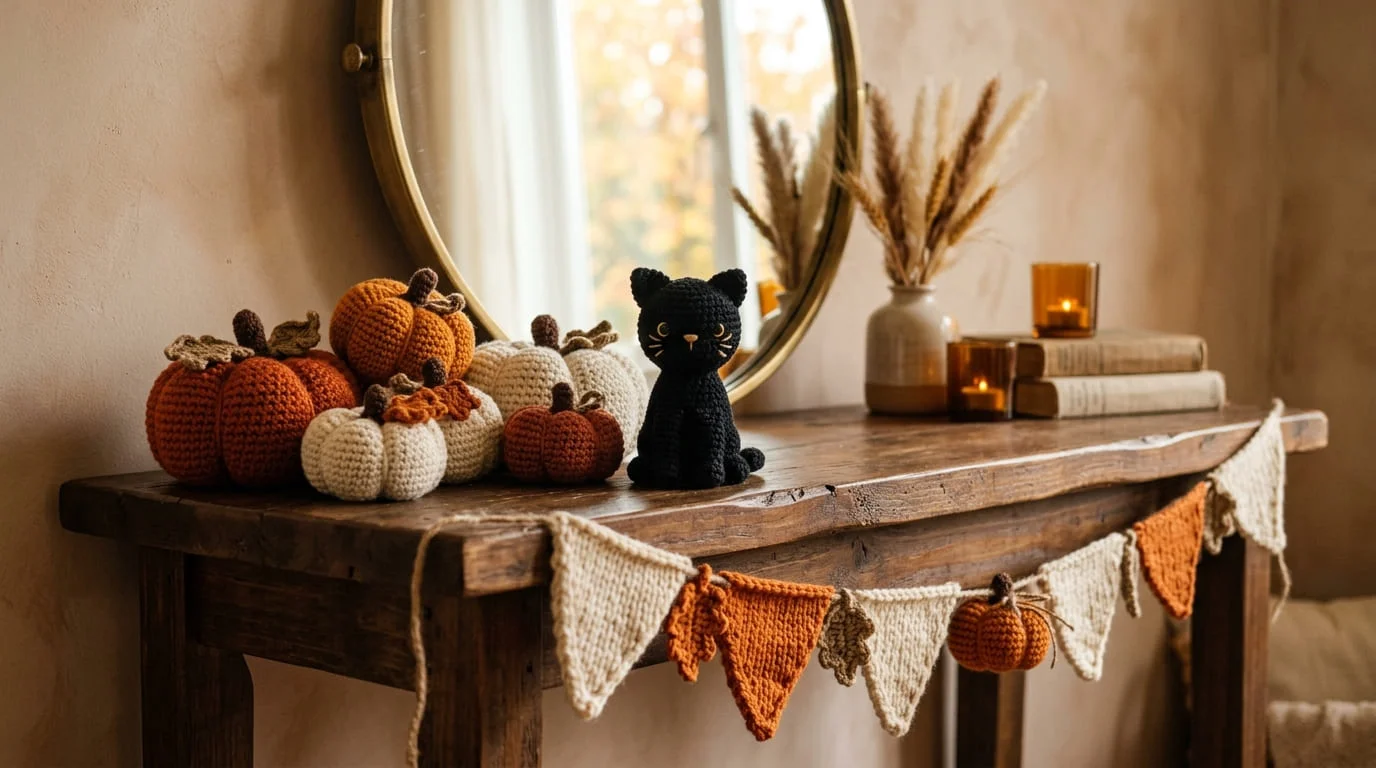
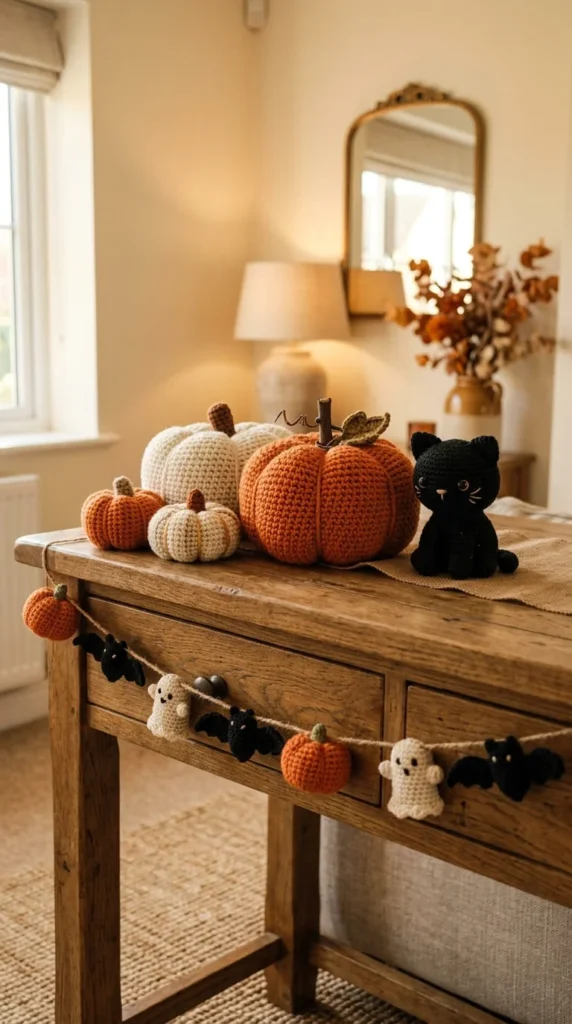
If your yarn stash has been begging for a reason to come out since summer, Halloween is the perfect excuse. Crochet Halloween ideas cover a lot more ground than the usual amigurumi pumpkin — think garlands strung across a mantel, tiny bat ornaments tucked into a wreath, table runners with a gothic edge, and gift bags stitched for the neighborhood kids. This list pulls together 22 projects organized around how you’ll actually use them: quick evening makes, weekend statement pieces, wearable accessories, and functional gifts you can hand out or sell at a fall market. Whether you’re brand new to crochet or comfortable with amigurumi shaping, there’s a project sized to your skill level and your October timeline.
1. A Pumpkin Family in Three Sizes
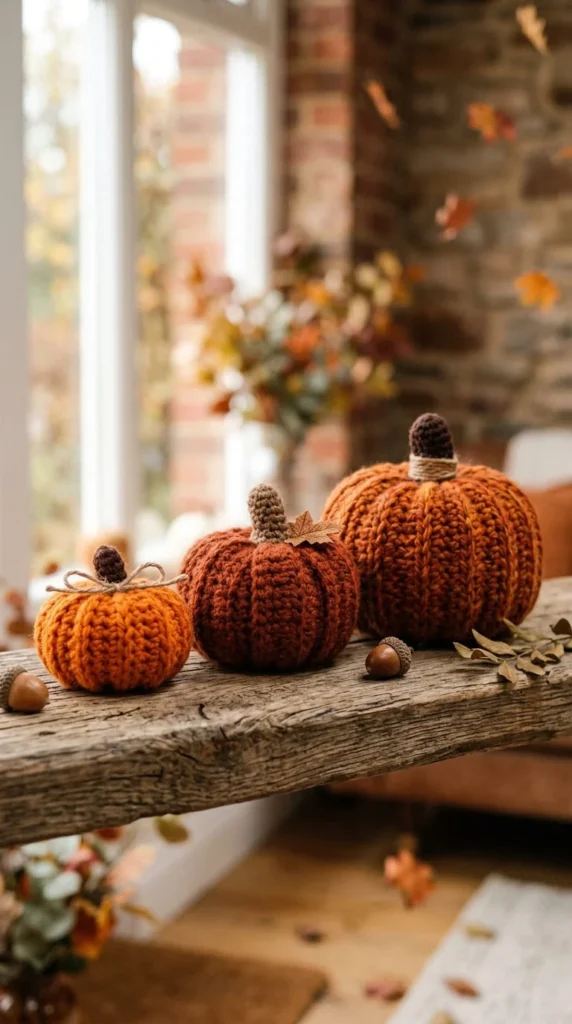
Start with the motif that shows up in nearly every Halloween crochet project: the pumpkin. Instead of stitching one, make a small family in three sizes using the same basic ribbed pattern and just adjusting your stitch count and rounds. A tiny 2-inch pumpkin works as an ornament or bowl filler, a medium 4-inch version anchors a shelf, and a larger 6-inch pumpkin becomes a doorstep accent.
Use worsted-weight yarn in burnt orange, cream, or a deep rust for a farmhouse-leaning palette, or stick with classic jack-o’-lantern orange if you want something more traditional. A short length of brown yarn or a real cinnamon stick makes a simple stem.
This project is ideal for beginners because pumpkins are worked in the round with basic single or double crochet, no complicated shaping required. Stuff lightly for a soft, huggable look or firmly for a decor piece that holds its shape on a shelf. Because the three sizes share a pattern base, you can knock out the whole trio in one evening once you’ve got your gauge dialed in.
2. A Ghost Garland for Your Mantel
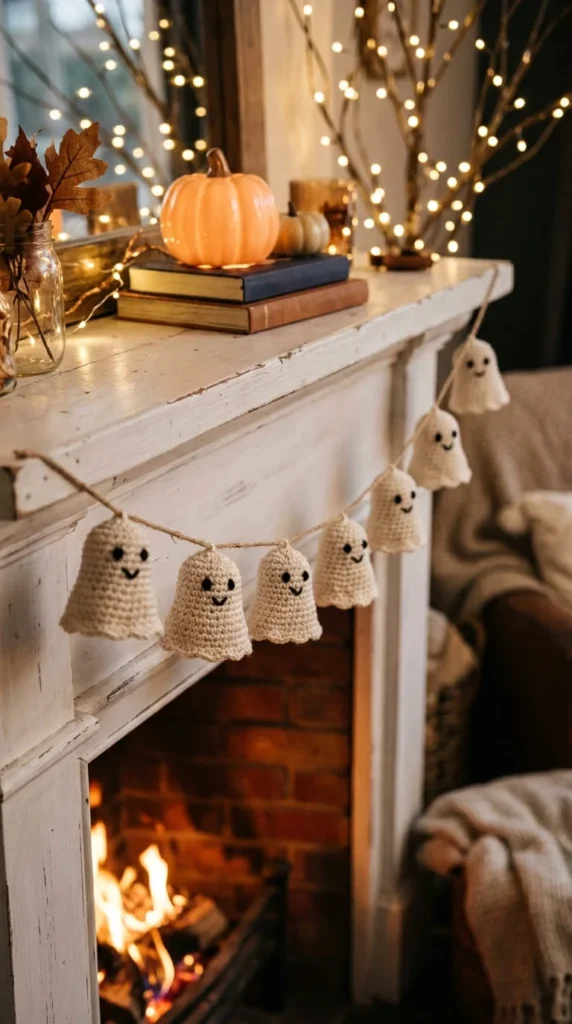
Garlands are one of the most repeatable formats in Halloween crochet because a single motif, strung on twine or ribbon, instantly becomes a banner. For this one, crochet a run of small round or teardrop-shaped ghosts in white or cream yarn, then stitch on tiny black eyes with embroidery floss rather than safety eyes if kids or pets will be nearby.
Space eight to ten ghosts about four inches apart along a length of jute twine or baker’s twine, using a yarn needle to thread through the top of each shape. Leave extra twine on both ends so you can loop it over hooks, nails, or curtain rods.
What makes this project worth repeating is the base pattern. Once you know how to make the ghost shape, you can swap the color and add details to create a bat garland, a pumpkin garland, or a candy corn version using the same stringing method. Keep a few finished motifs on hand so you can mix and match banners depending on which room you’re decorating that week.
3. Bat Bunting for Doorways and Windows
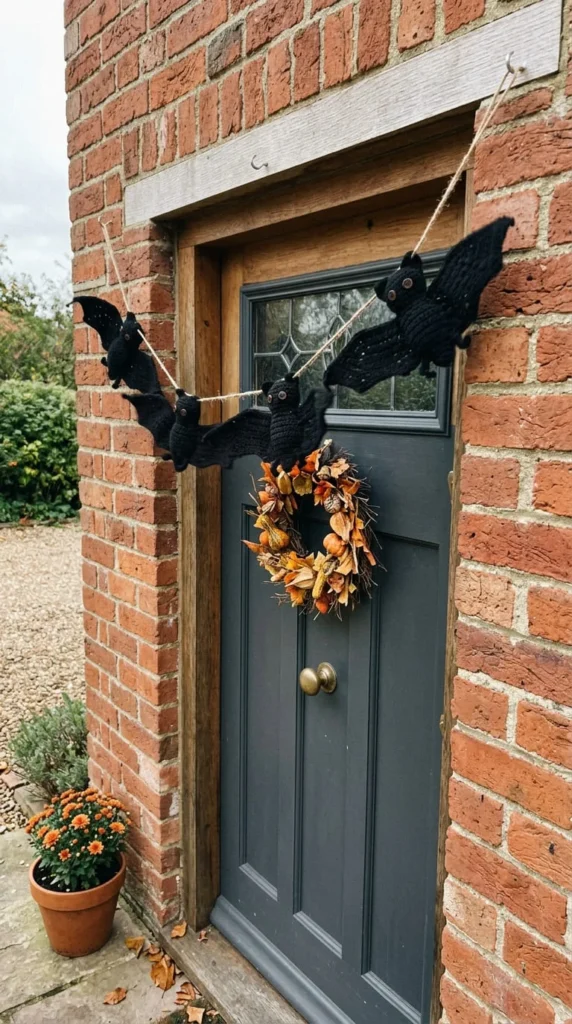
Bats are one of the strongest recurring motifs in Halloween crochet, and a simple triangular or winged bat shape reads clearly from a distance, which makes it a strong choice for bunting you’ll hang somewhere visible, like a front door or a window frame.
Crochet each bat as a flat piece — a rounded body with two triangular wings worked as one continuous shape — using black or deep purple yarn. Add small white or yellow eyes with a few embroidery stitches for a friendly rather than frightening look, or skip the eyes entirely for a more graphic, silhouette-style bunting.
Attach each bat to a length of ribbon using a few stitches at the top of the body, spacing them evenly so the wingtips almost touch. This project works well outdoors if you use a weather-resistant acrylic yarn, since it will hold its shape better than a natural fiber in humidity or light rain.
Because the bat shape is flat and doesn’t require stuffing, this is a fast project to batch. A dozen bats can realistically be finished in one sitting, making it a strong choice if you’re decorating on a tight timeline.
4. A Witch Hat Table Topper
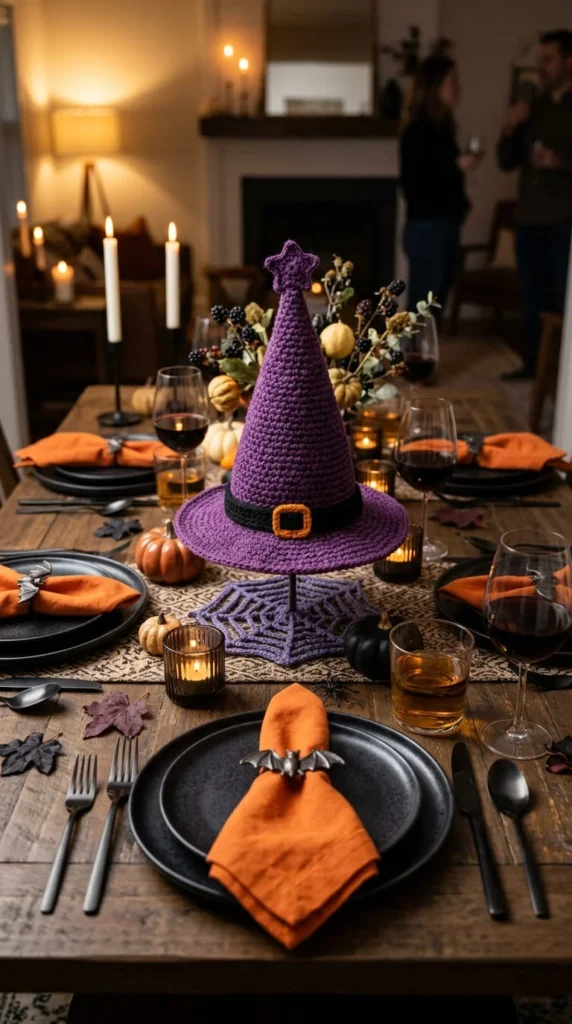
For a tabletop piece that doesn’t compete with dinnerware, crochet a witch hat in miniature and set it in the center of the table or use it as a napkin ring topper. Work a cone shape for the crown and a flat circle for the brim, then join them and add a small ribbon or buckle detail with a contrasting yarn color.
Purple, black, or deep green all read as classic witch colors, and a metallic thread carried alongside your main yarn adds a subtle sparkle without needing sequins or glitter glue.
If you want a full-size centerpiece instead of a mini topper, scale the pattern up using a bulkier yarn and a larger hook, then stuff the crown lightly so it holds its cone shape on its own. A wide-brim version can also double as a small basket for wrapped candy if you crochet the brim slightly cupped rather than flat.
This project is a good pick if you want a Halloween accent that feels a little more sophisticated than cartoon-style decorations, since the cone shape and rich color palette lean gothic rather than cutesy.
5. Candy Corn Coasters
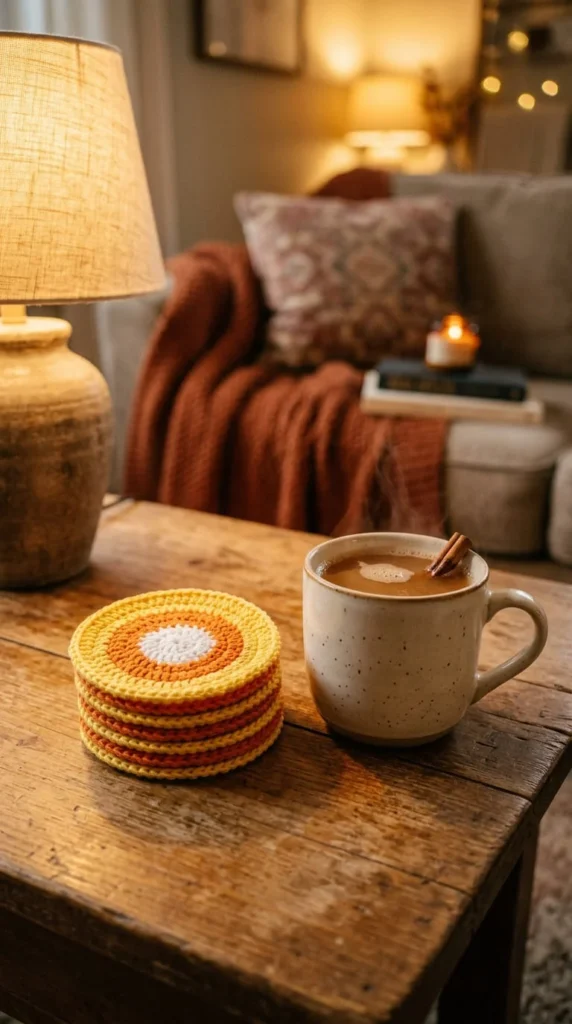
Candy corn’s tricolor stripe pattern translates easily into a flat crocheted coaster, and it’s a project that gives you something genuinely useful rather than purely decorative. Work each coaster as a circle or triangle, changing yarn color in bands of yellow, orange, and white to mimic the classic candy shape.
Use cotton yarn instead of acrylic for coasters, since cotton handles moisture better and won’t leave a plastic-y residue under a cold glass. A set of four or six makes a complete table set, and because each coaster is small, you can finish one in about twenty minutes once you’re comfortable with color changes.
To keep the back from unraveling or curling at the edges, work a single crochet border around the finished piece in a neutral color like cream or brown. This also gives the coaster a cleaner, more finished edge for gifting.
Candy corn coasters are a strong choice if you want a Halloween project that stays useful past October 31st — swap the colors slightly toward gold and rust and the same coaster works through Thanksgiving.
6. No-Sew Monster Jar Toppers
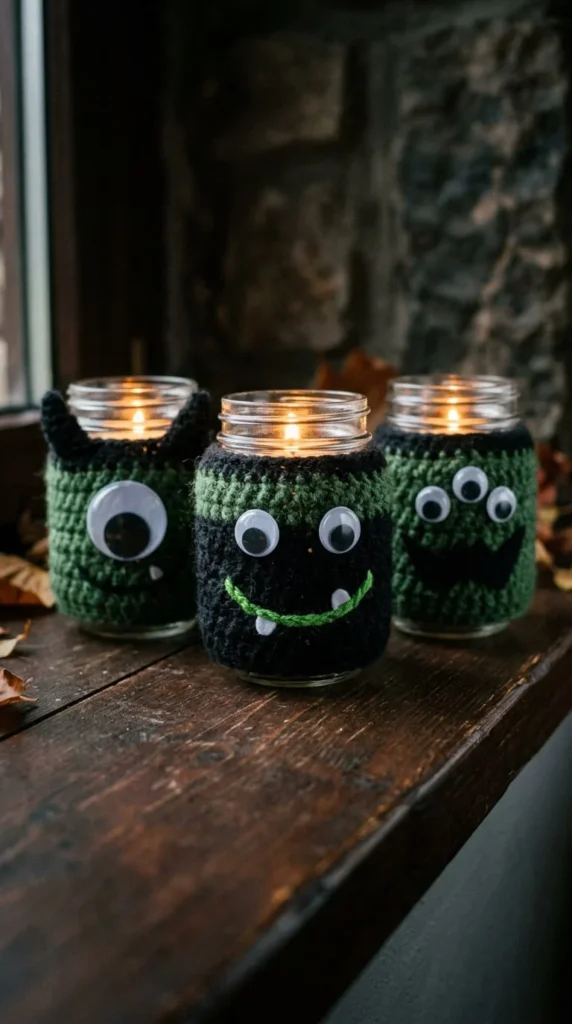
If sewing on faces and limbs is the part of amigurumi you dread, this project skips it almost entirely. Crochet a small flat monster face — just a rounded shape with two or three points for horns or hair — and slip it directly over the rim of a mason jar or votive holder instead of attaching it to a stuffed body.
Because the piece sits over the jar rather than being sewn onto anything, you only need to crochet the face and maybe a small strip that hugs the jar’s neck to keep it in place. Attach felt or embroidered eyes rather than plastic safety eyes if the jar will hold a lit candle, since you want everything at a safe distance from the flame.
This is one of the fastest projects on this list, and it’s a good one to repeat in different colors — green, purple, gray — to build a small monster collection for a mantel or windowsill. Because there’s no stuffing or seaming involved, it’s also a forgiving project if you’re still building confidence with shaping and color changes.
7. A Skeleton Motif Pillow for the Porch
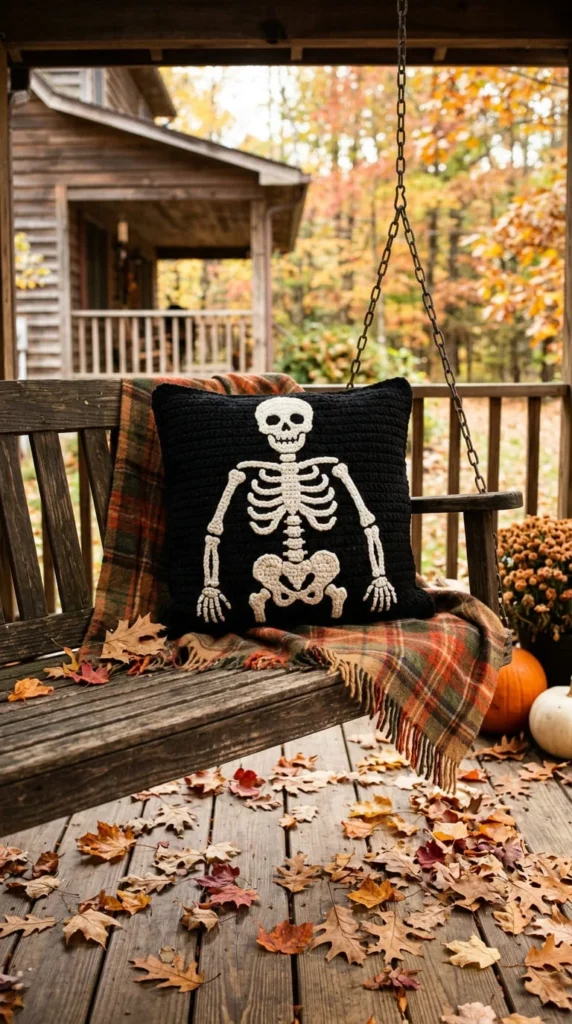
For a statement piece that doesn’t require amigurumi shaping at all, crochet a flat panel using a simple bone or rib-cage motif worked in white yarn against a black background, then sew it onto a plain pillow cover as an appliqué, or crochet the entire pillow front using a graphghan-style color-block chart.
A graphghan chart lets you follow a grid, changing colors square by square to build the skeleton image the same way you’d work a cross-stitch pattern, just in crochet stitches instead. This takes longer than most projects on this list, closer to a full weekend, but the result is a durable piece that can live on an outdoor bench or porch swing through the whole season.
Use a weather-tolerant acrylic or acrylic-blend yarn if the pillow will sit outside, and consider a removable cover so you can wash it after pollen season or a rainy week. Stuff the finished cover with a standard pillow form rather than loose fiberfill for a cleaner, firmer shape.
This project rewards patience rather than speed, and it’s a good one to save for a weekend when you want a Halloween decoration that reads as a genuine piece of home decor rather than a seasonal trinket.
8. Neutral Pumpkins for a Farmhouse Look
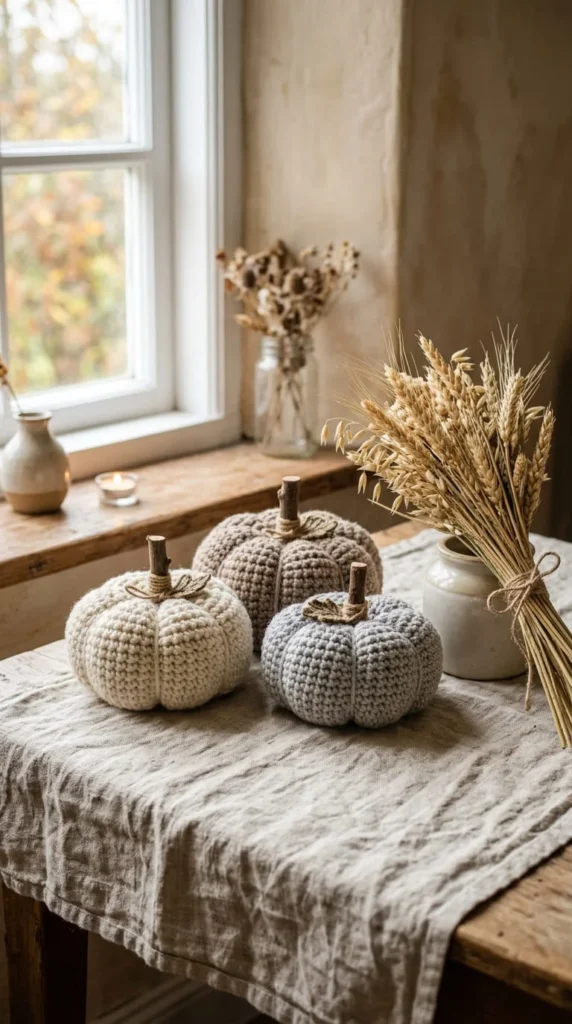
Not every Halloween decorator wants orange and black. If your home leans toward a neutral or farmhouse palette the rest of the year, crochet your pumpkins in cream, taupe, soft gray, or a muted sage instead of the traditional bright orange.
The pattern itself doesn’t change — you’re still working ribbed rounds and a simple stem — but the color shift changes the entire feel of the piece, making it blend into a living room or entryway that already features neutral throws and natural wood tones. Pair a cluster of three or four neutral pumpkins with a few dried wheat stems or a strand of raffia for a textured, understated centerpiece.
This approach solves a real styling problem: bright orange and black decorations can feel jarring against a neutral interior, which sometimes means people skip Halloween decorating in shared living spaces altogether. A neutral pumpkin cluster sidesteps that, and it has the added benefit of transitioning smoothly into general autumn decor once October ends, so you get more use out of the same handmade pieces.
9. A Trick-or-Treat Tote Bag
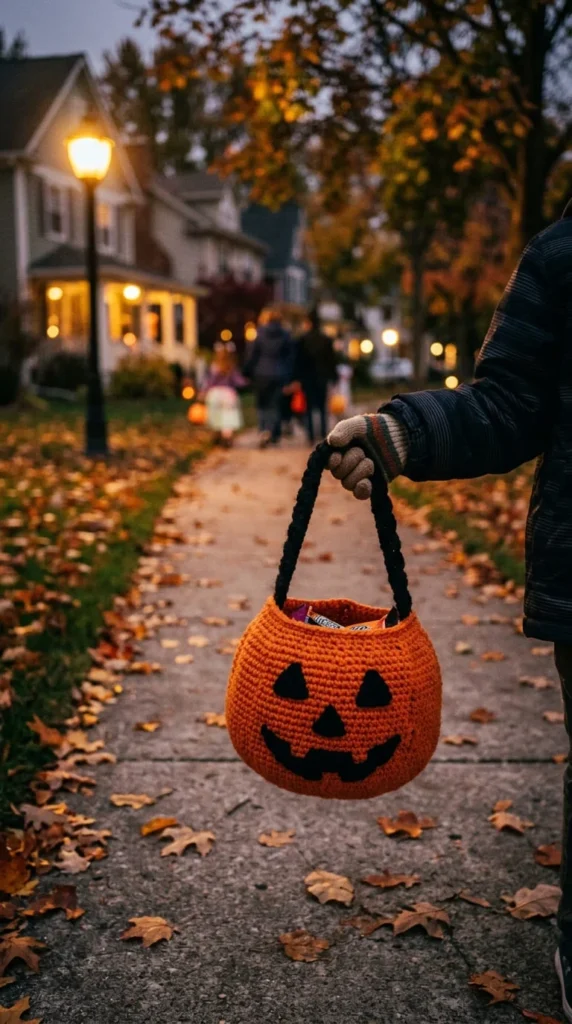
A crocheted trick-or-treat bag gives kids something sturdier and more personal than a plastic pumpkin bucket, and it’s a project that doubles as a meaningful handmade gift. Work the main body as a simple round or oval base, build up the sides with single or half-double crochet for durability, and add a sturdy strap using a chain-and-single-crochet cord or a length of ribbon threaded through the top.
Orange yarn with a simple jack-o’-lantern face worked in black, or a plain black bag with a single decorative motif like a bat or ghost, both work well. Because the bag needs to hold weight, use a firmer stitch pattern and consider a cotton or cotton-blend yarn for extra structure compared to a stretchier acrylic.
If you’re making bags for more than one child, personalize each one with a different small appliqué — a ghost for one, a spider for another — so each bag is easy to tell apart on a busy night. A drawstring closure at the top helps keep candy from spilling during an evening of walking house to house.
10. A Bat Cape for Costume Night
Costumes are a smaller but genuinely useful corner of Halloween crochet, and a bat cape is one of the more approachable wearable projects because it doesn’t require fitted shaping the way a sweater or bodysuit would. Crochet two large triangular or wing-shaped panels, join them at a shoulder seam or a simple collar, and finish the edges with a row of picot or shell stitch to mimic a scalloped wing texture.
A worsted or bulky weight yarn in black or deep purple works best here, since a thicker yarn drapes with more visual weight and photographs well for costume pictures. Add a simple tie or button closure at the neck rather than a full collar, which keeps the project quick and makes the cape easy to put on over a plain outfit.
Because this piece is flat and worked in large sections, it’s a good project for using up bulky-weight yarn you already have in your stash. Size it up for an adult-sized cape using the same construction, just with a longer chain to start and more repeats through the body of each wing panel.
11. A Spiderweb Wall Hanging
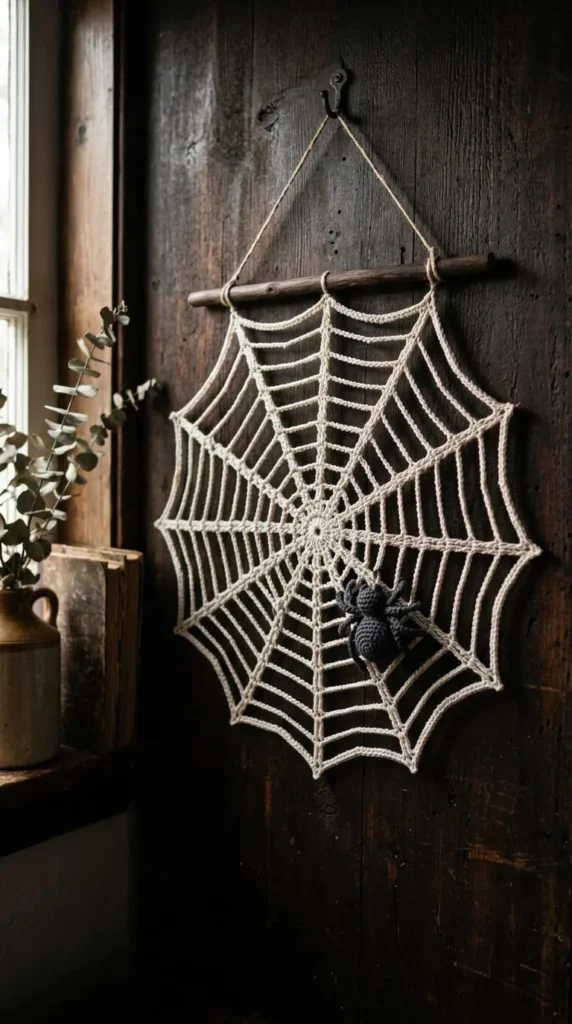
A crocheted spiderweb makes a striking wall piece without leaning on the more common pumpkin or ghost motifs. Work the web using a doily-style pattern — starting with a small center ring and building out in rounds of chain stitches and single crochet to form the radiating spokes and connecting rings of a web.
Thin cotton yarn in white, silver-gray, or black gives the cleanest, most web-like texture, since a bulkier yarn tends to hide the open, lacy structure that makes this piece read clearly as a spiderweb from across a room. Once finished, block the piece by pinning it out flat and lightly steaming or wetting it, which helps the rounds lie evenly and stretches the web to its full diameter.
Attach a small crocheted spider to one edge using a few strands of thread as legs for a finishing detail, or leave the web plain for a more minimalist look. Frame it in an embroidery hoop for an easy hanging method, or pin it directly to a wall or door for a flatter, more graphic presentation.
12. A Frankenstein Amigurumi Bookend Buddy
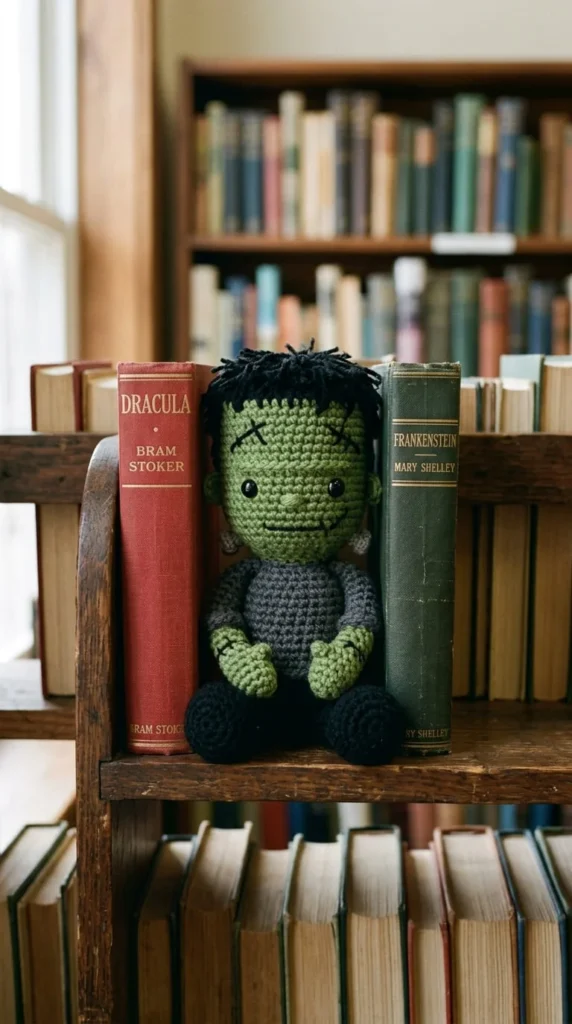
Frankenstein’s monster shows up less often than ghosts or pumpkins in most Halloween crochet roundups, which makes this a good pick if you want something a little different from the usual cast of characters. Crochet a rounded body and head in green yarn, then use black yarn for hair, simple stitched eyebrows, and a straight-line mouth to capture the classic flat-top, square-jawed look.
Add two small bolt shapes at the neck using a few chain stitches and a bead or button, and keep the overall proportions a little squat and boxy rather than rounded, which helps sell the character even at amigurumi scale.
Stuff firmly enough that the finished piece can stand upright or sit against a stack of books without slumping, since this project works best as a small functional bookend buddy rather than a purely decorative shelf-sitter. A single figure makes a fun gift for a crochet-curious kid, and a pair — one Frankenstein, one bride of Frankenstein with yarn “hair” styled into a beehive — makes a matched set for a mantel or bookshelf.
13. A Black Cat Wreath for the Front Door
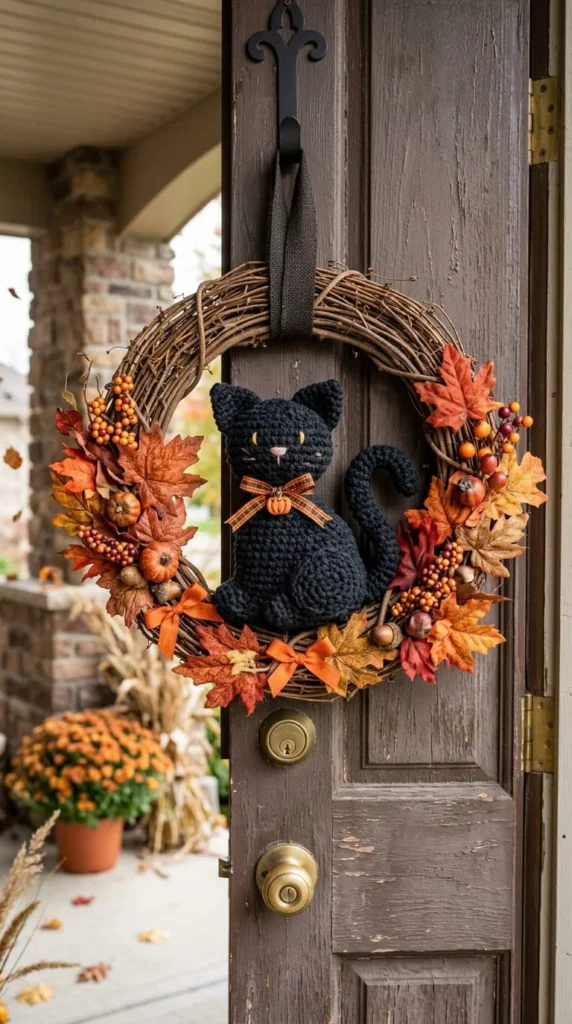
Wreaths are a natural next step once you’re comfortable with flat crochet shapes, and a black cat silhouette gives you a wreath that reads as Halloween-specific rather than generic fall decor. Start with a plain grapevine or foam wreath base, then crochet a flat black cat shape — arched back, pointed ears, a curled tail — sized to sit across one side or the bottom curve of the wreath.
Attach the cat with a few discreet stitches or hot glue, then fill in around it with smaller crocheted accents: a few candy corn shapes, a small moon, or simple orange leaves worked in half double crochet. This layered approach gives the wreath depth instead of looking like one flat motif glued onto a plain base.
Because the wreath will likely hang outdoors or in a sun-exposed entryway, choose an acrylic yarn that resists fading better than natural fibers, and consider a light coat of fabric protector spray if you plan to reuse the wreath for several seasons. This project takes a bit more assembly time than a single motif, but the finished piece works as a genuine door decoration rather than a small accent.[Image Prompt: Photograph of crocheted koozies with Halloween motifs — a pumpkin, a bat, a ghost — wrapped around cold drink cans on an outdoor table, string lights blurred in the background, evening party setting, no text.]
14. Haunted House Drink Koozies
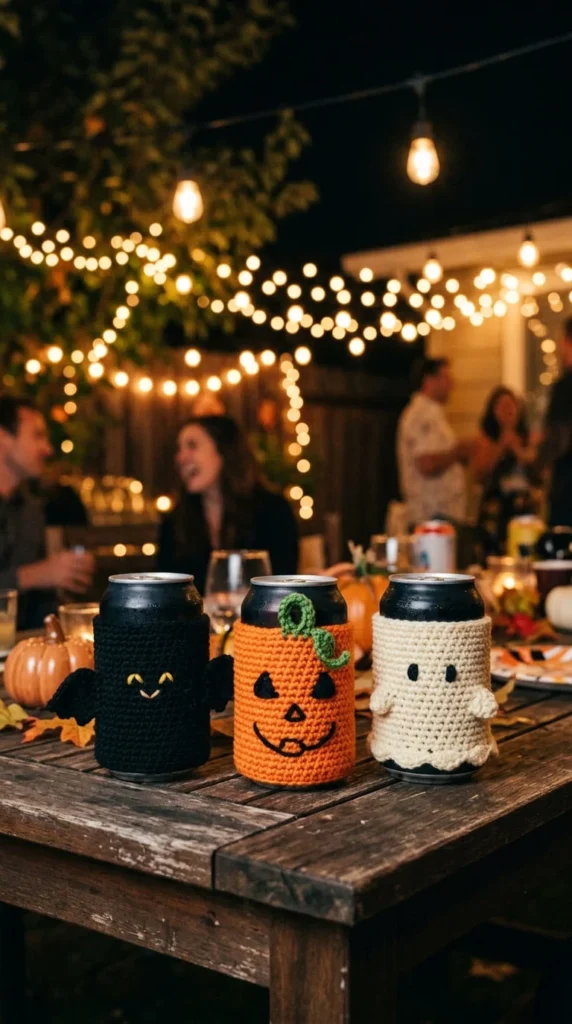
Koozies are one of the more practical, party-ready projects in Halloween crochet, and they’re small enough to make in batches for a gathering. Work each koozie as a simple tube using double crochet in the round, sized to fit a standard can, then add a small motif — a pumpkin face, a bat silhouette, or a simple ghost shape — using surface crochet or a contrasting yarn appliqué.
Because koozies get handled a lot and occasionally get wet from condensation, cotton yarn is a better choice than acrylic here, since it holds up better to repeated use and washing. Keep the tube slightly snug rather than loose so it grips the can and doesn’t slide off mid-conversation.
A set of six or eight koozies, each with a different motif, makes a good party favor or hostess gift, and they’re compact enough to finish one in under an hour once you’ve got the basic tube pattern memorized. If you’re planning to sell handmade items at a fall market, koozies are a strong candidate because the materials cost is low, the production time is short, and the finished item is something people will actually use rather than just display.
15. A Pumpkin-Bat Hybrid Ornament
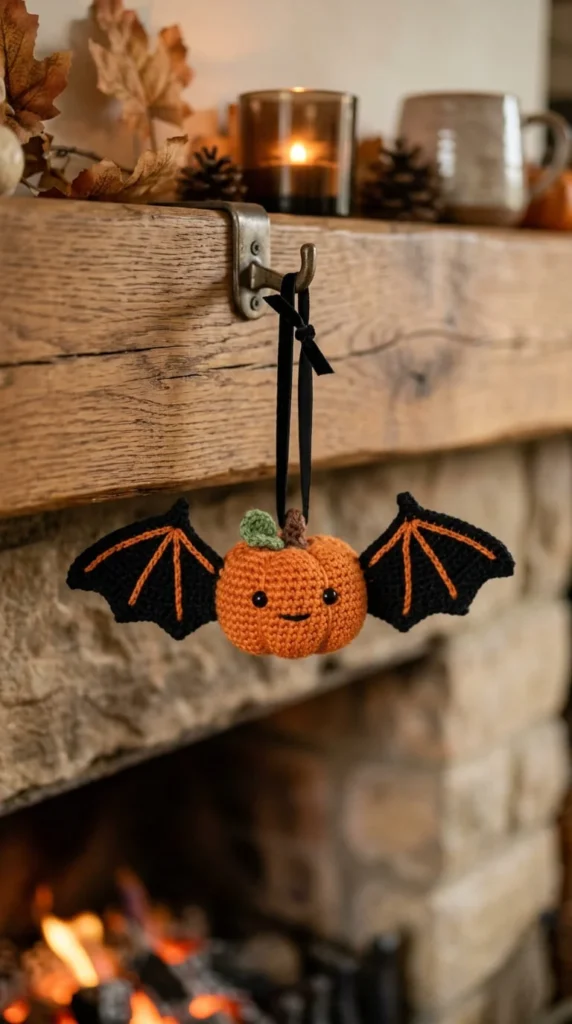
For something a little more inventive than a straightforward pumpkin or bat, try combining the two into a single hybrid creature. Crochet a round pumpkin body using your standard ribbed pattern, then attach two black bat wings to the sides instead of a stem, along with two small pointed ears on top.
This kind of mash-up character gives you a way to stand out from more traditional decoration sets, and it’s genuinely simple to construct since you’re really just combining two motifs you may already know how to make separately. Add small stitched eyes and a stitched mouth for a friendly, cartoonish expression rather than a carved jack-o’-lantern face.
Attach a ribbon loop at the top so the finished piece can hang from a mantel, a doorknob, or a small Halloween tree if you have one. Because the design is compact, it also works well as an ornament exchange gift or a small thank-you for trick-or-treating helpers.
Hybrid characters like this one are a good area to experiment in once you’re comfortable with basic amigurumi shaping, since you can mix and match features — a witch hat on a ghost, a spider body with bat wings — to build an entirely original set of characters.
16. An Emotional-Support Ghost Keychain
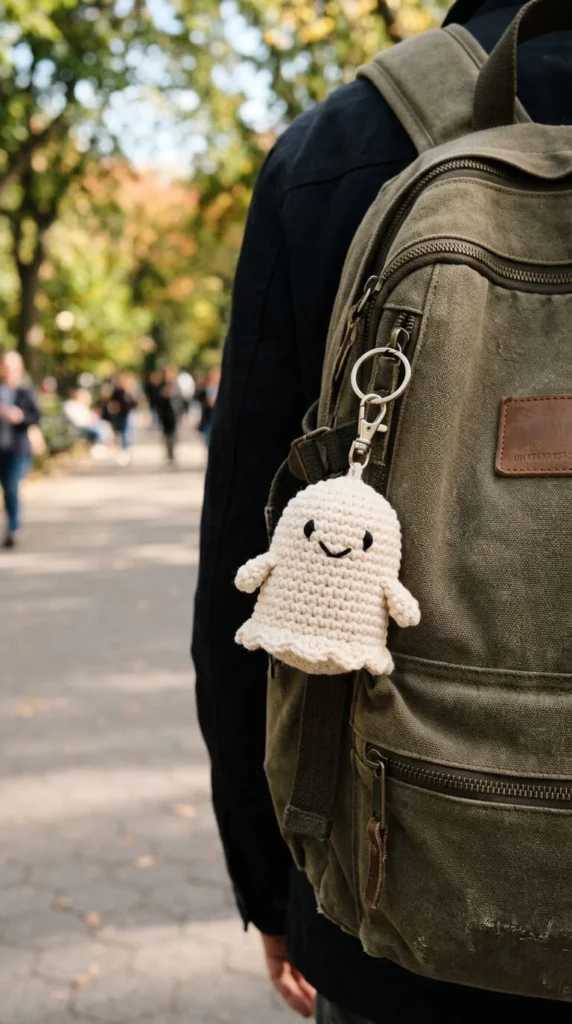
Not every Halloween project needs to sit on a shelf. A small crocheted ghost, sized to fit in a pocket or clip onto a keychain or backpack zipper, works as a comfort object as much as a decoration, and it’s a genuinely sweet, low-cost handmade gift for a friend going through a hard week.
Keep the shape simple: a rounded body tapering to a soft point, stuffed lightly so it stays squeezable rather than firm. Embroider a simple closed-eye or gentle expression rather than a spooky one, and consider adding a small tag or label with a short handwritten note if you’re gifting it.
Attach a keyring or clip using a short crochet chain or a store-bought hardware clip, sewn securely into the top seam so it can handle being tugged on a bag or keys throughout the day.
This project takes very little yarn and can be finished in well under an hour, which makes it a good option for batch-making a handful as small gifts, party favors, or thank-you tokens. Because the scale is small, it’s also a forgiving project for practicing your amigurumi shaping before committing to a larger figure.
17. Witch Finger Puppets for Treat Bags
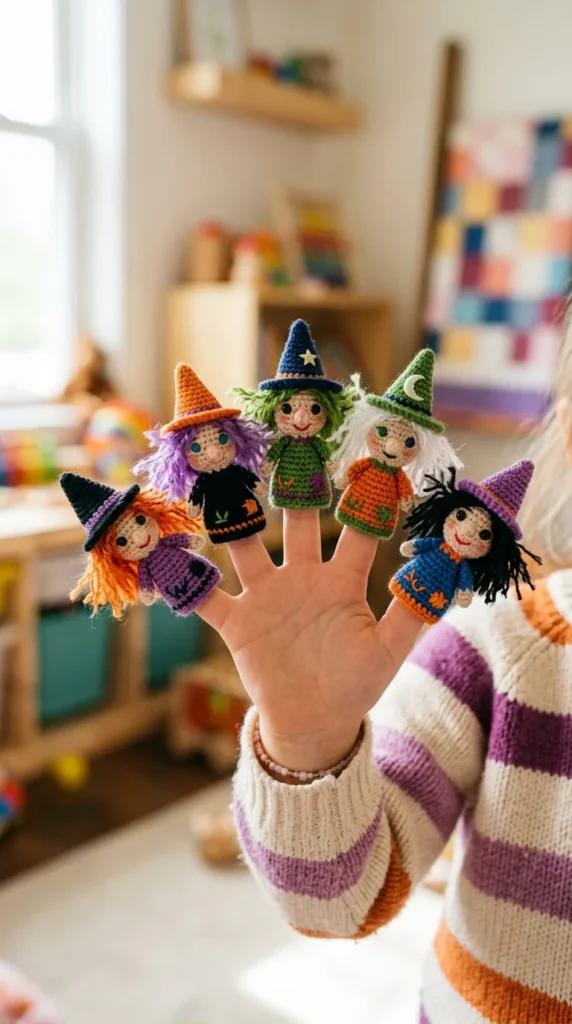
If you’re looking for a small, interactive project to tuck into trick-or-treat bags alongside candy, finger puppets are an easy win. Crochet a small tube to fit a child’s finger, then build up a simple witch hat, a swatch of yarn hair, and two small stitched eyes on the front.
Because these are worked at such a small scale, they use very little yarn per puppet, which makes them a good stash-buster project if you have leftover scraps in purple, black, or green. A set of five — enough for a whole hand of little witches — makes a complete, giftable unit.
Beyond trick-or-treat bags, these puppets work well as classroom party favors, since they’re compact, inexpensive to produce in batches, and give kids something to actually play with rather than just look at. Consider making a small variety pack with a witch, a ghost, and a black cat puppet so each child gets a different character.
This project is also a good one to make with a slightly older child who’s learning to crochet, since the small scale keeps each piece from feeling like an overwhelming commitment, and the finished puppet gives an immediate, playable result.
18. A Trio of Halloween Bookmarks
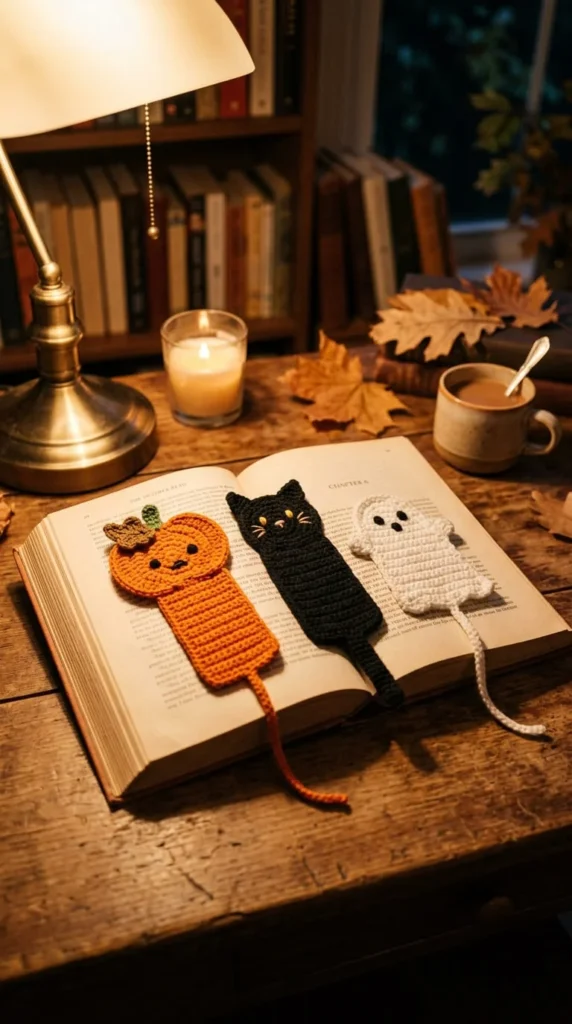
Bookmarks are an underrated Halloween crochet project because they’re fast, use almost no yarn, and give you a genuinely useful handmade item rather than something purely decorative. Crochet three small flat shapes — a pumpkin, a black cat face, and a ghost — each attached to a length of ribbon or crocheted cord long enough to hang out of a closed book.
Keep each shape flat rather than stuffed so the bookmark doesn’t add bulk between pages, and use a firm cotton yarn for a cleaner, crisper shape than a stretchier acrylic would give you. A small tassel at the bottom of the ribbon adds a finished, boutique-style touch without much extra effort.
Because each bookmark takes well under an hour, this is a strong project for last-minute gifting, teacher presents, or party favors when you’re short on time before Halloween. Package all three together in a small kraft paper envelope or a ribbon-tied bundle for a complete, ready-to-give set, and consider adding a fourth design, like a spider or bat, if you want a slightly larger set to sell at a fall market.
19. A Granny Square Halloween Throw
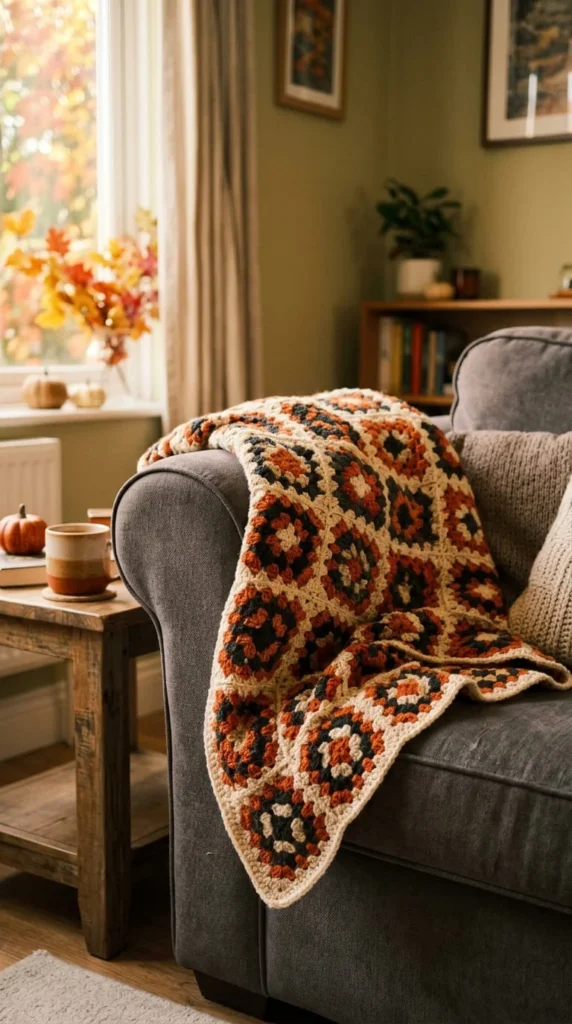
For a project that goes beyond small accents, a granny square throw built entirely in a Halloween palette makes a genuine statement piece for a couch or reading chair. Work individual squares in orange, black, cream, and a deep purple, then arrange and join them in a pattern that spaces the colors evenly rather than clustering them.
This is a multi-week project rather than a quick evening make, but granny squares are portable and easy to work on in small sessions, which makes the overall commitment more manageable than it might first appear. Keep a consistent square count in mind from the start — a lap-sized throw typically needs somewhere around 80 to 100 standard granny squares, depending on your yarn weight and hook size.
Because this blanket uses a general autumn palette rather than a specific Halloween motif like a pumpkin or ghost, it transitions naturally into November and beyond, giving you a piece that earns its keep well past the holiday itself. If a full blanket feels like too large a commitment right now, scale the same idea down into a lap-sized baby blanket or a set of matching throw pillows using the same square pattern.
20. A Gothic Bat Purse
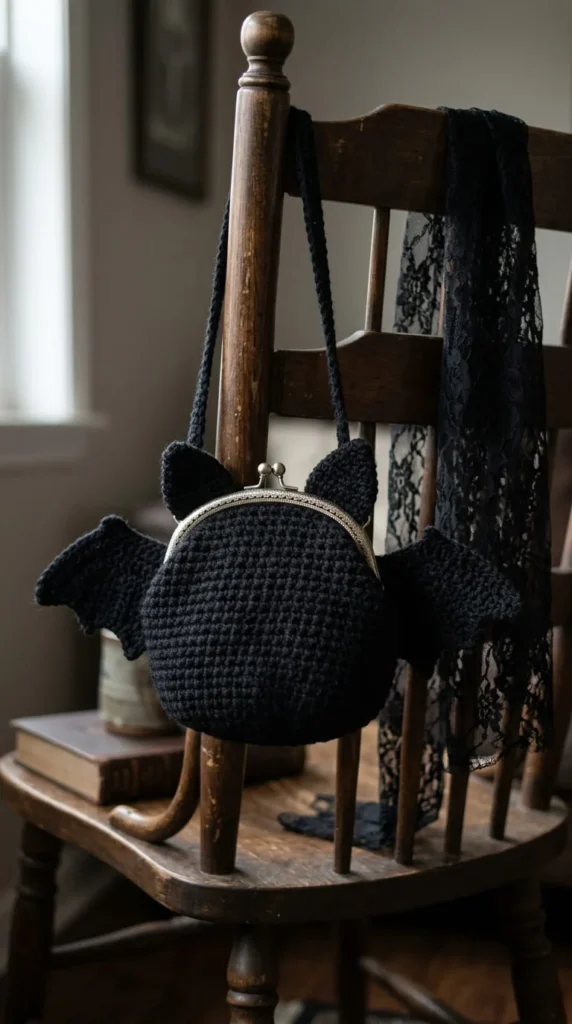
For crocheters who want a Halloween accessory that works as a genuine everyday accessory rather than a seasonal costume piece, a bat-shaped purse is worth the extra construction time. Crochet two matching wing-body panels, join them along the bottom and sides, and add a fabric lining for structure and to keep small items from falling through the stitches.
A metal purse clasp or a simple drawstring closure at the top works well, and a short crocheted or chain-link strap lets you wear it crossbody or as a small shoulder bag. Black yarn with a subtle purple or deep red lining adds a bit of visual interest when the bag is open.
Because this project involves lining, joining, and possibly hardware, it sits toward the more advanced end of this list, but the payoff is a piece you can genuinely use well beyond Halloween if you keep the design simple enough to read as “bat-shaped” without being overtly costume-like.
If you’d rather start smaller, make a mini version sized for a phone or cardholder using the same construction, which lets you practice the lining and closure techniques before committing to a full-size bag.
21. A Zero-Waste Scrap Yarn Pumpkin Garland
If you’ve got a basket of leftover yarn ends from other projects, this garland puts them to good use. Crochet a batch of miniature pumpkins, no bigger than an inch or two across, using whatever colors and weights you have on hand rather than matching everything to a single palette.
Because each pumpkin is small, you can often finish one using just a few yards of leftover yarn, which makes this an efficient way to work through odds and ends that are too short for a full project but too much to throw away. String the finished pumpkins onto twine or thin cord, alternating colors and sizes for a deliberately mismatched, handmade look rather than a uniform, matched set.
This approach also solves a practical problem: many crocheters end up with a growing pile of small yarn leftovers that never quite get used, and a scrap-based garland gives that pile a clear purpose. The varied colors and textures actually work in the project’s favor here, giving the finished garland a collected, eclectic character that a single-color version wouldn’t have.
Hang the finished garland across a bookshelf, a window frame, or a craft room wall as a reminder of past projects as much as a Halloween decoration.
22. A Pumpkin Centerpiece That Carries Through Thanksgiving
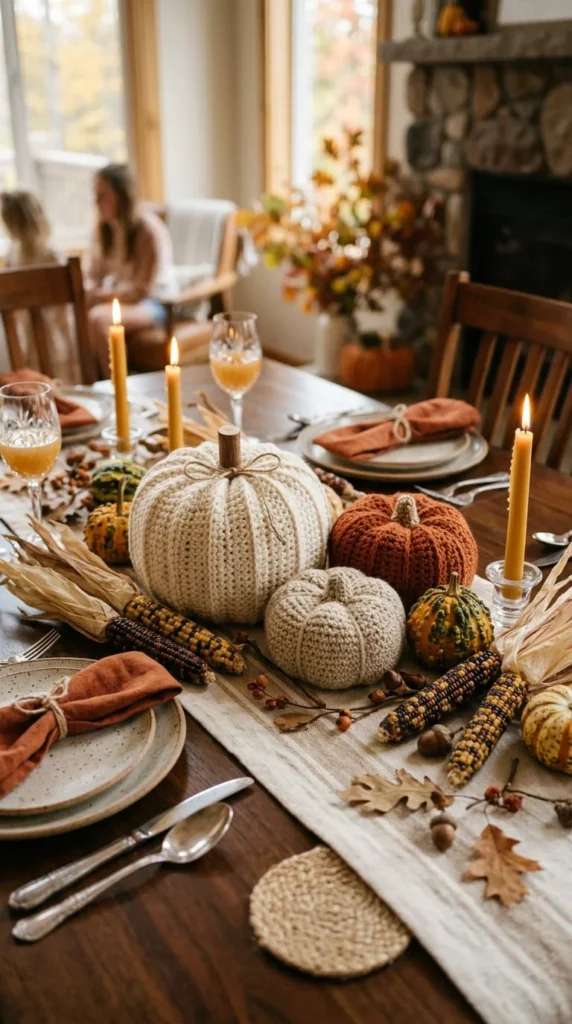
If you’d rather not pack away your Halloween decorations the moment November starts, build a centerpiece specifically designed to transition. Crochet a cluster of pumpkins in a palette that leans more toward rust, cream, and deep gold than bright orange and black, which keeps the piece feeling seasonal rather than tied to one specific holiday.
Arrange the pumpkins on a wooden tray or a woven placemat alongside real or faux dried corn, small gourds, or a scattering of acorns, so the crocheted pieces read as part of a broader autumn display rather than a standalone Halloween decoration. Skip any overtly spooky details like stitched jack-o’-lantern faces, keeping the pumpkins plain so they fit comfortably at a Thanksgiving table a few weeks later.
This approach solves a real seasonal timing problem: a lot of handmade Halloween decor gets put away right after October 31st, even though the underlying pumpkin motif works for the entire fall season. By planning the color palette and styling with that longer timeline in mind from the start, you get more use out of the same handful of crocheted pieces, and you spend less time swapping out decorations between one holiday and the next.
Conclusion
Halloween crochet covers a lot more territory than a single amigurumi pumpkin sitting on a shelf. Between garlands, wearables, table settings, and small giftable projects like bookmarks and keychains, there’s room to match a project to exactly how much time and yarn you have on a given evening. Start with whichever idea matches your current skill level, whether that’s a flat bat for bunting or a lined purse for something more involved, and build outward from there. Keep a running list of the motifs you enjoy making most, since many of these patterns share a base technique that carries easily from one project to the next. Pick one idea from this list, pull out your hook, and see how far a single skein of yarn can take your Halloween decorating this year.