
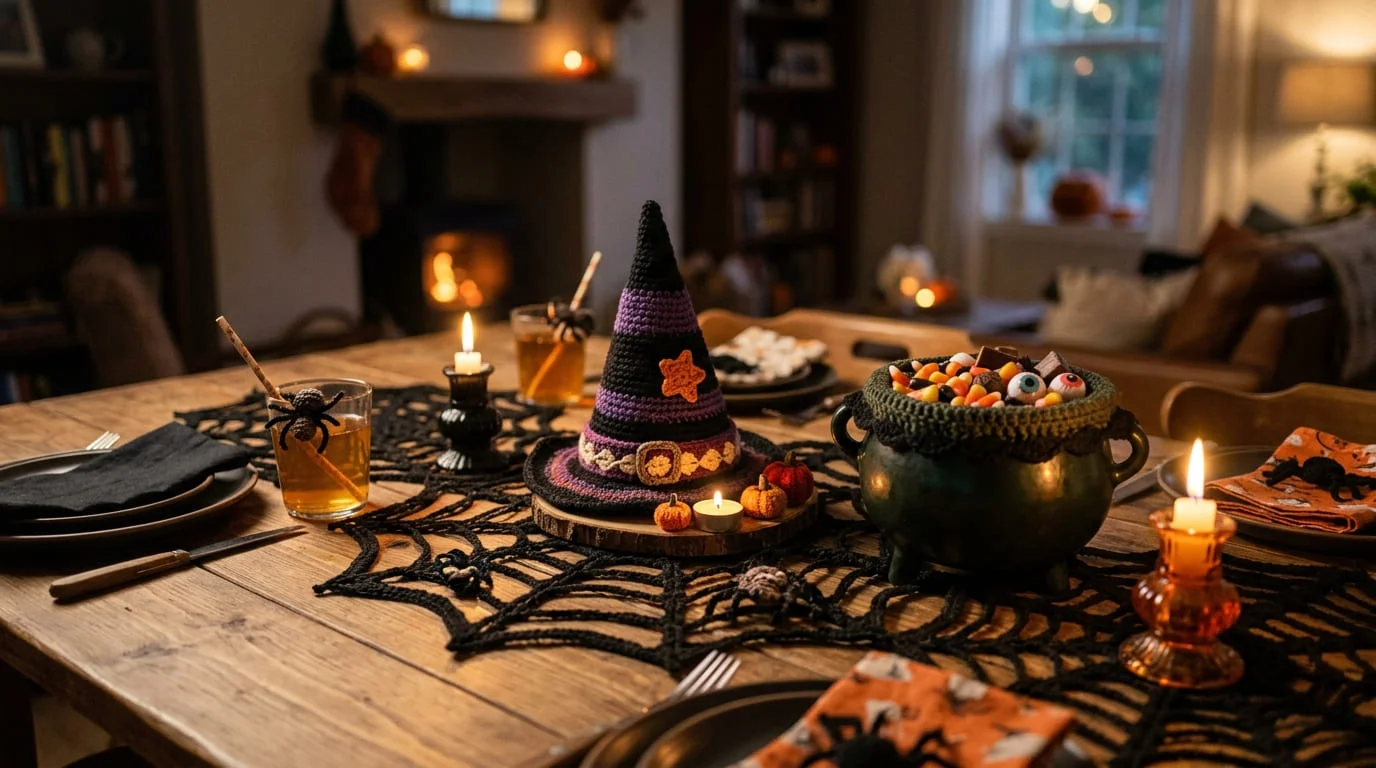
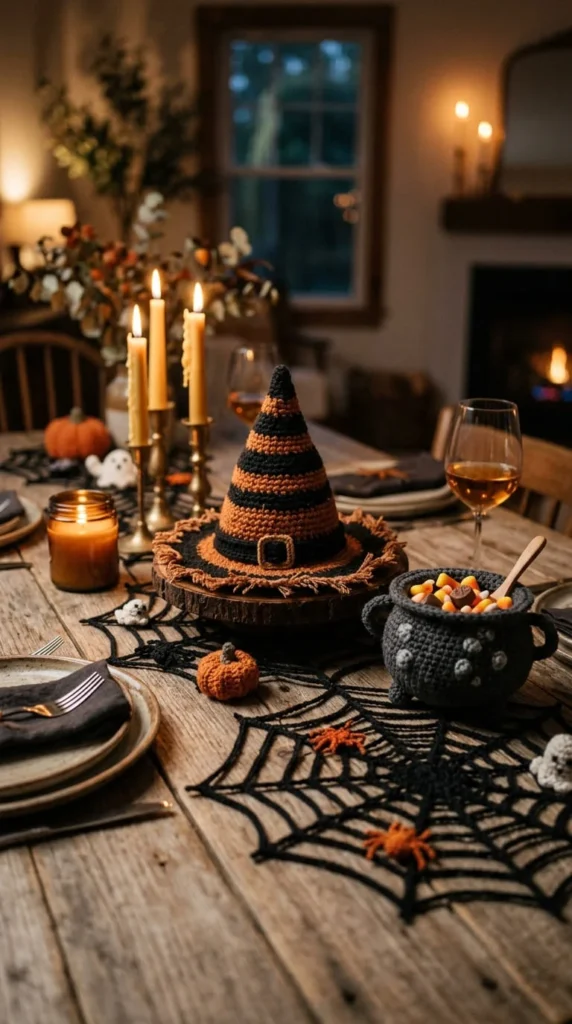
Store-bought Halloween decor tends to look the same in every house on the block, which is part of why crochet Halloween decorations have become such a popular alternative for people who want their home to feel personal during the season. This list is organized around where and how you’ll actually use each piece — entryway, mantel, porch, table, and small-space corners — rather than grouping everything under one generic “spooky decor” heading. You’ll find functional pieces like cozies and baskets alongside wall art and modular granny-square projects, plus a few ideas built specifically for renters, apartment dwellers, and anyone decorating on a tight weekend timeline.
1. A Cauldron Candy Bowl for the Entry Table
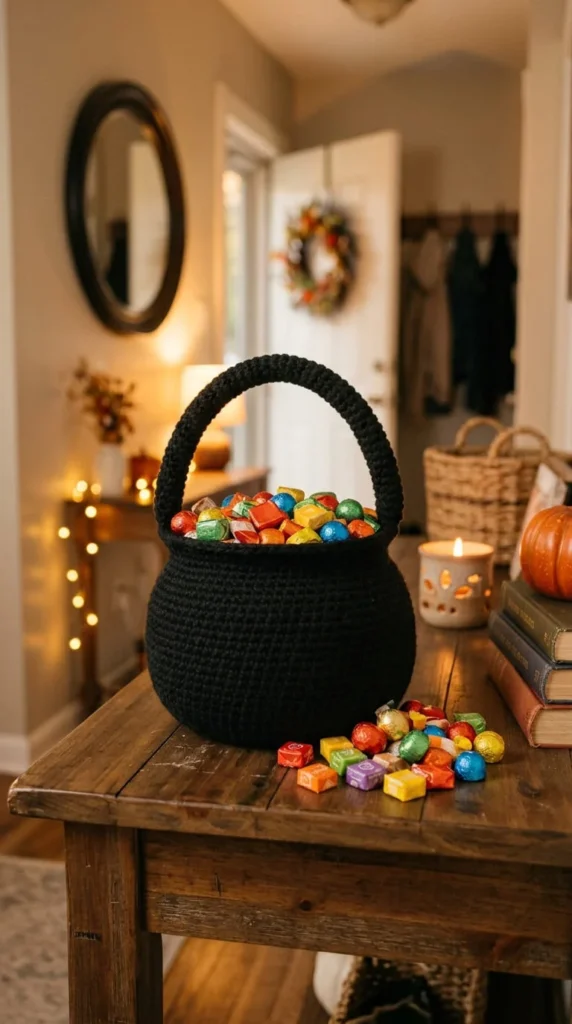
A crocheted cauldron doubles as a functional candy bowl and a witch-themed centerpiece, which makes it one of the more practical projects on this list. Work the body as a rounded bowl shape using firm single crochet, then add three small looped feet at the base and a curved handle across the top using a thicker cord or a length of chain reinforced with wire.
Black yarn is the obvious choice, but a deep green or charcoal also reads clearly as a cauldron without looking flat. Because this piece needs to hold weight, use a sturdy cotton or cotton-blend yarn rather than a soft, stretchy acrylic, and consider lining the inside with a thin fabric liner if you want it to hold loose candy rather than individually wrapped pieces.
Keep the base wide and the walls firm so the bowl doesn’t tip when kids reach in for candy. Set it on an entryway table, a porch step, or a kitchen counter during a party, and store it flat-packed with the handle tucked in once the season ends. This is a good weekend project if you want one piece that does double duty as both decoration and function.
2. A Modular Ghost Granny Square Banner
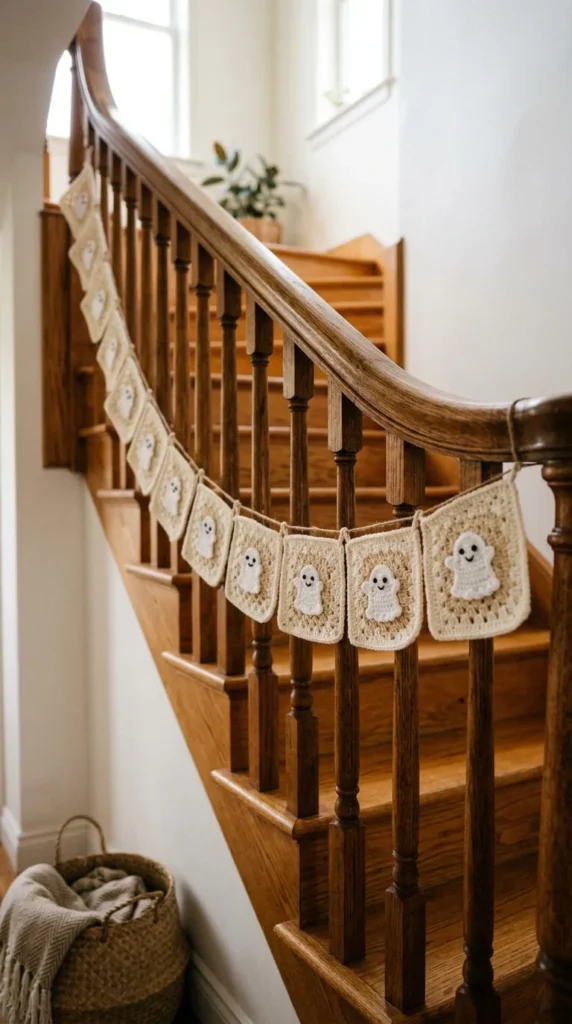
Granny squares are usually associated with blankets, but a small set of ghost-motif squares strung together makes a distinctive banner for a staircase railing, a mantel edge, or a doorway. Work each square using a simple color-block pattern — a round or rounded-square ghost shape in cream against a black or deep purple background — keeping every square the same finished size so they line up evenly once joined.
Instead of sewing the squares into a solid panel like a blanket, join them at just the top corners with a length of ribbon or crocheted cord, letting each square hang slightly loose so the banner has a bit of movement rather than sitting flat against the wall.
This project is worth trying if you already know how to work granny squares, since it reuses a skill you likely have without asking you to learn a new stuffed or three-dimensional shape. A run of six to eight squares makes a full-width banner for most staircases or mantels, and you can always add more squares later using leftover yarn from other projects to extend it.
3. A Witch’s Broom Corner Accent
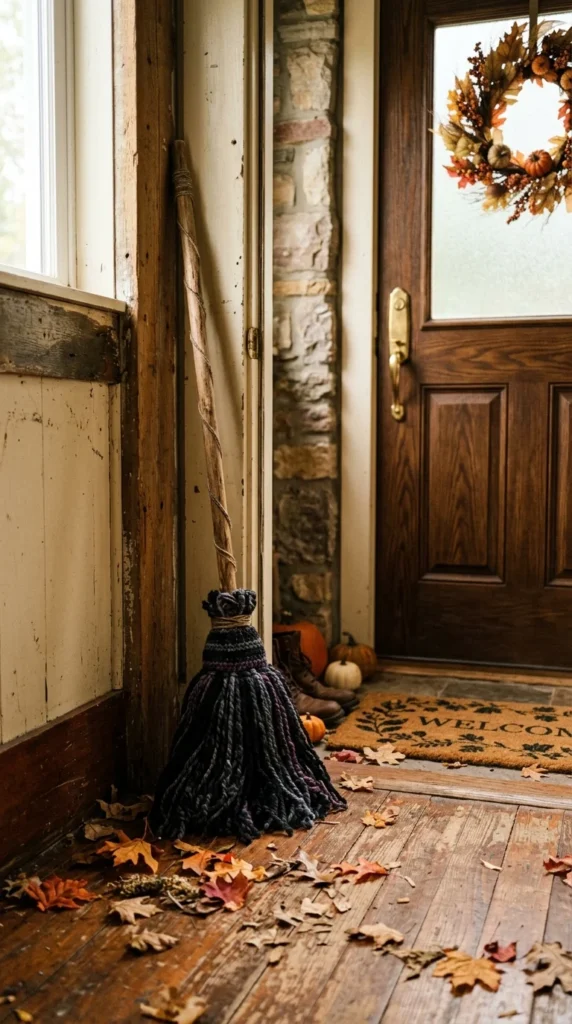
A crocheted witch’s broom gives you a floor-standing decoration that doesn’t compete for shelf or table space, which makes it a good option if your other Halloween pieces already cover the mantel and windows. Wrap a wooden dowel or a thin branch with brown or black yarn for the handle, then create the bristle section by cutting several long strands of dark yarn and binding them tightly around the base of the dowel with a few rows of single crochet.
Trim the loose bristle ends unevenly rather than in a straight line, which gives the broom a more worn, handmade look instead of a stiff, uniform one. A small bow or a strip of orange ribbon tied just above the bristles adds a finishing touch without much extra effort.
Lean the finished broom in a corner by the front door, prop it against a porch railing, or rest it beside a stack of pumpkins for a grouped display. Because the construction is mostly wrapping and binding rather than shaping, this is a fast project even if you’re newer to crochet, and it uses up long yarn scraps that are otherwise hard to repurpose.
4. A Jack-o’-Lantern Table Runner
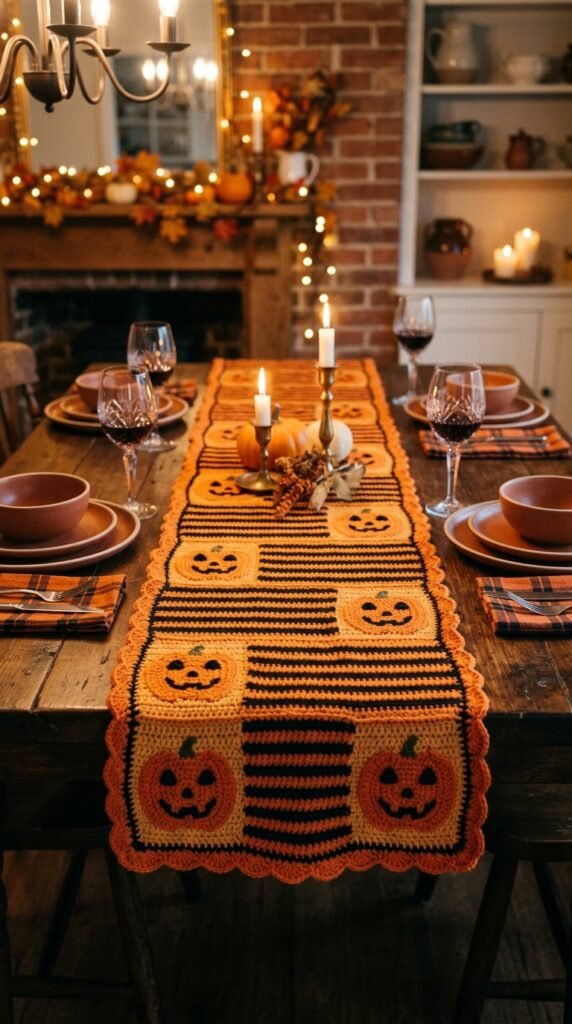
A table runner gives you a long, continuous surface to work a Halloween motif across, rather than relying on separate coasters or a single centerpiece to carry the theme. Crochet a series of connected panels using alternating orange and black blocks, and work a simple triangular jack-o’-lantern face — two eyes and a jagged mouth — into the center panel using surface crochet or a contrasting yarn appliqué.
Finish both long edges with a scalloped or picot border to keep the runner from looking plain, and size the finished piece to hang slightly over each end of the table for a more finished look. A cotton or cotton-blend yarn holds up better than acrylic if the runner will sit under dishes or serving trays during a gathering.
This project takes longer than a single coaster or a small motif, closer to a full weekend depending on your table length, but it gives you one continuous piece that anchors an entire table setting instead of several small pieces you have to arrange separately. Store it folded flat in a drawer once the season ends, ready to bring out again next year.
5. A Glowing Jar Cozy for String Lights
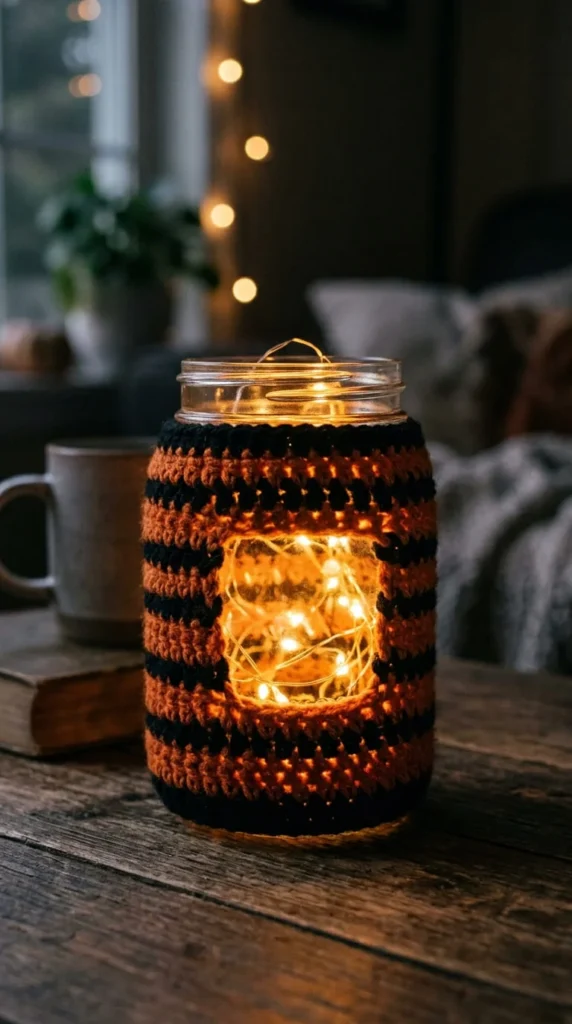
Instead of decorating a jar with a face or a stuffed topper, this project wraps a full cozy around the jar itself and lets a battery-operated string light glow through the open stitches. Work a simple tube in double crochet or a lacy shell stitch, sized to fit snugly around a mason jar or a glass vase, leaving the stitch pattern open enough that light can pass through the gaps.
Orange and black striping gives the clearest Halloween read, but a plain black cozy with a few scattered orange stitches also works if you want something subtler. Skip a solid, dense stitch pattern here, since the whole point of this project is letting light filter through rather than blocking it.
Always use battery-operated or LED lights inside the jar rather than a real candle, since the yarn sits close to the flame risk zone with a live wick. Set a few of these jars along a mantel, a porch step, or a window ledge for a soft glow that reads as decorative lighting as much as a standalone decoration, and swap the string lights for plain fairy lights once November arrives if you want to keep using the cozies through the rest of fall.
6. A Spider Web Table Runner for a Tablescape
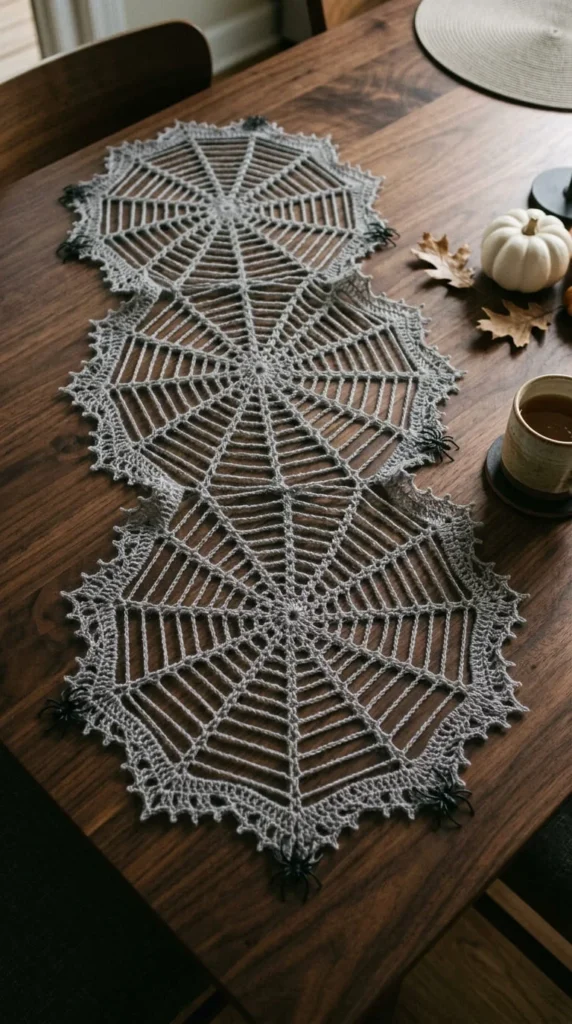
If a full jack-o’-lantern runner feels too busy for your table, a spider web version offers a more minimal, lace-like alternative. Work a series of connected web medallions using a fine cotton or lace-weight yarn, joining each circular motif to the next along one edge so they form a continuous strip rather than a solid rectangular piece.
Because the open, airy structure of a web motif lets the table surface show through, this runner works well over a dark wood table or a black tablecloth, where the contrast makes the pattern stand out clearly. A few small crocheted spiders tacked to the corners or scattered along the length add detail without overwhelming the design.
Block each medallion before joining them, pinning the pieces out flat and lightly steaming or wetting them so the rounds sit evenly and the runner doesn’t pucker once assembled. This project takes patience because of the fine yarn weight, but the finished piece has a more sophisticated, gothic-leaning look than a bold orange-and-black runner, which makes it a good fit if your table styling generally leans toward black, silver, or deep jewel tones.
7. A Rustic Pumpkin Door Basket
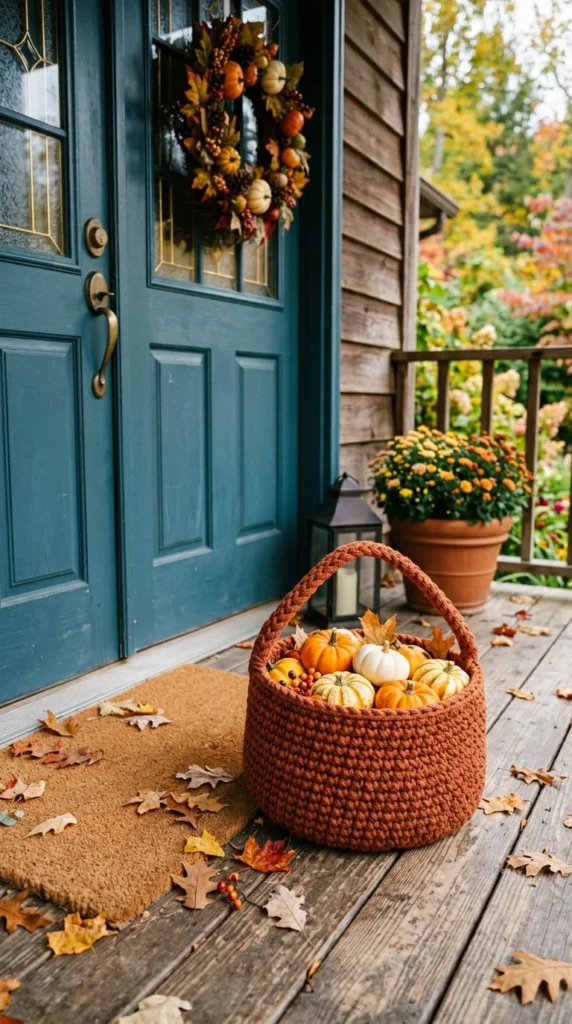
A sturdy crocheted basket set beside the front door gives you a landing spot for mini pumpkins, dried corn, or a stack of seasonal mail, combining decoration with a small amount of actual storage. Work the basket using a firm single crochet in the round, building up the sides with a slightly tighter tension than you’d use for a soft amigurumi piece, since the basket needs to hold its shape without a wire frame.
A rust, taupe, or deep brown yarn gives the basket a woven, rustic look rather than a stark craft-store finish, and a doubled strand of yarn worked together adds extra body if your base yarn feels too thin to hold structure on its own.
Fill the finished basket with a few of the neutral or traditional pumpkins from elsewhere on your decorating list, or use it to hold a rolled blanket, a few pinecones, or seasonal catalogs near the entryway. Because the construction is straightforward single crochet without much shaping, this is a good project to work on while watching television, and a slightly larger version doubles as a laundry or plant basket once Halloween has passed.
8. A Candy Corn Mantel Garland
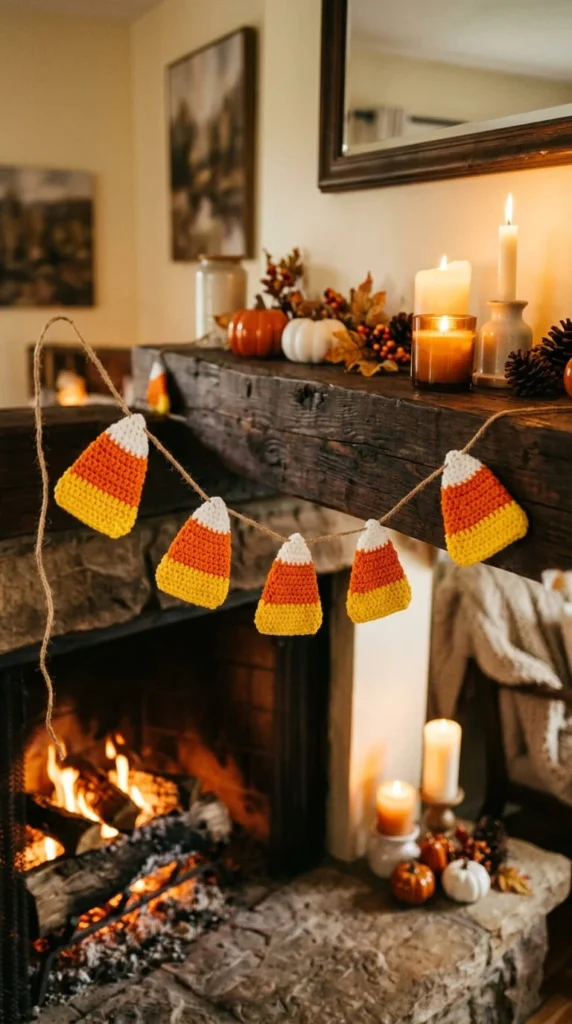
Candy corn’s tricolor stripe is instantly recognizable even at a small scale, which makes it a strong motif for a mantel garland that reads clearly from across the room. Crochet a run of small triangular shapes, working each one in bands of yellow, orange, and white from the point to the base, and leave a short loop of yarn at the top of each piece for stringing.
Thread eight to twelve triangles onto a length of twine or ribbon, spacing them evenly so the colors create a repeating rhythm along the mantel edge rather than clustering unevenly. Because each triangle is small and flat, you can realistically finish the entire garland in one evening once you’ve settled on your color-change technique.
Drape the finished garland along the mantel itself, or hang it from cup hooks just above a doorway for a slightly different placement. This project pairs well with a few candy corn ornaments made from the same pattern scaled down even smaller, giving you matching accent pieces to tuck among candles or framed photos without much extra yarn.
9. A Witch Hat Treat Basket
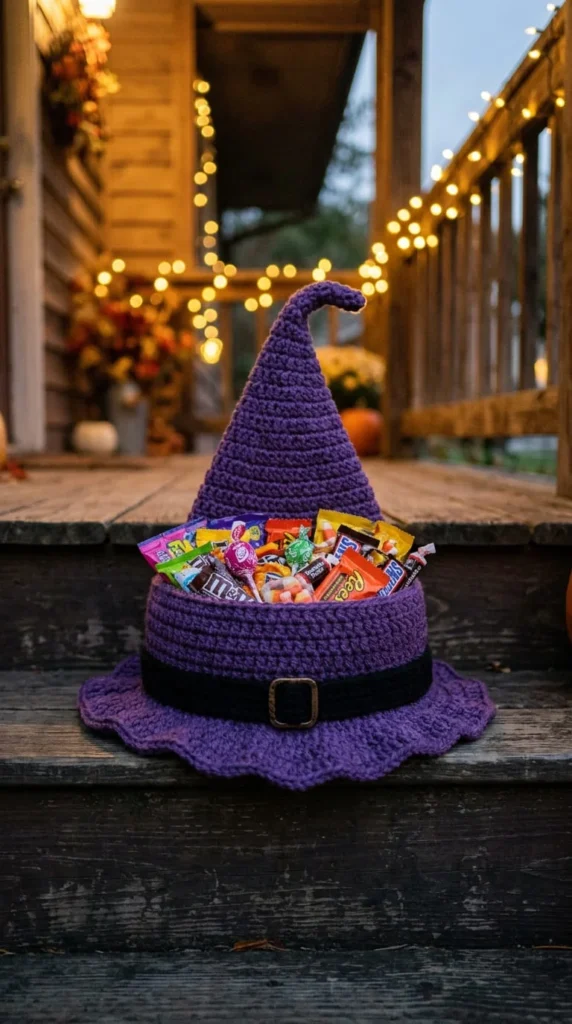
A witch hat reimagined as a basket rather than a wearable accessory gives you a functional container with a clear seasonal silhouette. Crochet the wide brim as a flat circle, then work the cone-shaped crown separately, stiffening the inside with a double layer of yarn or a fabric interfacing insert so the hat holds its shape when filled with candy.
Join the crown to the center of the brim, leaving the brim’s outer edge as the rim of your basket, and add a simple buckle detail in a contrasting yarn where the crown meets the brim for a more finished, recognizable witch-hat look.
Purple, black, or deep green all read clearly as witch colors, and a metallic thread carried alongside your main yarn adds subtle shimmer without needing glitter or sequins. Set the finished basket on a porch step for trick-or-treaters, use it as a candy dish on a party table, or fill it with small trinkets as a party-favor station where guests can help themselves. Because the brim doubles as a stable base, this piece sits upright on its own without needing extra support.
10. A Ghost Bunting for the Porch Railing
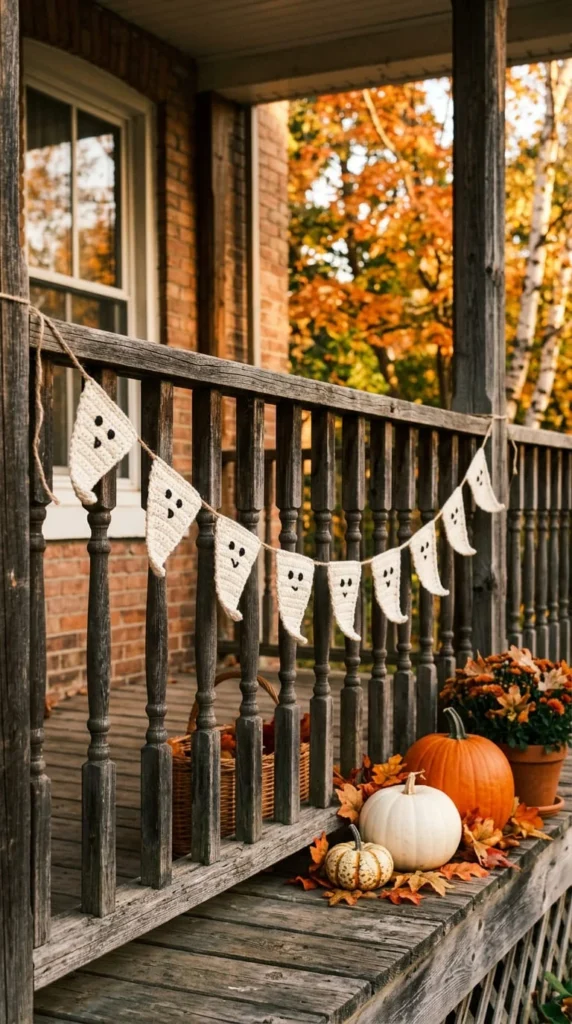
Bunting works differently from a garland because the flags are typically triangular rather than shaped like the motif itself, which makes it a faster project once you’ve settled on your construction method. Crochet a run of simple triangle flags in cream or white yarn, then add a small stitched ghost face — two dot eyes and a rounded mouth — to each flag using black embroidery thread.
String the triangles onto a length of twine through a small loop at the top corner of each flag, spacing them close enough that the bunting reads as a continuous strip rather than scattered individual pieces. Because porch railings are exposed to more weather than an indoor mantel, choose an acrylic yarn over a natural fiber, and bring the bunting inside during heavy rain to keep it from staying damp for long stretches.
This project works well as a wider, more casual alternative to a formal garland, and the plain triangle base means you can reuse the same construction with a different printed or embroidered motif — a bat, a pumpkin outline, a simple star — for other seasons once Halloween has passed.
11. A Black Cat and Pumpkin Doorstop Duo
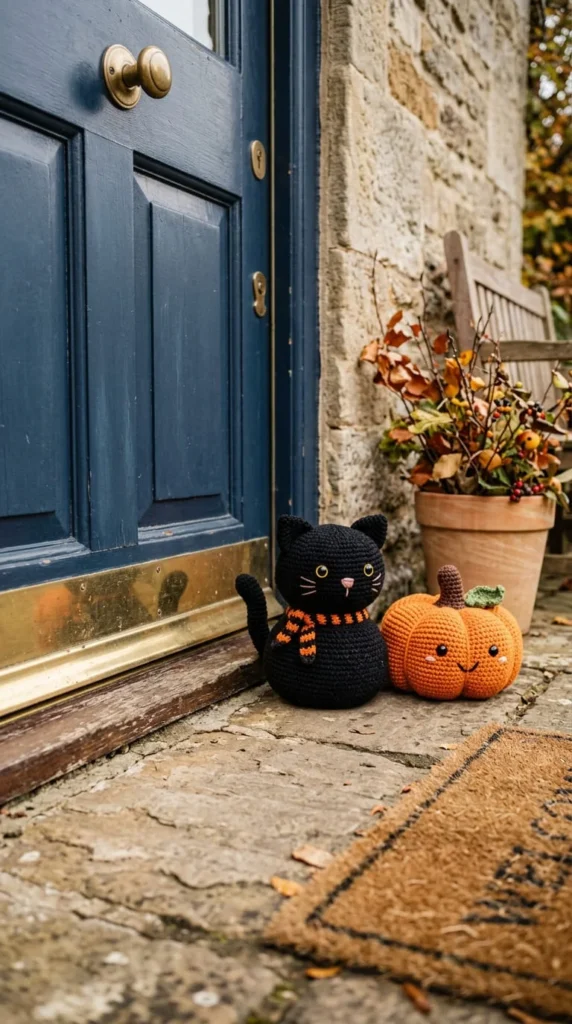
A crocheted doorstop solves a real household problem while still carrying the Halloween theme, which makes it one of the more genuinely useful projects on this list. Crochet a cover shaped like a sitting black cat and a second one shaped like a round pumpkin, sizing both to fit over a fabric bag filled with dried rice, sand, or poly pellets for weight.
Leave a small opening at the base of each cover so you can insert and remove the weighted insert for washing, closing it with a few buttons or a drawstring rather than sewing it shut permanently. Stuff a small amount of fiberfill around the weighted bag if you want the finished shape to look fuller and less flat-bottomed.
Set the pair at the base of the front door to keep it propped open for trick-or-treaters, or use just one indoors to hold a bedroom or closet door in place throughout the season. Because the weighted filling does the functional work, the crocheted cover itself can stay relatively simple, which makes this a good project if you want a practical Halloween piece without a long time commitment.
12. A Witch Granny Square Wall Art Piece
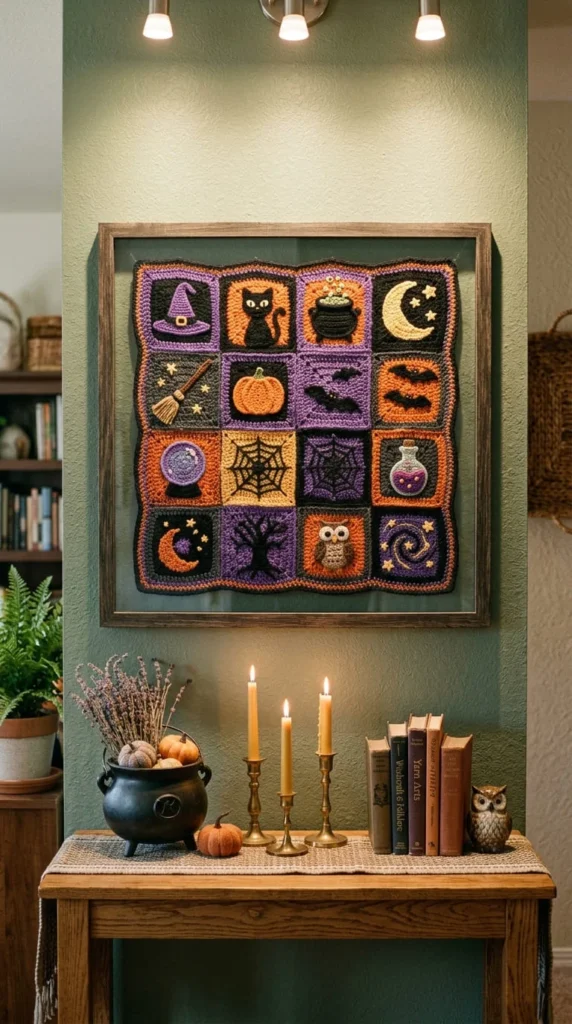
Instead of joining witch-motif granny squares into a blanket or a banner, this project frames a small grid of them as standalone wall art. Work four or nine matching squares using a simple witch hat or broom silhouette charted into the corner of each square, keeping the color palette consistent across all of them — purple, black, and a metallic accent works well here.
Join the squares into a single grid, then stretch the finished piece over a canvas frame or a simple wooden stretcher bar the way you might mount a piece of fabric art, pinning or gluing the edges to the back of the frame so the front stays smooth and taut.
This approach gives granny squares a more gallery-style presentation than the usual blanket or banner format, and it works particularly well in a hallway, above a console table, or in a home office where you want a piece of seasonal art rather than a soft textile accent. Because the squares are joined into a flat grid rather than left loose, the finished piece also has a cleaner, more structured look than a hanging banner.
13. A Personalized Name Pumpkin Banner
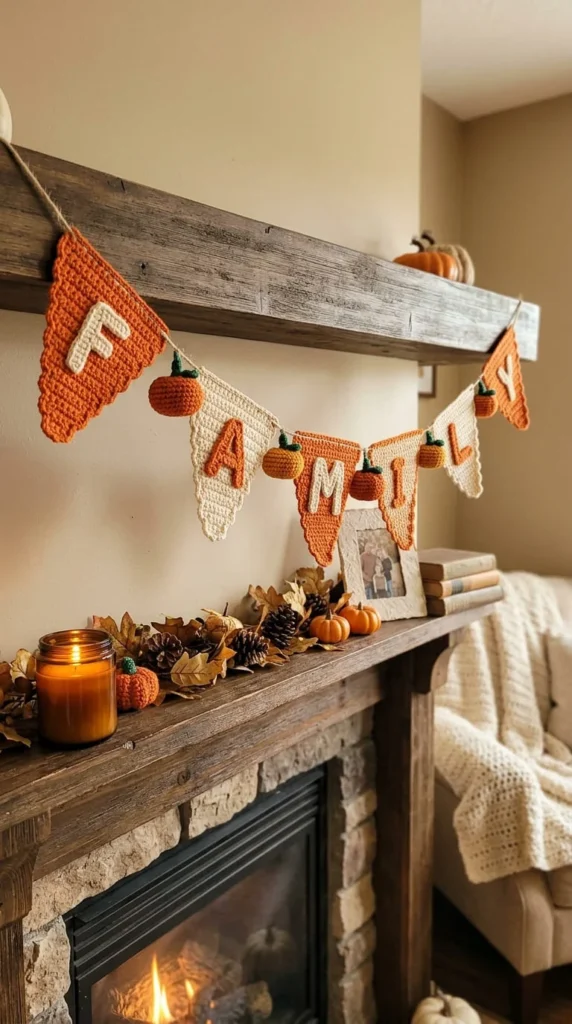
For a piece that feels more custom than a generic store-bought sign, crochet a small banner spelling out a family name, a simple greeting, or a child’s name using individual letter tiles worked in a consistent square or rectangular shape. Chart each letter using a graphghan-style color-block technique, working the letter shape in one color against a contrasting background square.
Join the finished letters with short lengths of ribbon or twine, adding a small pumpkin, bat, or leaf motif between words if you want a bit of decorative spacing rather than letters running edge to edge. Keep the letter squares uniform in size so the finished banner hangs evenly without any tiles sitting higher or lower than the rest.
This project takes more planning than most others on this list, since you’ll need to chart each letter before you start stitching, but the result is a piece that can’t be bought anywhere and works well as a housewarming or hostess gift as much as a decoration for your own home. A shorter version, spelling out just “BOO” or a single name, is a faster way to try the technique before committing to a full banner.
14. A Renter-Friendly Window Web Cling
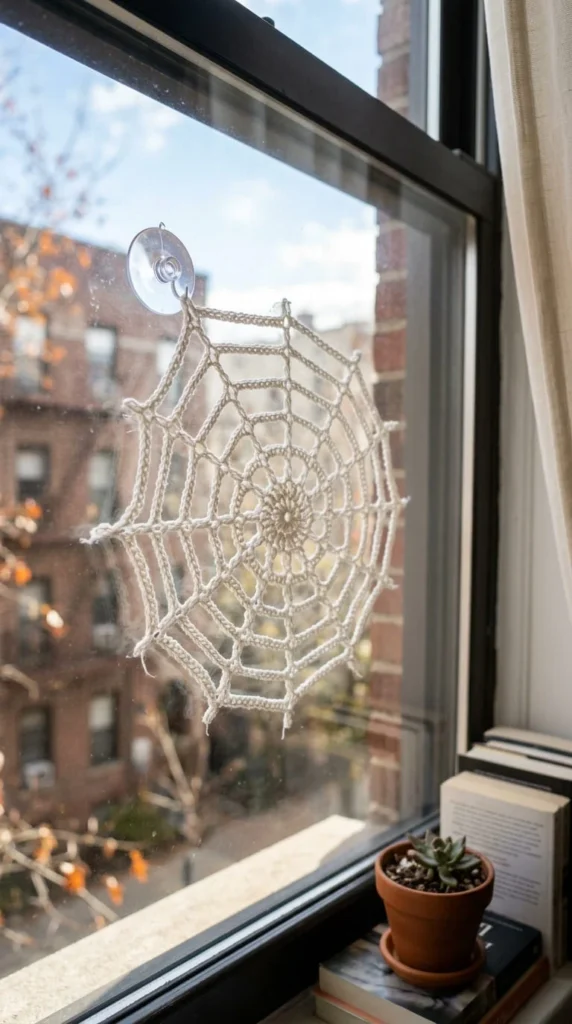
If you’re decorating a rental and want to avoid nail holes or adhesive residue, a small crocheted web attached to a suction-cup hook gives you a damage-free way to decorate a window. Work a lace-weight web motif using the same radial construction as a larger web project, keeping this version compact enough to sit comfortably in one corner of a windowpane rather than covering the whole glass.
Attach a small loop of thread to the top of the web and hang it directly from a clear suction hook, which holds securely on glass without leaving marks and comes off cleanly at the end of the season. Because the piece is small and lightweight, even a low-strength suction hook is usually enough to support it.
This project is worth repeating in a few different sizes if you have multiple windows to decorate, and the same suction-hook method works for other lightweight crocheted pieces, like a small bat or a mini ghost, if you want to rotate your window decor throughout the month rather than committing to one design for the whole season.
15. A Weekend Wreath Build for Beginners
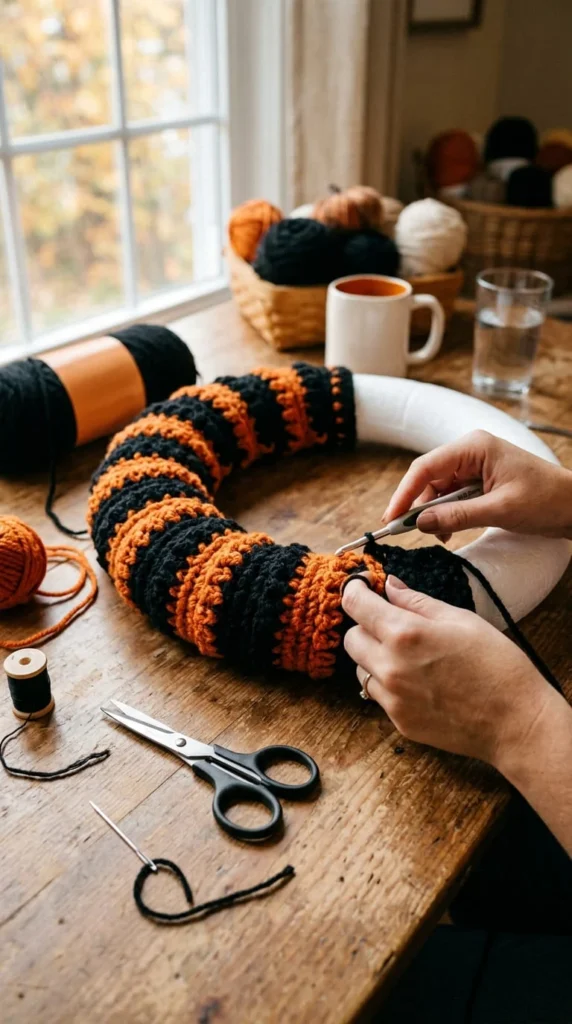
A full Halloween wreath can feel like a bigger commitment than a small garland or coaster, but breaking the project into a two-day plan makes it manageable even for a newer crocheter. On the first day, wrap a plain foam or wire wreath base evenly in black or orange yarn, working in sections and securing the ends with a few hidden stitches so the wrapped surface looks continuous rather than patchy.
On the second day, crochet three or four small accent motifs — a pumpkin, a bat, a simple bow — and attach them around the base using a few tacking stitches or a small amount of hot glue at the back where it won’t show.
Spacing the accents unevenly around the wreath, rather than centering everything at the bottom, gives the finished piece a more natural, balanced look. This two-session approach keeps each sitting short enough to fit around a weekend’s other plans, and it’s a good structure to borrow for other larger projects on this list if a single motif or a full garland ever feels like too much to finish in one sitting.
16. A Coordinated Coaster and Bowl Cozy Set
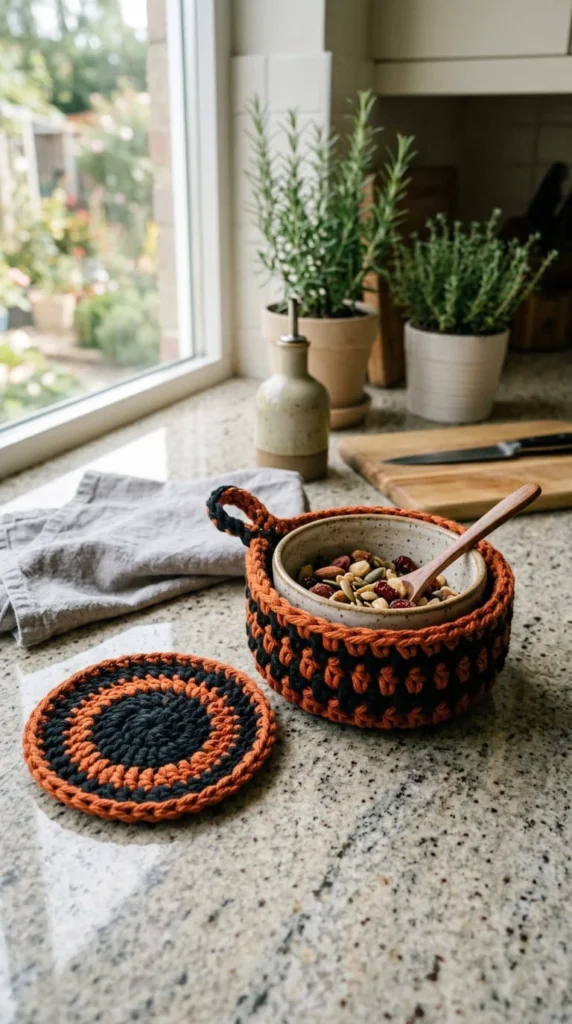
Matching sets give your Halloween table styling a more put-together look than a collection of unrelated pieces, and a coaster-and-bowl-cozy combination is a practical place to start. Crochet a set of four flat coasters using a simple circular or hexagonal shape, then work a matching cozy sized to wrap around a snack bowl, using the same color pattern and stitch repeats so the pieces clearly belong together.
Cotton yarn works best for both pieces, since it holds up to spills and can be tossed in the wash after a party without stretching out of shape the way acrylic sometimes does. Keep the bowl cozy open at the top so it slips over an existing bowl rather than replacing it, which means you can reuse whatever serving bowl you already have.
Set the coasters out for a small gathering, or keep a few in daily rotation through the rest of fall since a simple color-blocked coaster doesn’t read as overtly Halloween-specific once you swap out any pumpkin or bat detailing. This is a good weeknight project since both pieces are small and can be split across a few short sessions.
17. A Small Ghost Shelf Garland for Apartments
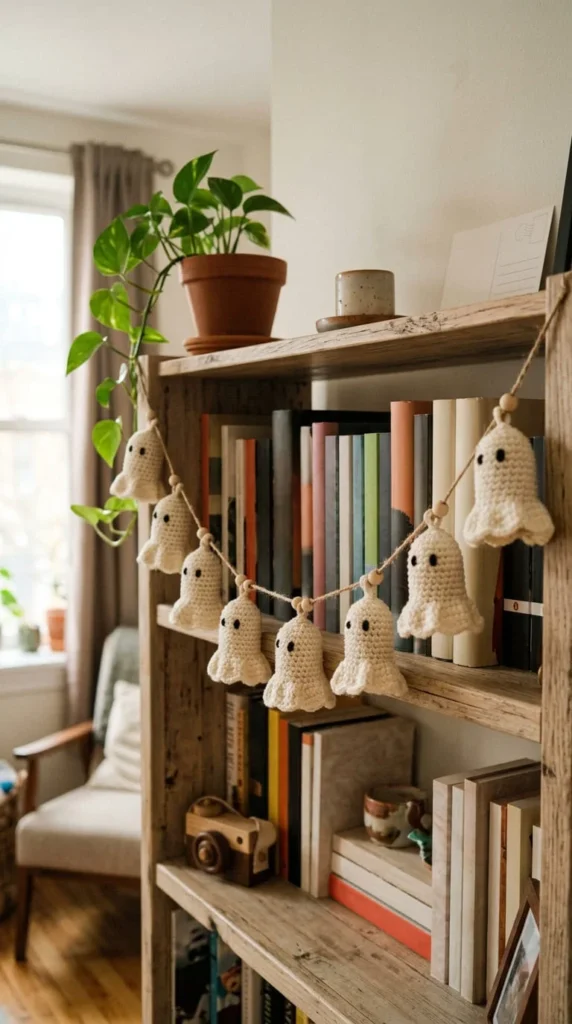
Not every home has a mantel or a wide window to decorate, and this project is built specifically for smaller spaces like a bookshelf, a desk, or a narrow entryway table. Crochet a short run of miniature ghost shapes, each about an inch tall, and string them close together on a short length of twine so the whole garland spans less than two feet.
Because the scale is small, this uses very little yarn and can be finished in under an hour, making it a good option if you want a Halloween accent without dedicating an entire evening to the project. Drape the finished garland along the front edge of a shelf, letting it hang slightly over books or framed photos rather than sitting flat against the wood.
This project is also easy to store, since a short garland rolls up small enough to tuck into a drawer or a small box between seasons. If you live somewhere with limited decorating space overall, a few small pieces like this one, placed thoughtfully, often read as more intentional than a handful of larger decorations crowded into a small room.
18. A Witch Cauldron Yarn Bowl
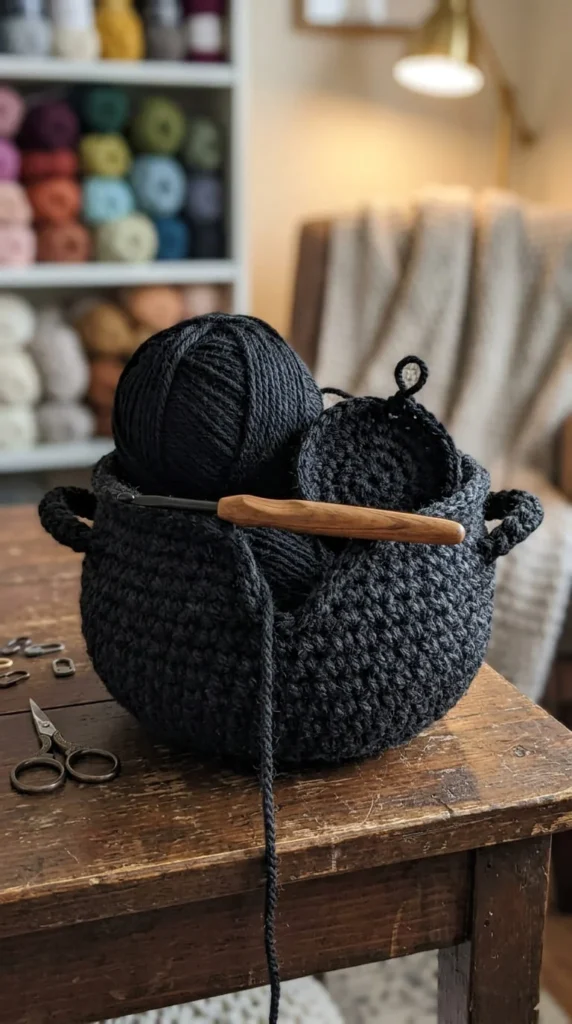
For crocheters who want a decoration that also supports future projects, a cauldron-shaped yarn bowl keeps your working yarn from rolling across the floor while looking the part on a craft table or shelf. Crochet a sturdy rounded bowl using firm single crochet, then add a small notch or slit along the top edge, either by leaving a gap in your stitching or by adding a curved opening after the fact, so your working yarn can feed through smoothly while you work.
Three small looped feet at the base echo the classic cauldron silhouette and lift the bowl slightly off the table surface. A black or deep green yarn worked in a slightly textured stitch, like a simple bobble or seed stitch, adds visual interest without competing with whatever project you’re using the bowl for.
Keep this piece out on a craft table or shelf year-round if you like the shape, or store it away with your other Halloween decorations and pull it back out each October as a functional seasonal tool rather than a purely decorative object.
19. A Fall-Ready Table Runner That Outlasts October
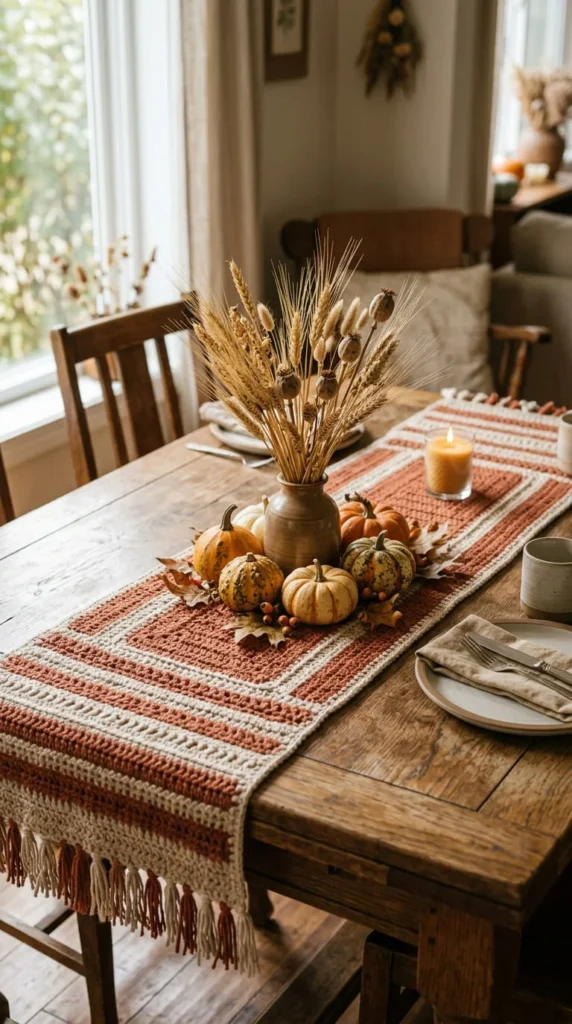
If you’d rather not pack away your table styling the moment Halloween ends, build a runner specifically in a palette that reads as general autumn rather than one holiday. Work the runner using rust, cream, deep gold, and a muted olive instead of bright orange and black, and skip any overtly Halloween-specific motifs like a jack-o’-lantern face or a bat silhouette.
A simple textured stitch pattern, like a shell or fan repeat, gives the runner visual interest without relying on a seasonal image to carry the design, which is what makes it easy to keep using the same piece through Thanksgiving and into early winter table settings.
Pair the runner with a few of the neutral pumpkins or a rustic basket from elsewhere on this list for a display that still feels seasonal without needing to be swapped out in early November. This approach solves a common frustration: a lot of handmade Halloween decor gets boxed up right after the holiday even though the materials and effort could keep serving the table for weeks longer with a slightly different styling choice.
20. A Mummy-Wrapped Vase Cover
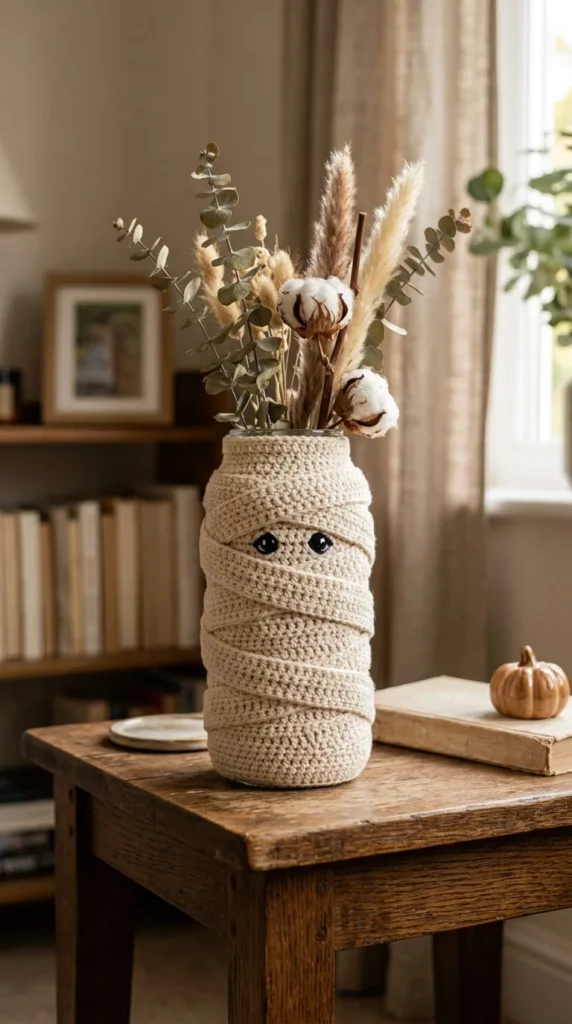
A mummy motif shows up less often than pumpkins or ghosts in most Halloween decorating lists, which makes this a good pick if you want something a little different. Instead of building a full amigurumi mummy, crochet long, narrow strips in cream or off-white yarn and wind them around a plain glass vase or candle holder to mimic loosely wrapped bandages, securing the ends with a few discreet stitches or a dab of fabric glue.
Leave a small gap near the top where two stitched eyes peek through, giving the piece a bit of character without requiring a full face or body shape. This technique works on almost any cylindrical object, so you can wrap a set of matching candle holders for a coordinated look across a mantel or table.
Because the strips are simple rectangles worked in basic single or double crochet, this is a forgiving project even if you’re newer to crochet, and it’s a good way to use up leftover cream or white yarn that doesn’t fit neatly into other projects on this list.
Conclusion
Crochet Halloween decorations work best when you think about where each piece will actually live in your home, rather than making a pile of unrelated motifs and figuring out placement later. Start with one or two projects that match a specific spot you already want to decorate, whether that’s a bare mantel, an empty entryway table, or a window that could use a little seasonal detail. Once you’ve built a few pieces, you’ll likely notice how many of them share the same base techniques, which makes the next project faster than the last. Pick the idea that fits your space best, pull out your hook, and start building a Halloween display that looks like nobody else’s.