
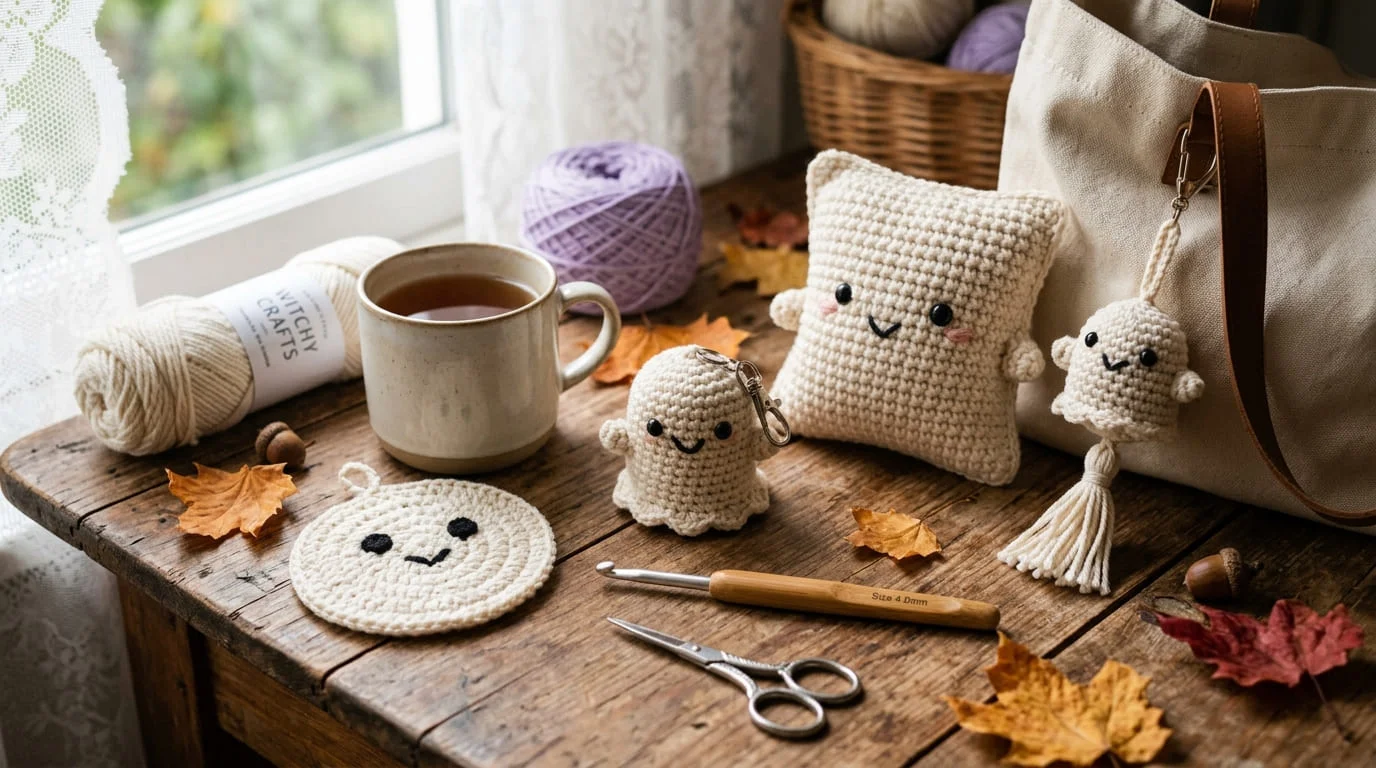
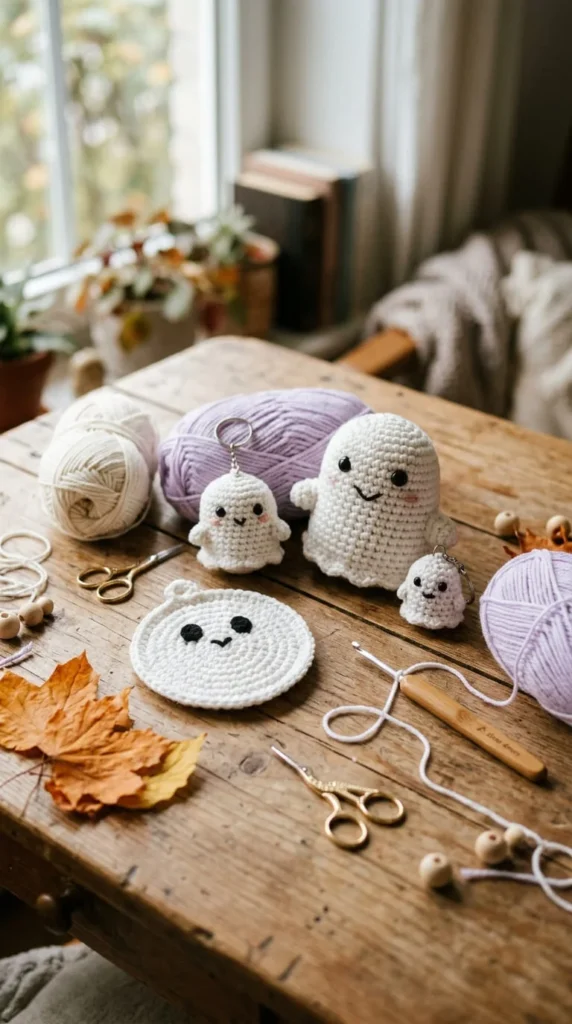
Crochet ghost ideas go a lot further than one soft little amigurumi sitting on a shelf. Once you start looking, ghosts show up as coasters, potholders, bag charms, granny squares, party favors, and even oversized pillows — which means there’s a project here for a spare ten minutes and one for a whole weekend. This list moves past the usual single-pattern roundup and organizes ideas by what you’ll actually do with the finished piece: wear it, gift it, sell it, decorate with it, or keep it around long after Halloween ends. Whether you’re stocking a craft fair table or just want something small to give the trick-or-treaters at your door, you’ll find a format here that fits your yarn stash and your free time.
1. A No-Sew Mini Ghost You Can Finish Before Your Coffee Gets Cold
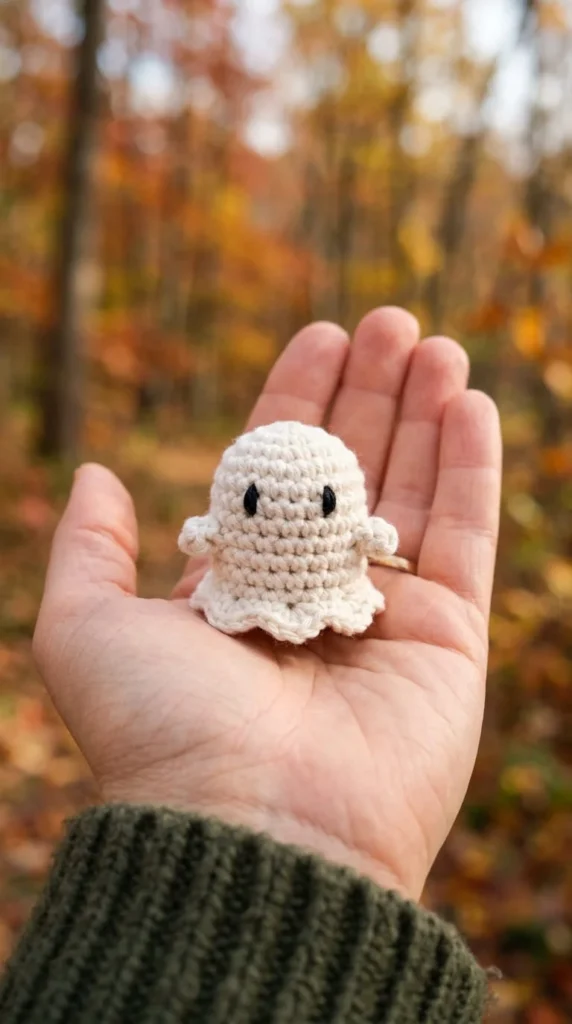
Some Halloween projects need a whole evening. This one doesn’t. A pocket-sized ghost, worked as a single continuous piece with an embroidered face instead of any attached parts, can realistically be finished in around ten minutes once you know the shape.
The construction is simple: a magic ring start, a handful of increase rounds to build width, a few even rounds for height, and a wavy final round worked into the front loop for that classic scalloped hem. No separate limbs, no safety eyes to insert, no seams to close.
Because it’s so fast, this is the project to reach for when you need a small stack of identical ghosts rather than one standout piece. Line up your materials — pre-cut yarn tails, a bit of stuffing portioned out ahead of time — and you can realistically finish half a dozen in under an hour.
These tiny ghosts work well tucked into a Halloween card, dropped into a trick-or-treat bucket as a bonus, or strung onto a bracelet for a quick handmade accessory. Keep a few in a jar by the door and hand them out alongside candy for a memorable twist on the usual treat.
2. A Ghost Bag Charm for Everyday Wear

Not every Halloween craft has to disappear into a storage bin come November. A ghost bag charm is small enough to clip onto a backpack, tote, or purse and wear well past the season if you keep the color palette neutral.
The body follows a standard small amigurumi shape, but the finishing details matter more here than on a shelf decoration. A sturdy metal clasp attached through a firmly worked loop at the top will hold up to daily use far better than a loop made from a single strand of yarn, which tends to stretch and eventually snap.
Use a tightly spun cotton or acrylic yarn rather than anything fuzzy or loosely plied, since a bag charm gets brushed against doorframes, car seats, and other bags all day. A denser stitch also helps the shape hold up over months of handling instead of going soft and misshapen.
If you want to make several as gifts, batch the clasp attachment step separately from the crocheting — sew on all the loops in one sitting rather than switching back and forth between crocheting and finishing each individual charm. This keeps your hands in one motion longer and speeds up the whole process considerably.
3. A Witch-Hat Ghost Charm for a Bit of Extra Personality
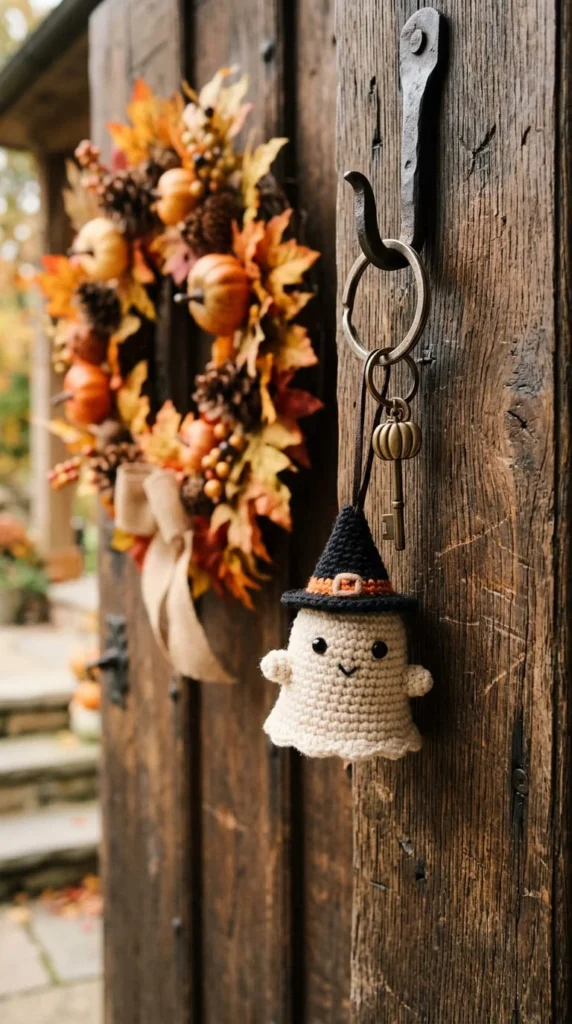
A plain ghost is charming on its own, but a tiny pointed hat changes the whole read of the piece without touching the main body pattern at all. This is one of the easiest ways to make a basic ghost feel like a distinct design rather than a repeat of every other ghost on your shelf.
The hat is worked as a small cone, starting with a tight magic ring and increasing just enough rounds to create a gentle flare before switching to even rounds that taper up to a point. Because it’s worked separately, you can experiment with different hat sizes and angles without redoing the ghost body each time.
A thin strip of contrasting yarn wrapped around the base of the hat, secured with a couple of stitches, adds a hatband detail that takes only a minute but reads as a deliberate design choice rather than an afterthought.
This upgrade works particularly well on keychains and bag charms, since the pointed silhouette makes the piece more recognizable at a glance than a plain rounded ghost shape would be. It’s also a good way to use up small amounts of black or purple yarn left over from other Halloween projects.
4. A Click-Clack Ghost That Doubles as a Fidget Toy
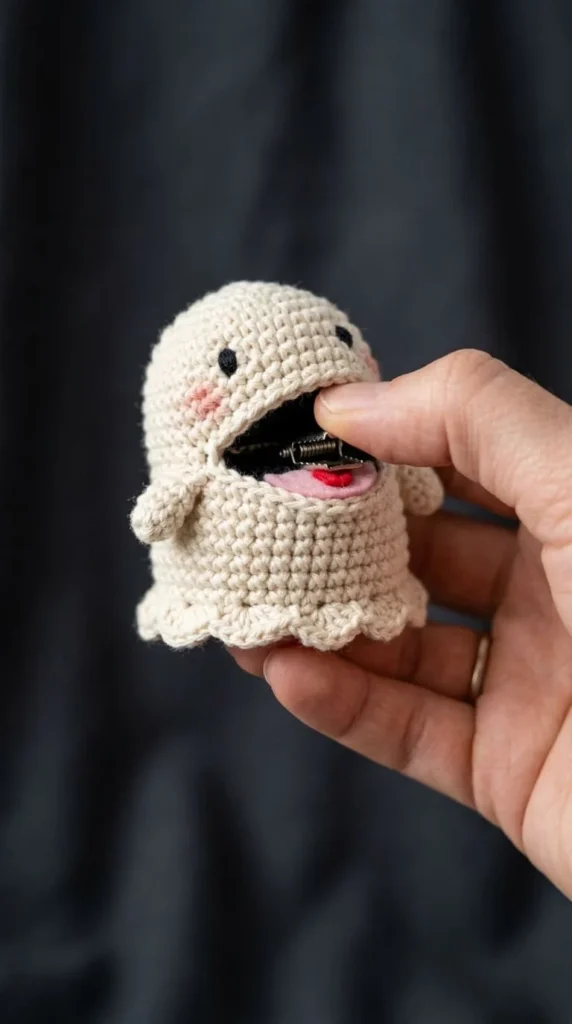
Most amigurumi are meant to be looked at, not played with, but a click-clack ghost is built specifically for handling. A small hair clip or snap barrette tucked inside the body, positioned so it opens and closes when squeezed, gives the ghost a satisfying little mechanism that makes it genuinely fun to hold.
The body is crocheted around the clip rather than stuffed solid, which means less filling than a typical amigurumi and a bit more attention to placement so the mechanism lines up with a gap left in the seam. Positioning the clip near the “mouth” area, so the opening and closing motion looks like the ghost is talking or biting, gives the toy a bit of visual humor beyond just the sensory appeal.
This is a genuinely different category from most crochet Halloween ideas, since the finished piece has an interactive element rather than being purely decorative. It works well for kids who like fidget toys, and it makes a memorable classroom or party favor precisely because it does something other ghosts on the table don’t.
Keep the yarn snug around the clip’s moving parts so repeated use doesn’t loosen the stitches over time, and check the mechanism periodically if it’s going into a child’s hands regularly.
5. Ghost Coasters for a Table That Still Has a Job to Do
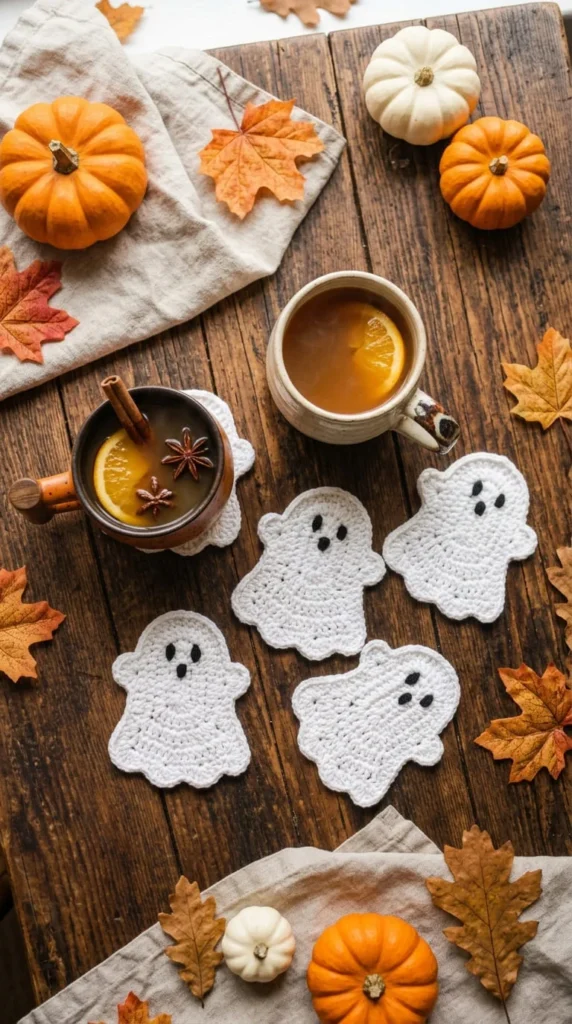
Amigurumi ghosts are fun, but they don’t do anything useful once Halloween is over. A set of flat ghost coasters solves that by giving you a decoration that earns its spot on the table year-round, not just during spooky season.
These are worked flat in the round using evenly spaced increases to keep the piece lying flush rather than curling into a bowl shape, which is the most common mistake when adapting a 3D pattern into a flat one. A simple embroidered or contrast-color face on the front is optional — plain white coasters look just as good in a minimalist kitchen.
Using a sturdy cotton yarn rather than acrylic matters more here than on most amigurumi, since coasters need to handle condensation from cold drinks and occasional light staining from hot mugs. Cotton also holds its shape better under repeated washing.
A set of four or six makes a practical gift, especially if you pair it with an actual set of drinkware. Because each coaster is quick to make — usually under 20 minutes once you’re comfortable with the increase pattern — this is also one of the more efficient projects on this whole list if you’re short on time but still want to make something useful.
6. Turning Two Ghost Coasters Into a Tiny Pouch
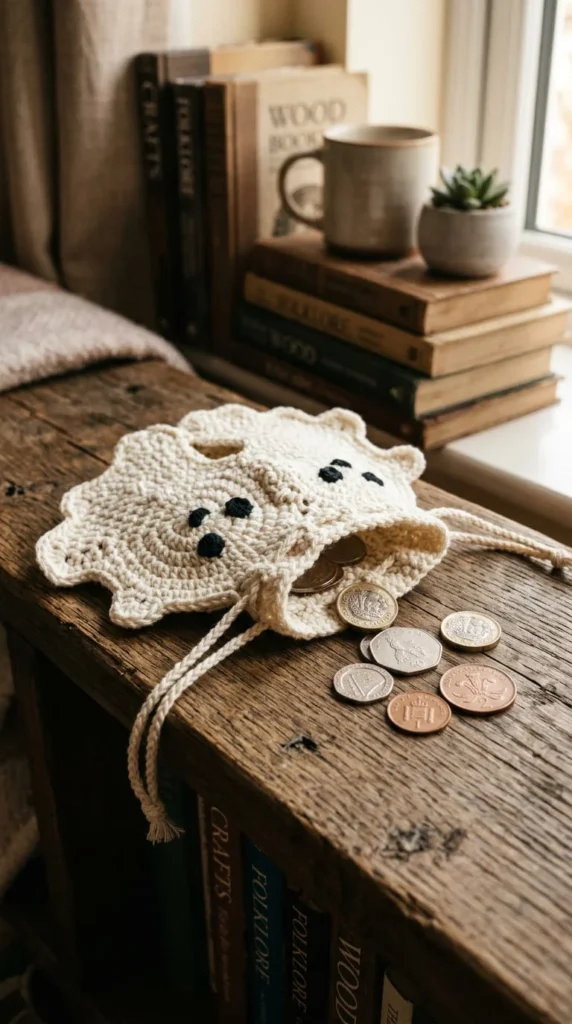
Once you’ve made a batch of flat ghost coasters, it’s worth knowing they can become something else entirely with very little extra work. Joining two identical ghost shapes together around the edges, leaving a small gap at the top, creates a simple pouch just large enough for coins, small jewelry, or a set of earbuds.
The join itself is a straightforward slip stitch or single crochet seam worked around the outer edge of both pieces held together, wrong sides facing so the finished seam sits on the inside. Leave an opening at the top wide enough to fit your hand through, then finish that edge separately so it doesn’t fray or stretch out of shape with use.
A short length of cord or ribbon threaded through a few stitches near the opening turns it into a working drawstring pouch rather than just an open pocket. This is a good project for using up a “practice” coaster that didn’t turn out quite even enough to use on a table, since a slightly imperfect ghost coaster still works fine once it’s part of a pouch.
Give these as small gift-card holders, jewelry pouches, or party favors — they take almost no additional time once you already have the coaster pattern down.
7. A Ghost Potholder That Actually Earns Its Place in the Kitchen
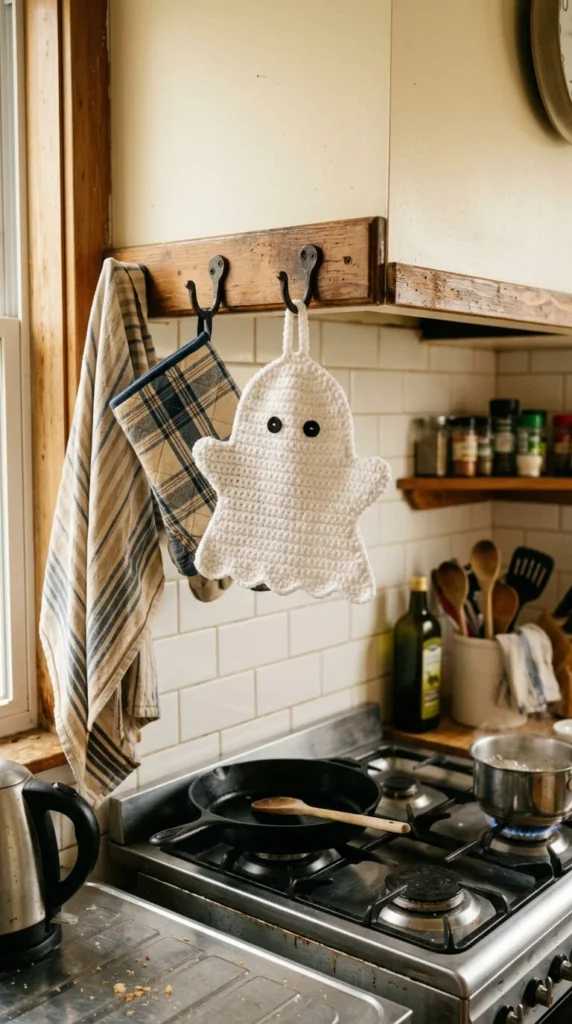
A potholder is one of the few crochet projects that gets used constantly rather than sitting on display, and a ghost shape is an easy way to bring a bit of seasonal charm into a space that’s normally pretty plain. This is a slightly more involved flat project than a coaster, since it has to be thick enough to protect your hands from real heat.
The standard approach is to work the ghost shape using a double layer of cotton yarn, or to crochet two identical ghost panels and join them with a layer of heat-resistant batting sandwiched in between. Skipping the batting and using a single thin layer might look fine, but it won’t actually protect against a hot pan, so this is one project where function has to come before appearance.
A sturdy hanging loop worked directly into one corner, rather than added afterward with a separate strand of yarn, holds up far better to being grabbed and pulled off a hook multiple times a day.
Stick with 100% cotton yarn for the whole project, since synthetic yarns can melt or scorch near heat. This is a good gift for anyone who already has a kitchen full of plain, mismatched potholders and could use one with a bit of character.
8. A Ghost Granny Square That Grows Into a Blanket
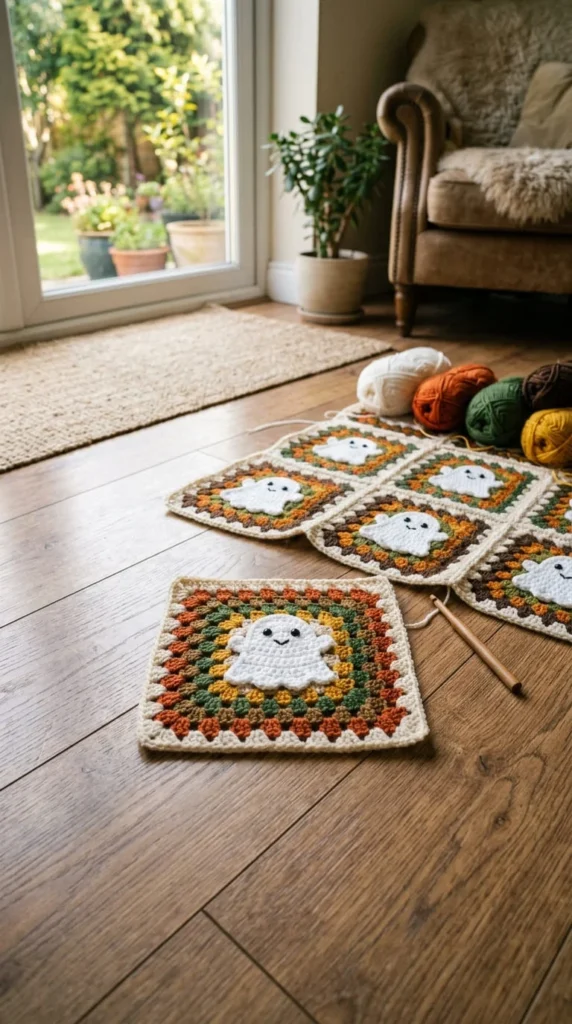
If you like the idea of a Halloween project but don’t want something that only makes sense for one month a year, a ghost granny square solves that by becoming part of something bigger. A single square worked with a ghost motif in the center, framed by a few rounds of solid granny stitching, can eventually join dozens of others into a full blanket, tote bag panel, or wall hanging.
The ghost motif itself sits in the middle of the square, usually built from a small rounded or triangular shape in white or cream yarn, then framed by standard granny square rounds worked in your choice of coordinating colors. Because the surrounding rounds don’t need to match the ghost theme exactly, you can mix in autumn oranges, deep purples, or muted grays depending on how seasonal or subtle you want the finished piece to look.
Making one square per week during the lead-up to Halloween is a realistic pace if you’re working on this alongside other projects, and by the time the season actually arrives, you’ll have a meaningful head start on a blanket that outlasts the holiday completely. This is a good option if most of your other Halloween makes tend to get packed away and forgotten.
9. One Ghost Appliqué, Used in Seven Different Places
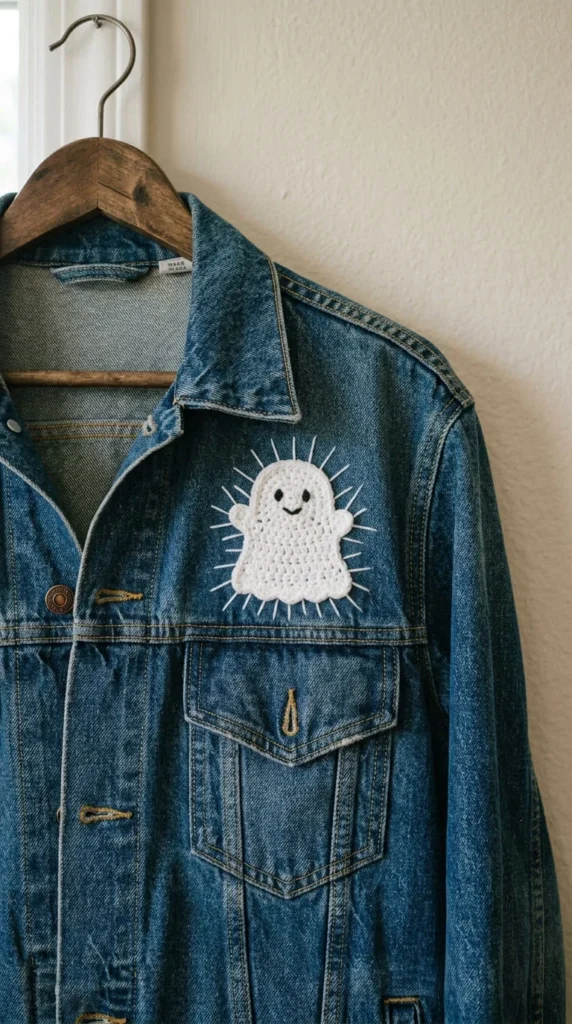
A flat ghost appliqué takes less time than almost any amigurumi on this list, and the real value is in how many different things you can attach it to once it’s finished. Rather than treating it as a single-use decoration, think of it as a small patch you can move between projects.
The same basic shape works stitched onto:
- A denim jacket pocket or the back of a tote bag
- The front of a plain greeting card
- A pillow cover, centered or tucked into a corner
- A knitted or crocheted hat brim
- A fabric garland strung between two hooks
- A window using removable fabric glue
- The corner of a table runner or cloth napkin
Because the appliqué is flat, it stitches on cleanly without adding much bulk, and a simple whip stitch around the edge is usually enough to secure it firmly to fabric. If you’re attaching it to something that’ll be washed regularly, like a jacket or a napkin, use a slightly tighter stitch and a sturdy thread rather than relying on the yarn tail alone.
Making three or four appliqués in one sitting gives you a small stockpile to use across several projects throughout the season instead of starting from scratch each time you want to add a ghost somewhere new.
10. A Mixed-Motif Garland Beyond Just Ghosts
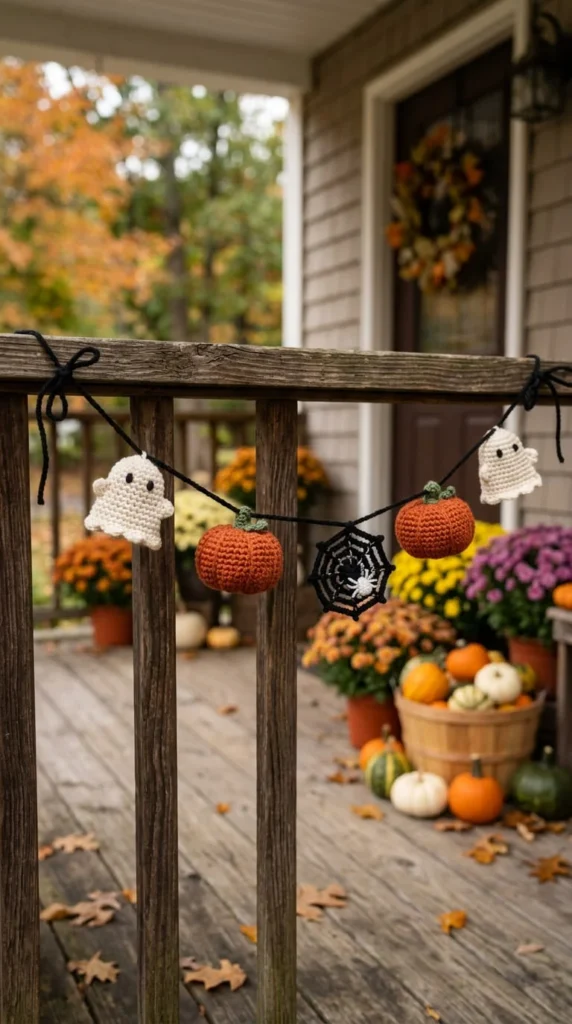
A garland made entirely of ghosts looks fine, but alternating ghost shapes with a couple of other quick motifs creates more visual rhythm without much extra effort. Pairing ghosts with small pumpkins and flat spiderweb circles is an easy combination, since all three motifs can be made at a similarly small scale.
Space the motifs evenly along a length of black cord or narrow ribbon, attaching each one through a small loop worked directly into the top of the piece rather than punching a hole through finished fabric afterward, which risks tearing the stitches.
A repeating pattern — ghost, pumpkin, spiderweb, ghost, pumpkin, spiderweb — reads as more intentional than randomly scattering the shapes, especially once the garland is hung and viewed from a distance. If you’re short on time, two motif types alternating is just as effective as three.
Keep the individual pieces lightly stuffed if they’re three-dimensional, since a heavier fill adds unnecessary weight that can make a long garland sag in the middle. This is also a good group project if you’re crafting with kids or friends, since everyone can work on a different motif at the same time and the garland comes together faster than if one person makes every piece alone.
11. An Oversized Ghost Pillow for a Weekend Project
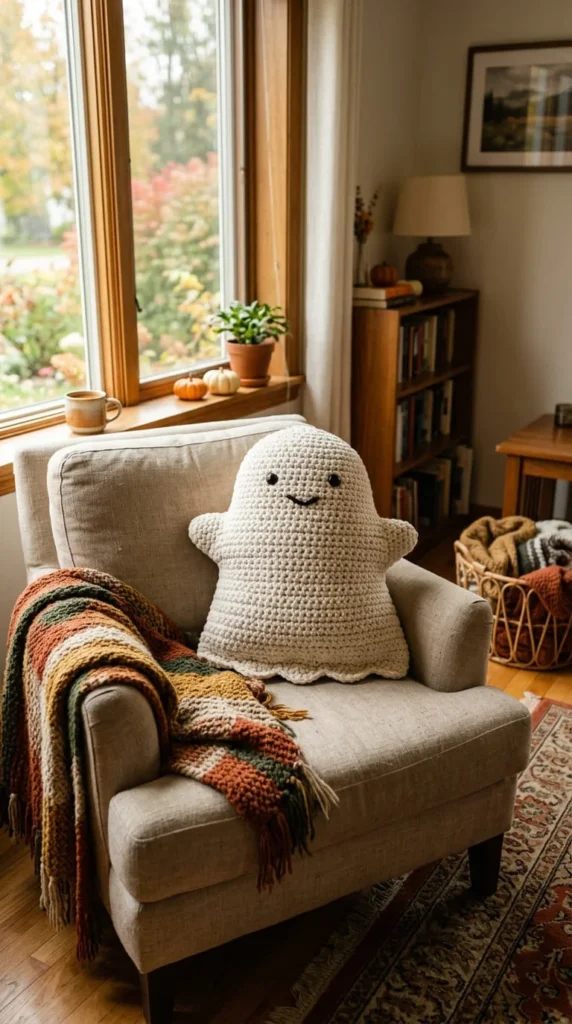
Most of the ideas on this list are small, fast projects, but a pillow-sized ghost is worth the extra time if you want one standout piece rather than a collection of tiny ones. This is a genuinely different kind of project — closer to a garment in scope than a quick amigurumi — and it takes more planning around gauge and yarn quantity before you start.
Work the front and back panels as two large flat ghost shapes using a bulky yarn and a correspondingly large hook, which keeps the stitch count manageable even at this scale. Joining the two panels together around the edge, leaving a gap for stuffing, follows the same logic as the mini pouch idea earlier in this list, just scaled up considerably.
Because a project this size uses a meaningful amount of yarn, buying enough in a single dye lot before you start prevents any noticeable color shift partway through, which is much more visible on a large solid-color piece than on a small one.
This is a satisfying weekend project if you want a genuine centerpiece for a reading nook or a couch, and unlike most Halloween crafts, a soft ghost pillow is comfortable and practical enough to stay out well past October.
12. A Ghost Cover to Dress Up Your Candy Bowl
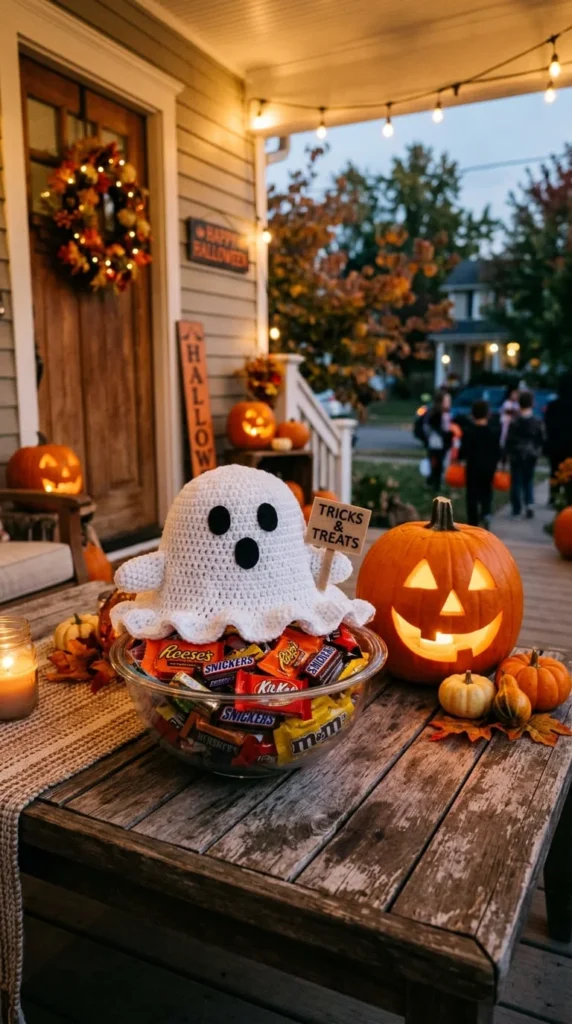
Trick-or-treat night usually means a plain bowl sitting by the door, and a crocheted ghost cover is a simple way to make that bowl look intentional rather than like an afterthought. Rather than crocheting a fully enclosed container, this pattern works more like a fitted cozy that slips over an existing glass or plastic bowl.
Start with a flat circular base sized to match the bottom of your bowl, then work upward in continuous rounds without increasing, so the sides go straight up rather than flaring outward. A simple face embroidered near the top, positioned so it’s visible above the candy line, finishes the look without adding bulk.
Because this cover has to slip on and off easily for refilling, keep the stitch gauge on the looser side rather than working it tightly. A slightly stretchy fit means you won’t need to measure your specific bowl too precisely, and the same cover can likely fit a few different bowls around the same general size.
This is a nice project to bring out once a year, since it stores flat and takes up almost no space compared to a solid decoration, and it turns a plain bowl into something a little more memorable for the kids stopping by.
13. Ghost Wine Charms for a Halloween Party Table
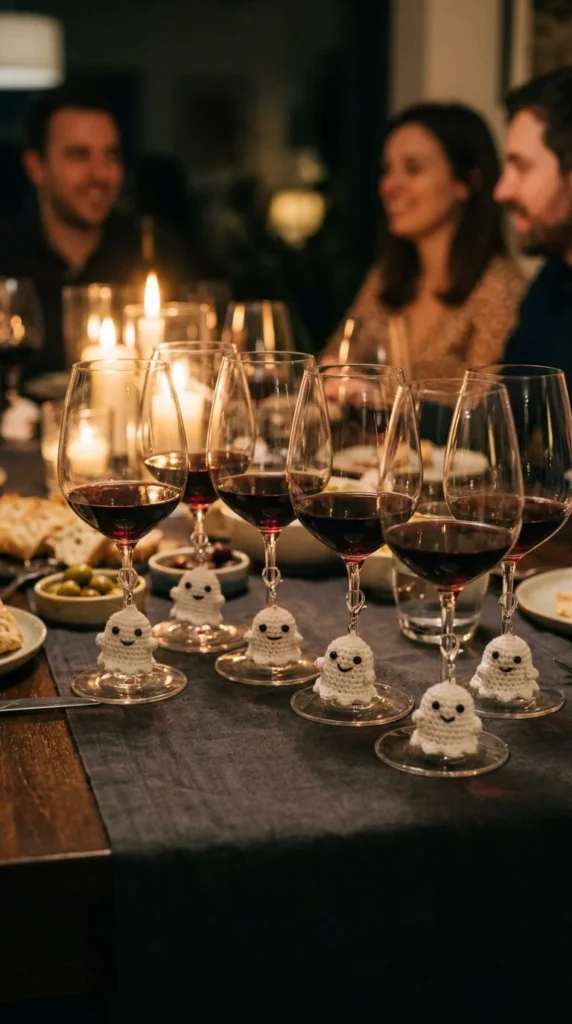
If you host a Halloween gathering, keeping track of whose drink is whose gets messy fast, and a set of tiny ghost wine charms solves that problem while doubling as a party favor guests can take home. Each charm is a miniature version of the classic ghost shape, made small enough that six or eight can be finished from a single small skein of yarn.
A simple loop of craft wire or a small metal ring threaded through a loop worked into the top of each ghost lets it clip securely around a wine glass stem without slipping off during the evening. Varying the face slightly on each one — a wink here, a small tongue-out expression there — gives guests an easy way to identify their own glass at a glance.
Because these are so small, this is a good project to batch out in one sitting rather than spreading across several days, especially if you’re making a full set before a specific event. Keep a small bag of finished charms on hand for future gatherings once Halloween is over, since a set like this gets reused for years with almost no wear.
14. Ghost Napkin Rings for a Spookier Dinner Table
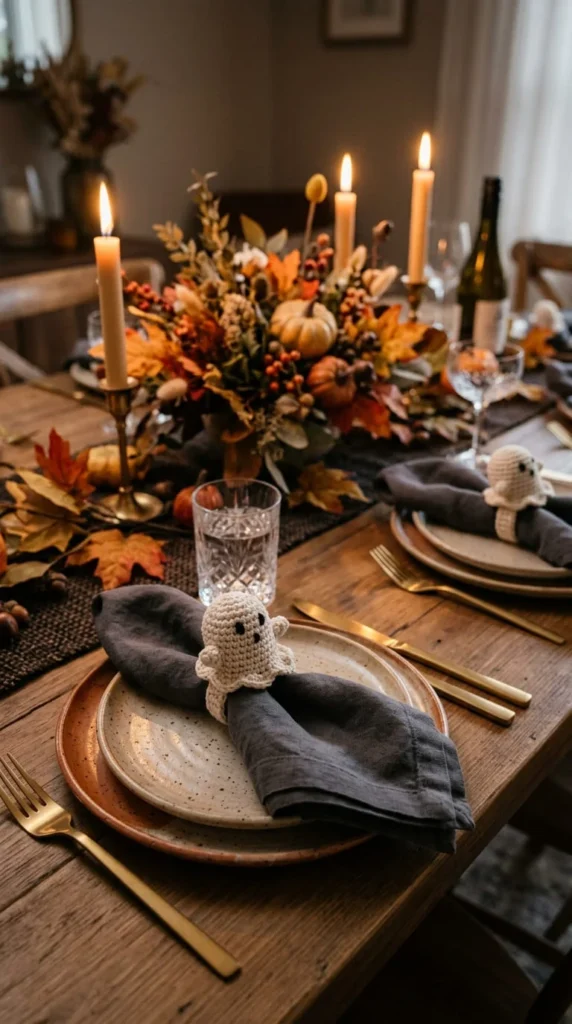
Napkin rings rarely get much attention, but a small ghost motif turns a plain table setting into something guests will actually notice and comment on. Unlike most amigurumi on this list, a napkin ring is worked as an open ring rather than a closed shape, since a napkin has to slide through it.
Crochet a simple tube using single crochet worked in a continuous round, sized to fit loosely around a rolled or folded cloth napkin, then attach a small flat ghost appliqué to the front using a few discreet stitches. Keeping the ring itself plain and letting the appliqué carry the seasonal detail keeps the whole piece from looking overly busy once it’s sitting next to a full place setting.
A set of six or eight makes a complete table setting, and because the base ring shape is so quick to make, most of your time goes into the small appliqués rather than the rings themselves. This is a good project to make gradually over several evenings if you’re prepping for a specific dinner or gathering rather than trying to finish an entire set at once.
15. A Mini Ghost Family for a Layered Shelf Display
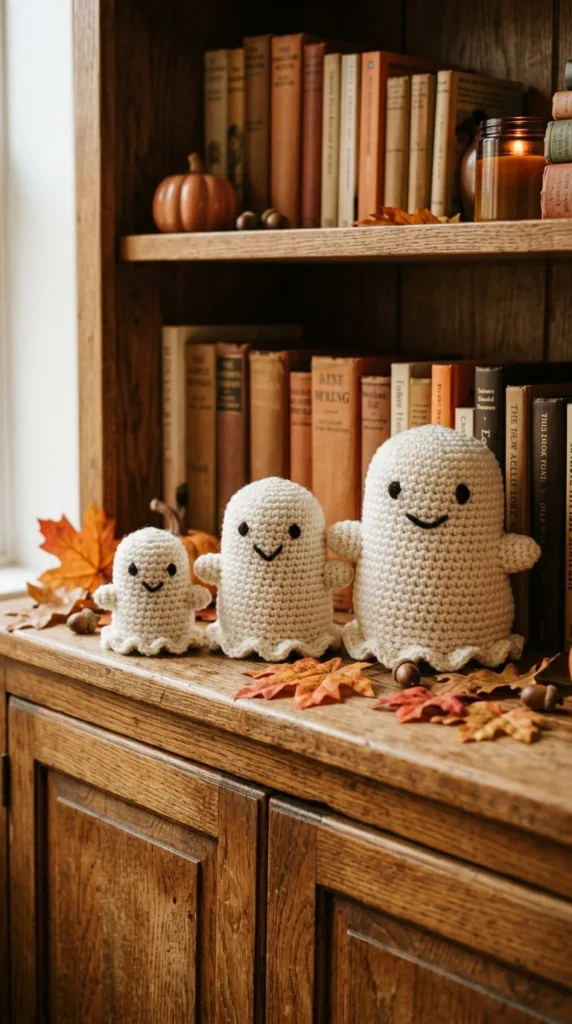
A single ghost on a shelf looks fine, but three ghosts in different sizes arranged together reads as a deliberate display rather than one leftover craft project. This idea uses the same basic pattern worked at three different scales — achieved simply by changing your hook size and yarn weight rather than learning three separate patterns.
A small version made with fine yarn and a small hook, a medium version at your usual gauge, and a larger version made with bulky yarn and a bigger hook gives you a natural size progression without any changes to the stitch count itself. Keep the stuffing density proportional to size — the smallest ghost takes very little fill, while the largest takes a noticeably fuller stuffing to hold its shape.
Arrange the three so they overlap slightly rather than lining up in a perfectly even row, which creates a more natural, grouped look rather than a stiff display. Varying the facial expression slightly across the three — a shy look on the small one, a bigger grin on the largest — adds a bit of personality to what would otherwise be three identical shapes at different sizes.
This is an efficient way to fill shelf space with a coordinated display using only one pattern.
16. A Ghost Wind Chime for Porches and Patios
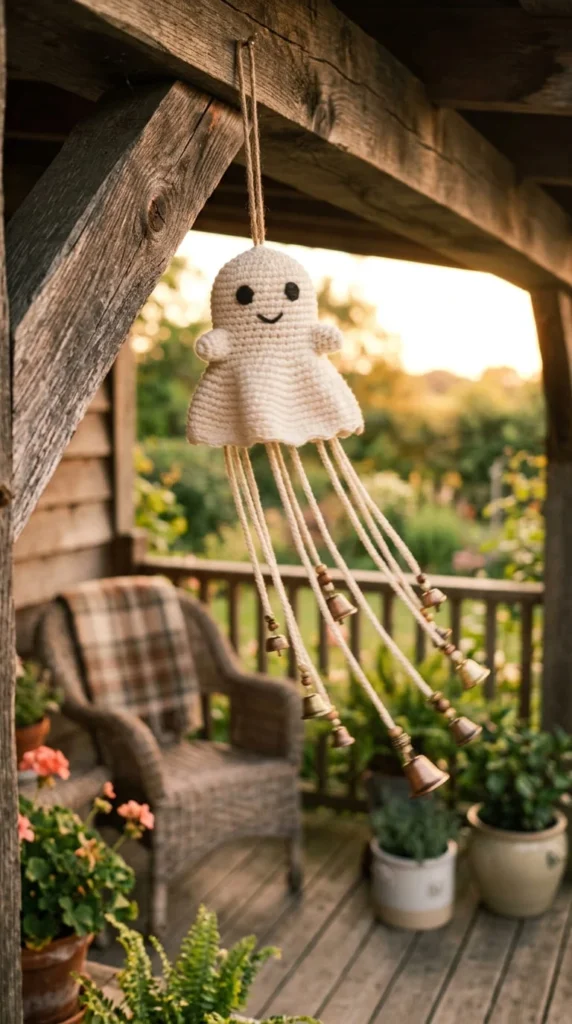
Most crochet Halloween ideas are meant to be looked at from a fixed spot, but a wind chime version adds both sound and movement to an outdoor space. The ghost itself sits at the top as the main body, with several thin crocheted cords hanging beneath it, each ending in a small bell or bead.
Work the cords as simple chains, thick enough to hold their shape without curling, then attach a small bell to the end of each one before securing all the cords evenly around the base of the ghost. Spacing them close enough together that they occasionally brush against each other in the wind is what actually produces the chiming sound, so don’t spread them out too far.
Because this piece hangs outdoors, choose a weather-resistant acrylic yarn over a natural fiber that might mildew or lose shape in humidity. A light coat of fabric stiffener on the ghost’s body also helps it hold up better against repeated exposure to wind and rain.
This is a fun project if you want your Halloween decor to do more than sit still, and it works particularly well hung near a porch entrance where both the visual and the sound will greet visitors.
17. A Chunky Yarn Ghost for When You Want Speed Over Detail
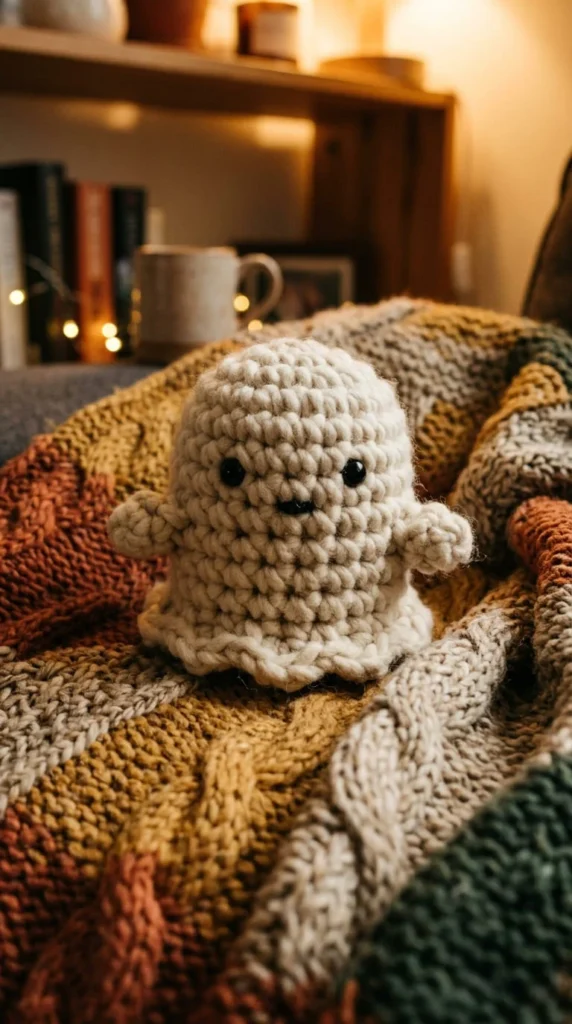
Sometimes the goal isn’t a refined, detailed amigurumi — it’s getting something finished fast. Switching to a bulky or super-bulky yarn with a correspondingly large hook turns a normally 30-minute pattern into a project you can finish in about ten minutes, since each stitch covers far more ground.
The trade-off is that fine details like small embroidered features become harder to execute cleanly at this scale, so it’s worth simplifying the face rather than trying to replicate a detailed expression. Two simple dot eyes and a small straight-line mouth read clearly even at a larger, chunkier gauge.
Because bulky yarn uses up your stash quickly, this is also a good way to work through a large leftover skein that’s been sitting around unused, since it takes far less yardage relative to its bulk than a fine yarn would for a similarly sized finished piece.
The finished ghost has a noticeably different look than a fine-gauge version — softer, rounder, and a little less defined — which some people actually prefer for a cozy, huggable feel rather than a crisp, detailed one. This is a good project to hand a beginner who wants a fast, satisfying result on their first attempt.
18. A Velvet Ghost for Something Softer Than Standard Yarn
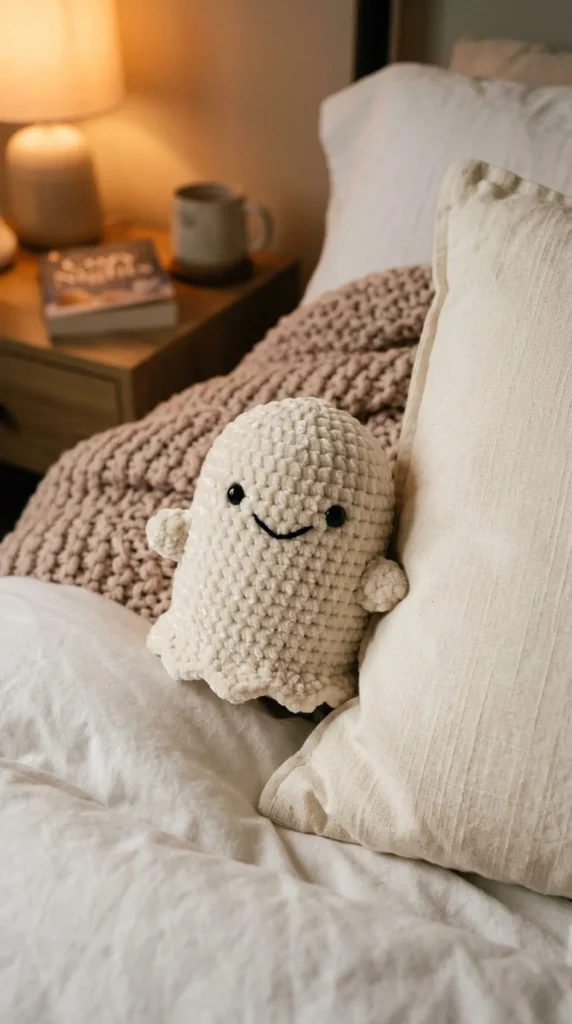
Standard cotton or acrylic yarn gives a crisp, defined stitch, but velvet yarn produces a completely different texture — soft, slightly glossy, and noticeably plusher once stuffed. If you’re making a ghost specifically as a snuggle toy rather than a shelf decoration, velvet is worth the switch.
Velvet yarn behaves a little differently than standard yarn while you’re working with it — it has more give and less defined stitch visibility, which actually works in your favor here since it smooths out minor tension inconsistencies that would show clearly on a cotton version. The finished stitches merge into a soft, rounded surface rather than showing individual definition.
One practical note: velvet yarn tends to be a bit heavier and less breathable than cotton, so keep the stuffing slightly lighter than you would for a standard amigurumi to avoid a finished piece that feels overly dense or firm.
This version works especially well as a gift for a young child, since the texture invites handling in a way that a stiffer cotton ghost doesn’t. Pair it with an embroidered rather than safety-eye face if it’s headed to a toddler, for the same safety reasons that apply to most soft toys made for very young children.
19. A Glow-in-the-Dark Ghost for a Kid’s Room
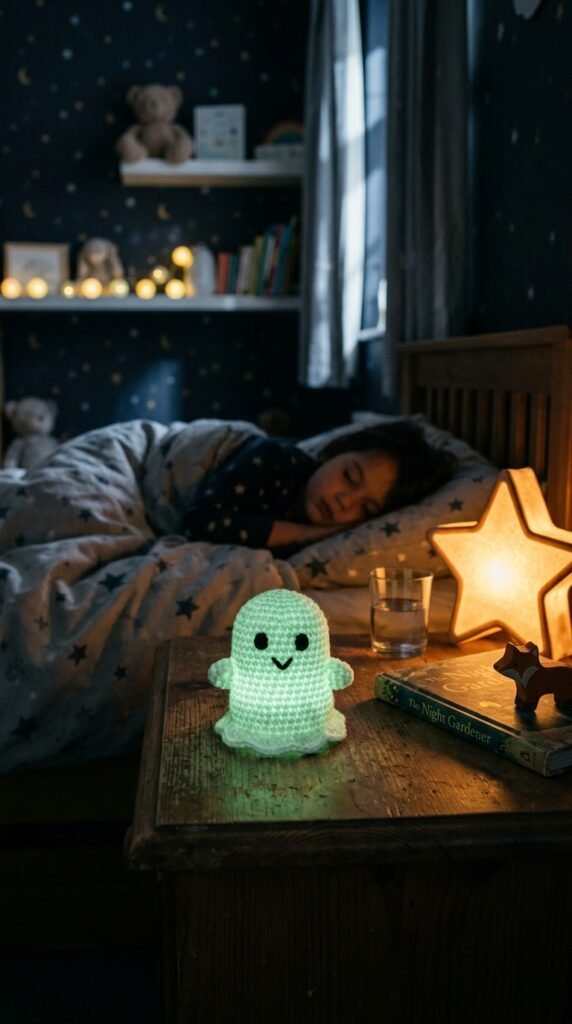
A standard white ghost looks the part during the day, but glow-in-the-dark yarn gives the same pattern a completely different function once the lights go off. This is a good project if the finished piece is headed for a child’s bedroom rather than a Halloween display that gets packed away after one month.
The construction doesn’t change at all from a standard amigurumi ghost — the glow effect comes entirely from the yarn itself, which requires brief exposure to light before it’ll glow, so keep the finished piece near a window or lamp during the day if it’s going to be used at bedtime.
Because glow yarn can look slightly different in texture and thickness compared to standard yarn, it’s worth doing a small test swatch first to check your gauge before committing to a full pattern, especially if you’re following stitch counts from a pattern written for regular yarn.
Pairing this with an embroidered face rather than safety eyes keeps it appropriate for younger children, and the novelty of a genuinely glowing toy tends to make it a favorite well beyond Halloween itself, since it doubles as a gentle nightlight companion in a dark room.
20. Color Palettes Beyond the Standard White Ghost
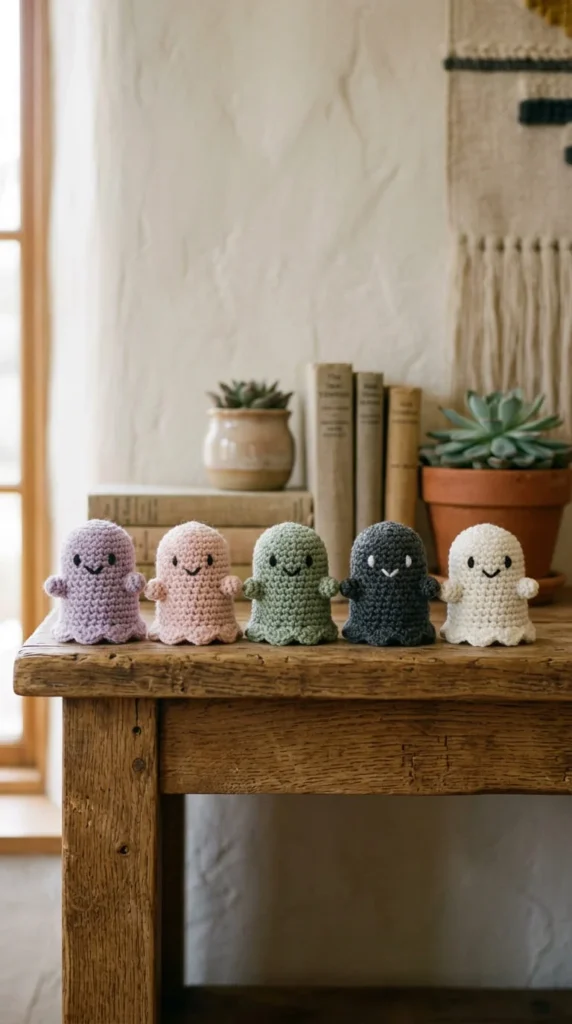
White is the obvious choice for a crochet ghost, but it’s far from the only option, and a different palette can shift the whole feel of the finished piece. A soft lavender or blush ghost feels more like a gentle nursery decoration than a Halloween prop, while charcoal gray leans into a moodier, more gothic aesthetic.
If you’re making several ghosts for a display, choosing one consistent undertone — all cool pastels, or all warm neutrals — keeps a group of different-colored pieces looking coordinated rather than random. Mixing warm and cool tones in the same small display can look a bit chaotic unless that contrast is intentional.
Sage green and muted mustard both work well for anyone leaning into an autumn-forward palette rather than a strictly Halloween one, which also makes the finished pieces easier to keep out through the rest of the fall season instead of packing them away right after October 31st.
This is a good angle to explore if you’ve already made a few standard white ghosts and want variety without learning a new pattern. The shape stays exactly the same — only the yarn color changes — making this one of the lowest-effort ways to expand a small collection.
21. Batch-Making Ghosts for a Craft Fair Table
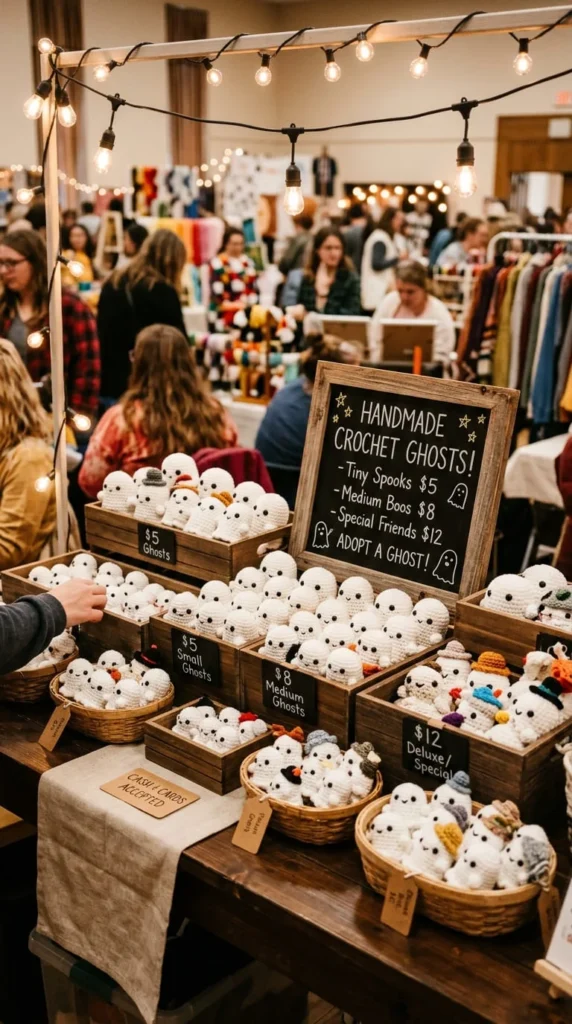
If you’re planning to sell handmade Halloween items, ghosts are one of the most efficient products to produce in volume, since the pattern is small, quick, and doesn’t require expensive materials. Treating a batch as a small production run rather than a series of individual projects makes a real difference in how many you can finish before an event.
Work through each stage across the whole batch instead of finishing one ghost completely before starting the next — crochet all the bodies first, then stuff them all, then finish all the faces. This assembly-line approach keeps your hands in the same motion longer and speeds up the overall pace considerably compared to switching tasks constantly.
Before you start, decide on two or three consistent variations — maybe a plain white version, a witch-hat version, and a colored version — rather than making every single ghost different. A cohesive small selection is easier for shoppers to browse and compare than a table full of one-off pieces with no clear categories.
Keep a simple cost log as you go, tracking yarn used and time spent per piece, so your pricing at the table reflects what the batch actually costs to make rather than a guess.
22. A Year-Round Ghost for the “Summerween” Crowd
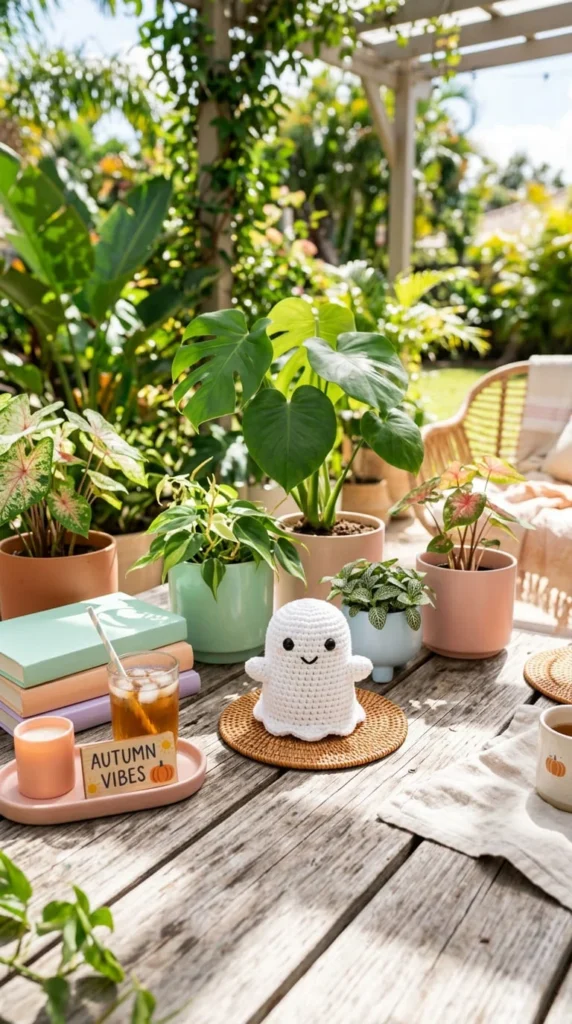
Not everyone waits until October to enjoy spooky-cute decor, and a growing number of crafters keep ghost-themed pieces out all year rather than treating them as strictly seasonal. If your own home leans toward a gothic or eclectic style, a crochet ghost fits in just as well on a bookshelf in July as it does in a Halloween display in October.
The easiest way to make a ghost feel less tied to one specific holiday is through color and styling rather than changing the pattern itself. A pastel ghost photographed among houseplants or paired with everyday home decor reads as a quirky accent piece rather than a seasonal decoration that looks out of place outside of autumn.
If you’re gifting a ghost to someone who loves the aesthetic but isn’t necessarily a big Halloween person, lean into this angle explicitly — frame it as a cute, slightly spooky character rather than strictly a holiday item. A simple gift tag calling it “a friendly ghost for your shelf” rather than “Happy Halloween” keeps the framing open enough to display anytime.
This is a good reminder that a lot of the ideas throughout this list don’t actually expire once November arrives, provided you think about color and presentation rather than treating every ghost project as disposable seasonal decor.
Conclusion
Between ten-minute mini ghosts, a full-sized pillow, and everything from wine charms to wind chimes in between, there’s enough variety here to match whatever kind of Halloween crafting mood you’re in this year. Pick one or two ideas that match the time you actually have, gather your yarn, and let the smaller, faster projects teach you the base shape before you move on to something bigger like the granny square blanket or the oversized pillow. Many of these ideas share the same core ghost body, so the skills carry over from one project to the next without much of a learning curve. Start with whichever version sounds the most fun to you right now, and see where the rest of the list takes you from there.