
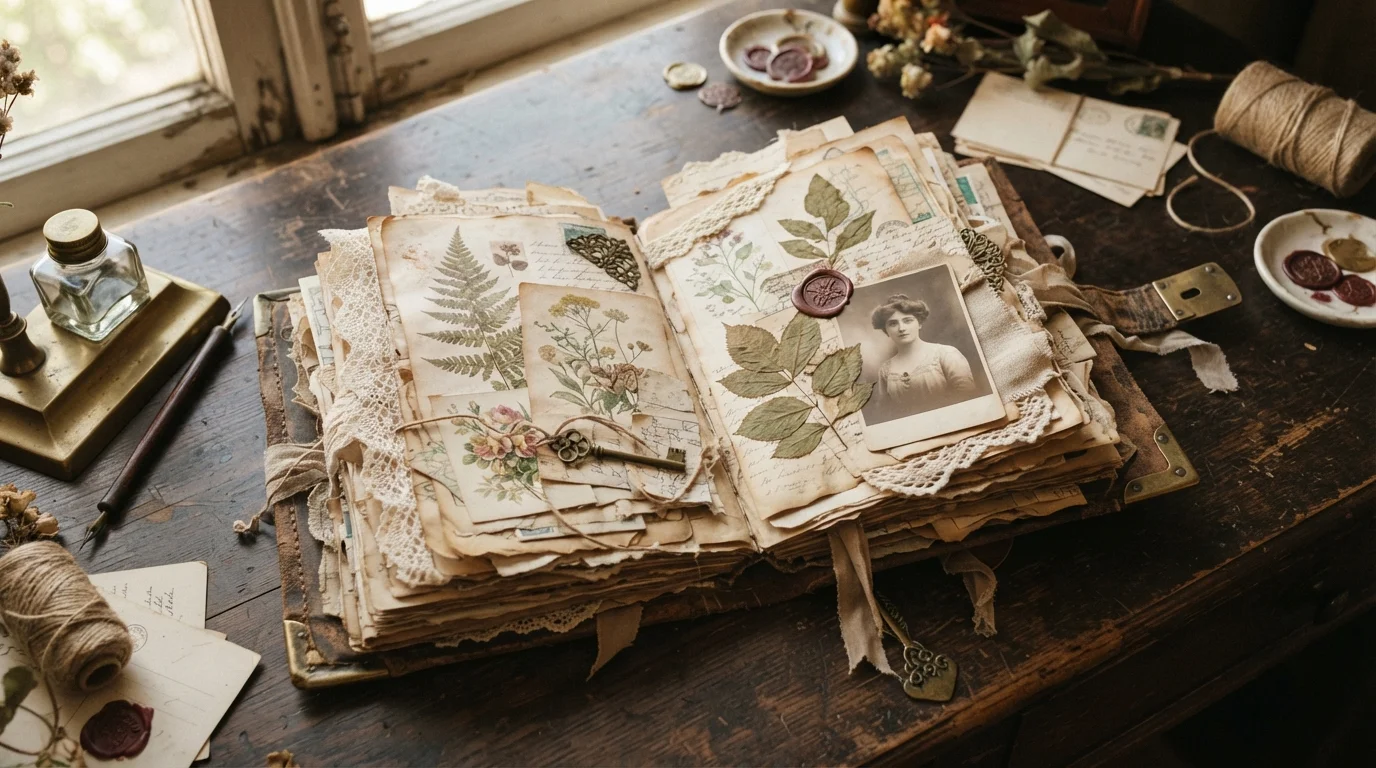
A beautiful vintage scrapbook cover should feel as though it has a story of its own. Softly faded paper, worn edges, delicate lace, old botanical prints, and layered ephemera can transform a plain album into something that looks discovered in an antique drawer rather than made yesterday.
The secret to an authentic old-world aesthetic is restraint. Instead of covering every inch with brown ink and decorations, combine several subtle textures and aged details. Vintage scrapbook design commonly relies on layering muted paper, distressed edges, lace, ribbon, old-style ephemera, and carefully chosen dimensional accents.
This tutorial shows you how to build or decorate a vintage scrapbook cover while keeping it sturdy, balanced, and practical enough for everyday memory keeping.

Choose the Right Base for Your Scrapbook Cover
You have two easy starting options: decorate a ready-made album or create a hardcover scrapbook from scratch.
For a handmade hard cover, chipboard is a popular choice because it gives the album structure. Recycled cardboard is a good budget-friendly alternative, while fabric or faux leather can be used as an outer wrap for a more durable finish.
A basic hardcover usually needs:
- Two boards for the front and back
- One narrower piece for the spine
- Decorative paper, fabric, or faux leather
- Strong craft or bookbinding adhesive
- A ruler and cutting mat
- Craft knife or paper trimmer
- Bone folder or another smooth creasing tool
- Lace, ribbon, ephemera, and optional embellishments
If you already own a plain scrapbook, simply skip the construction stage and begin with the decorative layers.
Build a Sturdy Cover Before Decorating
If you are making the scrapbook from scratch, measure everything before cutting.
Place the front cover, spine, and back cover next to one another, leaving small flexible gaps between the spine and cover boards. These hinge areas allow the scrapbook to open smoothly. The spine is one of the most important structural parts of the project, so avoid placing the boards tightly against it.
Cut your wrapping material slightly larger than the assembled boards so it can fold around the edges. A margin of roughly 2–3 cm is commonly used in similar album-cover construction, although the exact amount depends on your materials and album size.
Apply adhesive in a thin, even layer. Too much wet glue can wrinkle decorative paper or warp the cover.

Create an Aged Background Without Overdoing It
The background establishes the mood of your vintage scrapbook cover.
Start with subdued colors such as ivory, parchment beige, faded olive, dusty rose, muted blue, tobacco brown, or soft sepia. Old book pages, reproduction maps, botanical papers, and subtle floral prints work especially well.
Then age the paper gradually. Popular distressing techniques include tea or coffee staining, lightly crumpling paper, tearing selected edges, creating deckled edges, and adding small amounts of distress ink around the perimeter.
Avoid making every surface equally dark. Natural aging is uneven. Keeping the center lighter while adding slightly deeper tones around corners and edges usually creates a more convincing result.
Always test coffee, tea, ink, wax, or other aging materials on scrap paper first, particularly if valuable photographs will eventually be stored in the album.
Layer Ephemera for an Old-World Collage
Layering is what gives a vintage scrapbook cover visual depth.
Choose one main focal piece first. It might be a botanical illustration, faded portrait reproduction, antique building, bird illustration, or old map fragment.
Build outward from that focal point with smaller pieces such as:
- Vintage postcards
- Ticket-style ephemera
- Old book-page fragments
- Postage-stamp imagery
- Botanical cutouts
- Torn music sheets
- Lace scraps
- Thin ribbon
- Small paper tags
Vintage postcards, tickets, old book pages, labels, stamps, and botanical imagery are especially characteristic of this style.
A simple composition trick is to use one large focal image, one medium background layer, and several smaller accents instead of dozens of equally sized pieces.

Add Texture Without Making the Cover Too Bulky
Old-world design benefits from tactile materials, but scrapbook covers still need to close properly.
Use thin layers near the spine and save thicker embellishments for the center or outer corners of the front cover. Lace, gauze, flat ribbon, paper doilies, thin fabric scraps, and pressed-style botanical images add texture without creating excessive bulk.
For a slightly richer look, add one or two dimensional elements such as a small metal corner, charm, button, or faux wax-seal accent.
You can also attach a small pocket to the cover for a removable photograph, journaling card, or keepsake tag. Pockets and tags add useful storage rather than functioning as decoration alone.
Finish the Cover So It Lasts
Before adding the scrapbook pages, inspect every edge and corner.
Press down any lifted paper and reinforce loose fabric folds. When using wet adhesive, allowing the cover to dry flat beneath clean, heavy books can help reduce warping.
Check that the spine bends freely and that no thick decorations prevent the album from closing.

Create a Scrapbook That Feels Collected Over Time
Learning how to make a vintage scrapbook cover with an old-world aesthetic is less about making everything look old and more about combining materials thoughtfully. Start with a strong base, choose a restrained color palette, distress your paper gently, and build depth through carefully layered ephemera and texture.
The most convincing covers often leave some breathing room instead of filling every available space. Let faded paper, worn edges, fabric, and small imperfections create the character.
Save this guide for later and try these ideas when you’re ready!