
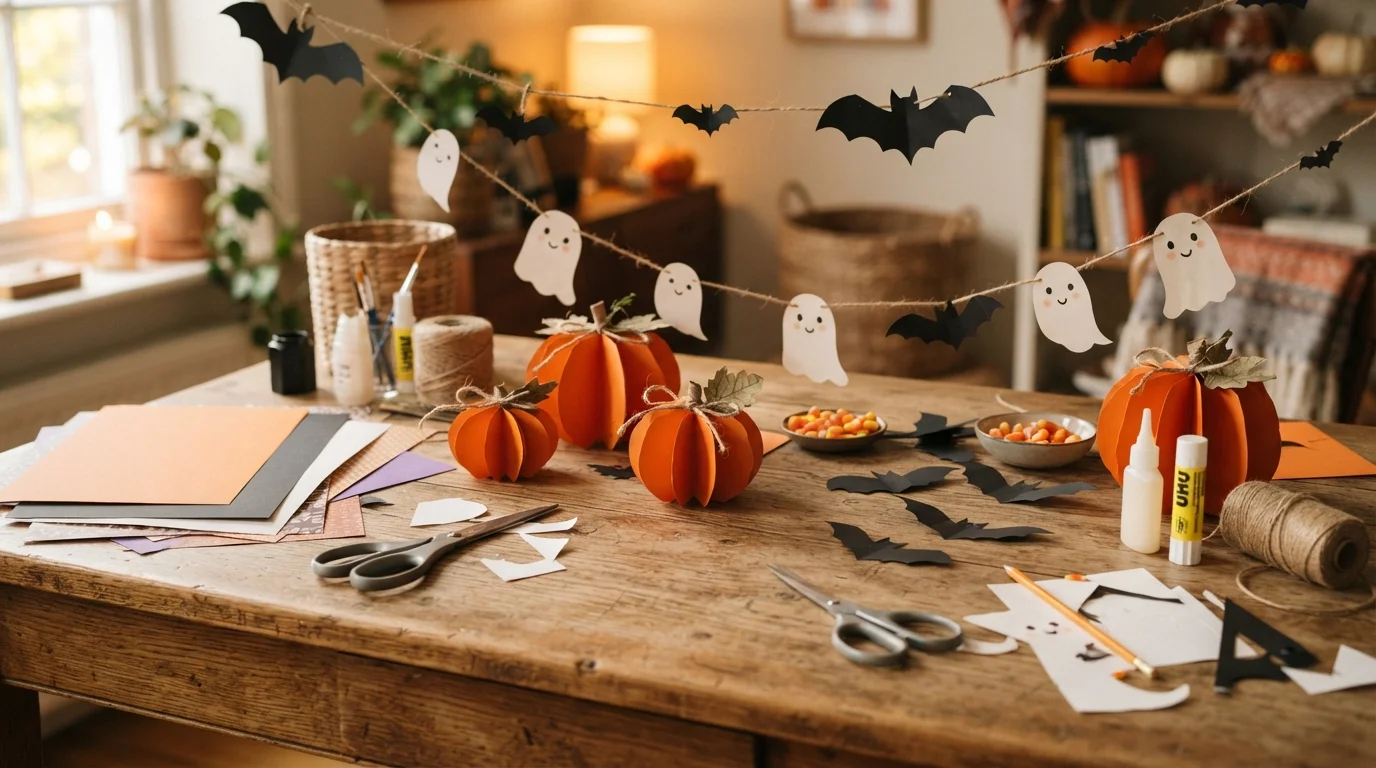
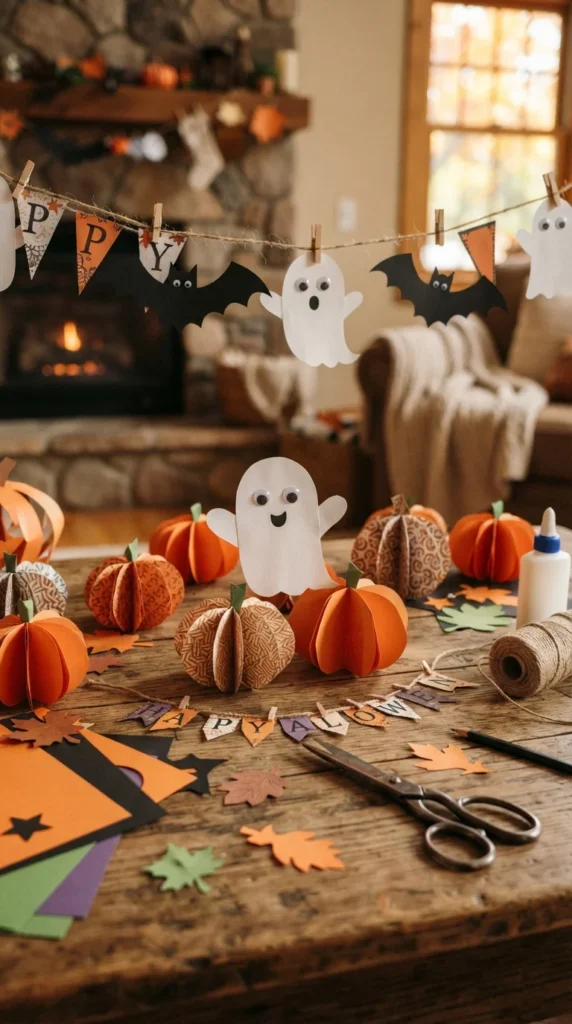
Halloween decorations do not have to cost much or take an entire afternoon to make. With cardstock, construction paper, old paper bags, paper plates, tissue paper, and a few basic craft supplies, you can create playful decorations for walls, windows, tables, doors, and party spaces. These easy Halloween paper crafts are suitable for different skill levels, so you can pick a quick project for kids or spend more time on a detailed decoration for your home. From folded pumpkins and spooky garlands to paper ghosts and shadowy window scenes, these ideas turn simple sheets of paper into decorations with plenty of personality. Many can also be adapted with different colors, sizes, and facial expressions to match your Halloween style.
1. Accordion-Fold Paper Pumpkins
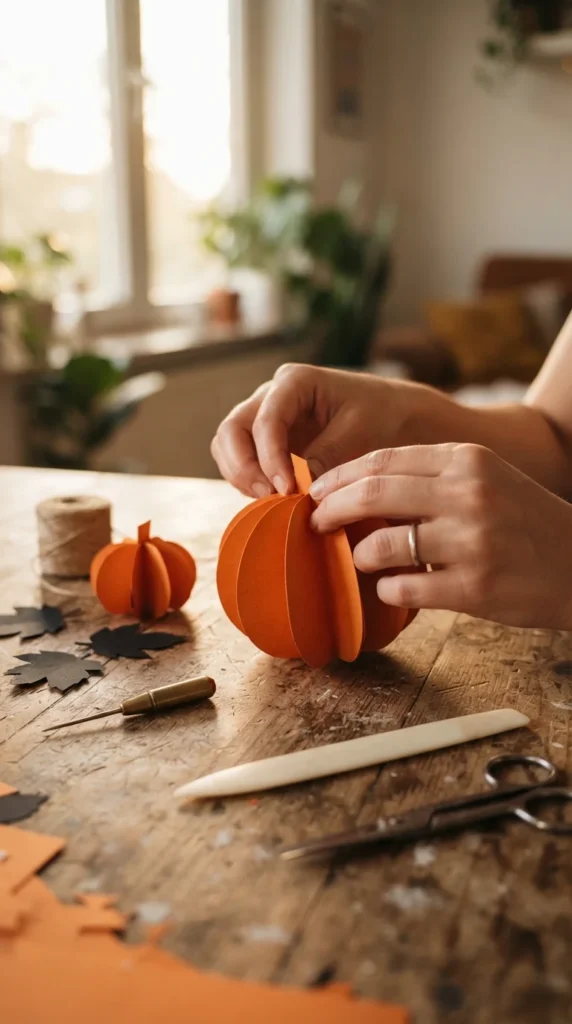
Accordion-fold pumpkins are an easy way to turn ordinary orange paper into a decoration with real dimension. The repeated folds create a round shape without requiring complicated cutting or construction.
Start with two or three sheets of orange construction paper or lightweight cardstock. Cut them into matching rectangles and fold each sheet back and forth like a fan. Folded sections around one inch wide are simple for beginners to handle.
Bring the ends together and secure them with glue or double-sided tape. Flatten the folded paper outward to create a circular pumpkin. Add a small brown paper stem and a green paper leaf at the top.
For a playful version, cut a tiny black mouth and triangular eyes from black paper. You can also leave the pumpkin plain for a more modern decoration.
Hang several pumpkins from a mantel, string them together, or place smaller versions on a Halloween table.
Helpful tip: Cardstock holds the folds better than very thin printer paper. If children are making the pumpkins, let them decorate the faces before assembling the circles.
2. Flying Paper Bat Swarm
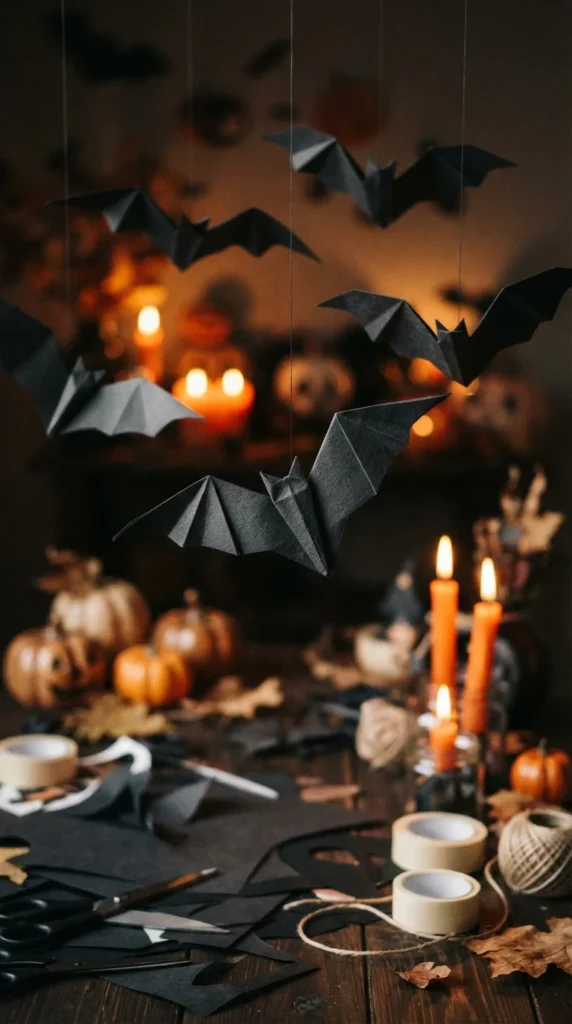
A wall covered with paper bats can make a room feel spooky without adding bulky decorations. This project works especially well because every bat can be a different size.
Use black construction paper or cardstock. Fold a sheet in half and draw half of a bat shape along the folded edge. Include a rounded head, pointed ears, a curved body, and jagged wing edges. Cut around the outline and open the paper.
For a faster option, make one bat template from cardboard and trace it onto several sheets of black paper.
Create small, medium, and large bats. Bend the wings slightly upward along the body so they do not look completely flat. Attach them to a wall with removable adhesive strips or small pieces of painter’s tape.
Arrange the bats so they appear to fly upward from a doorway or across a wall. A scattered arrangement can look more natural than placing them in straight rows.
Helpful tip: Use heavier paper for larger bats. Thin paper can curl when the wings are bent.
3. Friendly Paper Ghost Garland
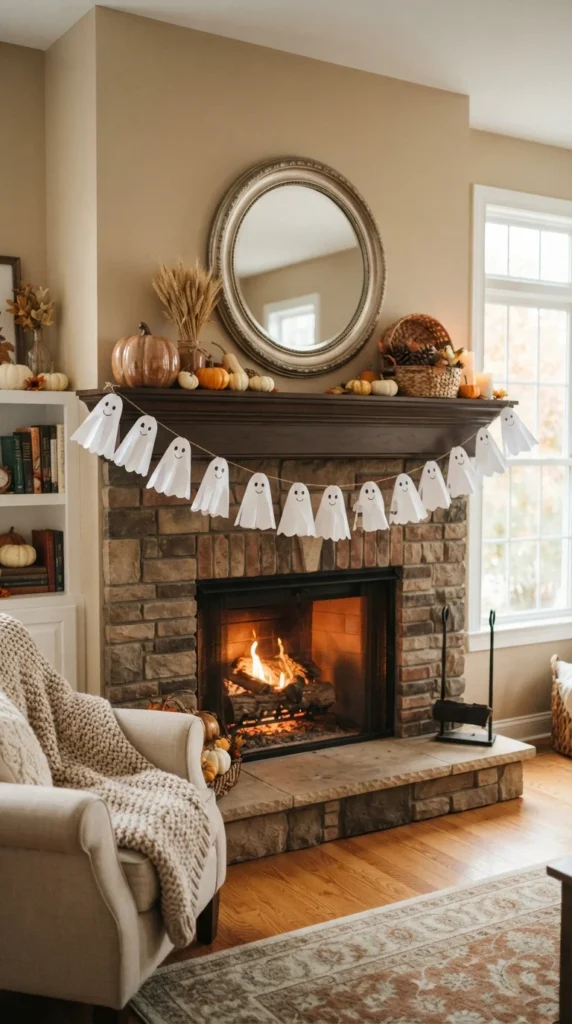
A ghost garland can be spooky, cute, or somewhere between the two. For a family-friendly decoration, use simple ghost shapes with rounded edges and friendly expressions.
Fold a long strip of white paper accordion-style. Draw a ghost outline on the top layer while keeping part of each side connected to the neighboring section. Cut around the shape without cutting through those connecting areas.
Open the paper carefully, and you should have a chain of connected ghosts. Add eyes and small mouths with a black marker or small pieces of black paper.
For a more decorative garland, alternate white ghosts with orange pumpkins and black bats. You can also make a longer version from several connected strips.
Hang it across a shelf, above a party table, or around a bedroom doorway.
This craft is especially useful for classrooms because the basic shapes are easy to draw and decorate.
Helpful tip: Keep the connections fairly wide. Very narrow sections can tear when the garland is unfolded.
4. Jack-o’-Lantern Paper Plate Faces
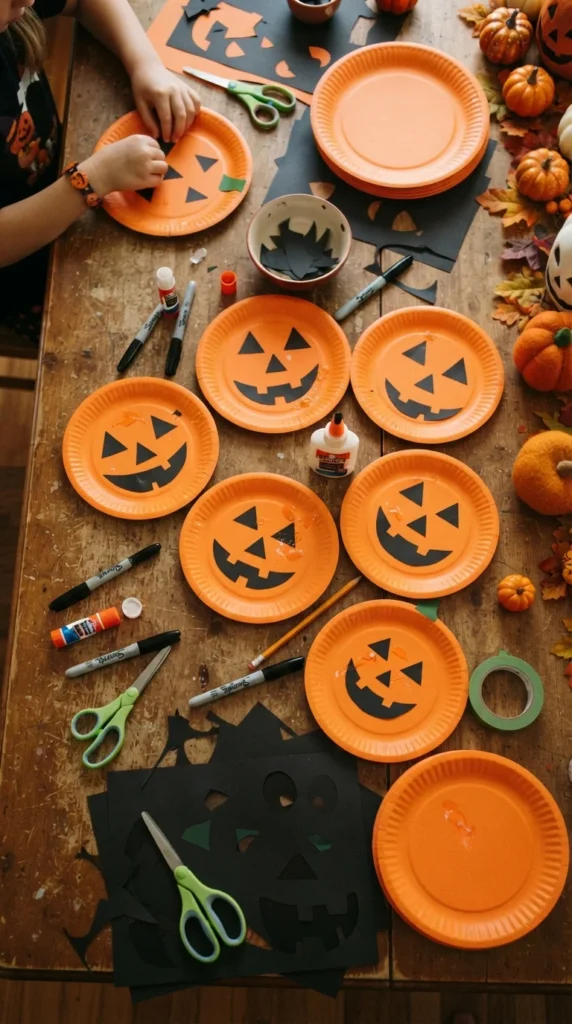
Paper plates make excellent pumpkin decorations because their circular shape already resembles a pumpkin. This craft also gives children plenty of space to create their own facial designs.
Paint a white paper plate orange or use an orange plate if you have one available. Once dry, cut eyes, a nose, and a mouth from black paper. Arrange the pieces on the plate before gluing them down.
Try different expressions instead of making every pumpkin look the same. One can have sleepy eyes, another can have a wide grin, and another can have a surprised expression.
For hanging decorations, punch two small holes near the top and thread through a piece of ribbon or string. Several faces can be displayed together on a wall.
You can also turn one into a mask by carefully cutting eye holes and attaching a craft stick to the bottom.
Helpful tip: If children are involved, an adult can handle any cutting that involves the center of the plate. Let kids take charge of the decorating stage.
5. Haunted House Window Silhouette
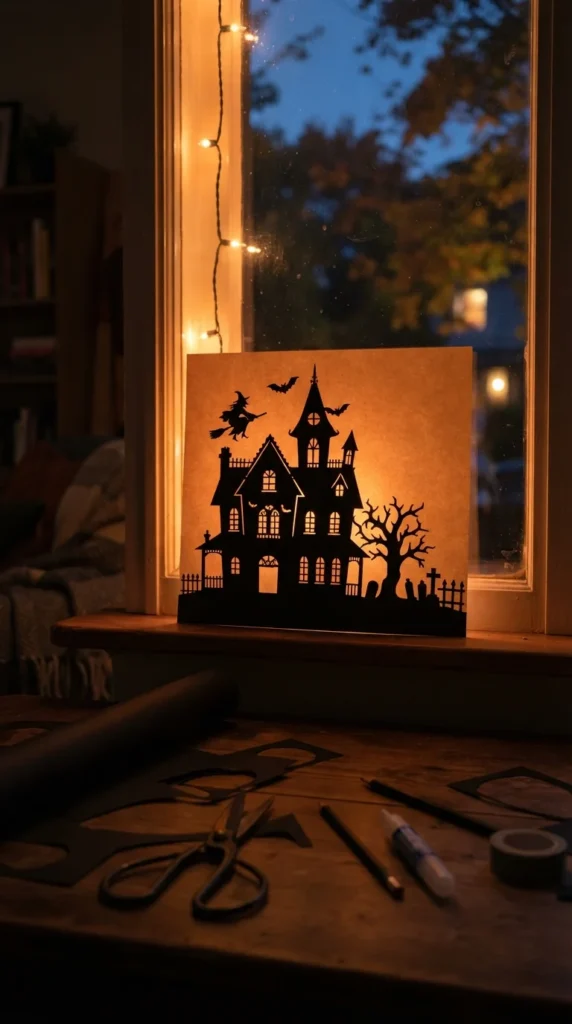
A paper haunted house can become a striking window decoration with very little material. The dark silhouette looks especially atmospheric when placed against a bright background.
Use black cardstock and sketch a simple house with a crooked roof, pointed tower, uneven windows, and a small fence. Cut out the design carefully. You do not have to make every line perfectly straight. Slightly uneven shapes can make the house look more playful.
For a larger scene, create several buildings at different heights. Add bare trees, flying bats, a moon, or a crooked fence.
Attach the finished pieces to the inside of a window using removable tape. During daylight, the black shapes create a clear silhouette. At night, indoor light can make the design visible from outside.
This project also works on a large piece of orange paper if you do not want to decorate a window.
Helpful tip: Use cardstock rather than thin paper for large silhouettes because it stays flatter and is easier to position.
6. Tissue-Paper Halloween Lanterns
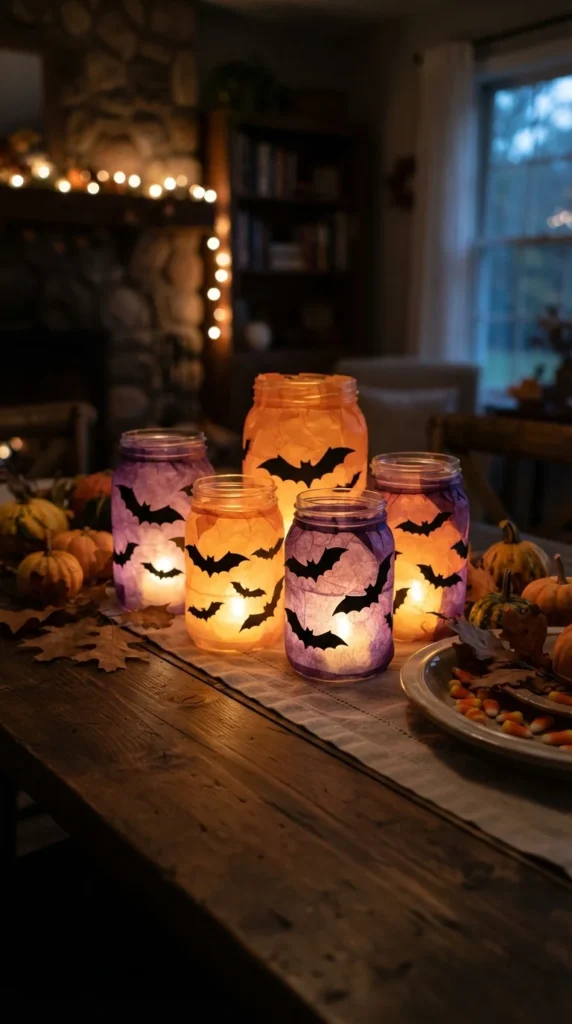
Tissue paper can create a soft glow when paired with battery-powered lights. This gives you a simple way to make Halloween decorations for a party table or shelf.
Start with clean glass jars or paper lantern forms. Cut pieces of orange, purple, white, or green tissue paper. Apply a thin layer of craft glue to the outside surface and smooth the tissue paper over it.
Do not place real flames inside paper decorations. Use battery-operated tea lights instead.
Once the surface is dry, add black paper shapes such as bats, cats, pumpkins, or crescent moons. You can make each lantern different or create a matching set.
For a ghost version, use white tissue paper and add simple black eyes. For a pumpkin version, use orange paper and add a black face.
Place the finished lanterns together on a tray for a small Halloween display.
Helpful tip: Work with thin layers of tissue paper rather than one thick layer. This helps the light shine through more evenly.
7. Classic Halloween Paper Chain
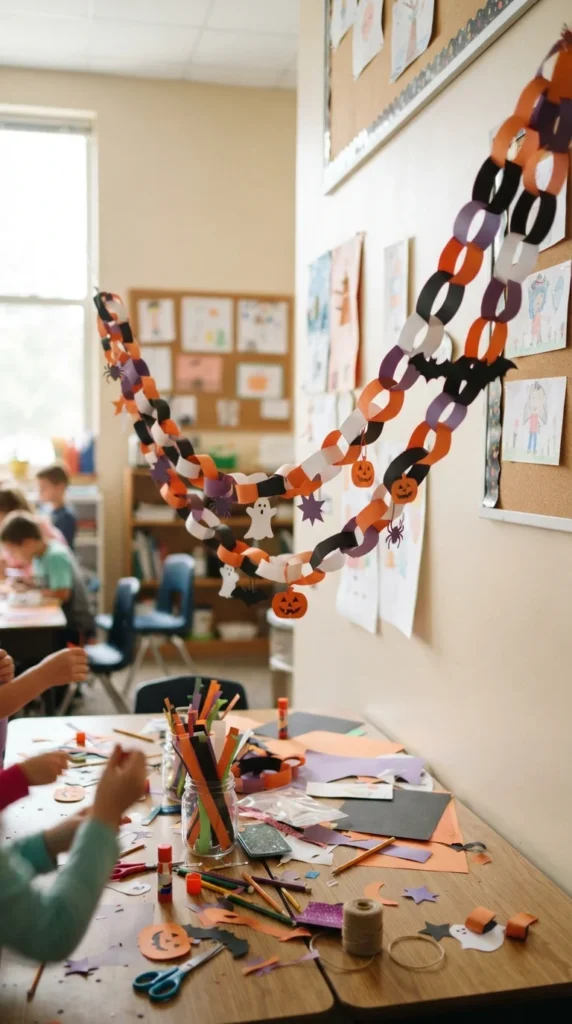
A paper chain is one of the easiest Halloween decorations to make when you want something long and colorful. It is also a good group activity because several people can make links at the same time.
Cut strips of orange, black, white, and purple paper. Form the first strip into a loop and secure the ends with glue, tape, or a stapler. Thread the next strip through the loop before securing it.
Continue until the chain reaches the length you want.
For a Halloween twist, add small paper pumpkins, ghosts, bats, or witches between selected links. You can also vary the link sizes for a less uniform appearance.
Use the finished chain around a doorway, across a window, along a staircase railing, or behind a party table.
If you are making decorations with young children, pre-cutting the strips can make the activity easier.
Helpful tip: Use slightly longer strips for larger loops and shorter strips for a tighter pattern. Test one link before cutting a large batch.
8. Layered Paper Witch Hats
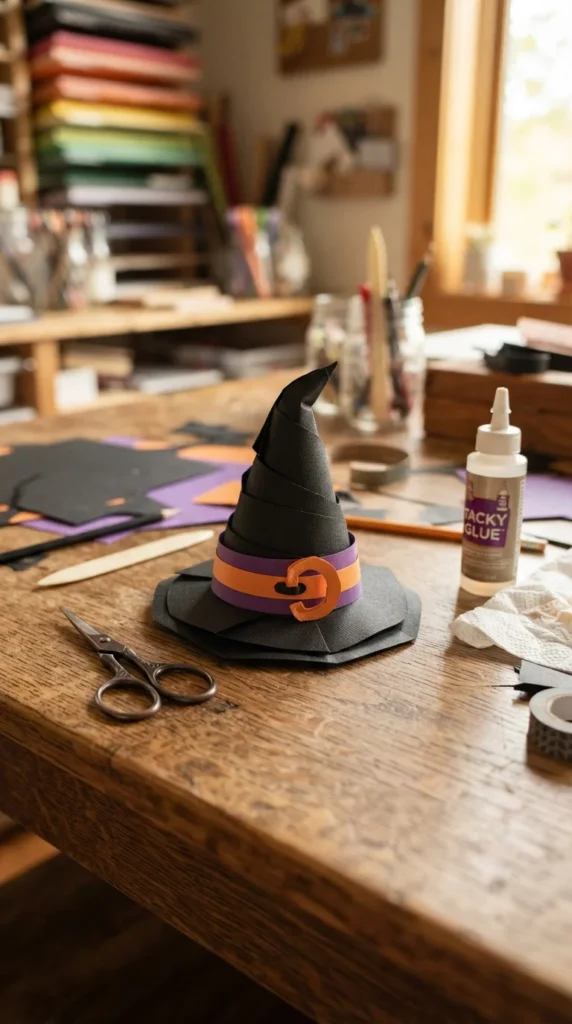
Small paper witch hats make charming decorations for shelves, place settings, and party tables. Layering several pieces of cardstock gives the hats more structure.
Cut a large circle from black cardstock for the brim. Then create a cone from another piece of black paper. Secure the cone with glue and place it over the center of the brim.
Add a purple, orange, or green paper band around the base. A small paper buckle can be attached to the front.
Make several hats in different sizes. Tiny versions can sit beside plates, while larger ones can decorate a mantel.
You can also add a string to the top and hang the hats from a branch or ceiling hook.
For children, simplify the project by using a pre-cut semicircle for the cone. They can decorate the pieces before an adult helps form the final shape.
Helpful tip: Use cardstock with a little stiffness. Very thin paper may collapse around the cone.
9. Cutout Paper Spiderweb
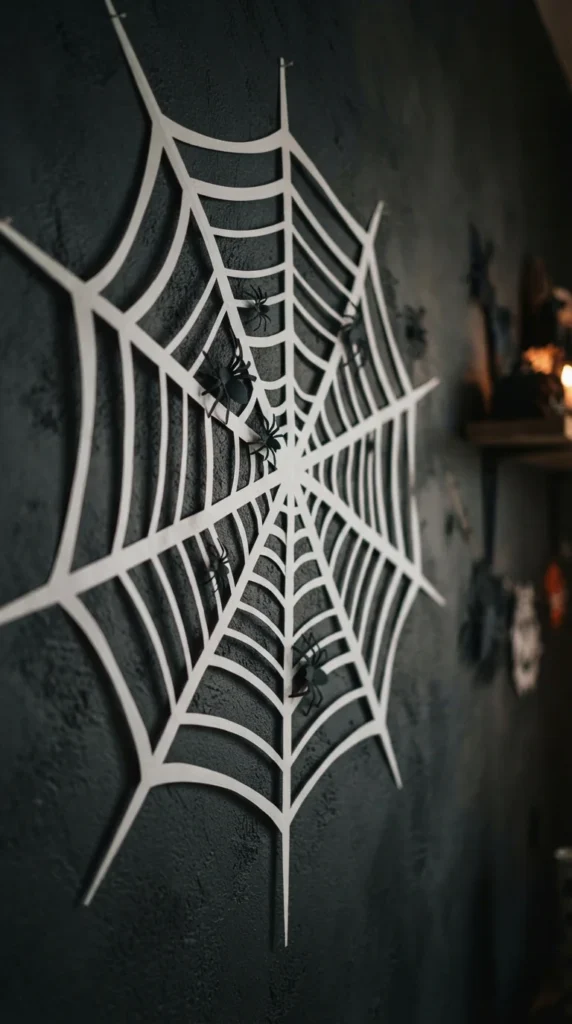
A paper spiderweb can add a spooky detail to corners, windows, and wall displays. The basic technique is similar to making a snowflake, but the final pattern uses web-like lines instead.
Fold a square piece of white, gray, or black paper several times. Cut small sections from the folded edges to create openings. Open the paper slowly so the delicate sections do not tear.
For a simpler version, draw the web directly onto black cardstock using a white paint marker. Add one or two paper spiders for extra detail.
Large webs look good in room corners. Smaller versions can decorate gift bags or party plates.
If you want a more layered effect, make webs in different sizes and overlap them slightly.
Helpful tip: Do not cut too many tiny sections when making a folded web. Wider connections make the final piece much easier to open without damage.
10. Paper Candy Corn Decorations
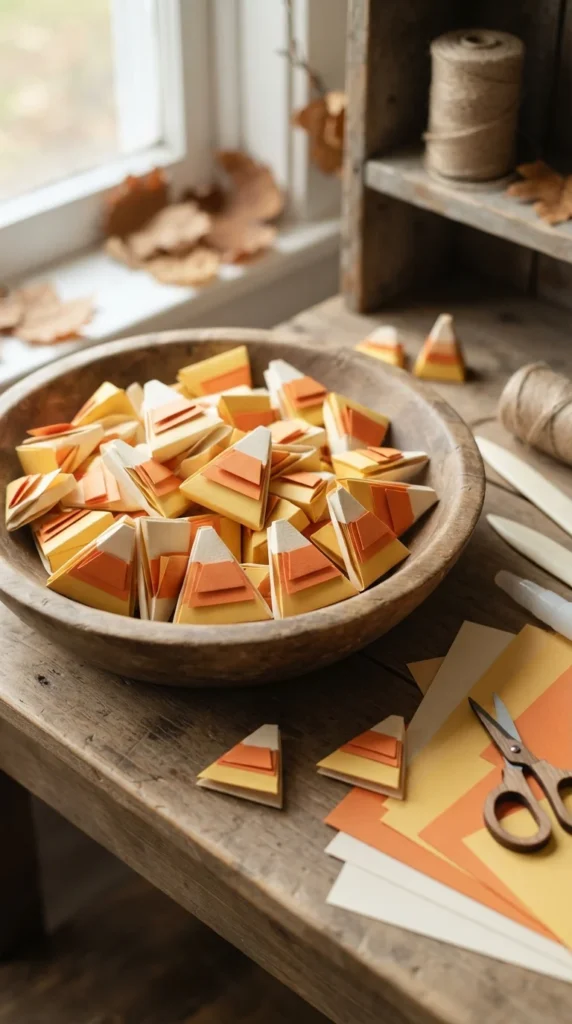
Candy corn shapes are easy to recreate with paper because the design uses three simple color sections. They can become table decorations, garland pieces, or gift embellishments.
Cut a triangle with slightly rounded corners from white cardstock. Add a yellow section at the bottom and an orange section in the middle. You can glue separate paper pieces onto the base or layer three colored shapes.
For a three-dimensional version, cut several matching candy corn shapes and connect them down the center with a small folded strip. Open the layers slightly so the piece stands out from a flat surface.
Make a group in different sizes and arrange them in a bowl.
You can also attach small candy corn shapes to a string with mini clothespins.
This project is useful when you want a Halloween decoration that feels cheerful rather than frightening.
Helpful tip: Choose matte cardstock if you want a handmade paper look. Glossy paper can make the colors appear more intense but may be harder to glue cleanly.
11. Black Cat Silhouette Garland
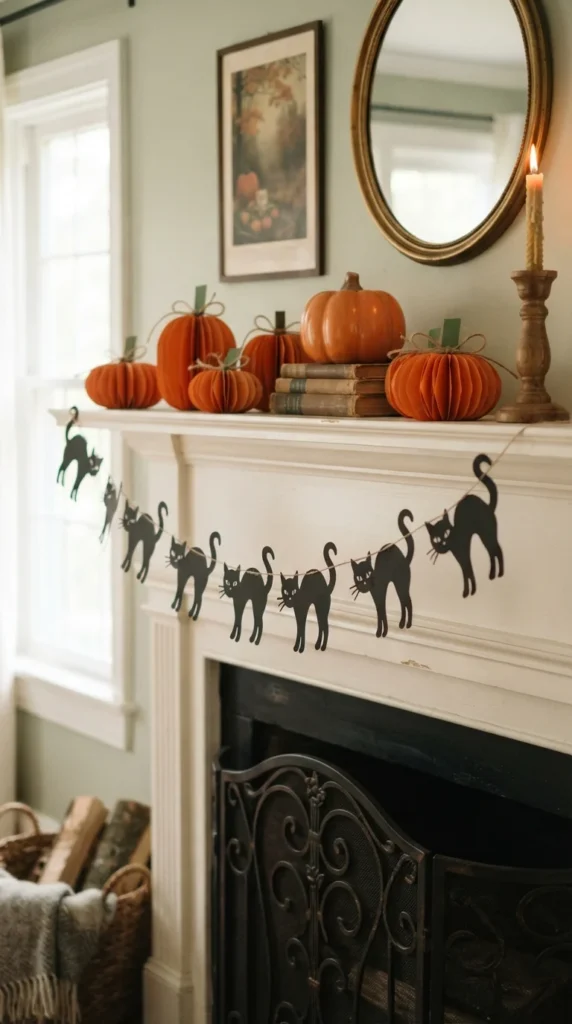
Black cats are a classic Halloween symbol and make an easy silhouette project. The simple outline also means you can create many pieces without complicated details.
Draw a cat shape on folded black paper. Include pointed ears, a rounded back, four simple legs, and a curved tail. Cut out the silhouette and open it.
Create cats in several poses. One can sit upright, another can stretch, and another can have its tail curled upward.
Punch a small hole near the top of each cat and thread them onto black or orange string. Leave a little space between the shapes so each silhouette is easy to see.
Hang the garland across a shelf, doorway, or wall.
For a child-friendly activity, provide a simple cat template and let kids decorate the silhouettes with tiny paper collars or colored bows.
Helpful tip: Keep the legs connected by making them slightly wider than you might expect. Very thin legs can tear during cutting.
12. Paper Pumpkin Wreath
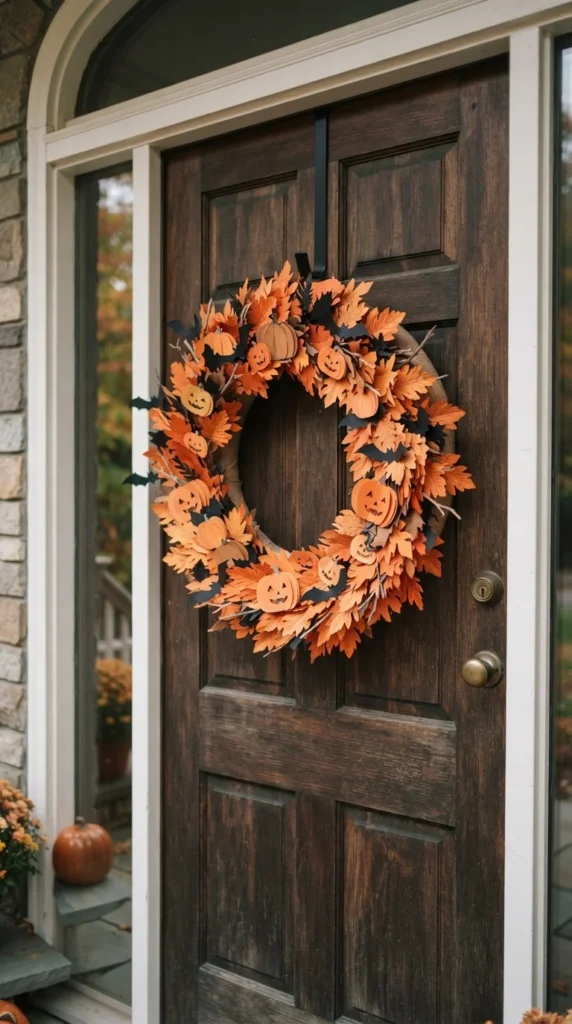
A paper pumpkin wreath gives you a larger decoration without requiring foam, wire, or expensive supplies. A cardboard circle can serve as the base.
Cut a ring from sturdy cardboard. Cover it with overlapping paper pumpkins made from orange cardstock. You can create flat pumpkin shapes or small accordion-fold pieces for added dimension.
Fill empty spaces with black leaves, bats, or small paper ghosts. A black ribbon at the top can help the wreath hang neatly.
For a farmhouse-style version, use muted orange, cream, brown, and black. For a brighter party look, choose vivid orange and purple.
The wreath can hang on a front door, interior door, wall, or cabinet.
If the wreath will be placed outdoors, keep it protected from rain and damp weather. A covered porch is a better location than an exposed doorway.
Helpful tip: Build the wreath in sections. Complete one portion before moving around the cardboard ring so the spacing stays balanced.
13. Paper-Bag Ghost Puppets
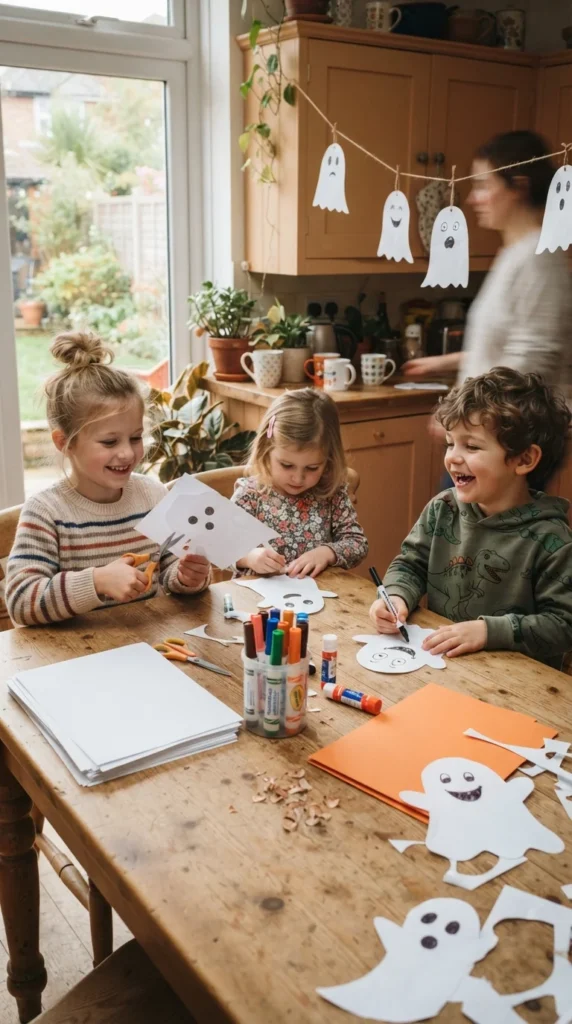
Paper lunch bags can become simple ghost puppets for Halloween play. This idea combines crafting with storytelling, making the finished pieces useful beyond decoration.
Turn a white paper bag upside down so the flap becomes the face area. Draw two eyes and a mouth with a black marker, or glue on large paper shapes.
Cut a few narrow strips of white tissue paper and attach them beneath the bag to create a floating effect.
You can make different ghost personalities by changing the facial expressions. Try sleepy, surprised, happy, or frightened faces.
Once finished, children can use the puppets for a short Halloween story or puppet show.
If you want to display them, place the bags over small containers so they stand upright on a shelf.
This craft uses inexpensive materials and gives children room to add their own details.
Helpful tip: Avoid very small decorative pieces when crafting with young children. Larger paper shapes are easier to handle and reduce loose small parts.
14. Origami Pumpkin Trio
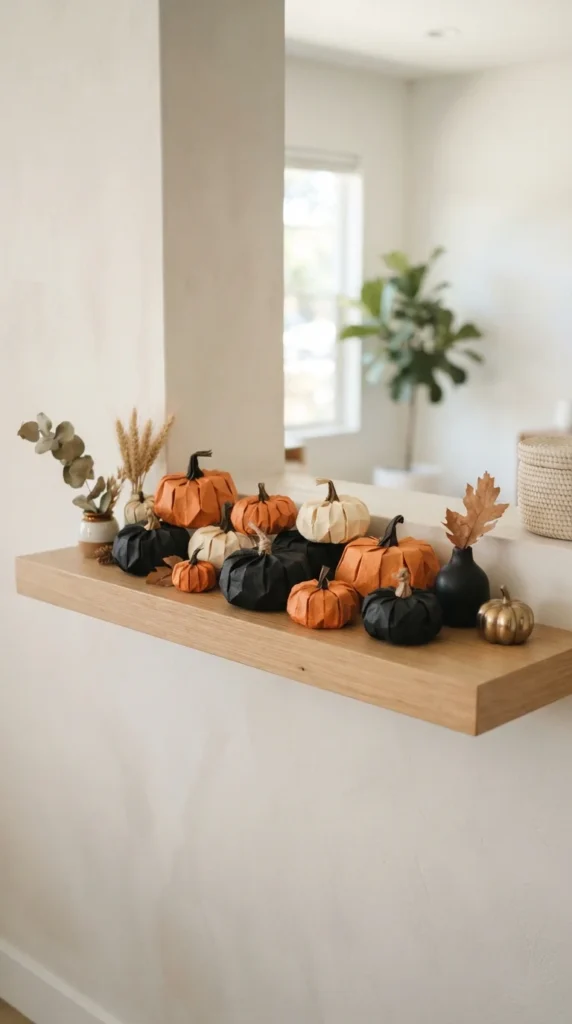
Origami pumpkins are a good choice when you want a paper craft that relies mainly on folding. You can make a coordinated set using different shades of orange and cream.
Choose square paper and follow a simple pumpkin-folding pattern. Beginner designs usually rely on repeated folds rather than complicated shapes.
Once folded, add a small paper stem and leaf. You can also draw tiny facial details with a fine marker.
Make three sizes and group them on a tray. A collection of folded pumpkins looks neat on a bookshelf, entry table, or desk.
For a more modern display, use one orange pumpkin, one black pumpkin, and one cream pumpkin rather than using only traditional orange.
Children can decorate the paper before folding, although very heavy markers may make thin paper harder to fold.
Helpful tip: Make the creases sharp by pressing along each fold with your fingertip. Accurate folds help the final pumpkin hold its shape.
15. Crescent Moon and Bat Wall
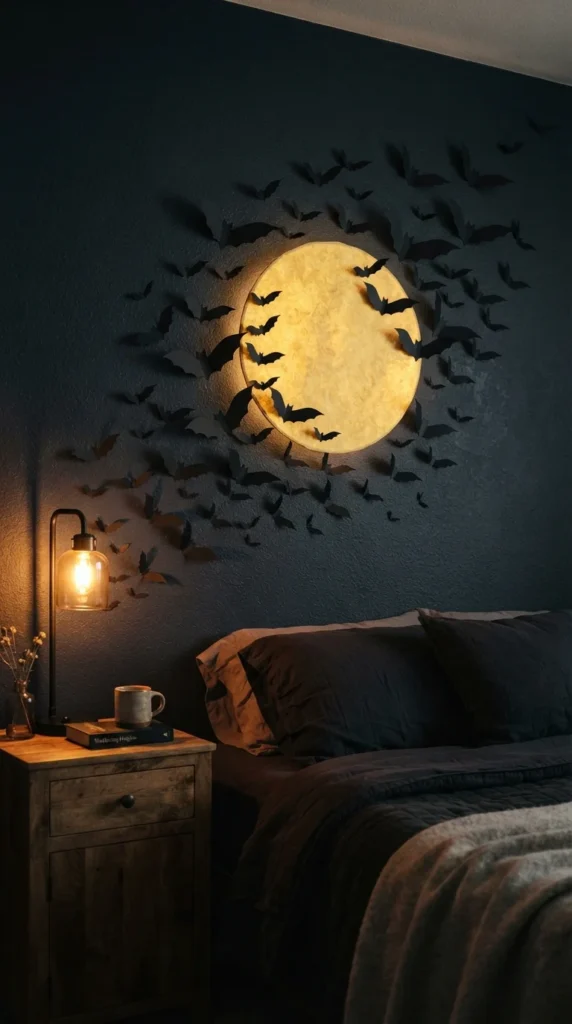
A large paper moon surrounded by bats can create a dramatic focal point with very little material. This project works well above a party table, sofa, or bed.
Cut a large circle from yellow or cream cardstock. Then cut a second smaller circle from one side to create a crescent shape.
Use black paper to create bats in several sizes. Bend the wings slightly so the pieces cast small shadows against the wall.
Arrange the moon first, then place the bats around it in a loose curved path. Start with larger bats near the moon and use smaller ones farther away.
The display can be completely flat or slightly raised using removable foam adhesive.
For a softer look, use cream paper instead of bright yellow. For a traditional Halloween palette, choose a rich yellow moon with black bats.
Helpful tip: Lay the entire design on the floor before attaching it to the wall. This lets you adjust the spacing without repeatedly moving the pieces.
16. Halloween Paper Bookmarks
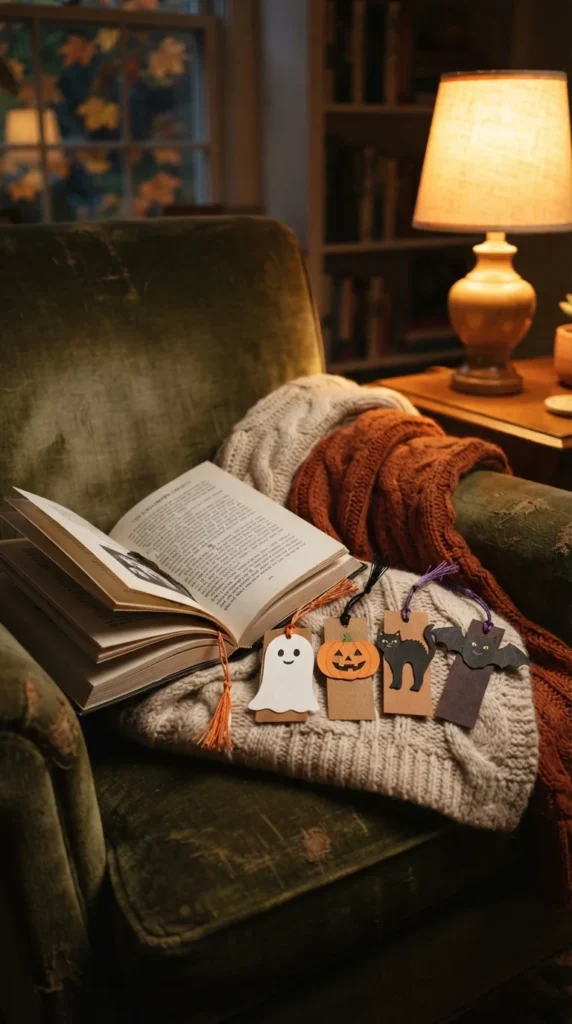
Halloween bookmarks are small projects that can be made quickly from leftover cardstock. They are useful for children, classroom activities, party favors, or personal reading.
Cut rectangular strips from orange, black, purple, and white cardstock. Decorate them with paper pumpkins, bats, ghosts, cats, or spiderwebs.
For a corner bookmark, fold a square piece of paper into a small triangular pocket that slips over the page corner. Add a pumpkin or ghost face to the front.
You can make a matching set for a family by giving each person a different character.
For extra durability, cover the finished bookmark with clear adhesive film or laminate it if you have access to a laminator.
Avoid making the decorations too bulky because thick pieces can damage book pages.
Helpful tip: Keep one end of each bookmark flat and lightweight. Decorative layers work best near the top where they are less likely to interfere with turning pages.
17. Glowing Paper Ghost Luminaries
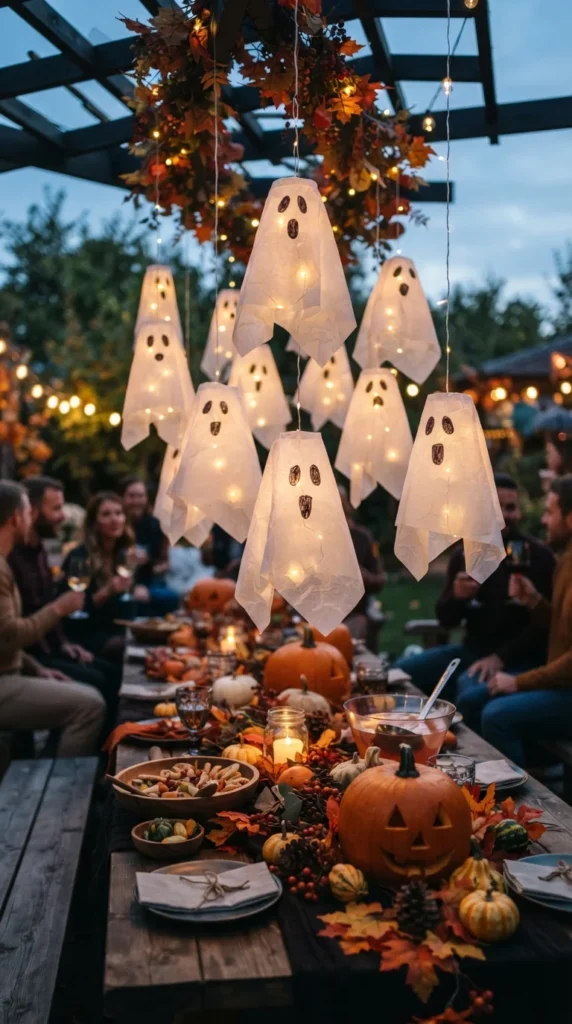
Paper ghost luminaries can add a soft glow to a Halloween display. The key is to use battery-powered lights rather than candles.
Create simple ghost shapes from white translucent paper or vellum. Draw facial features with a black marker or add black cardstock shapes.
Form each sheet into a loose cylinder and secure the back edge with removable adhesive. Place a battery tea light inside or behind the paper structure.
For a group display, vary the ghost heights. A few taller shapes mixed with smaller ones can create a more interesting arrangement.
These luminaries work well along a party table, on a covered porch, or on a shelf.
Avoid placing paper directly against a hot bulb or open flame. Battery lights are the safer choice for this type of decoration.
Helpful tip: Test the light behind one piece of paper before making the full set. Different paper thicknesses allow different amounts of light through.
18. Halloween Paper Fan Wall
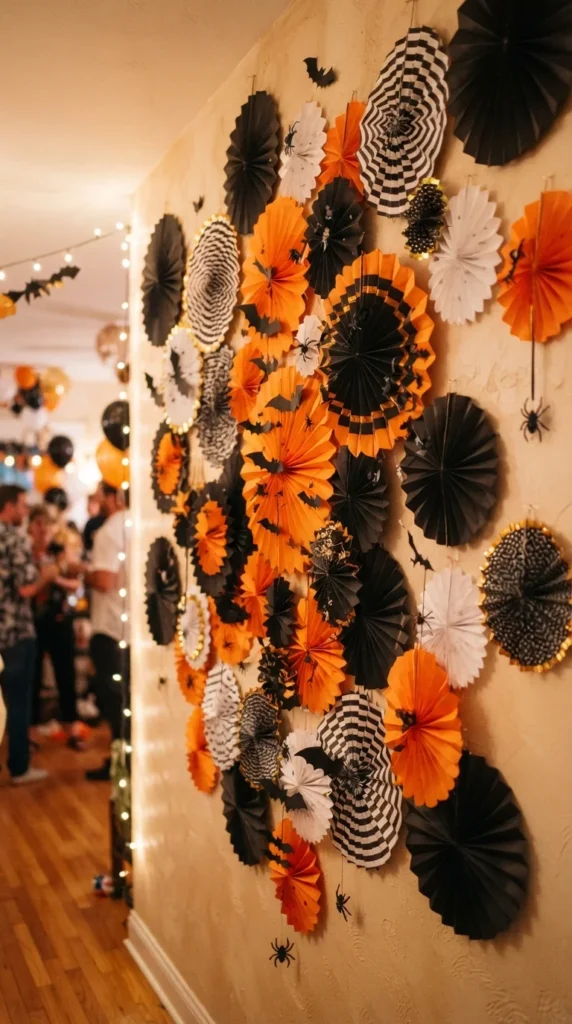
Paper fans are an easy way to fill a large blank wall. Their folded texture creates visual interest without requiring complicated shapes.
Choose orange, black, purple, and white paper. Fold each sheet back and forth into an accordion. Fold the finished strip in half and secure the center to form a fan.
Make small and large fans so the display does not look too uniform.
Arrange several fans in a cluster. Add small paper spiders, bats, or pumpkins between them. A central large orange fan surrounded by smaller black fans can work as a party backdrop.
The fans can also be attached to a long piece of string and hung like a decorative banner.
Helpful tip: If the paper fan feels floppy, reinforce the center with a small circle of cardstock. This gives the fold structure and helps it stay open.
19. Hanging Halloween Paper Mobile
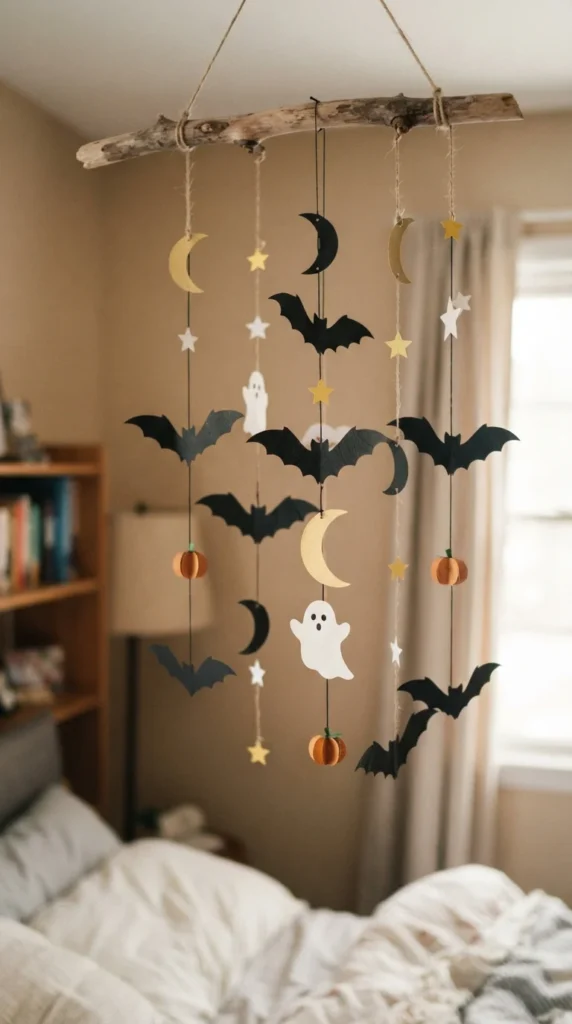
A paper mobile brings Halloween decorations into the space above eye level. It can hang over a party table, reading corner, or child’s room.
Start with a lightweight wooden hoop, embroidery hoop, or clean cardboard ring. Cut paper shapes such as bats, moons, stars, pumpkins, and ghosts.
Tie each shape to different lengths of thread or thin string. Attach the strings around the ring so the shapes hang at varied heights.
Keep the pieces lightweight so the mobile remains balanced.
For a calm look, use black, cream, and muted orange. For a children’s party, add purple, green, and bright orange.
A mobile can also be made with only one repeated shape. A ring filled with black bats can look simple and dramatic.
Helpful tip: Hang the mobile where people will not bump into it. A spot above a table or in an unused corner works well.
20. Paper Pumpkin Place Cards
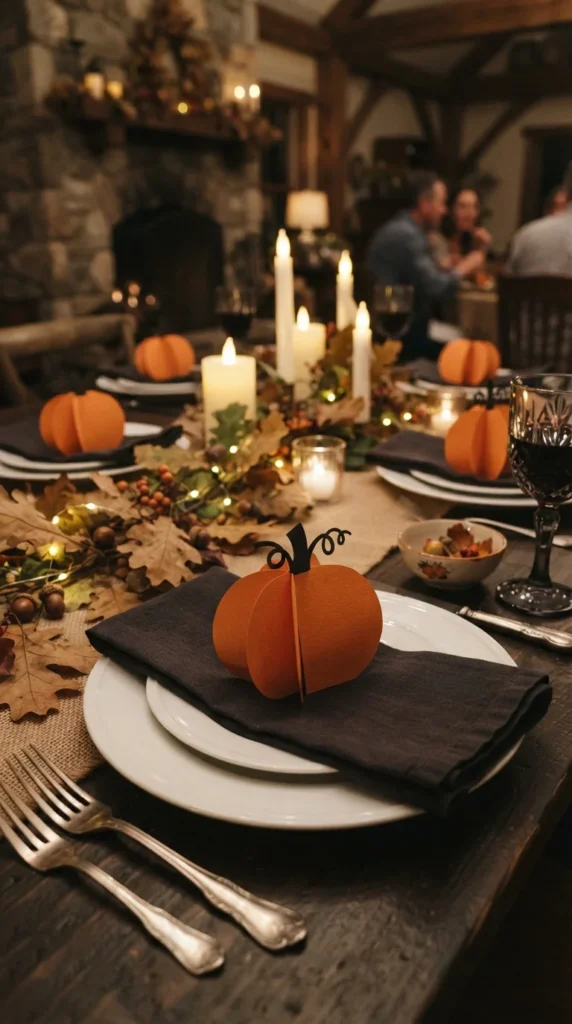
Paper pumpkins can serve as simple place cards for a Halloween dinner or party. The decoration adds a personal touch without requiring elaborate table settings.
Cut small pumpkin shapes from orange cardstock. Fold each pumpkin down the center so it can stand like a tiny tent.
Add a black paper stem and a small green leaf. The guest’s name can be written on the front if you are making these for an actual table, or you can leave the surface blank for a reusable decoration.
For a more decorative style, layer a smaller black pumpkin over a larger orange one.
You can also use cream, brown, or dark green cardstock for a less traditional table.
Arrange one pumpkin beside each plate or place several together in the center of the table.
Helpful tip: Use thick cardstock so the place cards stand without falling over. A tiny fold along the bottom edge can also improve stability.
21. Recycled Cardboard Tube Characters
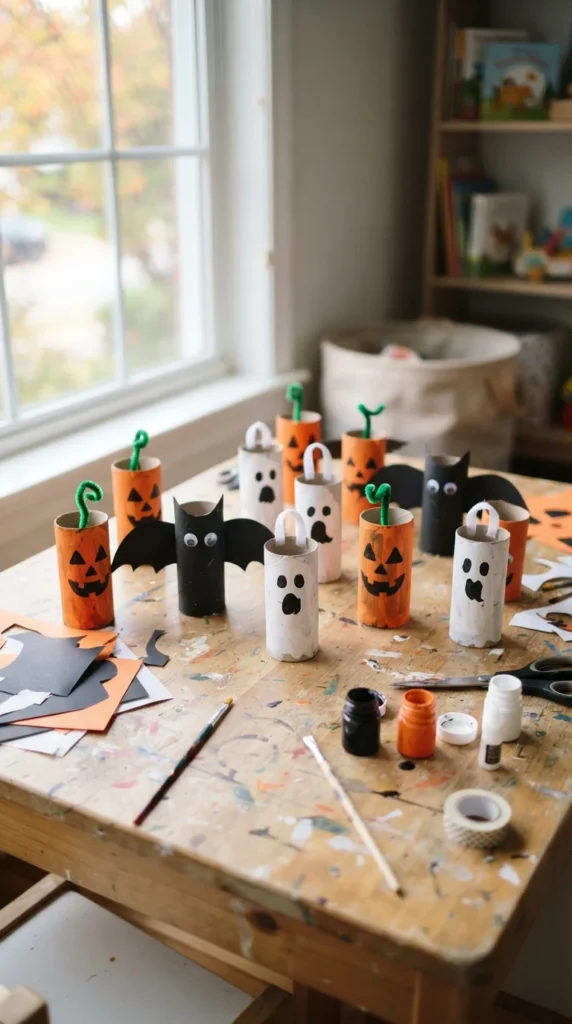
Empty cardboard tubes can become a small collection of Halloween characters. This is a practical way to reuse household materials while creating decorations.
Cover the tubes with orange, black, white, or purple paper. For a pumpkin, use orange paper and add a black face. For a ghost, cover the tube with white paper and draw a simple expression.
To make a bat, cover the tube in black paper and attach folded black wings.
You can also add paper hats, ears, tails, or tiny capes. Place the characters together on a shelf to create a miniature Halloween scene.
This activity works well for children because the basic tube shape is already prepared. Adults can cut the smaller decorative pieces while children handle the gluing and decorating.
Helpful tip: Flatten one side slightly if you want the character to sit securely on a shelf.
22. Mini Paper Pumpkin Patch
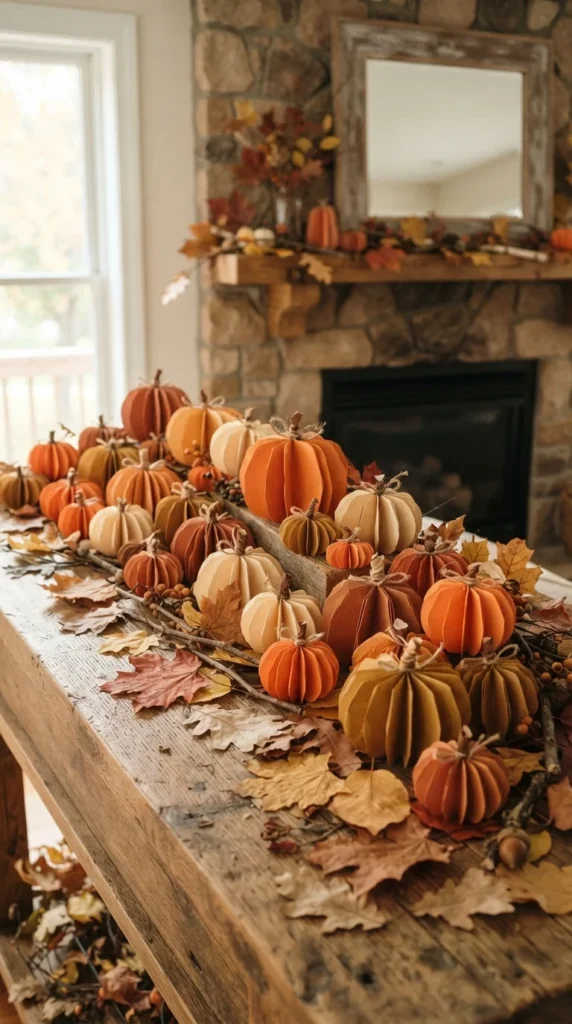
A collection of paper pumpkins can create the feeling of a miniature pumpkin patch indoors. The trick is to vary the shapes rather than making every pumpkin identical.
Use orange cardstock and cut several pairs of pumpkin silhouettes. Glue or fold them together to create dimensional forms.
Make some pumpkins tall and narrow, while others are short and wide. Add brown paper stems and small leaves.
Arrange them across a mantel, shelf, tray, or table. Place a few behind others to create layers.
For a more unusual display, include cream, pale green, and black pumpkins alongside orange ones.
Small paper signs would normally work well for this display, but the pumpkins can also stand beautifully without additional labels or wording.
Helpful tip: Use slightly darker orange paper for a few pumpkins. Subtle color differences make the group feel less flat.
23. Folded Paper Spiders
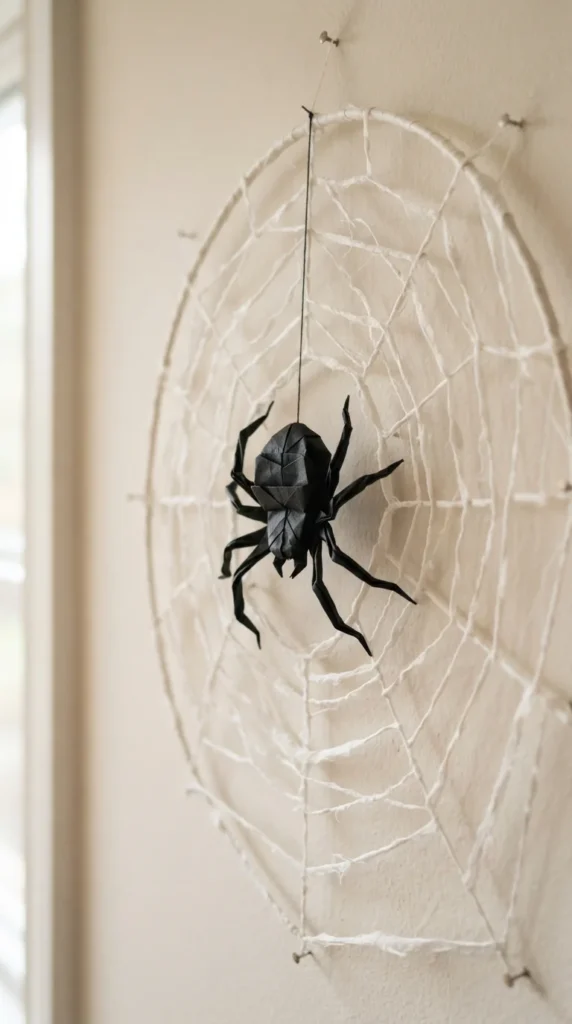
Folded paper spiders are a fun alternative to flat cutout spiders. The folded body and layered legs create more dimension.
Use black cardstock for the body and thinner black paper for the legs. Fold a small rectangular piece into an accordion shape and pinch the center to create the spider body.
Cut eight narrow legs and fold each one slightly so they lift away from the surface. Attach four legs to each side of the body.
Add tiny white paper eyes if you want a friendly look, or leave the spider completely black for a more dramatic decoration.
Place the spiders on a paper web, attach them to a wall, or use them as table decorations.
You can make several sizes and arrange them together.
Helpful tip: Use cardstock for the body and lighter paper for the legs. This keeps the spider sturdy while allowing the legs to hold their shape.
24. Spooky Paper Doorway Curtain
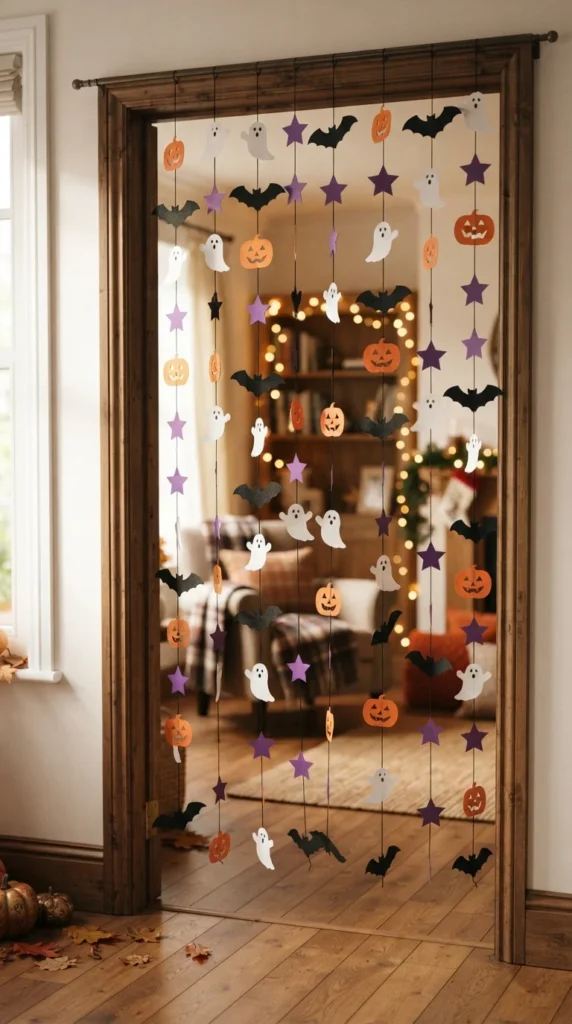
A paper doorway curtain can turn an ordinary entrance into a Halloween feature. Instead of using heavy decorations, hang lightweight paper shapes from several strings.
Cut bats, ghosts, pumpkins, moons, and stars from cardstock. Punch small holes near the tops and thread each shape onto a length of string.
Attach the strings to a long piece of ribbon or cardboard strip. Space them close enough to create a curtain while leaving room for people to walk through.
Use different lengths so the shapes hang at varied heights.
For a cleaner appearance, stick to two or three colors. Black and white with orange accents create a classic look.
This decoration is especially useful for party entrances because it creates a visual focal point without taking up floor space.
Helpful tip: Keep the lowest pieces well above head height. Lightweight paper is easy to move, but a clear walking area makes the decoration more practical.
25. Layered Paper Halloween Centerpiece
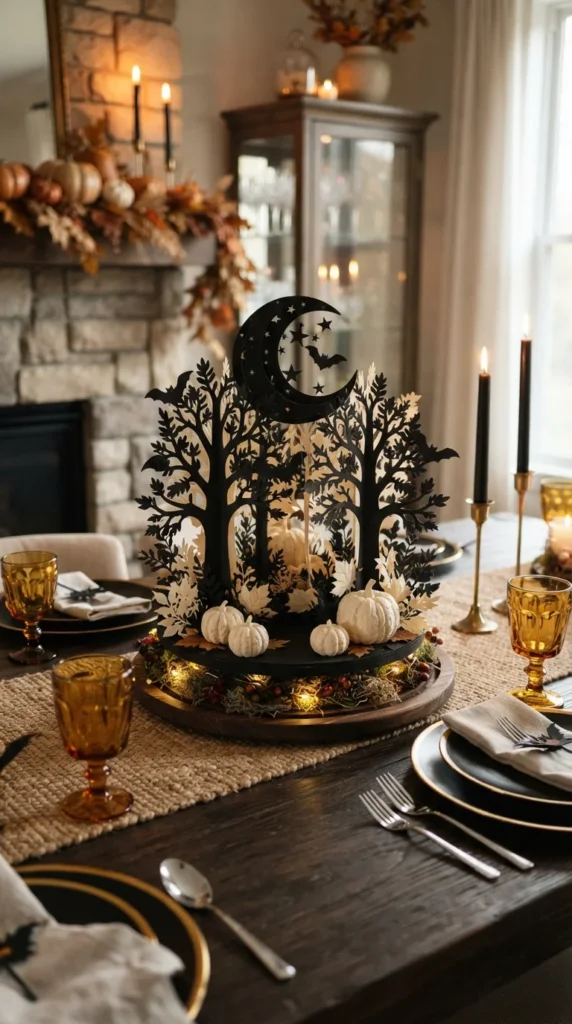
A layered paper centerpiece can bring several Halloween motifs together in one compact decoration. It works well when you want something more polished than scattered craft pieces.
Start with a sturdy cardboard base or shallow tray. Cut layers of black, orange, cream, and dark purple cardstock into different shapes.
Create a back layer with tall branches or a crescent moon. Add medium-sized pumpkins and cats in the middle. Place small bats and leaves toward the front.
Use folded tabs or small strips of cardstock to separate the layers slightly. This creates depth and allows shadows to appear between the shapes.
Keep the centerpiece low enough that guests can see across the table.
For a simpler version, use only pumpkins and leaves. For a more dramatic Halloween display, add a haunted house silhouette behind the foreground shapes.
Helpful tip: Build from back to front. Test the arrangement before gluing anything permanently so you can adjust the height and spacing.
Conclusion
These easy Halloween paper crafts show how much you can create with basic paper and a few household craft supplies. Folded pumpkins can decorate shelves, paper bats can fill a wall, ghosts can become garlands, and recycled cardboard can turn into playful Halloween characters.
Choose projects based on the time, materials, and skill level you have available. A quick paper chain may be perfect for a party, while a layered centerpiece or paper wreath can become a larger focal point.
Gather some cardstock, scissors, glue, and your favorite Halloween colors, then start with one small project. Once you have a few finished pieces, combine them into a larger display that makes your home feel ready for spooky season.