
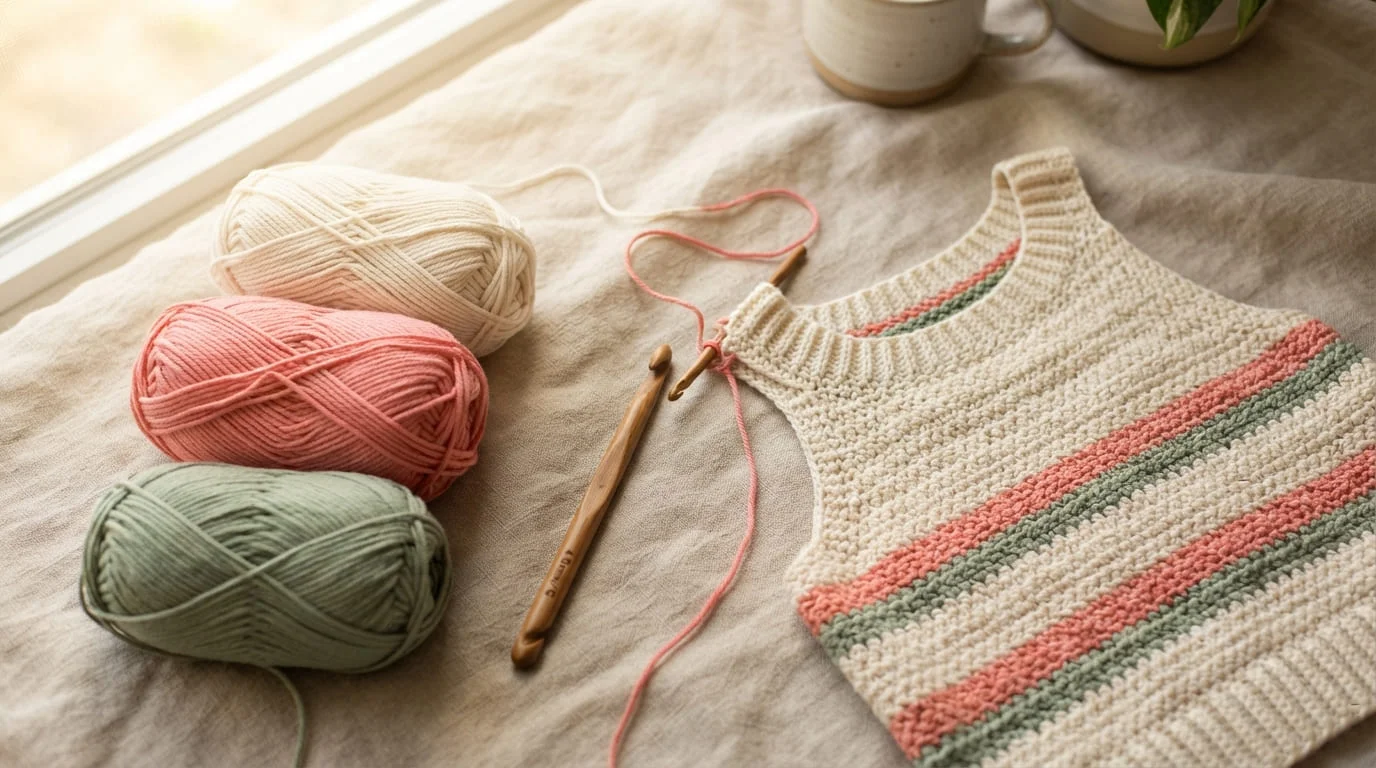
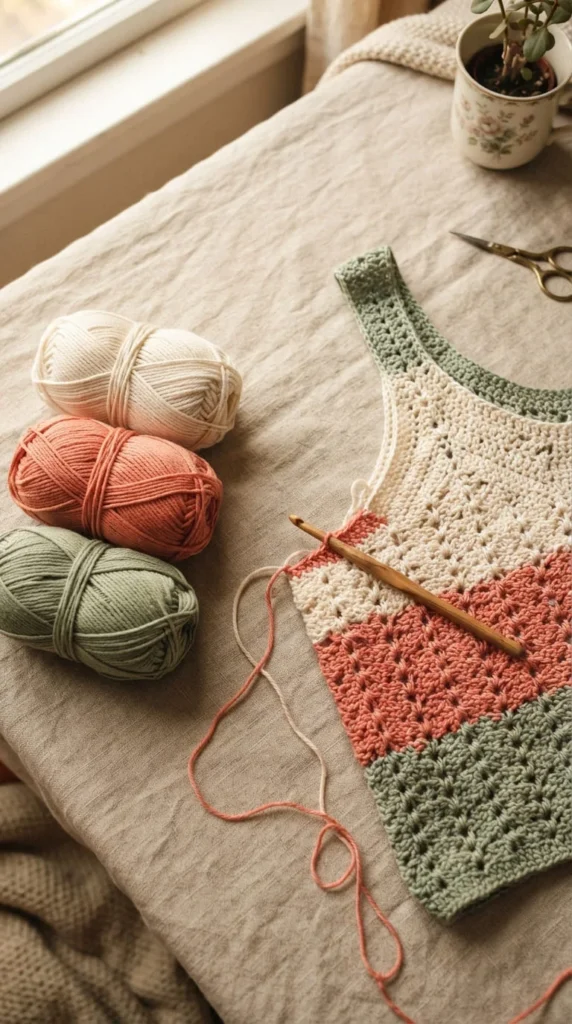
Summer wardrobes get a lot more interesting once you can make your own tops, and crochet happens to be one of the friendliest crafts for getting there. You don’t need years of experience or a shelf of specialty yarn — most of the patterns below use just a few basic stitches, simple shaping, and yarn you can find at any craft store. This list pulls together 24 easy crochet tops for beginners, ranging from classic tanks and halters to mesh tops, cropped silhouettes, and a few lightly textured pieces that look more advanced than they actually are. Along the way you’ll find practical notes on yarn weight, hook size, sizing, and finishing, so you’re not just picking a pretty picture but actually setting yourself up to finish a top you’ll want to wear.
1. Two-Panel Cotton Tank for Your First Garment
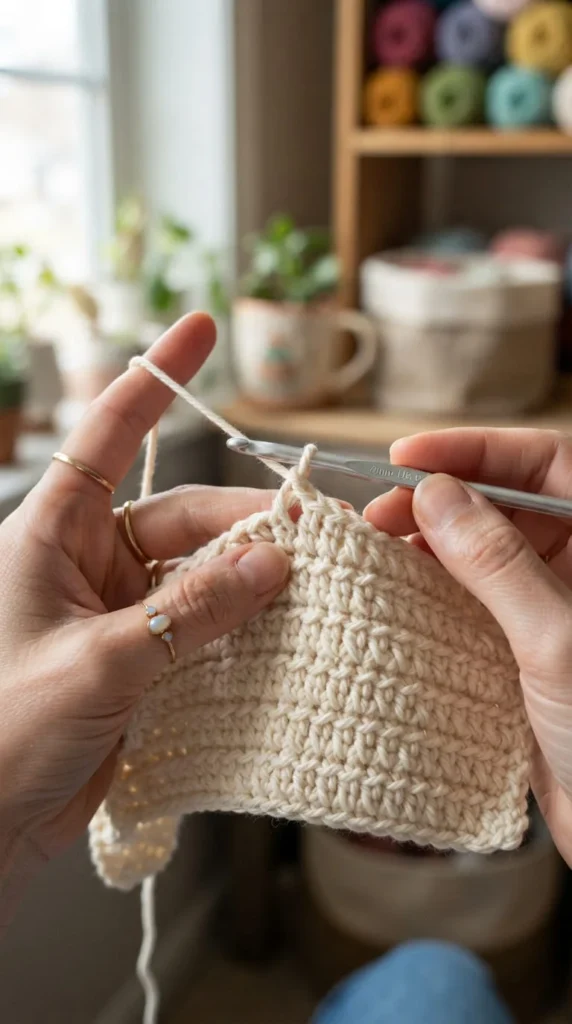
If this is your first wearable garment, start here. A two-panel tank is built from a front piece and a back piece, worked flat in rows using nothing more than double crochet and half double crochet, then seamed at the shoulders and sides. There’s no complicated shaping to track, which means you can focus on keeping your tension even instead of counting increases and decreases.
Use a smooth, light-colored cotton or cotton-blend yarn in a DK or worsted weight — it holds its shape at the neckline and armholes without stretching out after a few wears. A 4mm or 5mm hook usually gives a nice balance between drape and structure.
Before you cast on the actual top, crochet a quick swatch and wash it the way you’d wash the finished piece. Cotton can shrink slightly, and this step saves you from an unpleasant surprise later.
Sizing tip: measure a tank top you already own and love, then match your gauge swatch to those dimensions instead of guessing. It’s a small extra step that makes the difference between a top that fits and one that ends up in a drawer.
2. Top-Down Halter with Adjustable Neck Ties
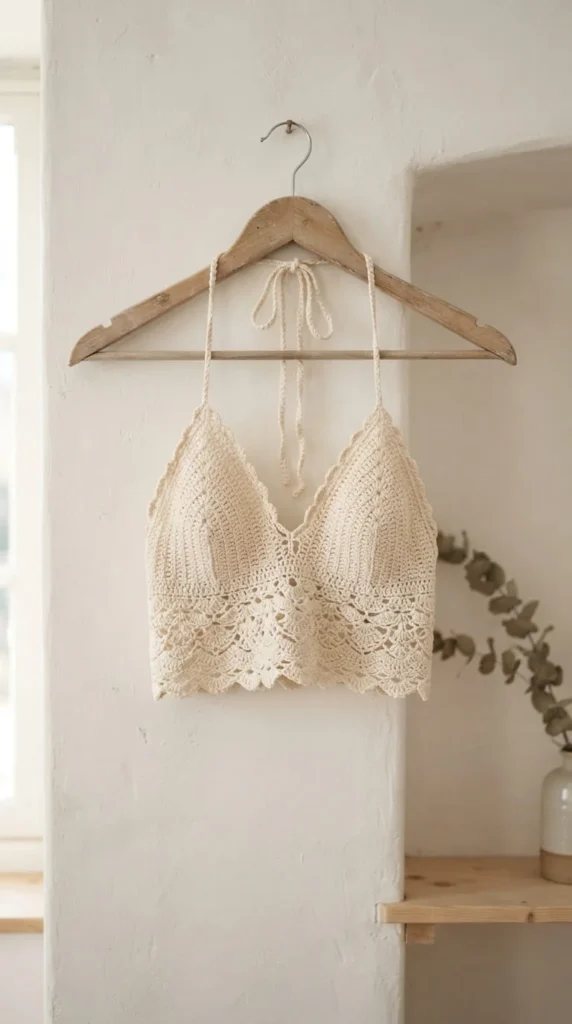
A top-down halter starts at the neckline and works its way toward the hem, which is genuinely one of the easiest ways to control fit as a beginner. You try the piece on as you go, so instead of hoping the measurements work out, you can see exactly how it’s fitting in real time.
This style typically begins with a foundation chain at the neck, then increases outward in half double crochet until the front panel reaches your desired width, with a second symmetrical panel for the back. Long chains at the neck and waist become the ties, so there’s no fussing with hooks, buttons, or zippers.
Because the ties are adjustable, this pattern is forgiving if your gauge runs a little tight or loose compared to the original designer’s. That flexibility makes it a smart pick if you’re still getting comfortable reading patterns.
Yarn note: a mercerized cotton gives this style a slightly glossy, polished look, while a matte cotton-linen blend feels more relaxed and beachy. Either works — it just depends on the vibe you’re going for.
3. Filet Crochet Mesh Top for Hot Weather
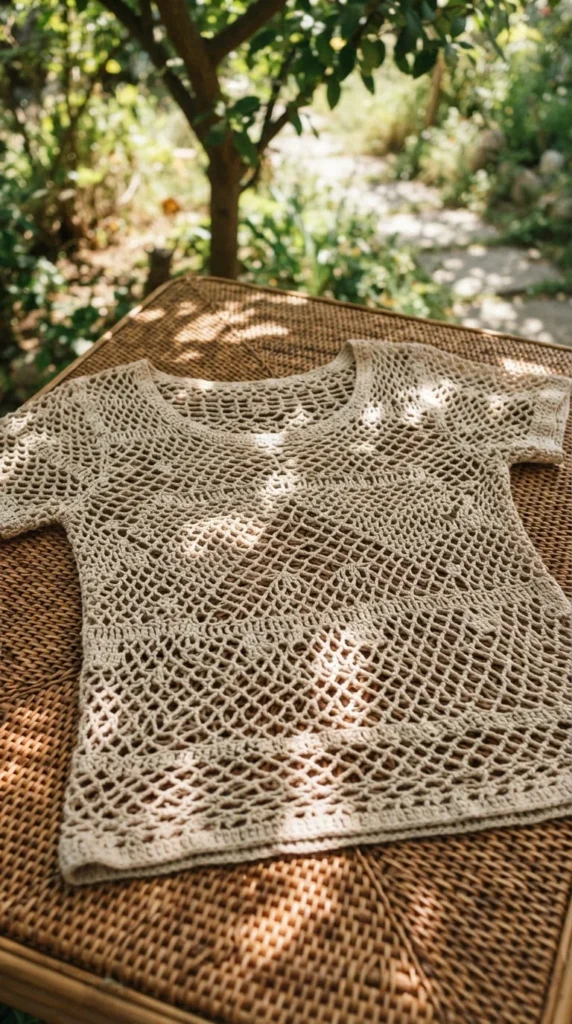
When the temperature climbs, a filet mesh top is one of the coolest things you can wear, literally. This technique alternates chain spaces with double crochet blocks to create an open, grid-like fabric that lets air move through. It looks intricate, but the stitch pattern itself just repeats the same two-row sequence over and over.
Because filet crochet relies on counting chain spaces rather than freehand shaping, it’s actually easier to keep track of than it looks. A stitch marker at the start of every row prevents you from losing your place, which is the most common stumbling block beginners run into with this style.
Layer this top over a fitted cami or bralette for daytime coverage, or wear it alone over a swimsuit for a beach cover-up that photographs beautifully.
Climate tip: in humid regions, a plant-based fiber like cotton or linen breathes better against skin than acrylic, which can trap heat. If you’re in a drier climate, a lightweight acrylic-cotton blend still works fine and tends to cost less.
4. Circle Yoke Tee Worked in One Piece
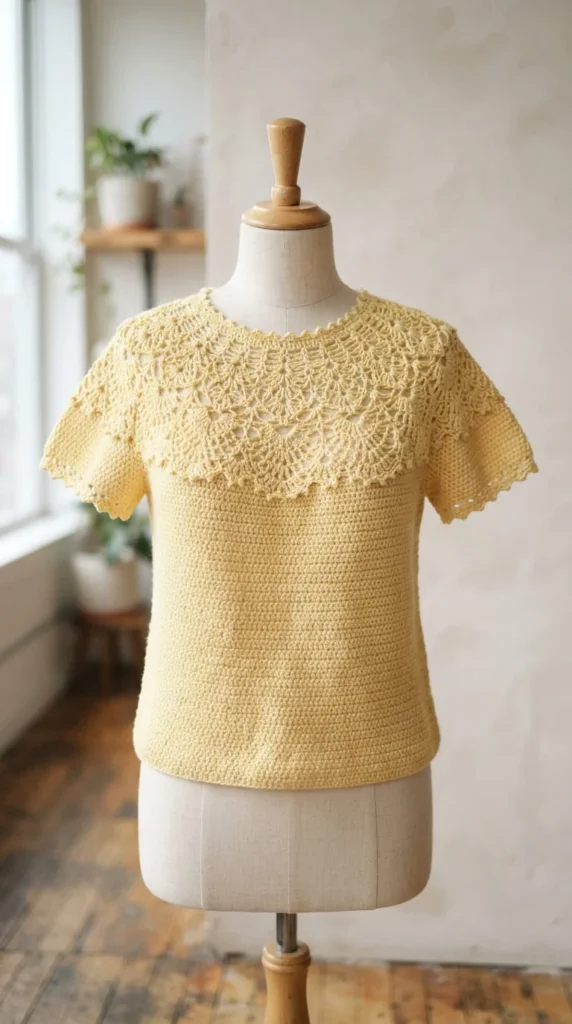
A circle yoke tee grows outward from a small ring at the neck, increasing evenly in rounds until the yoke is wide enough to divide into the body and two sleeves. It’s worked almost entirely in one piece, which cuts down on seaming — a real plus if sewing pieces together isn’t your favorite part of the process.
The evenly spaced increases create a radiating pattern around the neckline that looks decorative even though it’s really just basic math: increase stitches at regular intervals so the fabric lies flat instead of cupping or rippling.
Because the yoke determines the whole fit, take your time here. Try the piece on periodically once you separate the sleeves from the body, and adjust the body length before you start the final border.
Finishing touch: a single round of single crochet worked evenly around the hem and cuffs gives raw edges a cleaner, more finished appearance without adding bulk.
5. Shell Stitch Halter with a Scalloped Hem
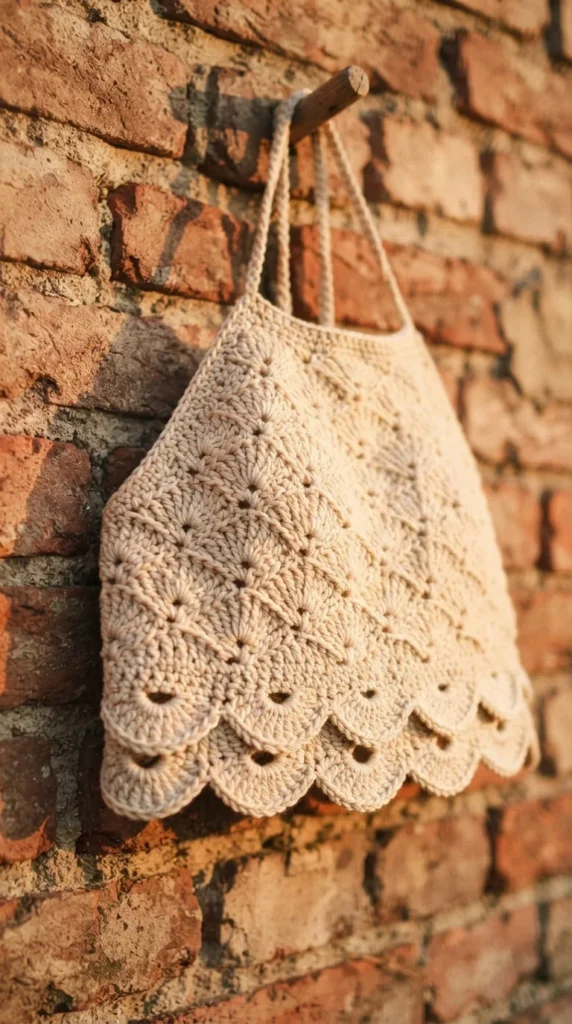
Shell stitch is one of the most beginner-friendly ways to add visual texture without adding difficulty. Each shell is just a cluster of double crochet stitches worked into a single space, repeated across the row, so the pattern reads as far more advanced than it actually is to execute.
This halter pairs shell stitch panels with a scalloped hem, giving the bottom edge a soft, wavy finish instead of a plain straight line. The scallops are formed the same way as the shells — you’re simply working the last row without joining it into the body of the fabric.
Because shell stitch uses more yarn per row than plain double crochet, budget slightly more yardage than a flat tank pattern calls for, especially if you’re substituting yarn.
Drape fix: if your shells feel stiff or boardy once finished, go up half a hook size. A looser gauge lets the shells open and drape rather than sitting flat and rigid against the body.
6. Granny Square Patchwork Crop Top
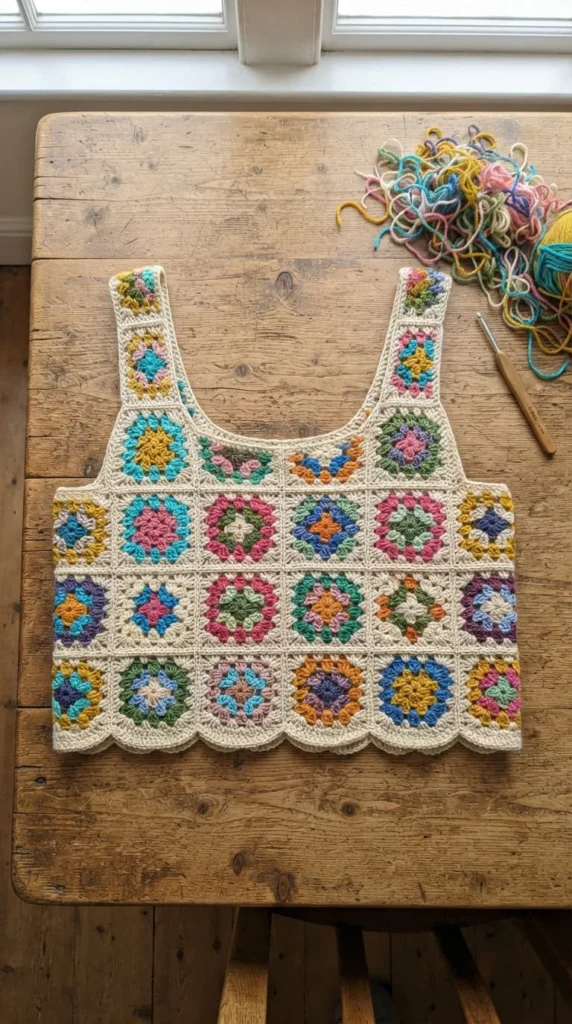
If you already have a stash of leftover yarn from other projects, a granny square crop top is the perfect way to use it. You crochet a set of squares individually, then join them into two panels for the front and back — no complicated shaping required, just consistent square sizes.
This is a genuinely forgiving project for a first-timer because any mistakes in one square don’t ripple through the whole garment the way they might in a top worked in continuous rows. If a square comes out slightly off, you can simply remake it.
Mixing colors intentionally, rather than randomly, gives the finished top a more cohesive look. Try sticking to two or three shades in a repeating sequence rather than a totally random assortment.
Cost note: because this pattern is scrap-friendly, it’s one of the cheapest tops on this list to make if you’re already a crocheter with a yarn stash, often costing next to nothing beyond your time.
7. Ribbed Tube Top with a Stretchy Waistband
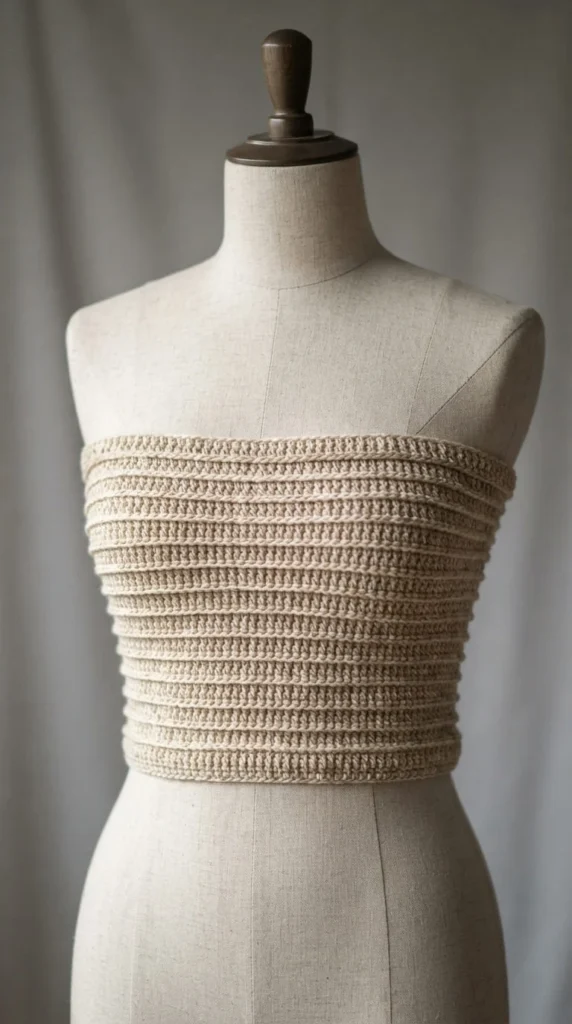
A tube top built from front-post and back-post double crochet creates ribbing that gives the fabric natural stretch, which helps it hug the body without a fitted pattern or complex shaping. The whole top is really just rows of ribbing joined into a tube and left strapless, or finished with thin straps for extra security.
Ribbing takes a little practice to get comfortable with, since you’re working around the post of the stitch below instead of into the top loops. Practicing on a small swatch first will save you frustration on the real project.
Because this style relies on stretch rather than exact measurements, it’s more forgiving of small gauge differences than a fitted panel top would be.
Comfort tip: add a strip of soft elastic or ribbon inside the top edge if you want extra hold without changing the stitch pattern. It’s an easy addition that doesn’t require any crochet skill beyond a needle and thread.
8. Chevron Stripe Crop Top
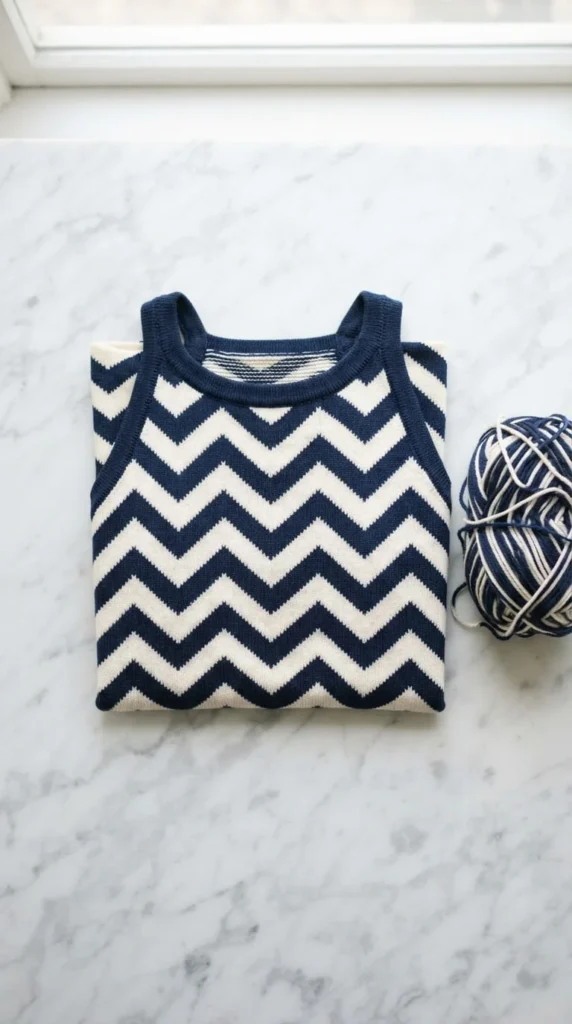
Chevron, or ripple, stitch creates a zigzag pattern by working increases and decreases at set points across each row. Paired with color changes, it turns into bold stripes that look far more complicated than the stitch count actually requires.
This chevron crop top works well as a project for practicing color changes, since you’re already counting stitches for the increases and decreases, and adding a new yarn color at the row’s edge is a natural next step.
Keep a small notebook or note on your phone tracking your row count and which color comes next. Chevron patterns are easy to lose track of if you’re multitasking while you crochet.
Yarn selection: high-contrast colors make the zigzag pattern pop, while tonal shades in the same color family give a softer, more subtle ripple effect. Both look intentional, so pick based on your personal style rather than which is “more correct.”
9. Lace Cold-Shoulder Top
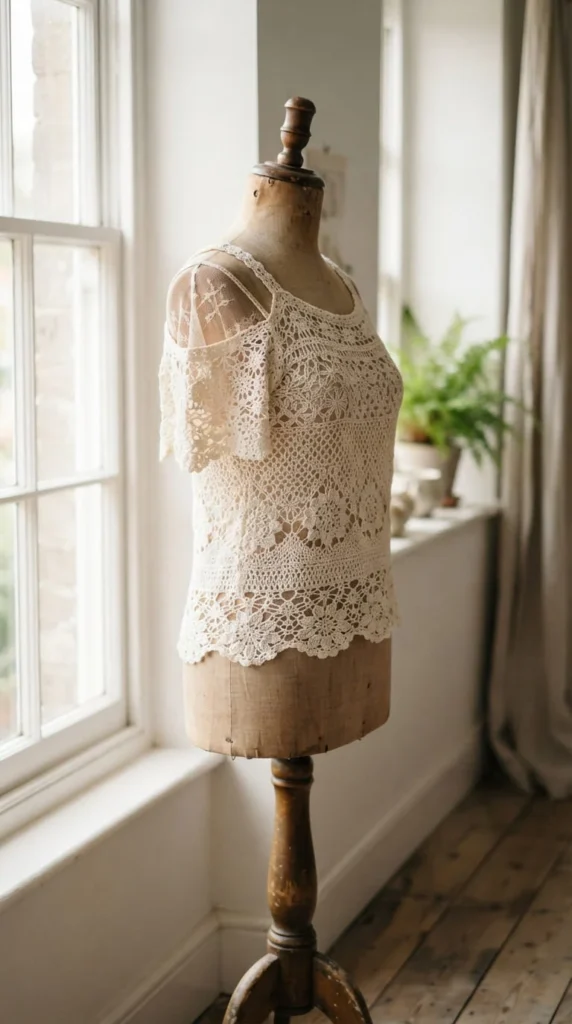
A cold-shoulder top leaves a cutout at the shoulder seam, usually filled with a lighter lace or mesh stitch while the rest of the body uses a solid stitch like half double crochet. The contrast between open and solid sections gives the top visual interest without requiring advanced shaping.
Because the cutout is planned into the pattern from the start, you’re not cutting or altering a finished piece — you simply switch stitch patterns for a few rows at the shoulder, then switch back.
This is a nice project for practicing how to read a pattern that shifts between two different stitch counts, a skill that transfers well to more advanced garments later on.
Coverage note: if the lace section feels too revealing for your comfort, work it a row or two narrower than the pattern suggests, or line the shoulder area with a scrap of soft fabric sewn in afterward.
10. Button-Front Layering Vest Top
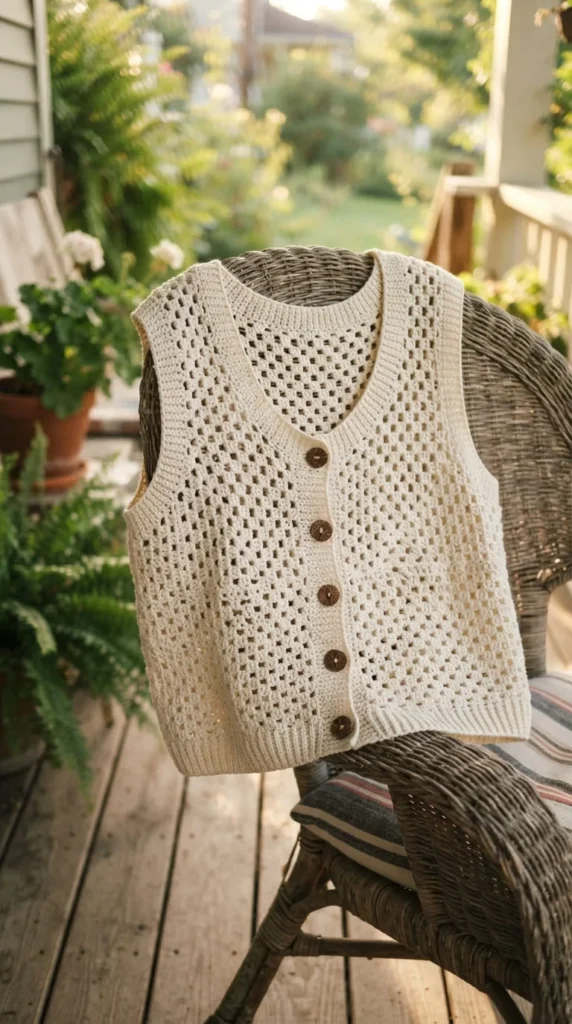
Not every crochet top needs to stand alone — a button-front vest worked in simple double crochet panels makes a great layering piece over tank tops or fitted camis. The button placket is just a strip of single crochet with evenly spaced buttonholes, which is a genuinely approachable way to practice buttonholes for the first time.
Because this style is meant to be worn open or layered, it’s more forgiving on exact body measurements than a fitted top would be. A little extra ease around the body reads as intentional rather than ill-fitting.
Choose buttons that are slightly larger than the buttonhole gaps you’ve crocheted, since fabric loosens a bit with wear and buttons can slip through gaps that felt snug when new.
Practical use: this piece works year-round, not just in summer, since you can layer it over long sleeves once the weather cools. That versatility makes it a good return on the time you put into it.
11. Tie-Back Halter with a Bow Detail
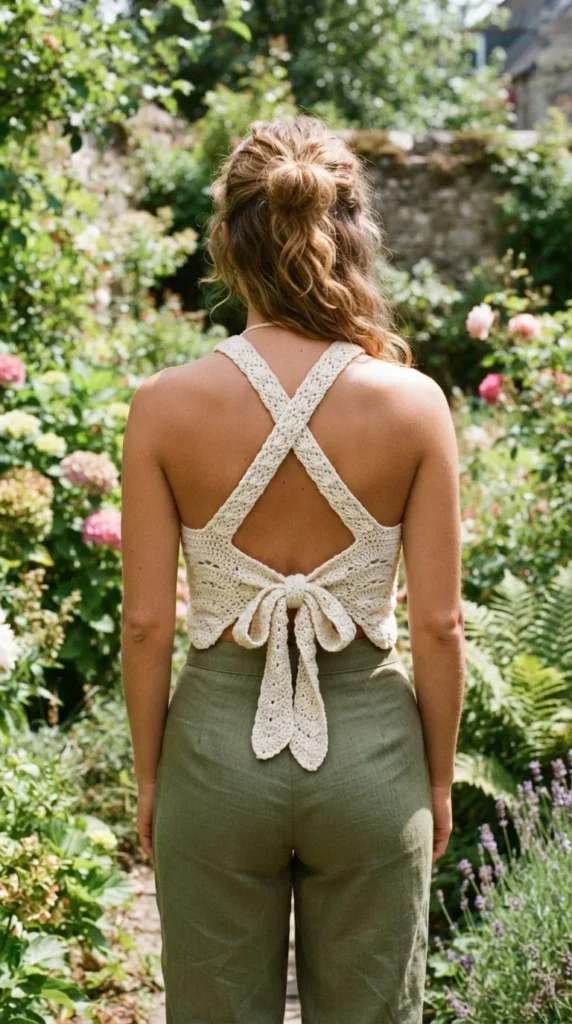
A tie-back halter ties at the back rather than the neck, which changes both the look and the fit. Long straps cross or wrap around the back and finish in a bow, giving you an easy way to adjust the fit without redoing any stitches if your gauge runs slightly off from the pattern.
This design is a good next step after a basic tank top because it introduces you to working long foundation chains for straps and attaching them neatly to the body panels, a skill you’ll reuse in plenty of future patterns.
Practice your bow-tying technique on scrap yarn first if you want it to sit neatly rather than looking lopsided once it’s on your body.
Seaming tip: attach straps with a whip stitch rather than crochet slip stitches where visible, since it creates a flatter, less bulky join at the shoulder that won’t dig in when you’re wearing a bag or seatbelt.
12. V-Neck Raglan Tee
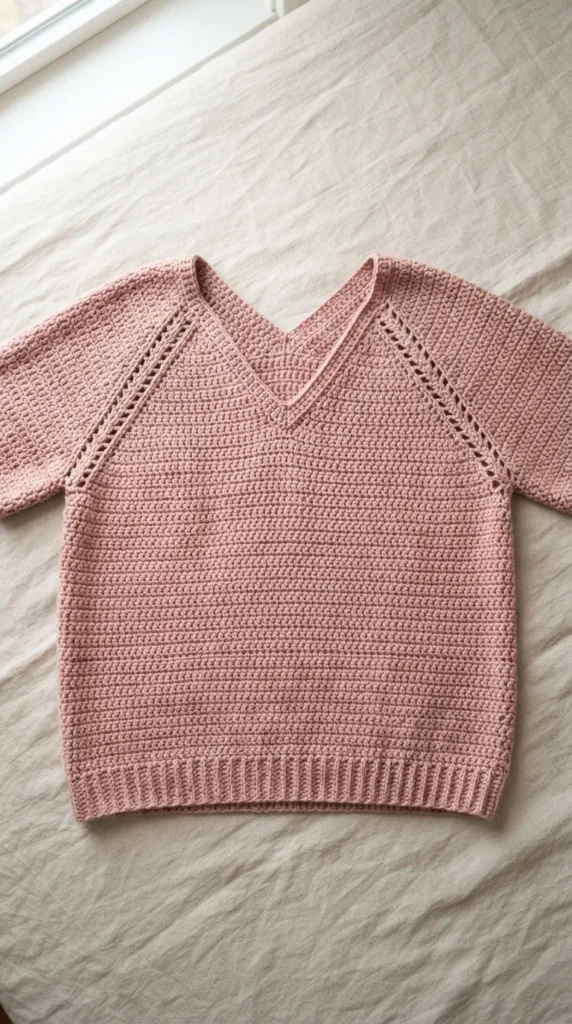
Raglan construction uses diagonal lines running from the underarm to the neckline instead of a set-in sleeve, which makes it one of the simplest ways to join sleeves to a body without complicated shaping math. Increases happen along four consistent diagonal lines, so once you understand the pattern, it’s easy to keep track of.
This top adds a V-neck at the front, worked by simply skipping a stitch or two at the center front on each row as you approach the neckline, then finishing with a border round.
Raglan tops are especially good for beginners who want a more fitted silhouette than a boxy tank without tackling princess seams or darts.
Fit adjustment: if you want a looser, more relaxed fit, add a few extra rows before dividing for the sleeves. If you prefer something more fitted, work fewer increase rounds before the split.
13. Puff Sleeve Blouse Top
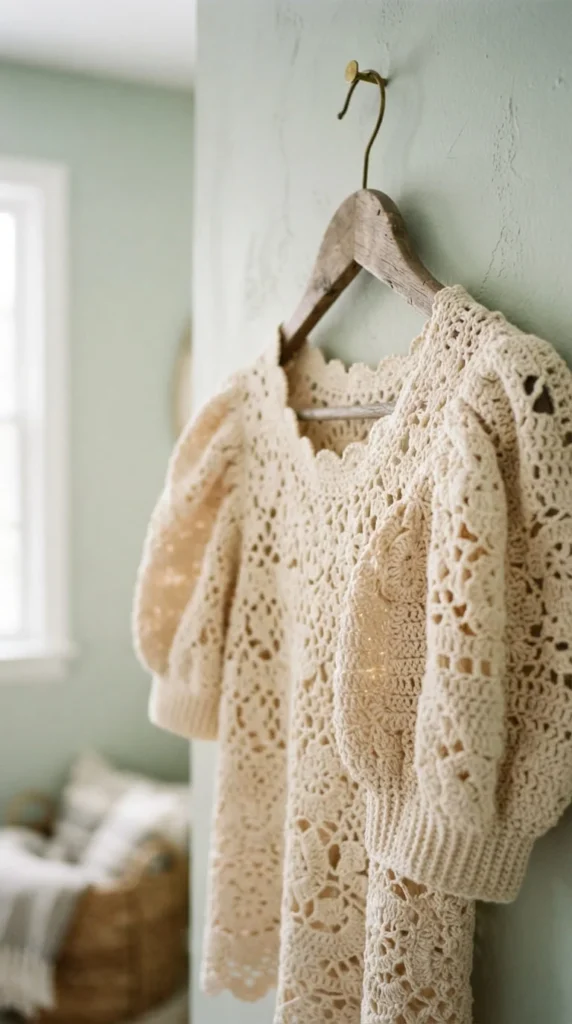
Puff sleeves are created by working extra stitches into a sleeve round and then gathering the fullness at the cuff with a tighter round of single crochet or a drawn-through elastic. The effect looks romantic and a little vintage, but the technique itself is just an increase round followed by a decrease round.
This top works well over a fitted cami or with high-waisted shorts and skirts, giving it a blouse-like feel rather than a plain summer tank.
Because puff sleeves use noticeably more yarn per round than a plain sleeve, check your yardage before you start, especially if you’re substituting a different yarn than the pattern calls for.
Beginner note: practice the gather technique on a small swatch shaped like a cuff before committing to the full sleeve. It only takes a few minutes and will save you from unraveling a nearly finished sleeve.
14. Off-the-Shoulder Ruffled Top
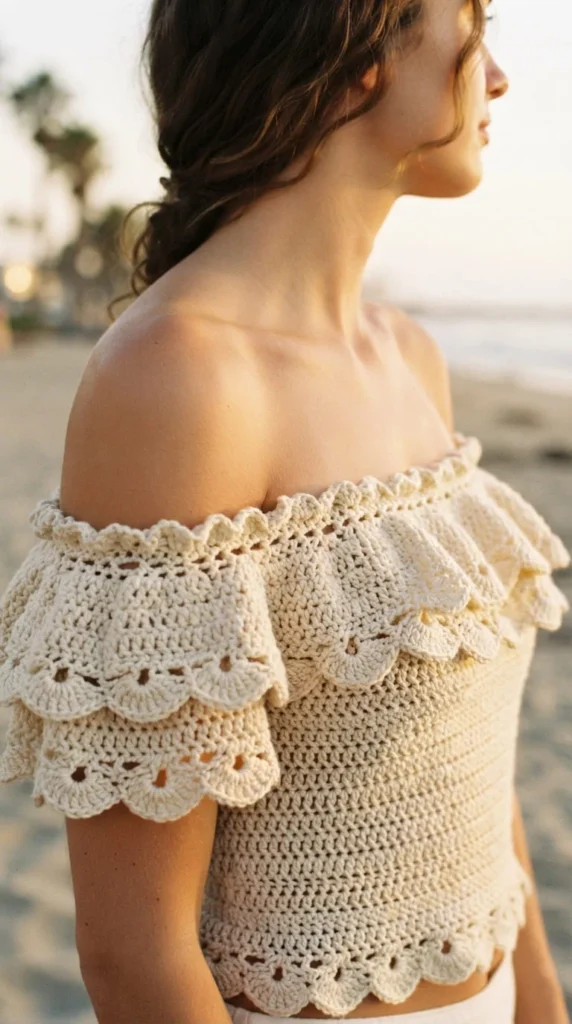
An off-the-shoulder top sits below the collarbone with an elasticized or ruffled top edge that stays in place without straps. The ruffle is formed by working significantly more stitches into the final round than the body actually needs, so the extra fabric has nowhere to go but out and down.
This is a satisfying project because the ruffle transforms a very plain, simple tube of fabric into something that looks elaborate, even though the base construction is one of the easiest on this list.
If you’re nervous about it slipping down while worn, thread a length of soft elastic through the top round before you add the ruffle, so the top has some grip against the skin.
Styling idea: this shape pairs naturally with high-waisted bottoms, since the eye is drawn to the shoulders and the waistline gets visually elongated in photos and in person.
15. Crochet Bralette for Layering
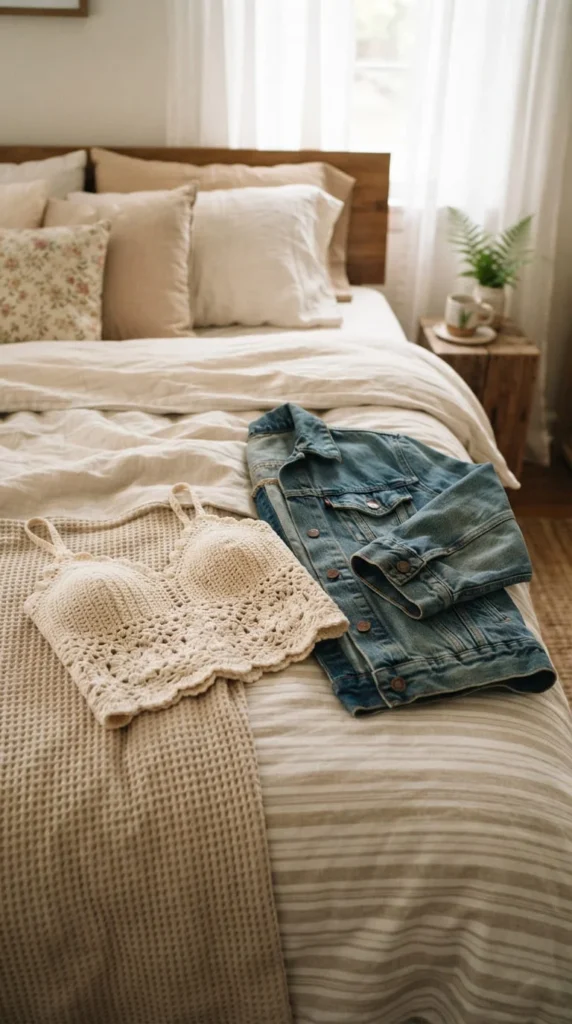
A bralette top is a smaller, more fitted project than a full tank, which makes it a fast beginner win if you want to finish something in a weekend. It’s typically worked in two triangular cups joined at the center and finished with straps and a back closure or tie.
Because this style is meant to be layered under a jacket, cardigan, or sheer top rather than worn entirely alone in most settings, it’s a low-pressure way to experiment with color and stitch texture without worrying too much about overall garment fit.
Test the stretch and structure with a swatch before committing, since a bralette needs just enough firmness to hold its shape without feeling stiff against the skin.
Practical note: this is one of the more budget-friendly projects here, often using a single skein of yarn, which makes it a good option if you want to try a new yarn brand before buying enough for a bigger project.
16. Diamond Mesh Racerback Top
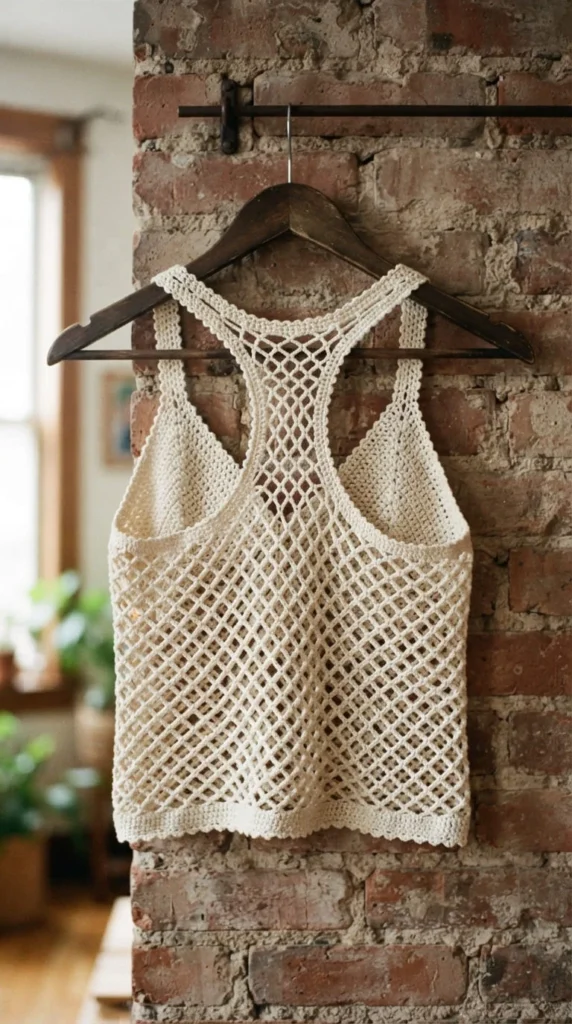
A racerback silhouette narrows the straps toward the center back, which works well for layering over sports bras or swimsuits since it won’t show wider straps peeking out. Combined with a diamond mesh stitch pattern across the body, this top stays breathable while still having a defined, athletic shape.
The diamond mesh is created with a simple chain-and-double-crochet repeat, similar to filet crochet but worked on the diagonal, which changes the visual effect from a grid to a lattice.
Because the racerback strap shaping happens gradually across several rows, take it slow and count carefully near the shoulder, since this is the one part of the pattern where losing track can throw off the fit.
Practice run: if diagonal shaping is new to you, work a small swatch practicing the decrease sequence before starting on the actual top, so you’re confident before it matters.
17. Waffle Stitch Textured Crop Top
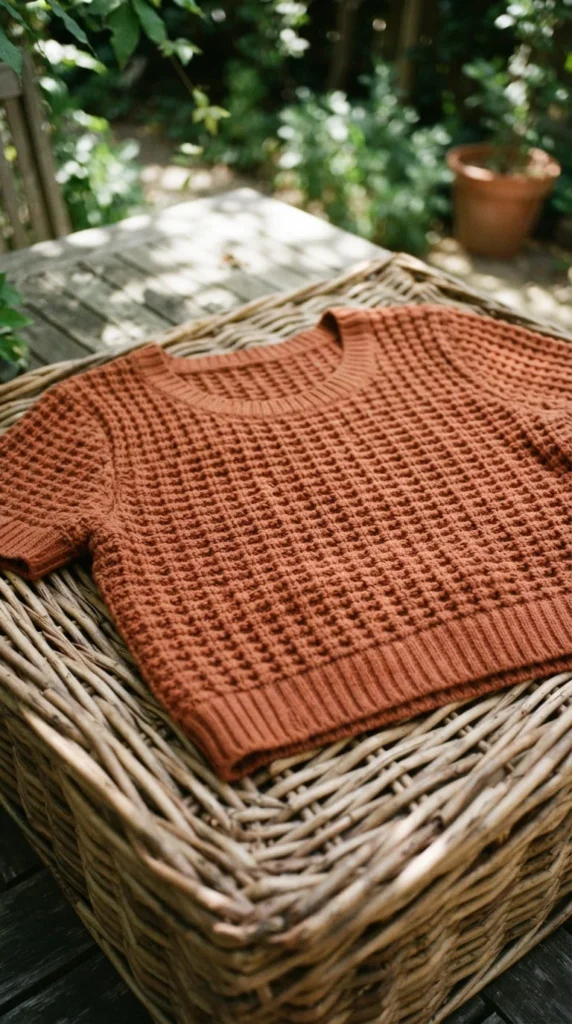
Waffle stitch alternates front-post and back-post stitches to create a raised, grid-like texture that looks and feels more substantial than a plain double crochet fabric. It’s a great way to introduce yourself to post stitches without committing to a full ribbed garment.
This crop top uses waffle stitch across the body and finishes with a plain single crochet border, which keeps the overall project approachable even though the texture itself looks detailed.
Because post stitches use slightly more yarn than standard stitches, plan for a bit of extra yardage compared to a plain crop top pattern in the same size.
Texture tip: work a swatch first and hold it up to the light. Waffle stitch fabric tends to be denser and less airy than mesh or filet styles, so it’s a better pick for cooler summer evenings or air-conditioned spaces than peak heat.
18. Asymmetric One-Shoulder Top
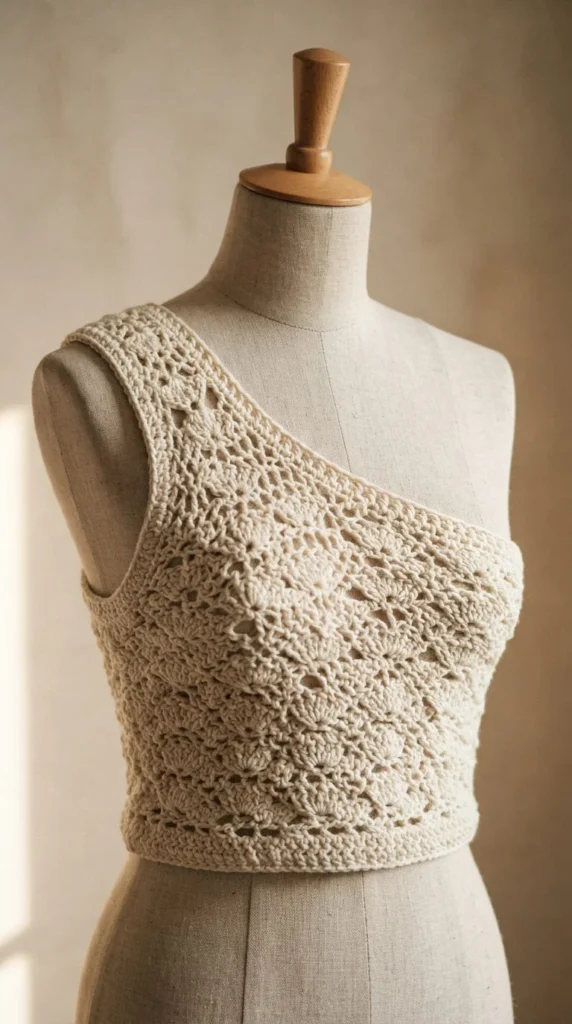
A one-shoulder top shifts the neckline diagonally across the body instead of sitting evenly on both sides, which gives a simple tank shape a much more distinctive look. The shaping is achieved by working short rows on one side of the fabric while the other side continues at full length.
Short rows can feel intimidating at first, but in this pattern they’re limited to just the top edge near the shoulder, so there’s a small, manageable section to practice rather than an entire garment full of them.
This style works particularly well with a solid stitch like double crochet, since the diagonal line reads more clearly against a flat, even fabric than it would against a busy textured stitch.
Confidence builder: if short rows feel like too much for a first project, work the more standard two-strap version first, then come back to this pattern once you’ve built up some experience.
19. Boho Fringe Hem Top
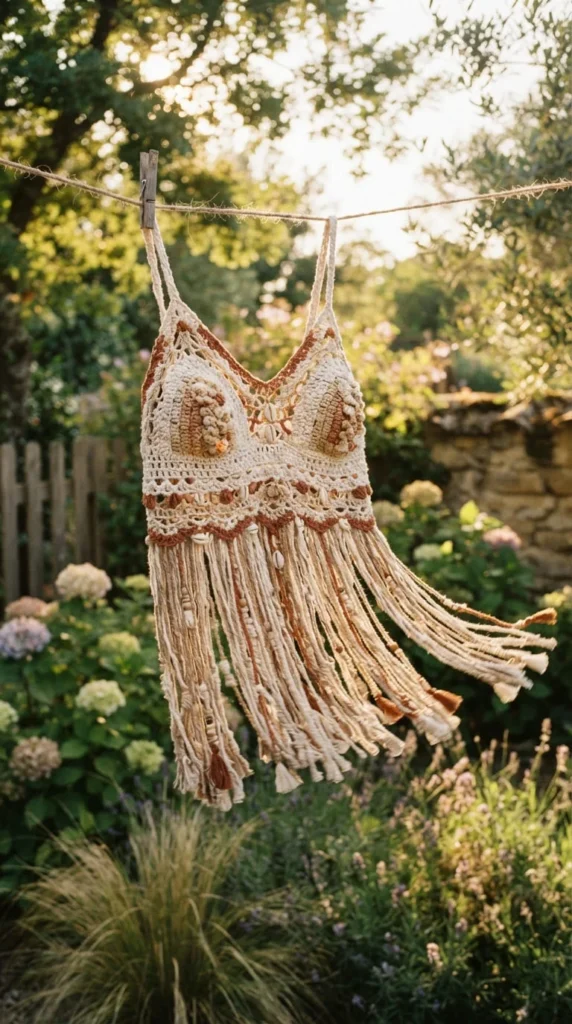
Adding fringe to the hem of a simple tank is one of the easiest ways to change the entire mood of a top without altering the base pattern at all. Fringe is added after the top is finished, by cutting yarn lengths and knotting them through the bottom edge with a crochet hook, similar to finishing a scarf.
This makes it a great option if you’ve already made a plain tank from earlier in this list and want to give it a second life with a different look, rather than starting an entirely new project from scratch.
Vary the fringe length slightly rather than cutting every strand identically. A little natural variation looks more relaxed and less like a craft-kit finish.
Yarn tip: a slightly textured or slubby cotton yarn gives fringe more movement and visual interest than a perfectly smooth yarn, which can look flat once cut into strands.
20. Striped Colorblock Tank Top
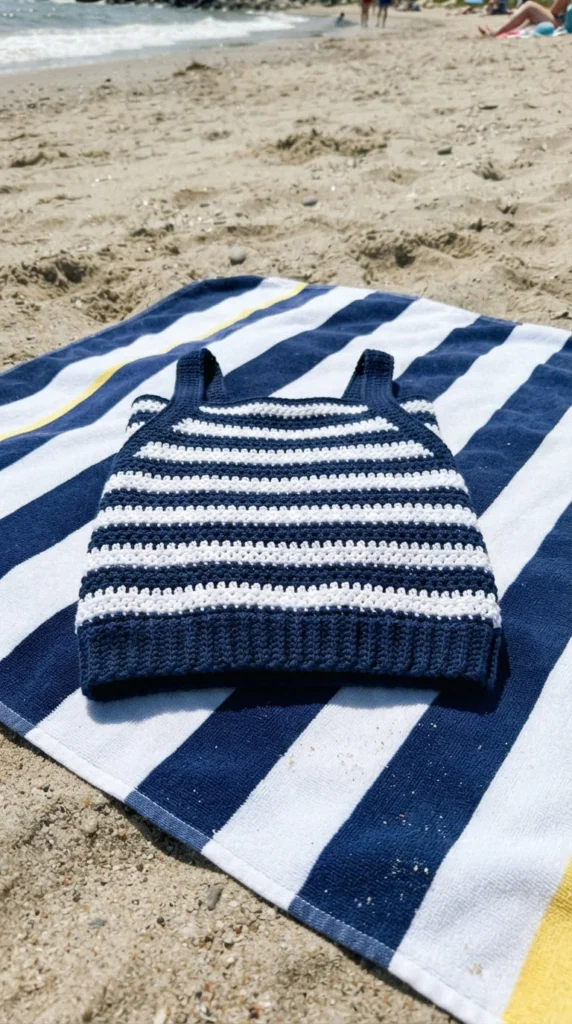
A colorblock tank uses large blocks of solid color rather than thin stripes, which is a simple way to practice joining new yarn colors without the frequent switching that thinner stripes require. Each block might run for ten or fifteen rows before switching, so you’re not constantly weaving in ends.
This is a good project if you’re still working on keeping your tension consistent, since any small tension changes are easier to spot within a large solid block of color than they would be in a busier textured stitch.
Plan your color blocks before you start, either by sketching a quick diagram or laying your yarn balls out in the order you plan to use them, so you’re not deciding on the fly mid-project.
Finishing detail: weave in ends along the color-change seams rather than trimming them short, since blocked color sections tend to show gaps if the join isn’t secured well.
21. Peplum Crochet Top with a Flared Waist
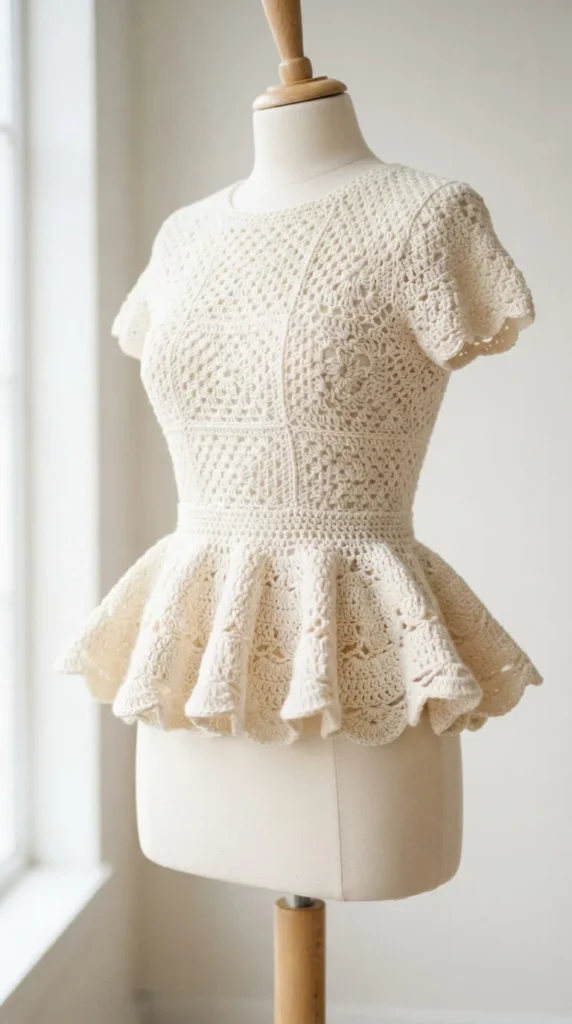
A peplum top adds a flared section at the waistline, created by increasing stitches sharply over just a few rows before returning to a straight hem. The flare draws the eye to the waist, which can make a simple boxy top read as far more shaped and tailored than it actually is to construct.
Because the increases are concentrated in a short section rather than spread gradually, this is a nice introduction to more dramatic shaping without the longer, more complex increase sequences used in fitted dresses or skirts.
Try the top on right before you start the peplum section, so you can decide how much flare you actually want based on how the fitted section already sits on your body.
Pairing idea: this style looks especially polished over high-waisted pants or a pencil skirt, since the peplum flare naturally lines up with the waistband.
22. Sailor-Collar Square Neck Top
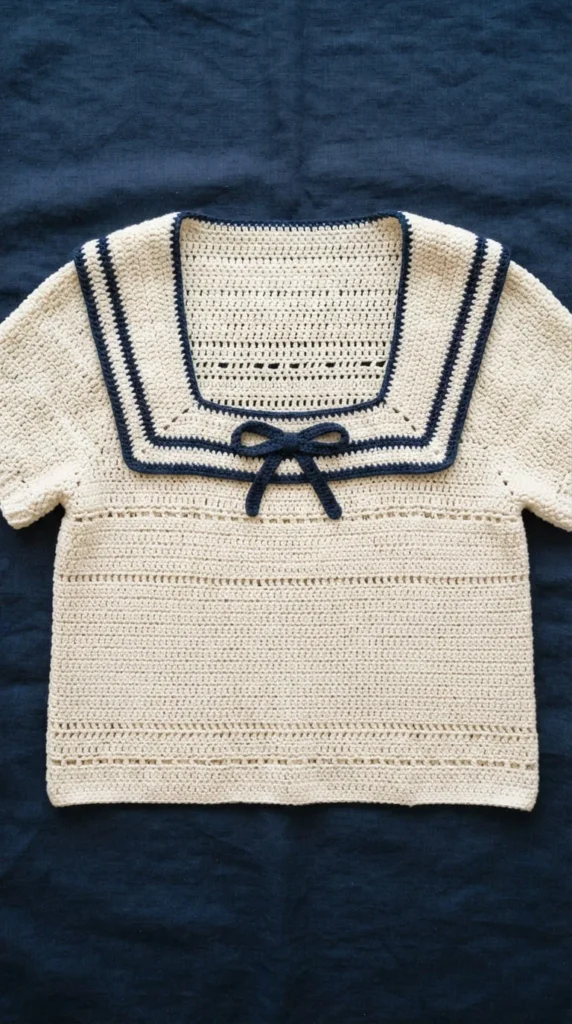
A square neckline is one of the more forgiving shapes to crochet because it’s built from straight lines and simple right angles rather than curves, which are trickier to keep smooth in crochet. Add a contrasting collar trim in a nautical stripe or solid navy, and the whole top takes on a sailor-inspired look.
Because the neckline is squared off, you’ll work the front panel in two separate sections that meet at the center, joining them once you reach shoulder height, which is a nice introduction to splitting a piece for a neckline without full raglan or set-in sleeve shaping.
This top pairs naturally with high-waisted denim shorts or a midi skirt for an easy, put-together outfit.
Collar tip: work the collar trim slightly looser than the body tension so it lies flat rather than curling or puckering around the neckline edge.
23. Wrap-Front Crochet Top
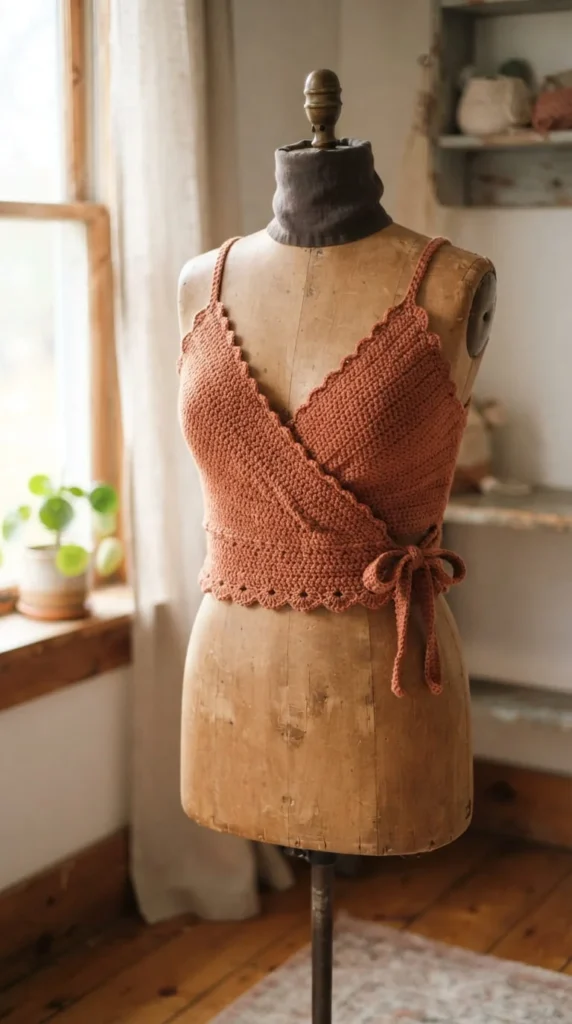
A wrap top crosses one front panel over the other and ties at the side or back, giving you a naturally adjustable fit without precise shaping. Because the wrap overlaps, small differences in gauge or body measurements are far less noticeable than they’d be in a fitted, symmetrical top.
This design is worked as two separate front panels and one back panel, joined at the shoulders, then finished with long ties that wrap around and secure at the waist or back.
If you’re self-conscious about how much the wrap opens while moving, add a small button or snap at the underlap to keep it more secure through the day.
Versatility note: because the tie closure adjusts the fit, this top works well through small weight fluctuations, making it one of the more practical, long-term pieces in your handmade wardrobe.
24. Beaded Trim Summer Top
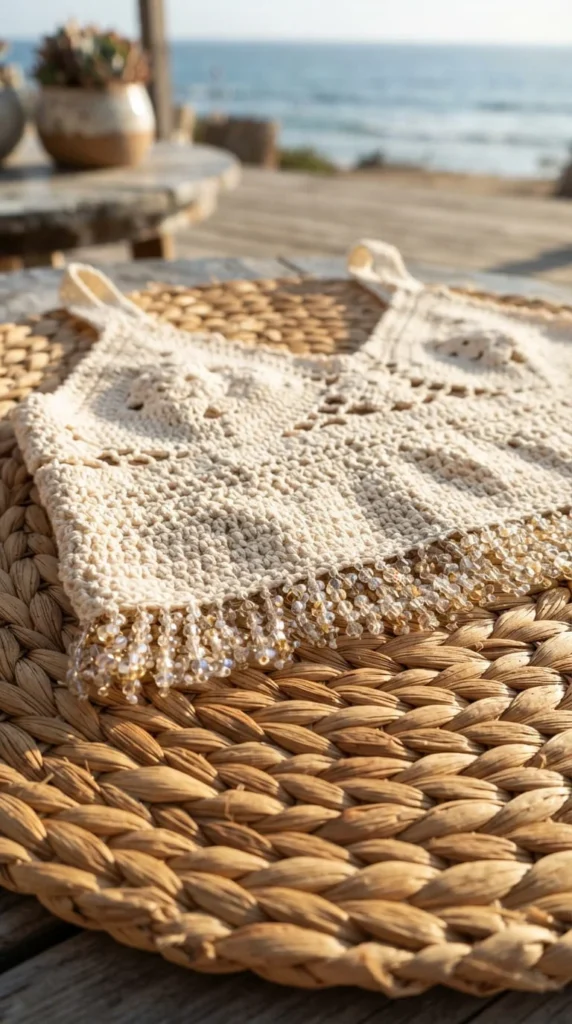
Adding a beaded trim along the hem or straps is a simple way to dress up an otherwise plain tank without learning any new stitches. Beads are pre-strung onto the yarn before you begin crocheting the final round, then slid into place and secured as you work each stitch.
This project is a nice choice if you’ve already built confidence with a basic panel top and want a small, low-risk way to practice a new technique before tackling anything with more complex shaping.
Start with a simple hem trim rather than beading an entire top, since threading a large number of beads onto yarn takes time and patience you’ll want to save for a first attempt.
Practical tip: choose lightweight plastic or wooden beads rather than heavy glass ones for a top, since glass beads can pull and distort the fabric’s drape over time, especially in a warm-weather cotton yarn.
Conclusion
Crochet tops are one of the most rewarding entry points into making your own clothes, mainly because the projects on this list stay small enough to finish without losing momentum, while still teaching you real, transferable skills — reading a pattern, shaping a neckline, joining color changes, or fixing tension issues before they become a bigger problem. Pick one style that matches where you are right now, whether that’s a beginner-proof two-panel tank or a slightly more textured piece like a waffle stitch crop top, and treat the first attempt as practice rather than perfection. Keep a small notebook of what worked, which hook size gave you the drape you wanted, and which yarn felt best against your skin, since that record will make every project after this one faster and less frustrating. Once you’ve made two or three of these, mixing and adjusting patterns on your own will start to feel a lot less intimidating. Pick up a hook, grab a skein of cotton yarn you actually like, and start with whichever top on this list is pulling at you the most.