
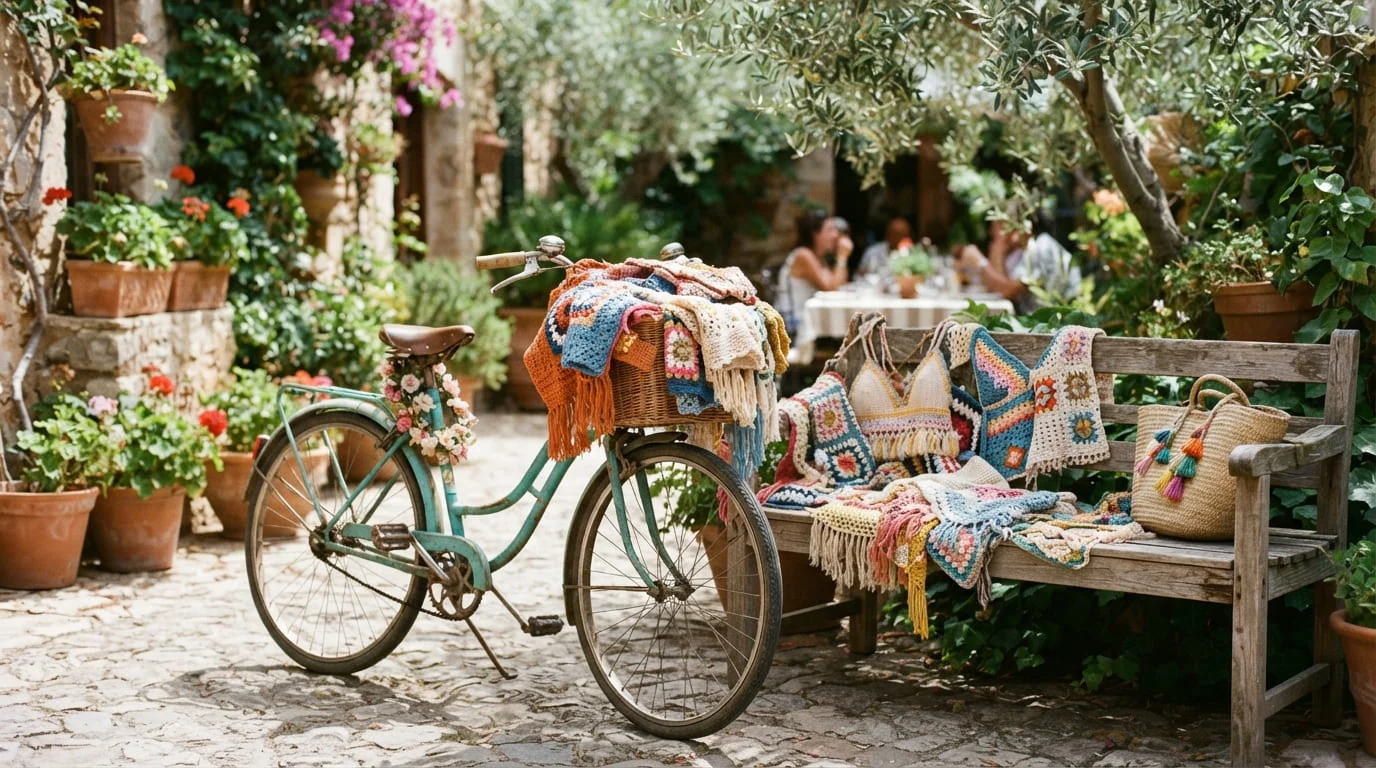
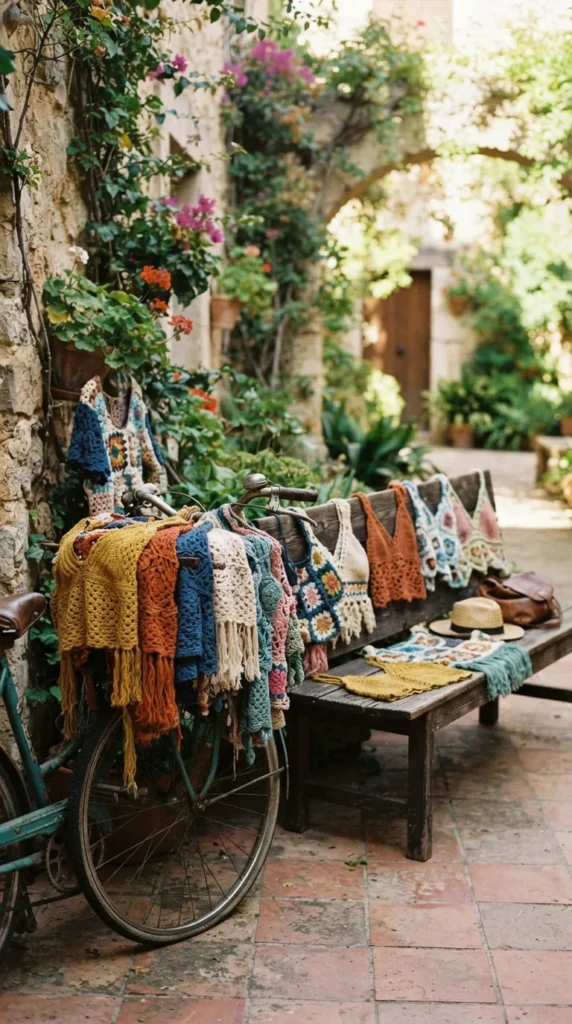
Building a handmade wardrobe starts to feel less like a craft project and more like actual style once you have a few reliable crochet top patterns for beginners you can turn to for different occasions. This list moves through 22 patterns organized around how you’d actually wear them — festival days, date nights, layering under a jacket, lounging at the beach — rather than sorting by stitch type alone. Along the way you’ll pick up practical guidance on yarn substitution, sizing, repair, and the small mistakes that trip up most new crocheters, so each finished top actually holds up once it leaves your hook and enters your closet.
1. Boho Sun Halter for Festival Days
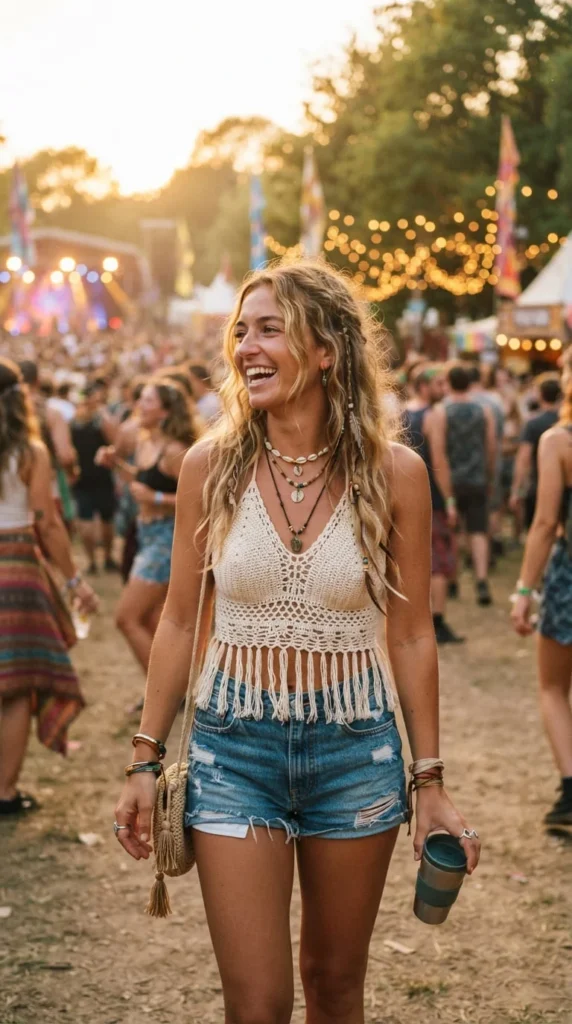
A boho halter built from a simple triangle front and crossed back straps is one of the fastest ways to get a festival-ready piece without complicated shaping. The triangle shape is worked in rows of increasing double crochet, so you’re just adding stitches at the edges until it reaches the width you want.
Long ties at the neck and waist double as adjustable sizing, which matters if you’re substituting a yarn that crochets up slightly thicker or thinner than the original pattern called for.
Add a few strands of fringe along the bottom edge once the top is finished, cutting yarn to matching lengths and knotting them through with a hook, the same way you’d finish a scarf.
Yarn substitution tip: if you’re swapping the recommended yarn for something in your stash, match the yardage per skein rather than just the weight category. A worsted-weight cotton with less yardage per ball than the pattern’s yarn will leave you short before the top is finished.
2. Classic Ribbed Crop for Everyday Wear
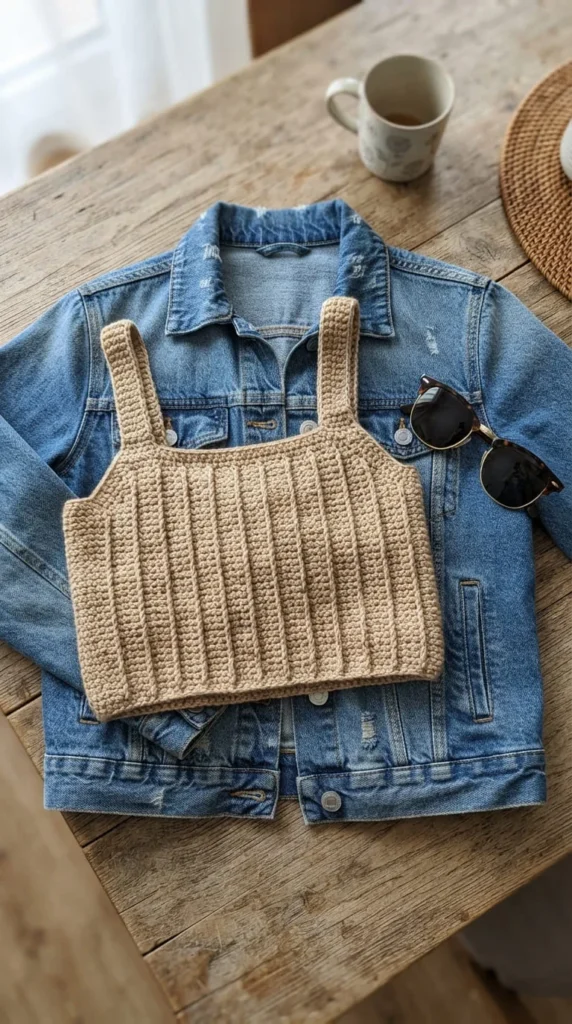
This is the top you’ll reach for constantly once it’s finished. Worked in front-post and back-post double crochet, the ribbed crop has natural stretch and a snug, structured fit that pairs easily with jeans, shorts, or a skirt without needing to think too hard about styling.
Ribbing takes a bit of practice since you’re working around the post of the stitch rather than into the top loop, but once it clicks, it becomes second nature fast.
Because ribbing pulls in slightly compared to plain double crochet, swatch first and measure your gauge after a light stretch, not just at rest, so your finished size matches your body rather than the relaxed swatch measurement.
Mistake to avoid: losing track of which post you worked into last is the most common ribbing error for beginners. Place a stitch marker at the start of every row until the rhythm feels automatic — it only takes a few rows before you won’t need it anymore.
3. Scallop-Edge Cami for Date Night
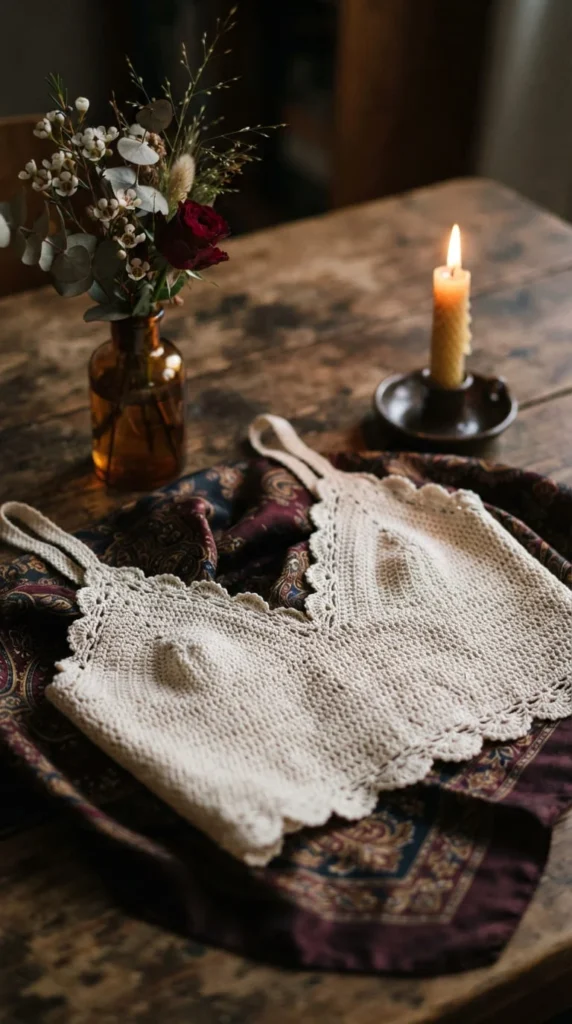
A plain cami top gets an instant upgrade with a scalloped trim along the neckline and hem. The scallops are formed in the final row by working clusters of double crochet into single spaces without joining them flat, which creates the soft wave shape without any extra stitches to learn beyond what you already know.
This top works best in a slightly drapier cotton-acrylic blend rather than a stiff pure cotton, since the extra movement makes the scallops flutter instead of sitting rigid.
Pair it with high-waisted trousers or a slip skirt, and it reads as a finished outfit rather than a “craft project,” which matters if you’re building confidence in wearing what you make out of the house.
Drape tip: if your finished top feels stiffer than you’d like, going up half a hook size loosens the fabric enough to drape properly without changing the stitch count or the pattern’s shaping.
4. Lacy V-Neck Top for Garden Parties
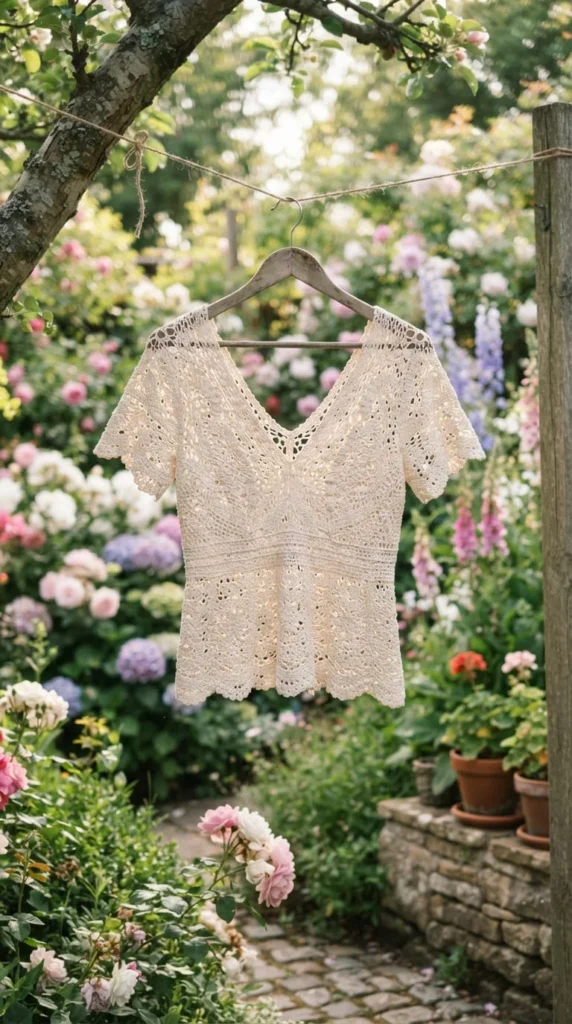
Lace patterns look intricate, but many beginner-level versions are really just a repeated chain-and-double-crochet sequence, the same building blocks used in filet crochet. This V-neck lace top uses that repeat across the body, with the V simply formed by skipping stitches gradually as you near the center front.
Because the lace pattern is open and airy, this top works well layered over a solid-color cami in a contrasting or complementary shade, which also solves any coverage concerns without changing a single stitch.
Garden party settings tend to call for lighter colors, and pastel or cream cotton yarn photographs especially well against greenery if you’re documenting your handmade wardrobe for yourself or online.
Coverage note: if the open lace pattern feels too revealing on its own, work an extra inch of solid stitches at the underarm and side seams before switching to the lace repeat, so the sheerest part sits higher on the body.
5. Colorblock Racerback for Weekend Errands
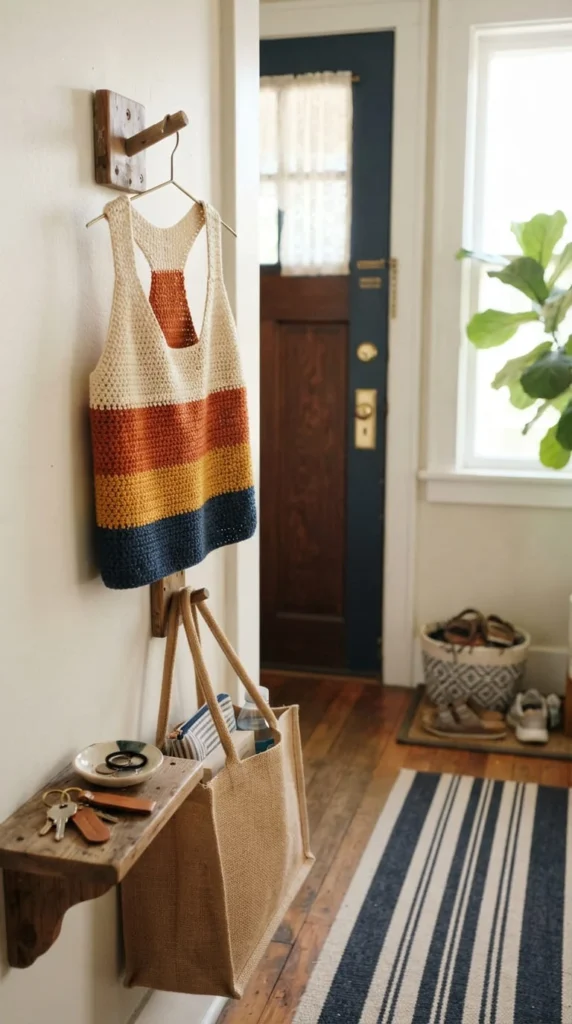
A racerback tank narrows the straps toward the center back, which keeps them from slipping and makes this one of the more practical, wearable tops on this list. Working it in two or three color blocks rather than a single solid color is an easy way to practice joining new yarn without constant switching.
Plan your color sequence before starting: a light base color with one bold accent block near the hem or straps reads as intentional, while random switches can look more chaotic than planned.
Weave in your ends as you go rather than saving them all for the end. It’s a small habit that saves a tedious finishing session and keeps color joins secure from day one.
Cost estimate: because this top uses moderate yardage and works up in worsted weight, most beginners finish it using one full skein of a main color and a partial skein of an accent color, keeping material costs low.
6. Openwork Kimono-Sleeve Top for Layering
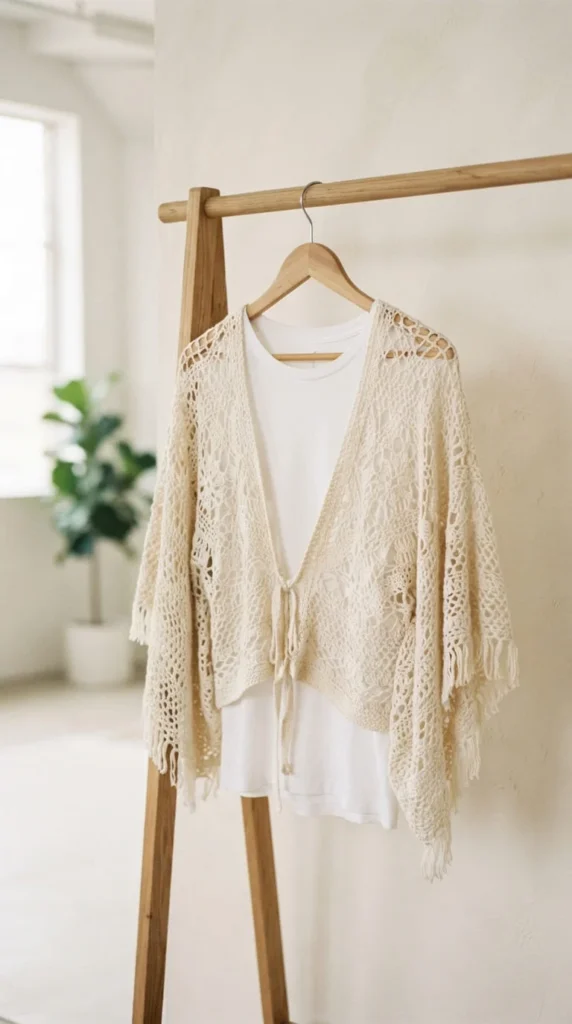
This piece is built to be layered rather than worn alone, which makes it a smart pick if you want a project that gets used through more of the year than a typical summer top. Wide, dropped kimono sleeves are simply rectangles attached at the shoulder seam, without any of the more complex shaping raglan or set-in sleeves require.
An open mesh or shell stitch across the body keeps it lightweight, while the loose, flowing sleeves add movement without adding fitting complexity.
Because the sleeves are rectangular, this is a good pattern for practicing even tension across a wide panel, since any inconsistency shows up clearly in a large flat piece of fabric.
Wardrobe tip: layer this over a fitted tank or bodysuit for a finished daytime look, or over a swimsuit as a lightweight beach cover-up — one project, two completely different wears.
7. Preppy Striped Polo-Style Top
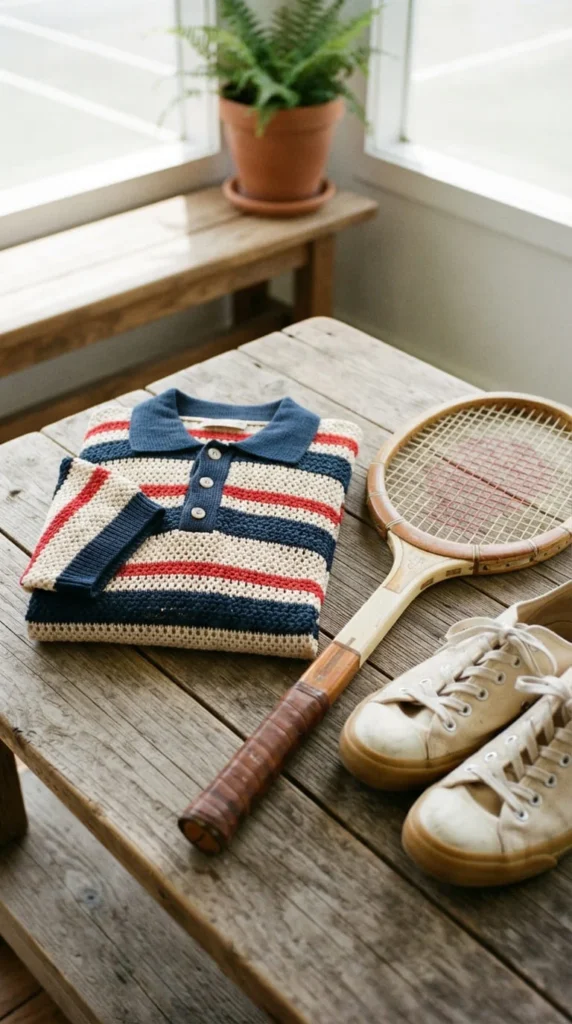
Stripes plus a small folded collar give this top a preppy, polished feel that stands apart from the breezier boho styles earlier on this list. The collar is just a rectangle of single crochet folded and attached at the neckline, a technique that transfers directly to future sweater or cardigan projects.
Horizontal stripes are one of the most forgiving ways to practice color changes, since you’re switching at the start of a row rather than mid-row, which keeps the join clean and easy to hide.
A structured cotton yarn holds the collar shape better than a very soft or drapey fiber, so this is a good project for trying a firmer cotton than you might use for a flowier halter or cami.
Fit note: work a swatch and check your row gauge specifically, not just stitch gauge, since stripe width depends on how many rows you work per color before switching.
8. Y2K-Inspired Baby Tee
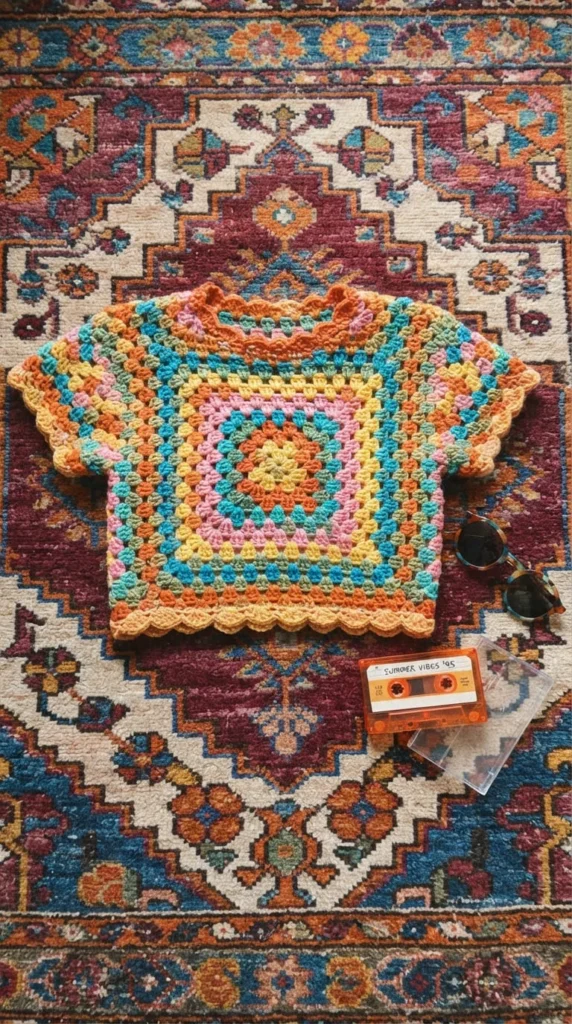
Short, fitted, and cropped just above the waistband, this baby tee silhouette leans into a nostalgic look that’s easy to build using basic single or half double crochet in the round. Working in the round from the hem upward avoids side seams entirely, so there’s less finishing work once the stitching is done.
Because this top sits close to the body, gauge matters more here than in looser styles. A swatch that’s even slightly off will show in the fit far more noticeably than it would in an oversized kimono top.
Bright, saturated colors suit this style well, and it’s a fun project for using a single vibrant skein rather than mixing multiple colors.
Sizing tip for a snug fit: work your swatch, wash it the way you plan to wash the finished top, then measure again. Cotton in particular can loosen slightly after washing, which affects how snug a fitted style like this actually sits.
9. Cottagecore Puff-Sleeve Blouse
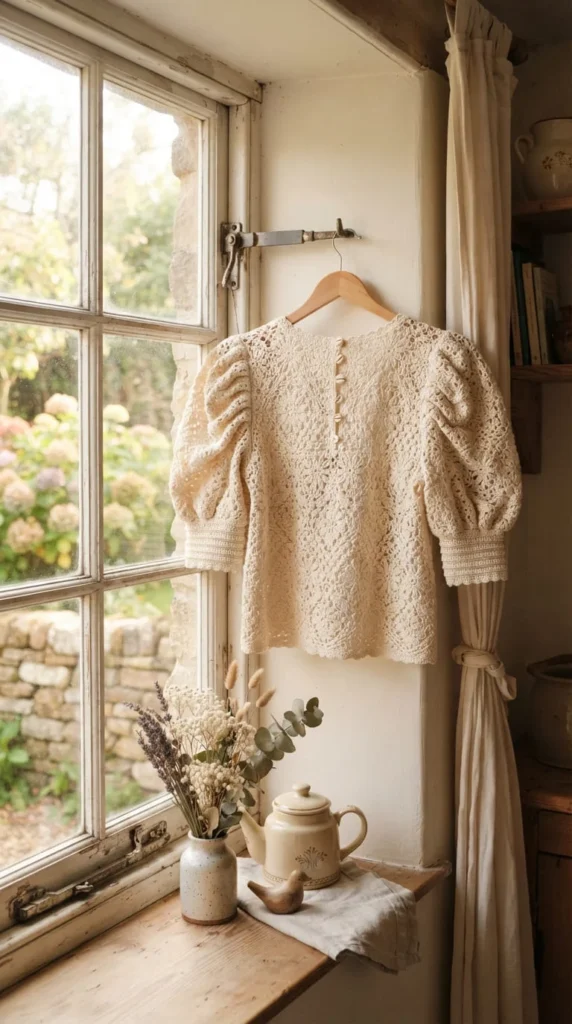
Gathered sleeves and a slightly loose, romantic silhouette give this top a cottagecore feel that pairs naturally with midi skirts and wide-brim hats. The puff is created by increasing stitches around the sleeve and then working a tighter gathering round at the cuff, a technique that looks far more advanced than the two extra rounds it actually takes.
This blouse uses more yarn per sleeve than a plain fitted top, so if you’re substituting yarn, add a bit of extra yardage to your estimate rather than assuming the pattern’s suggested amount will stretch to cover a different brand.
A soft, matte cotton or cotton-linen blend suits the relaxed, lived-in look of this style better than a shiny mercerized yarn, which tends to read as more polished than cottagecore aesthetics usually go for.
Practice tip: gather technique struggles are common on a first attempt. Crochet a small test cuff separately before working the real sleeve, so you’re not unraveling a nearly finished piece if the gather doesn’t look right the first time.
10. Beach Cover-Up Poncho Top
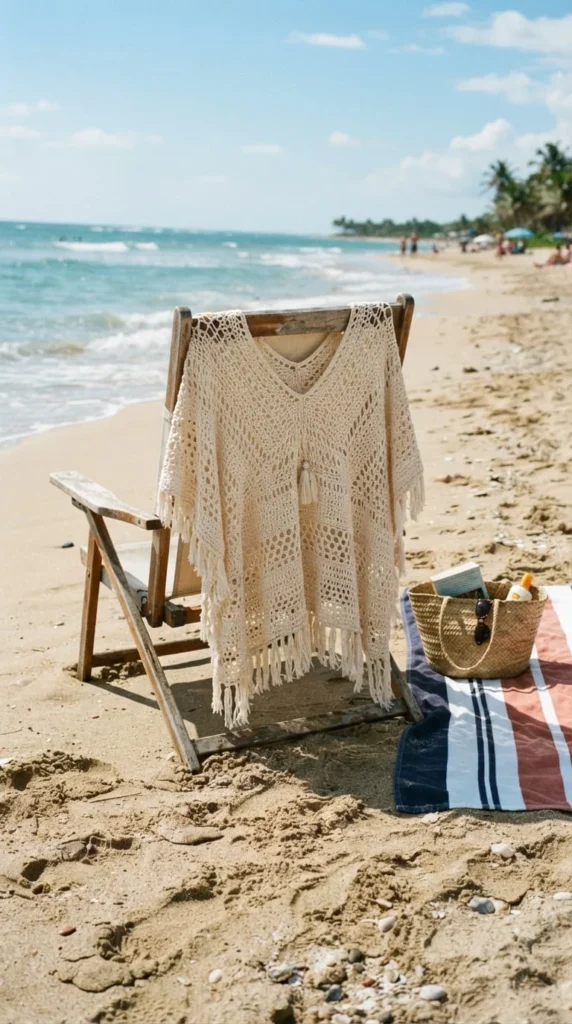
A poncho-style top skips fitted shaping entirely, which makes it one of the fastest projects on this list to finish. It’s essentially a rectangle or trapezoid worked flat, folded, and seamed partway up each side to leave openings for your arms and head.
Because there’s so little shaping involved, this is a good confidence-building project if you’ve felt discouraged by a more fitted pattern. You get a genuinely wearable result without tracking increases, decreases, or short rows.
An open mesh or filet stitch keeps this style breathable over a swimsuit, and the loose fit means gauge differences matter far less here than in a fitted tank or tee.
Climate tip: in especially humid or hot climates, a plant-based fiber like cotton or bamboo blend breathes noticeably better against damp skin than acrylic, which tends to feel warmer and stickier in direct sun.
11. Minimalist Square-Neck Top
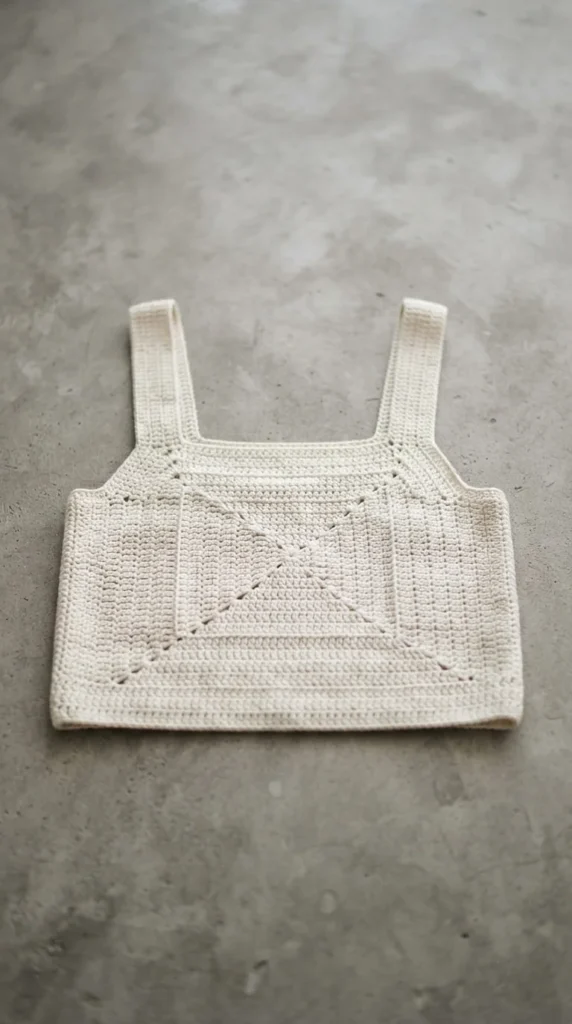
For a reader who wants something closer to ready-to-wear than “craft project,” this square-neck top strips away decorative stitches in favor of clean lines and a single neutral color. The squared neckline is built from straight edges rather than curves, which are genuinely easier to keep even in crochet than rounded shaping.
Working the front in two sections that meet at a defined center point gives you practice splitting a piece for a neckline, a skill that carries over to more structured garments later.
Because there’s no texture or color pattern to distract from mistakes, this top demands more consistent tension than a busier design would. Treat it as a tension-building exercise as much as a finished piece.
Styling note: a minimalist top like this works as a base layer under blazers and cardigans just as easily as it works alone, making it one of the more versatile pieces in a handmade wardrobe.
12. Resort Wear Crochet Kaftan Top
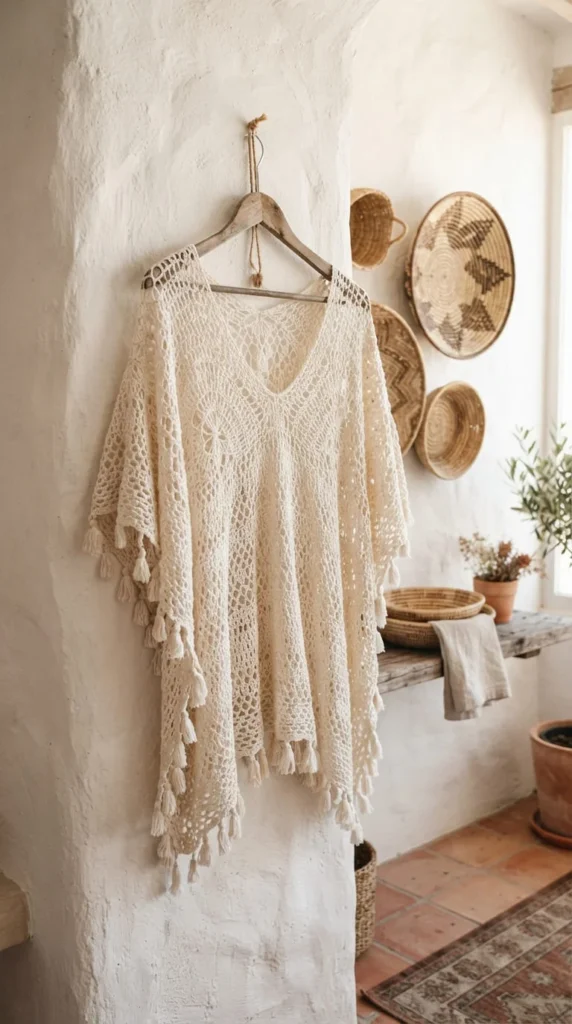
Loose and flowing, a kaftan-style top is built from wide rectangular panels joined at the shoulders and sides, leaving generous openings for movement and airflow. This is a genuinely low-stress project because the fit is meant to be relaxed, so small measurement differences barely register in the final result.
An openwork stitch across the body keeps the kaftan from feeling heavy in warm weather, while a solid border at the neckline and sleeve openings adds a bit of structure so the piece doesn’t feel shapeless.
This top uses a significant amount of yarn compared to a fitted tank, so it’s worth checking total yardage requirements carefully if you’re working from stash yarn rather than buying enough for the whole project up front.
Time estimate: because of the yardage and repetitive stitch pattern, most beginners spend somewhere between ten and fifteen hours on a kaftan top, often finishing it across several weekends rather than one sitting.
13. Textured Popcorn Stitch Top for Cool Evenings
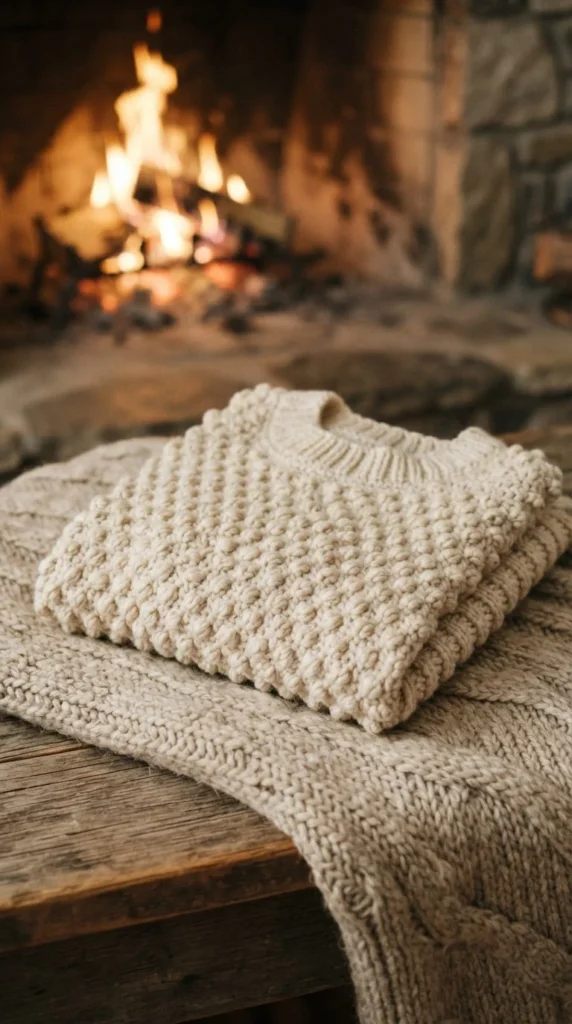
Popcorn stitch creates small raised bumps across the fabric by working several double crochet stitches into one space, then closing them together at the top. It’s a satisfying texture to learn because the visual payoff is dramatic compared to how simple the actual technique is.
This top uses popcorn stitch as an accent across the yoke or hem rather than the entire body, keeping the project from becoming too dense or heavy, which popcorn stitch can do if overused across a full garment.
Because popcorn stitch pulls the fabric in slightly compared to plain double crochet, swatch a small section before deciding how much of the top to cover in texture, so your finished measurements stay predictable.
Fabric weight tip: this style works better as a transitional piece for cooler summer evenings or breezy climates than as an ultra-lightweight top, since the raised texture adds a bit more warmth and structure than an open mesh stitch would.
14. Braided Strap Bandeau Top
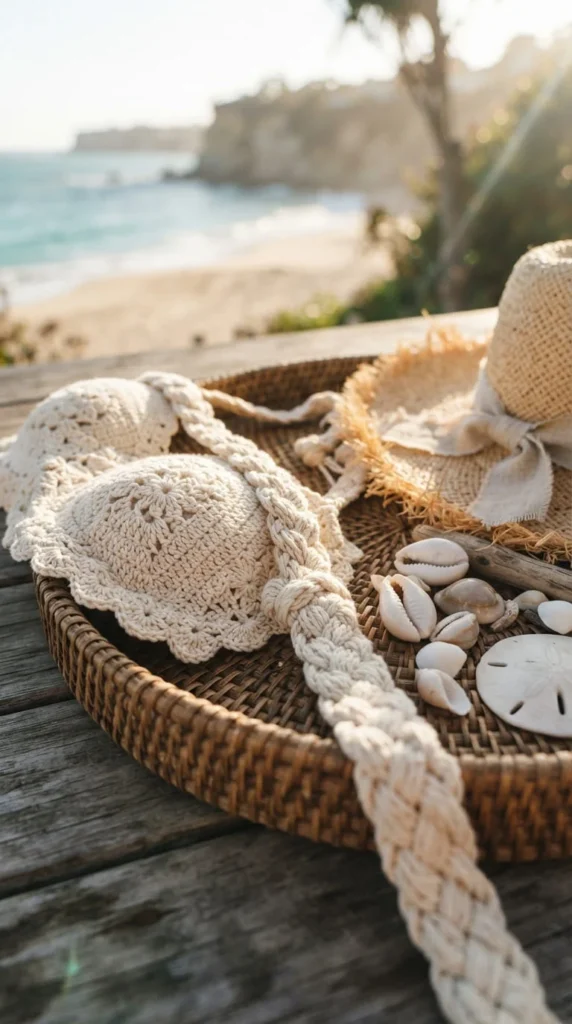
A simple crocheted tube becomes a bandeau top with the addition of braided straps, made by crocheting three long chains and braiding them together like hair before attaching them at the shoulders. It’s a nice low-pressure way to add a decorative detail without learning a new stitch.
Because a bandeau relies on close, even tension to hold its shape without slipping, this is a good project for practicing consistent stitch height across a small, manageable piece before attempting a larger fitted garment.
Line the inside edge with a strip of soft elastic or ribbon if you want extra grip and hold, especially if you’re planning to wear this layered under an open top rather than as outerwear on its own.
Practical use: this is one of the quickest projects on the list, often finishable in a single afternoon, which makes it a good confidence boost between longer projects elsewhere on this list.
15. Ombre Gradient Tank
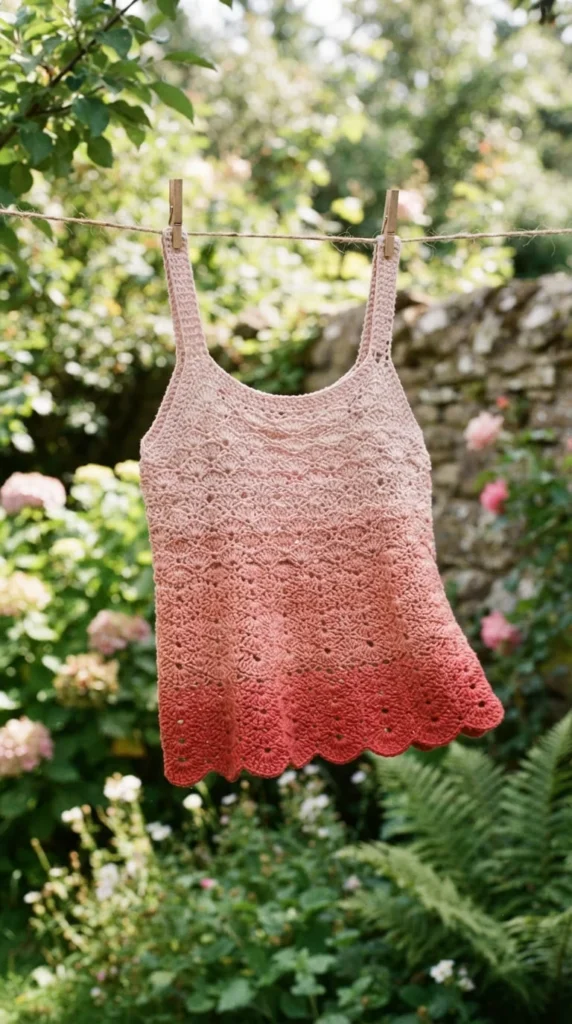
Working with a single gradient or ombre yarn cake gives you a color-fading effect without ever needing to switch skeins or weave in extra ends. As you crochet, the color shifts gradually on its own, which makes this a low-effort way to add visual interest to an otherwise plain tank pattern.
Because the color changes happen at whatever rate the yarn manufacturer set, work a small swatch first to see how quickly the gradient shifts at your gauge, so you can plan the top’s length around where you want each color transition to land.
This project is a nice one for readers who enjoy color but don’t want the extra step of managing multiple skeins and color-change joins.
Yarn note: gradient cakes tend to cost more per skein than solid colors of the same weight, but they eliminate the need to buy and coordinate multiple colors separately, which can even out the total cost.
16. Long-Line Duster Vest Top
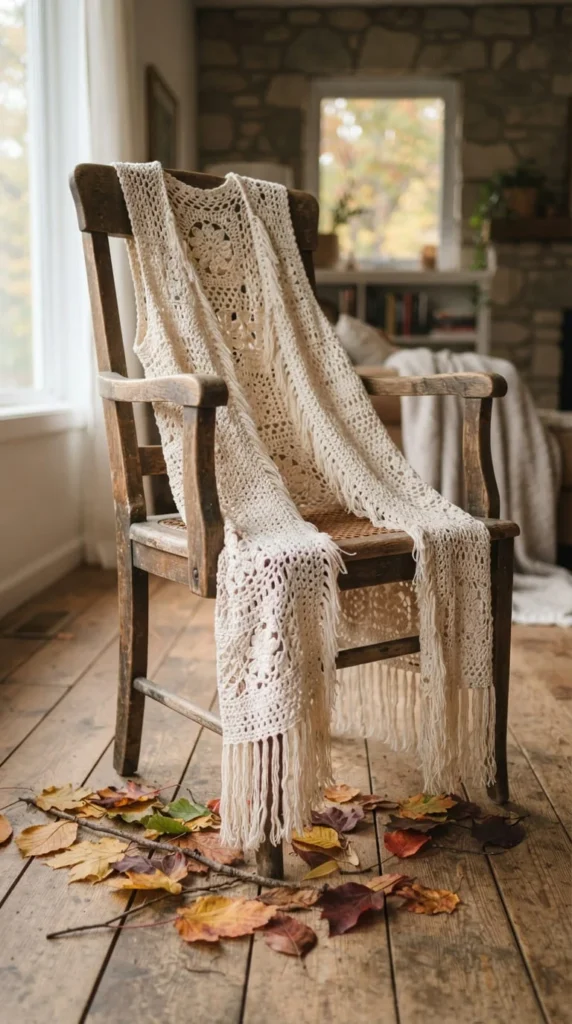
An open-front duster vest extends past the hip and layers over a plain tank or tee, giving you a piece that works through more of the year than a strictly summer top. It’s worked in two long panels joined only at the shoulders, left open down the front and sides, which keeps the construction simple despite the longer length.
Because there’s no side seam to hold the panels together, this style is more forgiving of small width differences between your gauge and the pattern’s than a fitted, fully seamed top would be.
A drapier yarn, like a cotton-bamboo or cotton-modal blend, makes the vest move and flow rather than hanging stiffly, which matters more here than in a shorter, more structured piece.
Layering idea: pair this over the ribbed crop or square-neck top from earlier in this list for a complete, coordinated handmade outfit built entirely from patterns on this page.
17. Cropped Cardigan-Style Button Top
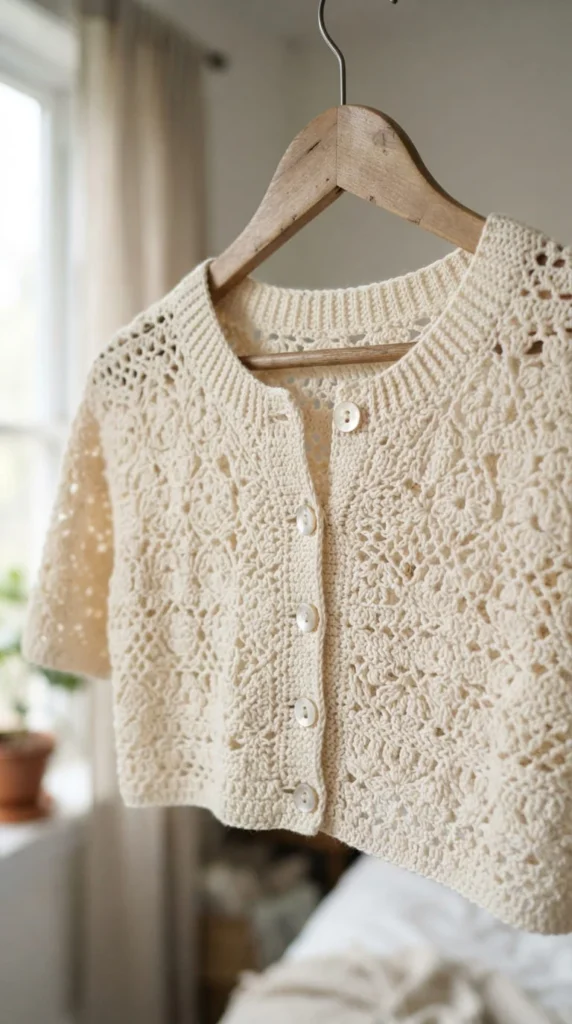
A button-front placket turns a simple crop top into something that reads as a small cardigan, which gives you a piece that layers just as easily as it stands alone. The placket is a strip of single crochet with evenly spaced buttonholes, a genuinely approachable first attempt at buttonholes if you haven’t tried them before.
Space your buttonholes slightly closer together than you think you need, since gaps that feel snug when the top is new tend to loosen slightly with wear and washing.
This top works especially well in a two-color version, with the button band in a contrasting shade from the body, which highlights the detail without requiring any extra technique beyond a basic color change.
Repair tip: if a buttonhole stretches out over time, reinforce it with a few whip stitches in matching yarn around the edge rather than remaking the whole placket. It takes minutes and extends the life of the top significantly.
18. Netted Swim Cover Top
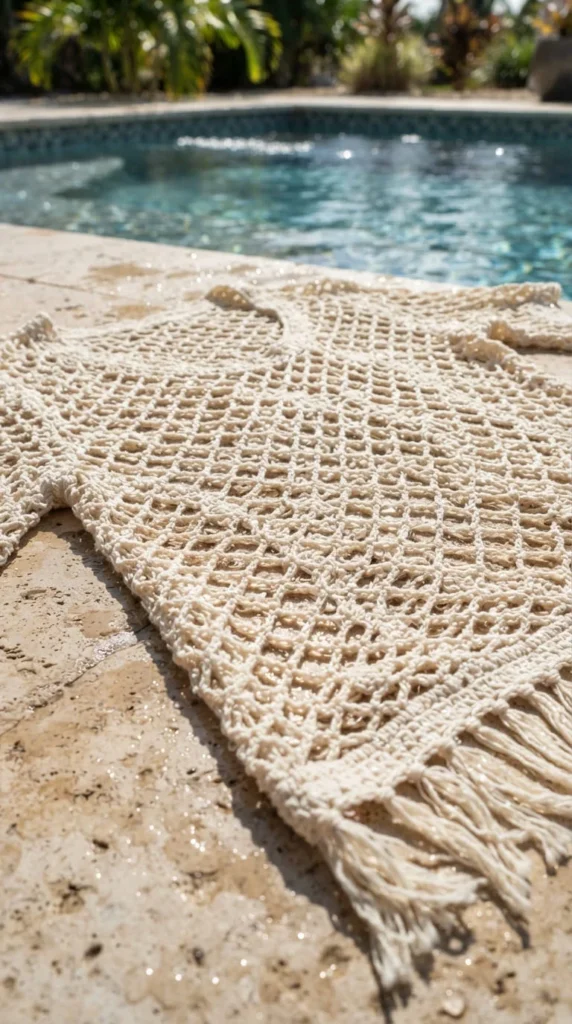
Built entirely from an open net stitch, this top is meant to be worn over a swimsuit rather than alone, which takes the pressure off worrying about coverage or lining. The net is formed with a simple chain-and-single-crochet repeat, one of the most beginner-accessible open stitches available.
Because this top isn’t meant to be a standalone garment, gauge and exact sizing matter less than in a fitted tank — a little extra ease actually suits the relaxed, oversized way most people wear swim cover-ups.
A quick-drying acrylic or acrylic-cotton blend suits this piece better than pure cotton, which can feel heavy and slow to dry after repeated contact with pool or ocean water.
Care tip: rinse this top in fresh water after wearing it near a pool or the ocean, and lay it flat to dry rather than hanging it while wet, since chlorine and salt water can weaken fibers and stretch a wet, hanging garment out of shape.
19. Asymmetric Hem Festival Top
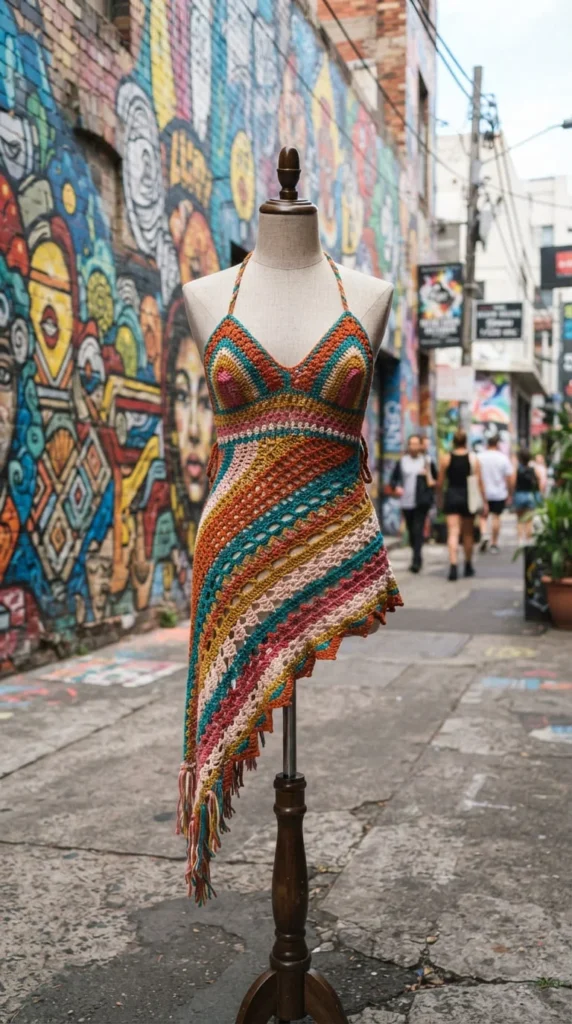
A hem that dips lower on one side than the other gives an otherwise simple tank a dynamic, festival-ready shape. The asymmetry comes from working a few extra rows on one side before joining both panels at the shoulder, rather than any complicated shaping technique.
This is a nice project for building confidence with short rows in a low-stakes way, since the uneven hem is meant to look intentional, so small variations in your short-row count won’t ruin the overall effect the way they might in a more precise pattern.
Pair this top with high-waisted shorts or a fitted skirt so the longer side of the hem has room to move without looking accidental.
Mistake audit: if your asymmetry looks lopsided rather than intentional, compare your row counts on each side against the pattern before blocking. Catching the difference before you wash and shape the piece is much easier than trying to fix it afterward.
20. Vintage-Inspired Puff Collar Top
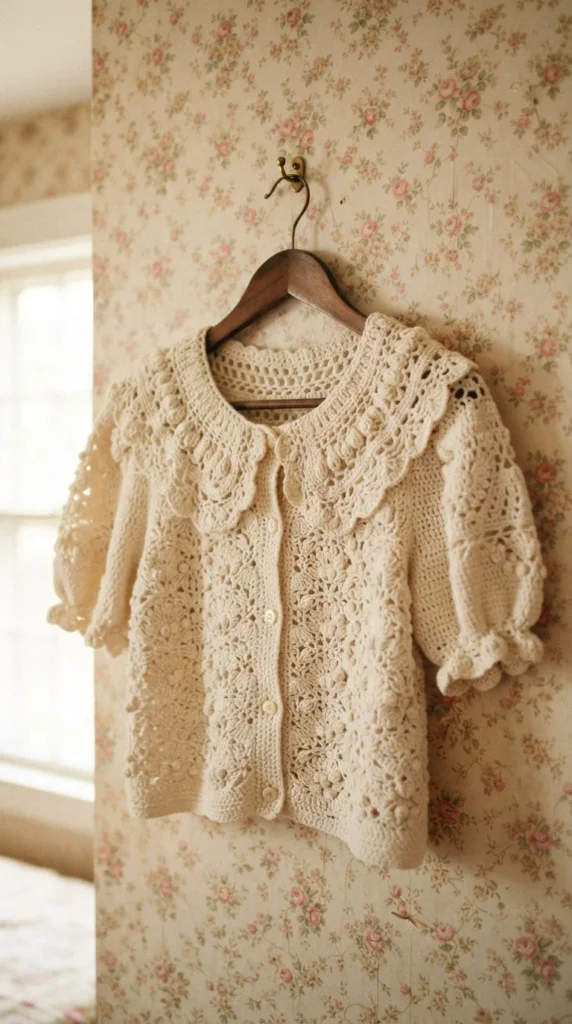
A rounded, slightly puffed collar gives this top a vintage feel reminiscent of older knitwear silhouettes. The collar is worked separately as a small half-circle shape, using the same increase technique as a circle yoke, then attached around the neckline once both pieces are finished.
Because the collar is made separately, mistakes here are low-risk. If it doesn’t turn out the way you want, you can simply remake just the collar rather than unraveling the entire top.
A slightly fuzzy or brushed yarn, like a light mohair blend used only for the collar, adds a soft, vintage texture without committing the whole garment to a fussier fiber that might be harder to work with as a beginner.
Marker tip: place a stitch marker at the exact center of the collar before attaching it to the neckline, matching it to the center front of the top, so the collar sits evenly rather than shifting to one side once it’s sewn on.
21. Convertible Halter-to-Tank Top
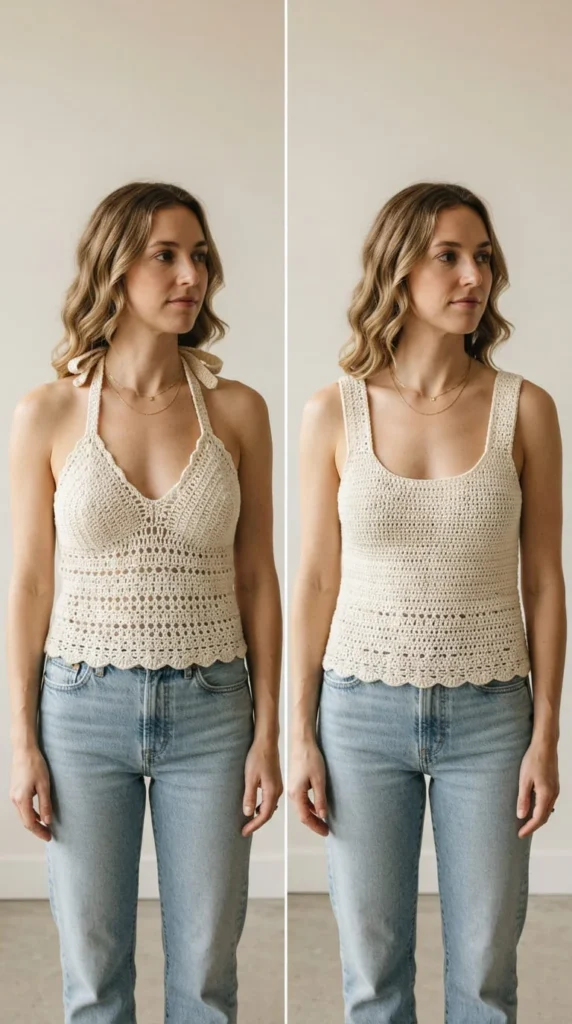
This pattern is built with detachable or repositionable straps, so the same top can be worn as a halter one day and a standard tank the next. Two sets of straps are crocheted separately and attached with small button loops or snaps, giving you two looks from a single project.
This is a good pattern for practicing how to attach a finished piece neatly to a garment after the fact, a skill that’s useful well beyond this specific top.
Because you’re making two strap options, keep careful notes on your row and stitch counts for each version, since even small differences in length will be obvious once you switch between the two styles.
Grading note: if you want to make this top in a different size than the pattern’s default, scale the body width evenly across your row count first, then remeasure and adjust strap length separately, since strap placement depends on the finished body width rather than the original pattern’s numbers.
22. Statement Sleeve Blouse Top
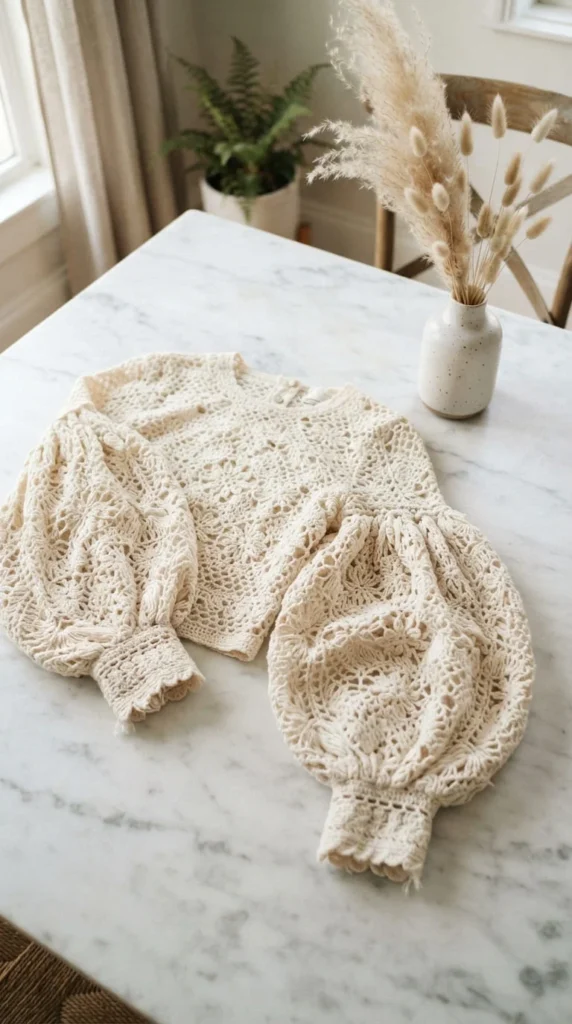
Oversized, dramatic sleeves turn a plain crochet body into something that looks considerably more elevated than the effort it actually took. The sleeves are worked as large rectangles or gently flared trapezoids, gathered at the cuff, then attached at a dropped shoulder line rather than a fitted armhole.
Because the sleeves are the focal point, keep the body of the top simple — plain double crochet or half double crochet lets the statement sleeves stand out instead of competing with a busy stitch pattern elsewhere.
This is a heavier project in terms of total yarn used, so budget extra time and yardage compared to a plain sleeveless tank earlier on this list.
Ergonomic tip: working large sleeve panels with thick cotton yarn over several sittings can tire your hands and wrists faster than smaller projects. Take short breaks every twenty minutes or so, and consider a hook with a softer, cushioned grip if cotton yarn tends to leave your hands sore.
Conclusion
A handmade wardrobe built from crochet tops doesn’t need to happen all at once — pick one pattern from this list that fits an outfit you’re already picturing, whether that’s a ribbed crop for weekend errands or a flowing kaftan for a warm-weather trip, and let the rest fill in over time as your skills grow. Keep track of which hook sizes, yarns, and small adjustments worked best for your body and your tension, since that record turns every future project into less guesswork and fewer redone rows. Mistakes like an uneven hem or a slightly tight gauge are part of the process rather than a sign to give up, and most of them are fixable with the small adjustments covered throughout this list. Choose the pattern that’s calling to you most, pick up a skein of yarn in a color you actually love, and start turning your hook time into pieces you’ll reach for all season.