
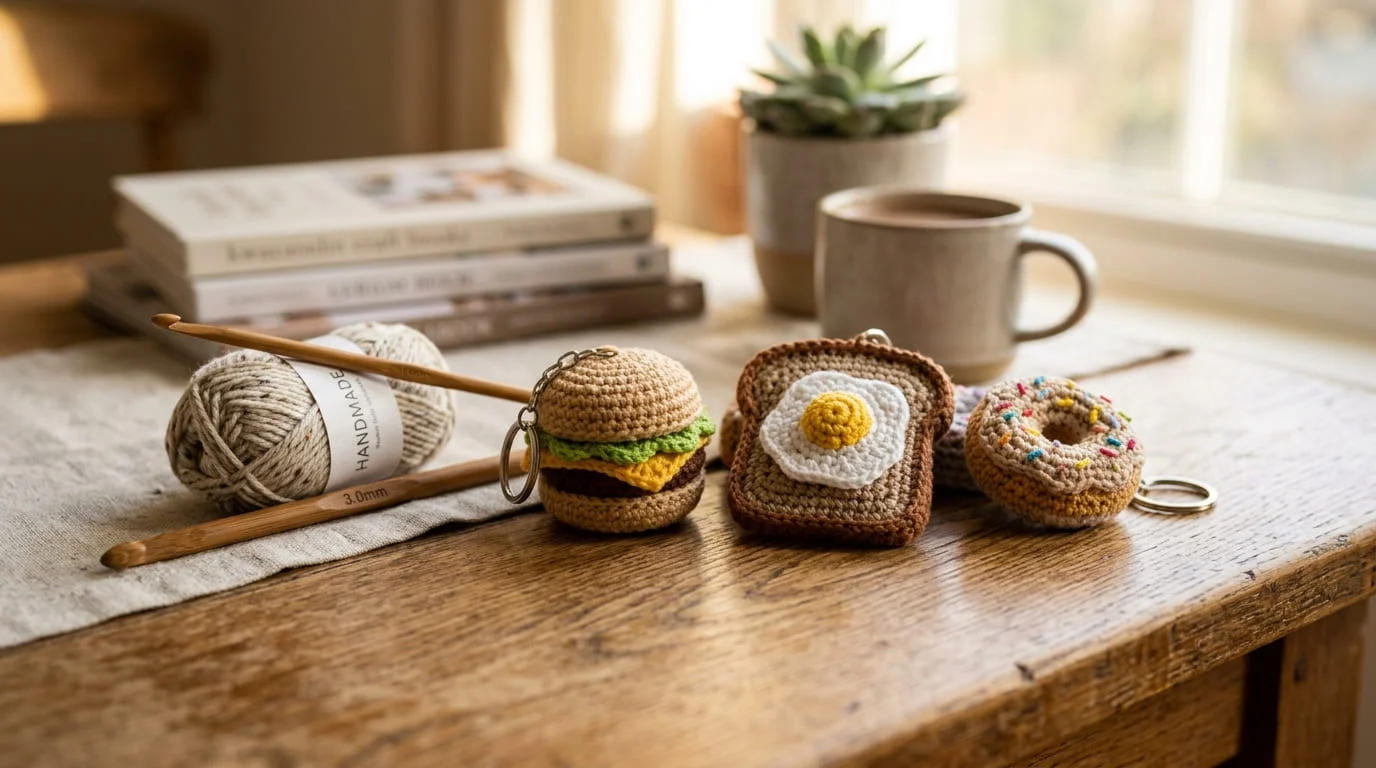
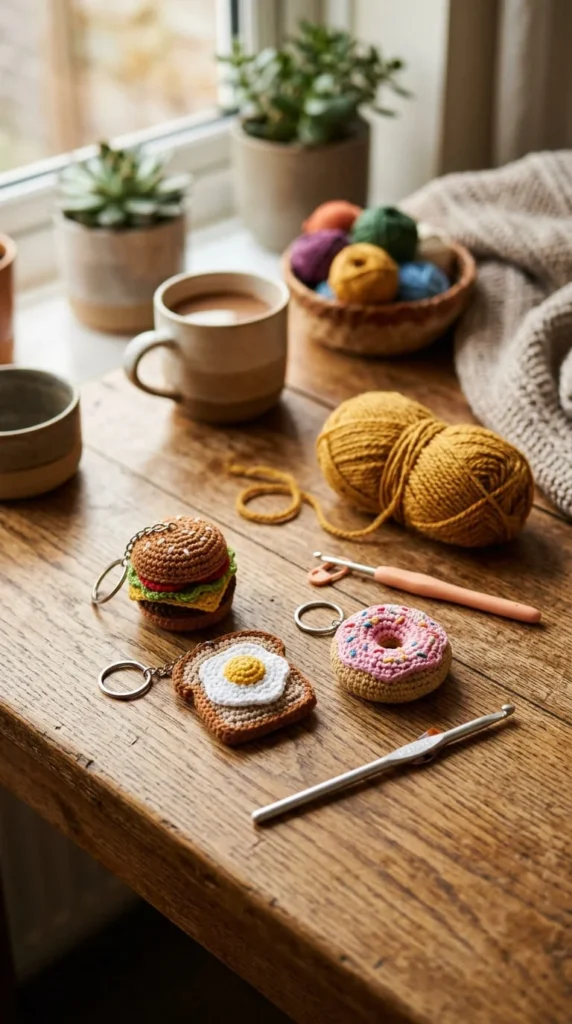
Crochet food keychains have become the project people reach for when they want something small, funny, and finished in a single sitting. They turn a handful of yarn scraps into a tiny burger, a slice of toast, or a cup of coffee that clips right onto a bag. This list walks through more than twenty specific food keychain ideas, grouped by how they’re built and what makes each one work, so you can pick projects that match your skill level, your yarn stash, and whether you’re making these for yourself, for gifts, or for a growing craft table. Along the way you’ll find practical notes on hooks, hardware, and the small details that make a finished piece look intentional rather than rushed.
1. A Stacked Burger That Teaches Layer Construction
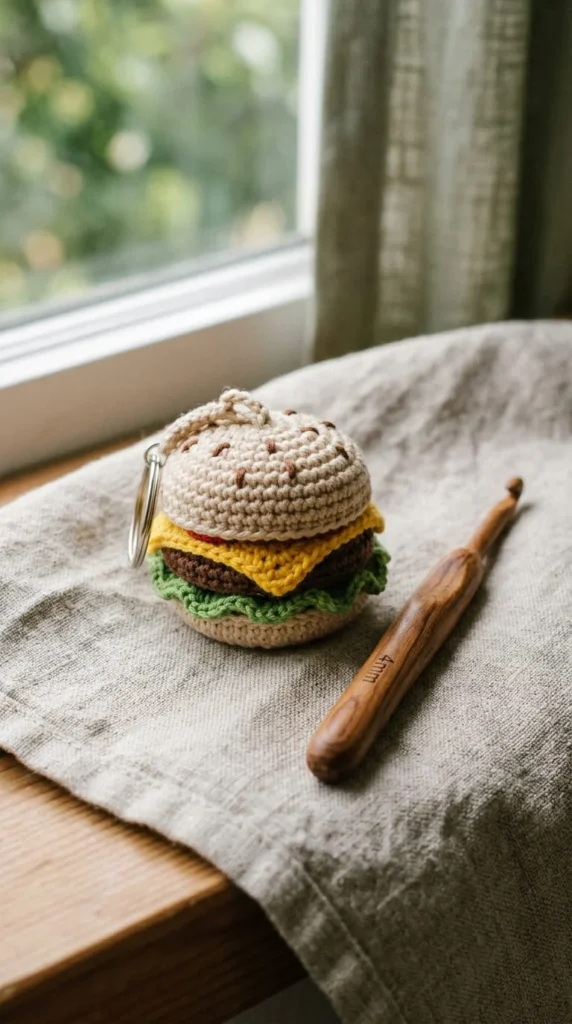
The burger keychain is one of the most requested food patterns for a reason — it looks complicated but is really just five or six separate flat and rounded pieces stacked and glued or sewn together. A top bun, bottom bun, a flattened brown patty, a wavy strip of lettuce, and a thin yellow cheese square are each worked individually before assembly.
This project is a good one for practicing how to make pieces “read” as their ingredient through shape alone. The cheese square gets slightly draped edges instead of straight ones, so it looks melted rather than stiff. The lettuce piece uses a scalloped or wavy edge worked in single crochet increases along one side.
A few build notes that matter more than they seem:
- Glue the layers lightly before sewing so they stay aligned while you stitch
- Keep the patty slightly smaller than the buns so it peeks out realistically
- A few small tan French knots on the top bun mimic sesame seeds without much effort
Once you’ve built one burger, the same layering logic transfers directly to a stacked sandwich or slider variation, just with different proportions.
2. Toast and Egg for a Breakfast-Themed Pair
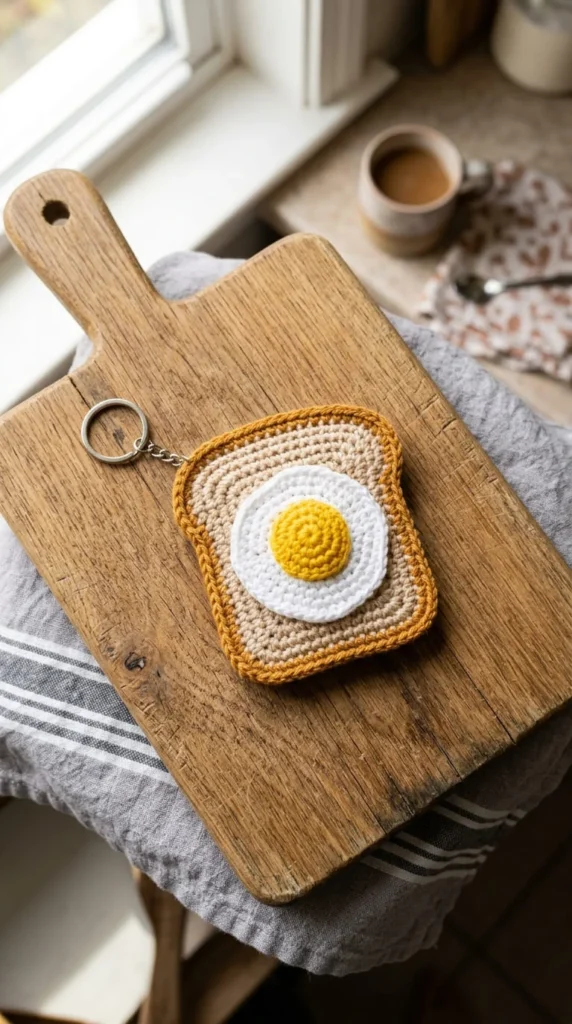
Toast with a fried egg on top is one of the simplest food shapes to crochet well, which makes it a strong pick if you’re newer to this hobby. The bread base is a rounded square worked flat, usually in a tan or golden-brown yarn with a slightly darker crust edge added as a border round.
The egg sits on top as a separate flat piece: a white oval base with a smaller yellow circle centered on it for the yolk. Because both pieces are flat, there’s no stuffing involved, which keeps the whole project quick and low-effort.
What separates a convincing toast-and-egg from a flat blob is mostly in the crust detail:
- Work the border round in a slightly darker brown to suggest a toasted edge
- Leave the yolk slightly off-center rather than perfectly placed, since fried eggs rarely sit dead-center
- A tiny bit of white “drip” stitched from the yolk toward one edge adds realism
Because this pairs so naturally with other breakfast items, it works well as the anchor piece in a themed morning-food bundle alongside pancakes or a coffee cup.
3. A Pancake Stack With Embroidered Syrup Drip
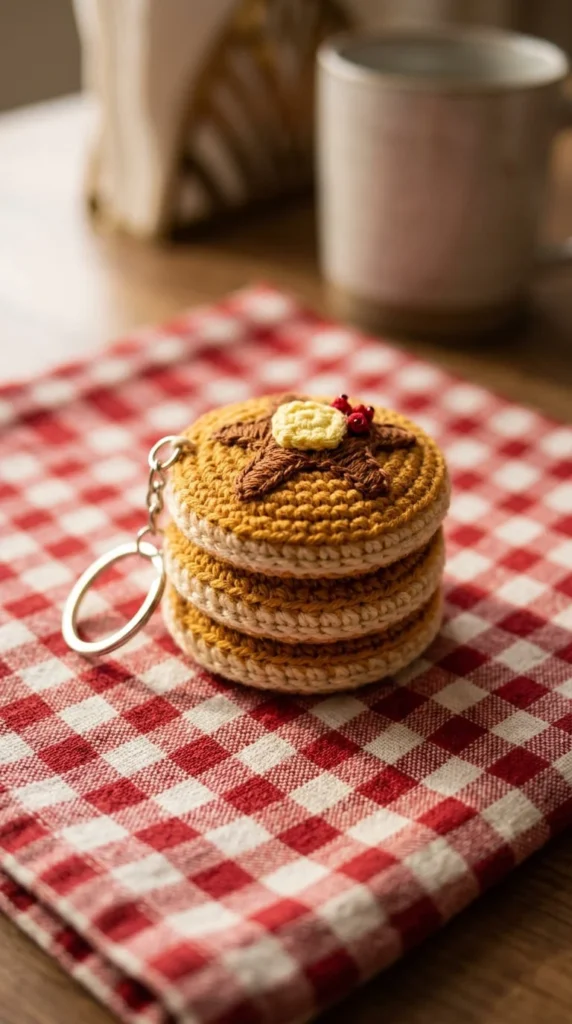
A pancake stack keychain is built from two or three flat, slightly domed circles stacked and sewn together, each one worked in golden-brown yarn with a subtle color shift between layers to suggest depth. The top layer usually gets a small pat of “butter” — a tiny yellow square sewn on slightly off-center.
The detail that makes this project feel finished is the syrup drip. Rather than crocheting it, most makers embroider a thin amber-colored line running down one side of the stack using a simple chain stitch or backstitch, letting it pool slightly at the base.
A few things worth knowing before starting:
- Slightly vary the size of each pancake layer, since real stacks are never perfectly uniform
- Stitch the syrup after assembly, once all layers are sewn together, so the line can flow naturally across the stack
- A satin or slightly glossy embroidery thread for the syrup reads more convincingly than matte yarn
This is a good project to practice subtle color shading between rounds, a skill that transfers well into shading other layered food items like cinnamon rolls or club sandwiches.
4. A Spiral Cinnamon Roll That Uses One Continuous Strip
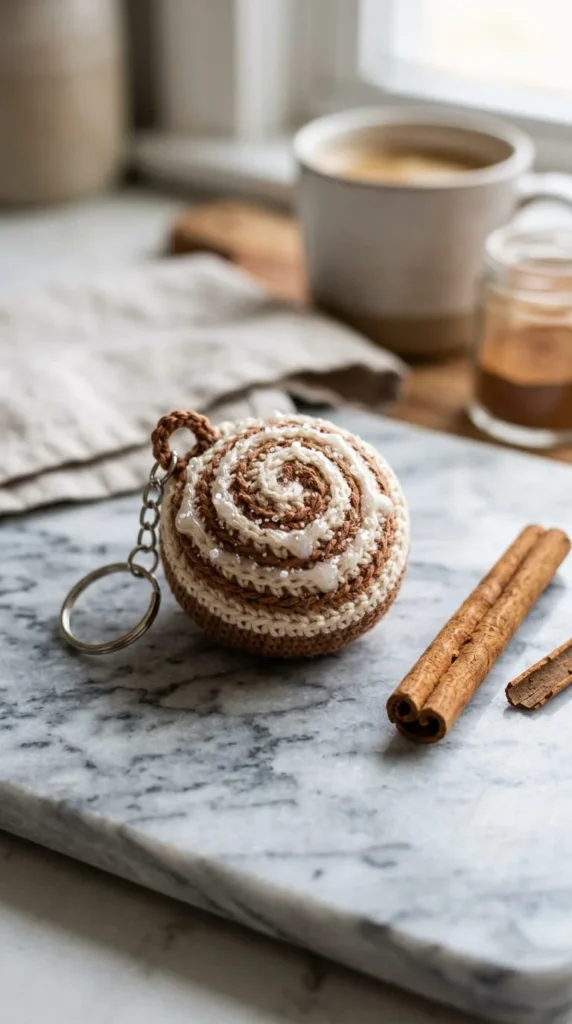
Cinnamon rolls look intricate but are usually made from a single long crocheted strip, coiled and stitched into a spiral rather than built from separate pieces. The strip alternates between a cream-colored dough section and a thin brown cinnamon-swirl section, worked as color changes along its length.
Coiling the strip evenly is the trickiest part of this project. Starting from the center and winding outward while sewing each new wrap to the one before keeps the spiral tight and even, rather than loose or lopsided.
A glaze detail on top finishes the look:
- A light drizzle pattern in white or pale yellow yarn, couched down in a loose zigzag, mimics icing without much bulk
- Keep the glaze off-center and uneven, since real icing drips unevenly
- A slightly fuzzy cream yarn for the dough sections gives a softer, more bread-like texture than smooth cotton
Because the technique here — coiling a striped strip into a spiral — is different from the flat or stacked construction used in most other food keychains on this list, it’s worth practicing on a larger scrap piece before attempting the mini keychain version.
5. A To-Go Coffee Cup With a Removable Lid Detail
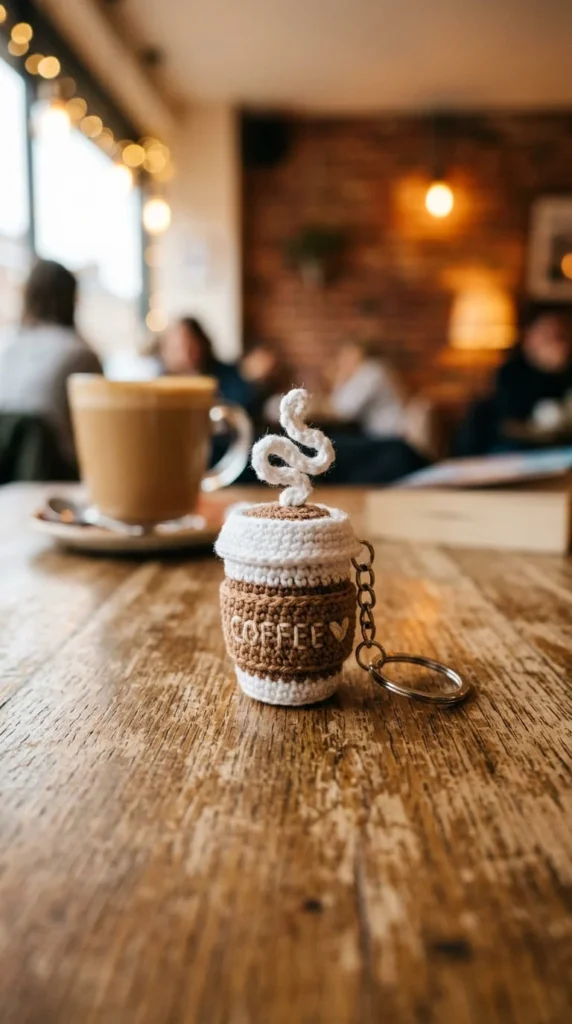
A coffee cup keychain is essentially a small cylinder worked in continuous rounds, with a contrasting band near the top to represent the cardboard sleeve and a domed lid piece attached on. Because the whole shape is simple geometry, this is one of the more approachable projects for someone still building confidence with continuous-round amigurumi.
The lid is what gives this piece personality. A slightly flattened dome in white or tan, with a small raised sipping tab worked as a tiny separate piece, makes the cup instantly recognizable rather than looking like a generic tube.
A few details that add character without much extra work:
- A thin embroidered “steam” swirl rising from the lid, worked in a light gray thread, suggests a hot drink
- The cardboard sleeve band can be worked in a contrasting texture stitch, like a basic ribbing, for visual interest
- Keep the cup body slightly narrower at the base than the top, mimicking the real taper of a to-go cup
This shape adapts easily into a cold drink version too, just by swapping the lid for a flat cover with a straw and switching the sleeve detail for a clear plastic look in pale yarn.
6. A Twisted Pretzel That Practices Shaping Skills
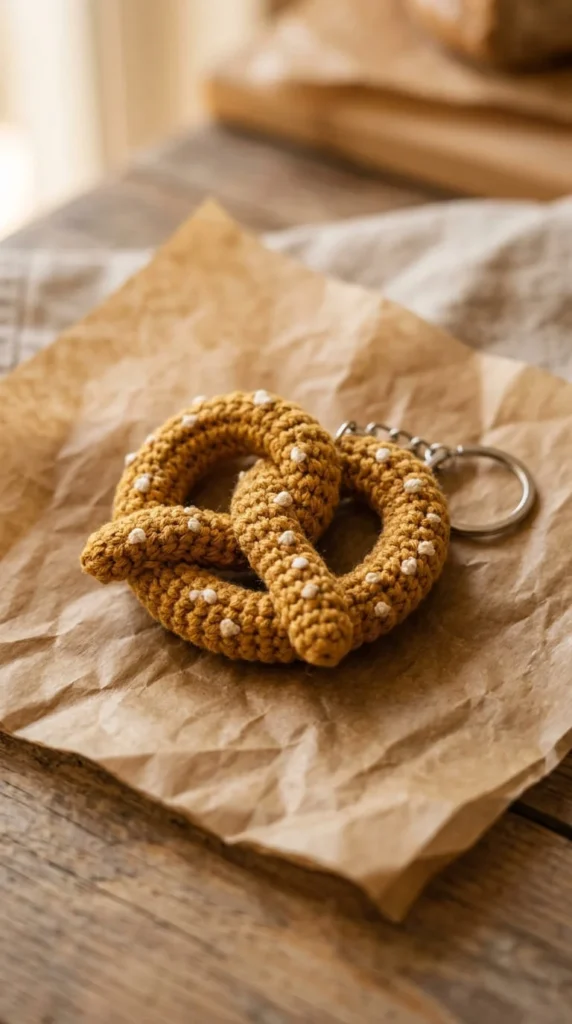
The pretzel is one of the more satisfying shapes to crochet because the twist is achieved through actual physical shaping rather than stitch pattern. A single long rope-like tube is crocheted first, then folded and crossed over itself in the classic pretzel knot before being tacked in place with a few hidden stitches.
Getting the twist to hold its shape takes a little patience. Light stuffing throughout the rope keeps it firm enough to fold without collapsing, and pinning the twist in place before sewing helps avoid an asymmetrical result.
Salt detail is what sells the realism here:
- Small white or cream French knots scattered unevenly across the surface mimic coarse pretzel salt
- A slightly darker golden-brown yarn at the twist’s high points suggests the natural baked sheen
- Keep the rope thickness consistent along its length so the finished twist looks proportional
Because the folding technique here is unlike anything else on this list, it’s a good confidence-builder for anyone wanting to move beyond straightforward round or flat amigurumi shapes into more sculptural crochet work.
7. A Pizza Slice Built From a Simple Triangle Base
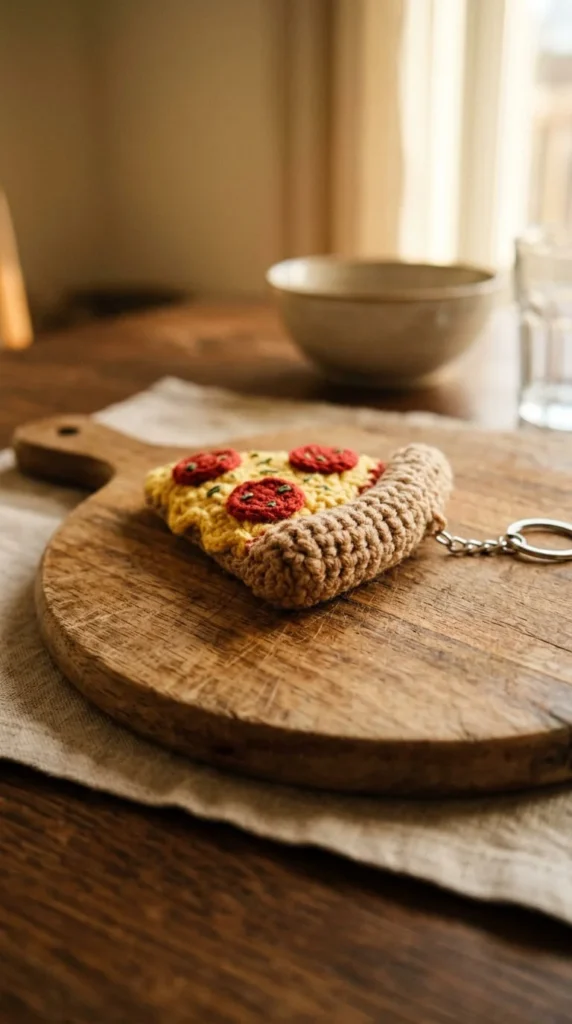
A pizza slice keychain starts as a basic triangle, worked flat in rows rather than rounds, which makes it accessible even for someone who hasn’t tackled amigurumi shaping yet. The crust edge along the wide end gets a slightly puffier texture, often achieved with a row of bobble stitches or a doubled border.
Toppings are added as small separate pieces sewn onto the cheese-colored base: little red pepperoni circles, or whatever topping combination feels right. Keeping toppings slightly raised rather than flat against the surface adds dimension.
A few build tips specific to this shape:
- Work the cheese layer slightly larger than the crust triangle underneath, so a thin border peeks out realistically
- Vary pepperoni placement rather than spacing them in a perfect grid
- A subtle darker-yellow shading near the crust edge suggests browned cheese without extra stitches
Because the base triangle is so simple, this is a strong project for someone who wants a finished, recognizable food keychain without committing to a full evening of stuffing, shaping, and multi-piece assembly.
8. A French Fry Box That’s Really a Tiny Container Project
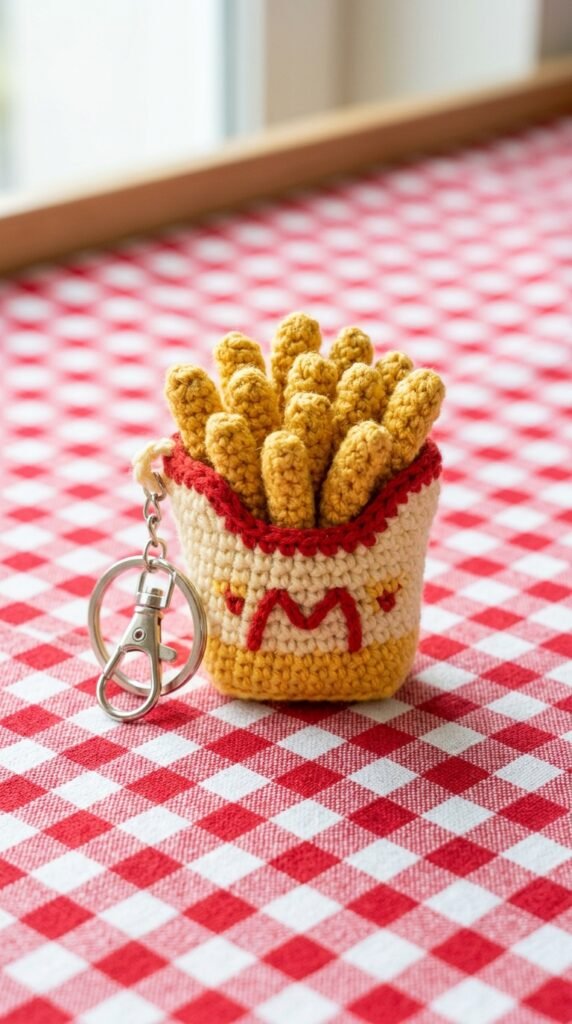
Fries in a container are a slightly different challenge than most food keychains, since the “container” itself is a small crocheted vessel rather than a solid shape. A red-and-white striped or plain red cup base, worked in rounds, holds three or four individual fry pieces that stand up out of the top.
Each fry is a thin rectangular tube, lightly stuffed or left unstuffed depending on how rigid you want them to stand. Gluing or sewing the fries into the container at slightly different heights and angles makes the arrangement look more natural than a perfectly even row.
Construction notes worth keeping in mind:
- The container needs a firm base, either through denser stitching or a small cardboard disc insert, so it doesn’t collapse under keyring weight
- Fries worked in a pale golden-yellow with slightly darker tips read more convincingly than a single flat color
- Leave 2–3 fries slightly bent rather than perfectly straight, mimicking how real fries look in a container
This project pairs naturally with the burger keychain for a matched fast-food set.
9. A Sandwich Cookie With a Visible Cream Layer
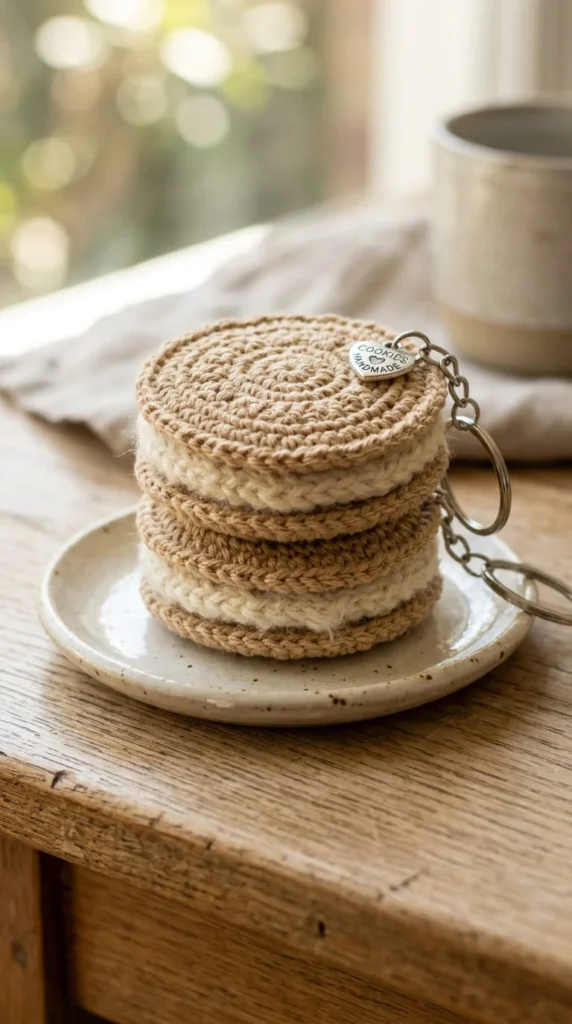
The classic dark chocolate sandwich cookie translates well into a keychain because the shape is just two identical flat rounds with a thin cream-colored layer sandwiched between them. Each dark round often gets a simple textured pattern — small raised bumps or a basic relief stitch — to suggest the embossed design on the real cookie.
The cream filling is the detail that takes this from “dark circle” to “recognizable cookie.” A slightly thicker ring of white or off-white yarn worked between the two dark halves, peeking out just past the edge, creates that familiar sandwich-cookie silhouette.
A few things that improve the finished look:
- Keep both dark rounds identical in size so the cookie sits level rather than lopsided
- Let the cream layer peek out evenly around the entire edge, not just on one side
- A very slightly domed shape on each dark round, rather than perfectly flat, adds a touch of realism
Because this shape is so simple, it’s a good candidate for batch-making in different flavors, like a golden vanilla version instead of chocolate, using the same construction with different colors.
10. A Cupcake With Piped-Look Frosting Texture
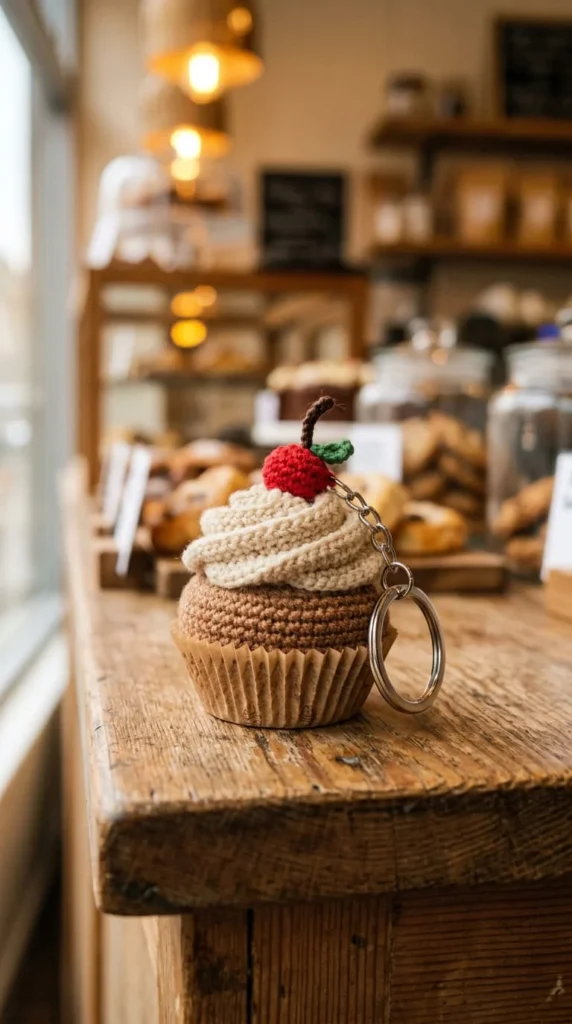
Cupcakes get their charm from the frosting swirl, and replicating that piped-icing look in yarn comes down to stitch choice rather than complicated shaping. A spiral of puff or bobble stitches worked in decreasing rounds toward the top mimics the ridged texture of piped buttercream far better than smooth single crochet would.
The base “cake” portion is a simple, slightly wider cylinder in a contrasting color, often with a small paper-liner texture worked as a ribbed or textured band around the bottom.
Finishing touches that make the biggest visual difference:
- A tiny cherry or sprinkle detail on top gives the eye somewhere to land
- Use a slightly variegated frosting yarn for subtle color depth without extra effort
- Keep the frosting swirl proportionally large compared to the cake base, since real cupcakes are often more frosting than cake
This is a strong project for practicing texture stitches in general, since the bobble-and-decrease technique used for the frosting swirl shows up again in other food projects like soft-serve ice cream or whipped cream toppings.
11. A Boba Milk Tea Cup With Layered Color Detail
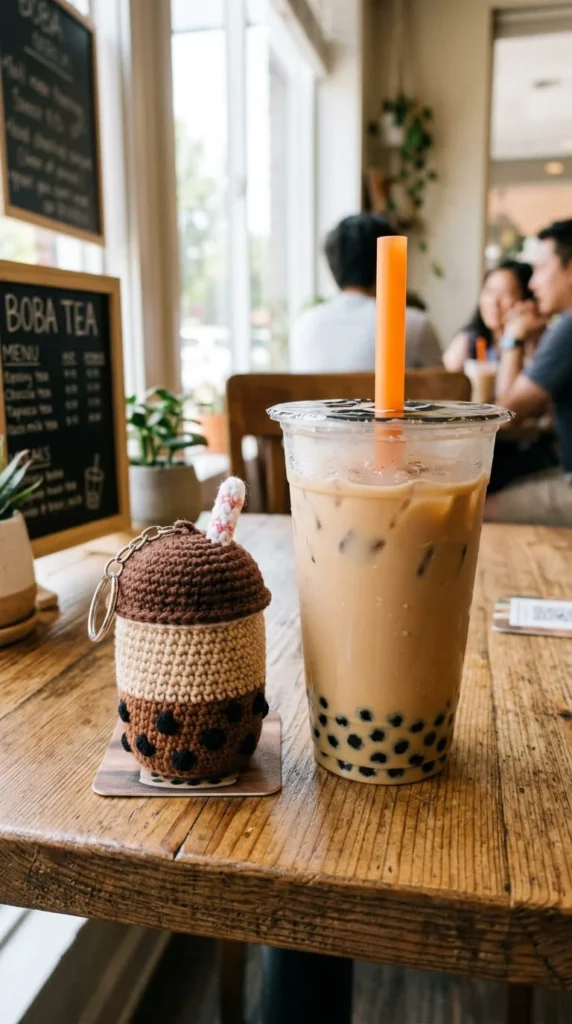
Boba tea keychains work by layering distinct color sections inside a clear-look cup shape — a pale tan or cream tea section, and a cluster of small dark brown or black dots representing tapioca pearls settled at the bottom.
The pearls are usually tiny individual crocheted spheres or simply embroidered French knots clustered at the base of the cup, visible through a lighter-colored “liquid” section worked above them. A thin straw, either crocheted as a narrow tube or represented with a piece of stiff cord, pokes out through the lid.
Getting the layered look right depends on a few choices:
- Work the pearl cluster first, then build the tea-colored body upward from that base
- A slightly translucent-looking pale yellow or cream yarn for the tea section suggests the drink without needing to be literally see-through
- Keep the straw slightly off-center, angled the way a real boba straw usually sits
This keychain has become popular partly because it photographs well against bright, colorful backgrounds, making it a strong pick if you’re building a shop listing that needs eye-catching product photos.
12. An Onigiri Rice Ball With a Simple Seaweed Wrap
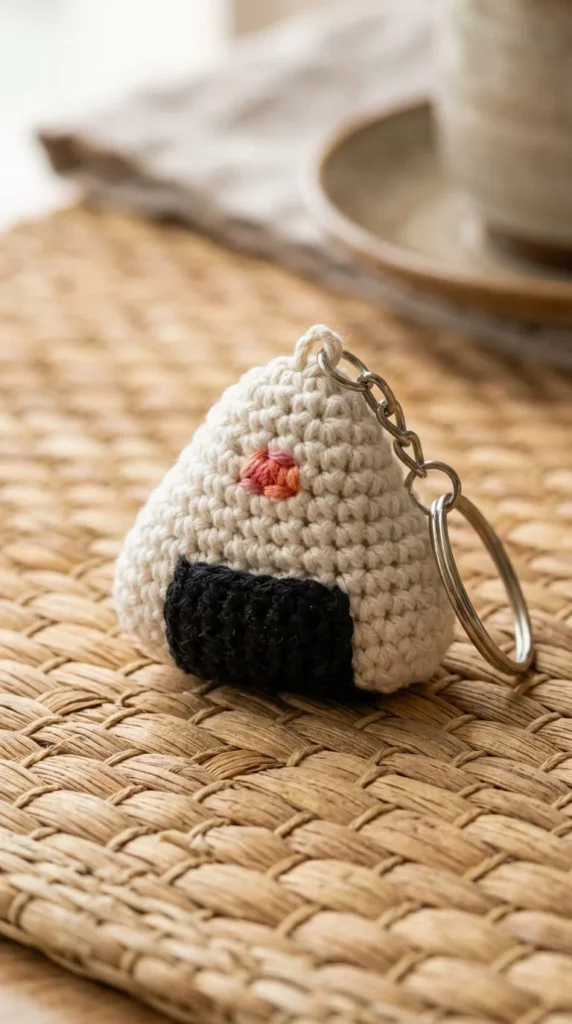
Onigiri offers a food keychain option outside the usual Western snack lineup, and the shape is refreshingly simple: a rounded triangle in white yarn, textured slightly to suggest individual rice grains, with a dark strip of “seaweed” wrapped around the base.
The seaweed wrap is typically a flat rectangular piece in black or very dark green, sewn around the lower portion of the triangle rather than crocheted as part of the main shape. This two-piece approach keeps the project simple while still capturing the recognizable look.
A few details worth getting right:
- A slightly bumpy texture stitch on the white body suggests individual rice grains without overcomplicating the pattern
- Leave a small gap or peek of filling color — pink for salmon, orange for something else — at the front if you want to suggest a filling
- Keep the seaweed wrap matte rather than glossy, since a shiny finish reads more like plastic than nori
Because this shape is worked mostly flat with one simple wrap piece, it’s a good entry point into food keychains inspired by cuisines outside the usual burger-and-dessert lineup, and it tends to stand out in a shop full of Western snack designs.
13. A Roasted Sweet Potato With a Textured Split
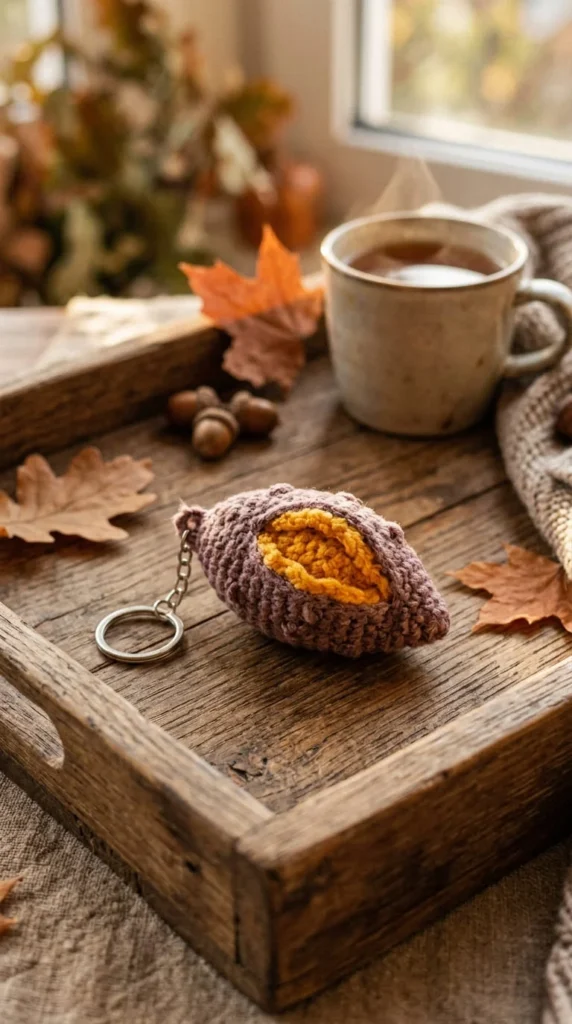
Roasted sweet potato keychains lean into texture more than most other food shapes on this list. The elongated oval body is worked in a deep purple-brown yarn with an intentionally uneven, slightly bumpy surface to mimic charred, roasted skin — a texture that’s forgiving of small tension inconsistencies, which actually works in your favor here.
A split down one side reveals a bright orange-yellow “flesh” section, usually a separate flat piece sewn into a shallow slit or gap left in the main body. This contrast between the dark exterior and bright interior is what makes the shape recognizable at a glance.
Practical notes for this project:
- Use a slightly fuzzy or textured yarn for the skin rather than smooth cotton, since imperfection reads as realism here
- Keep the flesh section slightly domed outward, like it’s steaming from the split
- A thin line of steam, embroidered the same way as the coffee cup detail, adds a nice finishing touch
This is a good project if you want something that looks different from the usual bright, glossy food keychains and leans into a warmer, more rustic color palette instead.
14. A Hot Dog With a Zigzag Mustard Detail
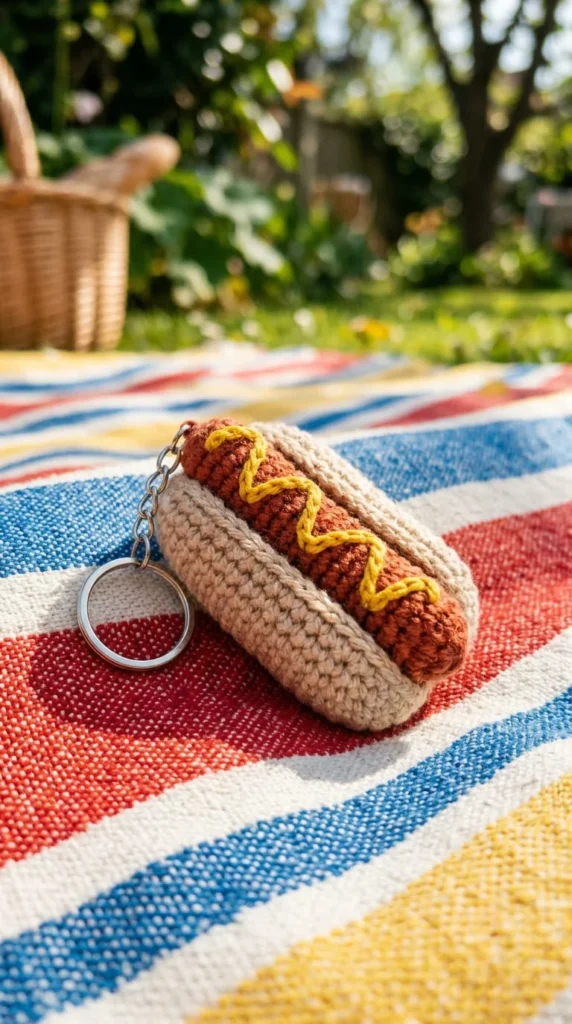
A hot dog keychain follows similar layered logic to the burger but with a simpler two-piece build: a curved tan bun and a slightly darker pink-brown sausage nestled inside it. Both pieces are worked as elongated, gently curved shapes rather than straight tubes, which keeps the finished piece from looking stiff.
The mustard line is what turns this from a generic bun-and-sausage shape into something instantly recognizable. A thin strip of yellow yarn, either crocheted separately and laid on top or embroidered directly, zigzags along the length of the sausage in a loose, uneven pattern.
A few tips for a convincing result:
- Curve the bun slightly more than the sausage inside it, so the sausage appears to sit snugly within the bread
- Keep the mustard zigzag irregular — a perfectly even zigzag looks printed rather than squeezed on by hand
- A light shading difference between the top and bottom of the sausage suggests roundness without extra stuffing
This shape works well as a quick weekend project once you’ve already built confidence from the burger keychain, since the layering skills transfer directly.
15. An Ice Cream Cone With a Waffle-Textured Base
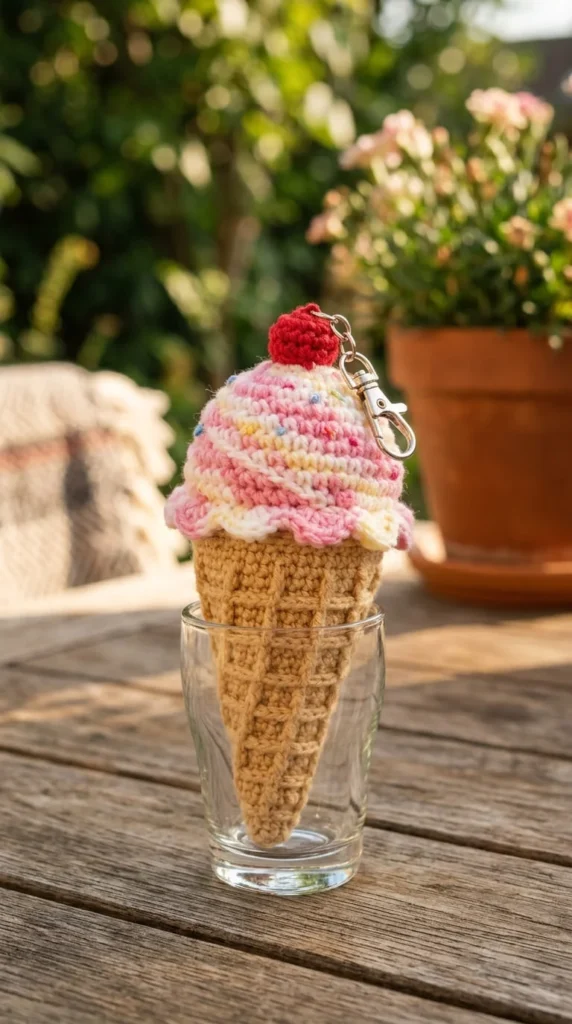
The ice cream cone splits into two distinct textures that make it visually interesting to crochet: a tan, diamond-textured cone worked with a simple crossed-stitch or embroidered grid pattern, and a soft, swirled scoop on top using the same bobble-spiral technique described earlier for cupcake frosting.
Because the cone needs to hold its shape and support the scoop above it, working it in a slightly stiffer yarn or adding a light cardboard or plastic cone insert inside keeps the whole piece from flopping over on a keyring.
A few construction details worth noting:
- The waffle texture on the cone can be embroidered as a crossed-grid pattern rather than crocheted stitch by stitch, which saves time
- Keep the scoop slightly larger at its base than the cone opening, so it looks like it’s resting on top rather than sunken in
- A single small “drip” of the scoop’s color running partway down the cone adds a nice touch of realism
This is a good project for combining two different texture techniques — grid embroidery and spiral bobble stitching — in one small piece.
16. A Glazed Donut With Scattered Sprinkle Detail
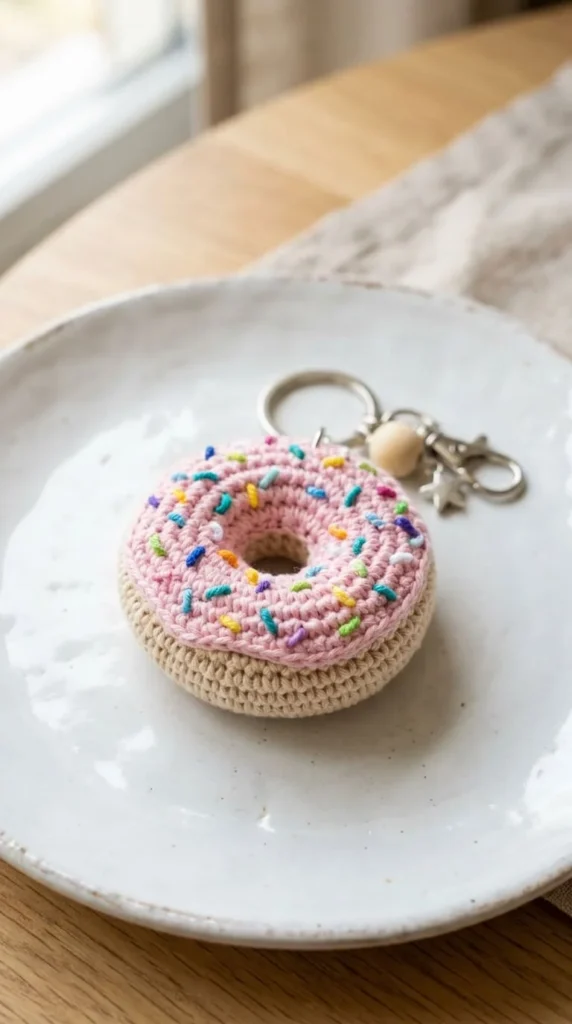
A donut keychain is one of the simpler ring shapes on this list — a plain torus worked in continuous rounds around a center hole, then topped with a contrasting glaze layer worked as a slightly smaller ring sewn on top of the base.
The glaze doesn’t need to cover the entire top surface. Leaving a thin border of the plain donut color visible around the glaze edge, especially with a slightly drippy, uneven glaze outline, looks more realistic than a perfectly centered, uniform coating.
Sprinkles are quick but make a big visual difference:
- Use short lengths of contrasting yarn knotted or tacked on individually rather than embroidered dots, for a slightly raised, tactile sprinkle look
- Scatter sprinkles unevenly, avoiding any obvious pattern or symmetry
- A pastel glaze color tends to photograph better for shop listings than a stark white one, since it reads as more “bakery-fresh”
Because the base ring shape is so adaptable, this same construction works for a plain glazed version, a chocolate-frosted version, or even a savory bagel variation with a cream cheese swipe instead of glaze.
17. A Folded Taco Shell With Peek-Through Filling
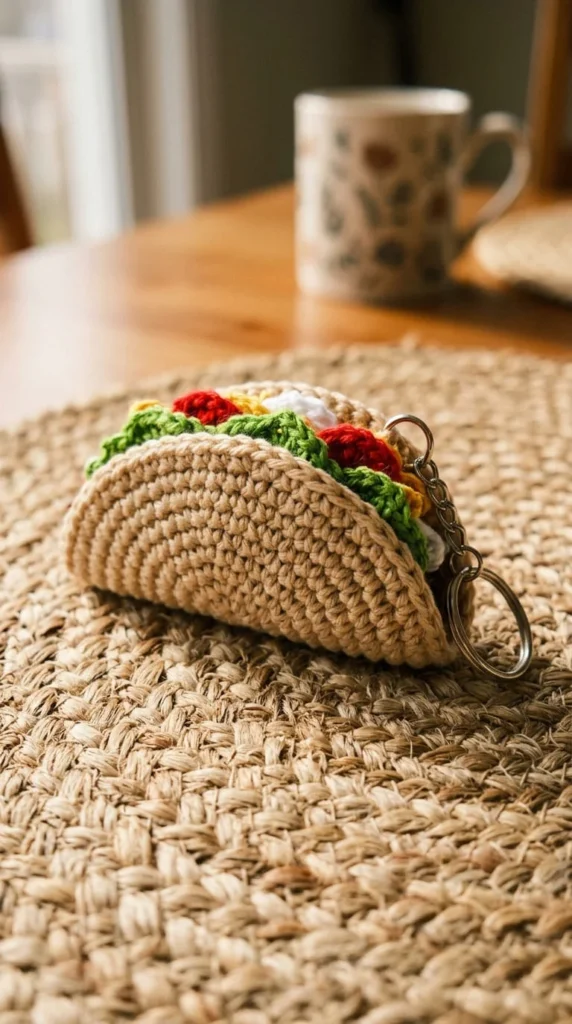
Tacos bring a folding technique to this list that’s different from the flat or stacked builds used elsewhere. A single piece, worked flat as a wide oval or fan shape, gets folded down the center and tacked at the base to create the classic curved taco shell silhouette.
Filling pieces — a strip of shredded lettuce texture, small red tomato dots, and a hint of meat filling color — are added inside the fold before the shell is fully closed, so they peek out naturally from the opening rather than looking glued on top.
A few notes on getting the fold to hold:
- Light starch or fabric stiffener on the shell piece before folding helps it hold its curved shape permanently
- Fill the inside before doing the final closing stitches at the base, since it’s much harder to add filling after the shell is sewn shut
- Keep the shell’s outer edge slightly ruffled or textured to mimic a fried tortilla edge
This is one of the more advanced builds on this list because of the folding and stiffening step, so it’s worth trying after you’ve built confidence with flatter projects like the pizza slice or toast.
18. A Sushi Roll Cross-Section With Visible Filling
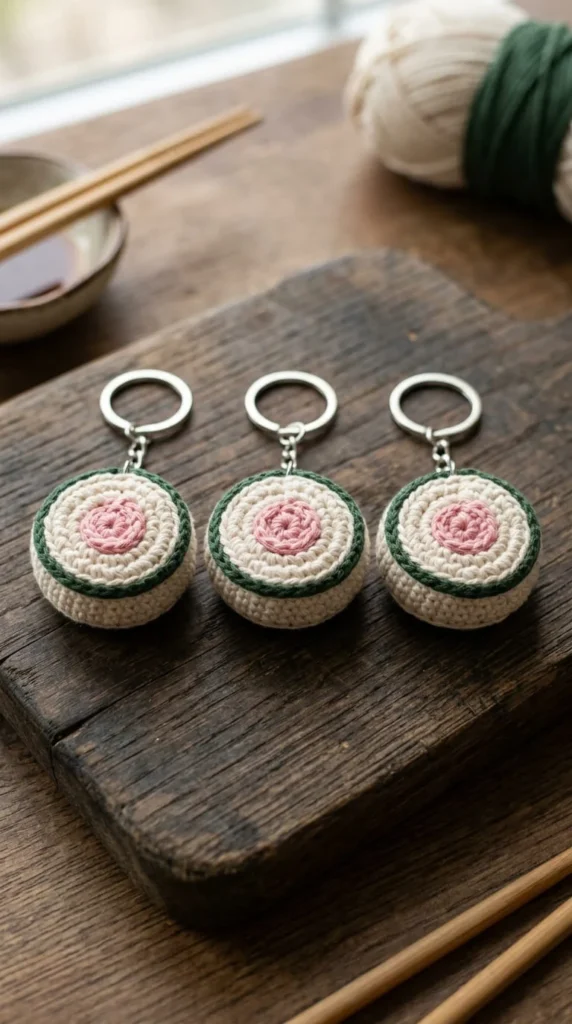
A sushi roll keychain captures a single cross-section slice rather than a whole roll, which keeps the project small while still showing off the layered detail that makes sushi visually interesting. A ring of white “rice” texture surrounds a dark seaweed border, with a bright filling color — pink, orange, or green — visible at the center.
Building this in layers, from the center filling outward, tends to give a cleaner result than trying to work the rice ring first and fit a filling into it afterward.
A few details that improve the finished look:
- A subtly bumpy texture on the rice ring, similar to the onigiri technique, sells the grain detail
- Keep the seaweed border thin and consistent, since an overly thick wrap starts to look more like a black donut than sushi
- Making three or four rolls with different filling colors and displaying them together in a small row reads more convincingly as sushi than a single piece
Because the construction here shares techniques with both the onigiri and donut projects, it’s a good one to tackle once you’ve already made both of those.
19. A Popcorn Box Filled With Individually Textured Pieces
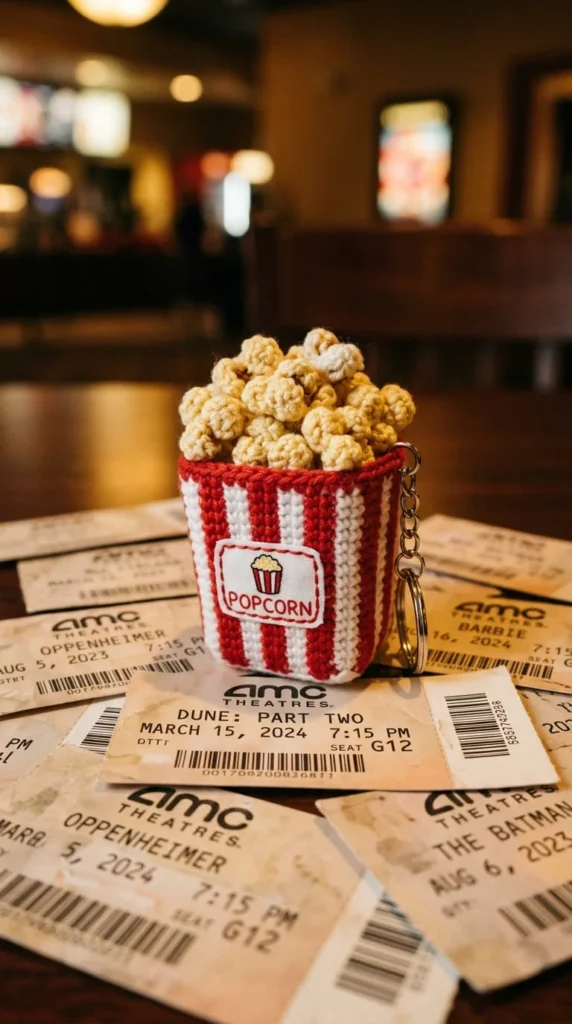
Like the fries container, a popcorn box keychain is really about building a small vessel and filling it convincingly, rather than one continuous shape. The striped red-and-white box is worked in rounds with color changes for the stripe pattern, then filled with a cluster of individually textured popcorn pieces.
Each popcorn piece is a small, irregular puff — worked with uneven, lumpy stitches on purpose rather than a smooth round shape, since real popcorn has that same craggy, irregular texture.
A few tips specific to this build:
- Vary the size of individual popcorn pieces noticeably, since uniform popcorn looks unnatural
- Overfill the box slightly above the rim for a more generous, appealing look
- A pale cream-yellow color with subtle darker shading in the crevices of each piece adds depth without extra stitches
This project takes a bit longer than most others on this list simply because of the number of small popcorn pieces needed, but batching them in one sitting before assembly speeds things up considerably.
20. A Wedge of Cheese With Embroidered Holes
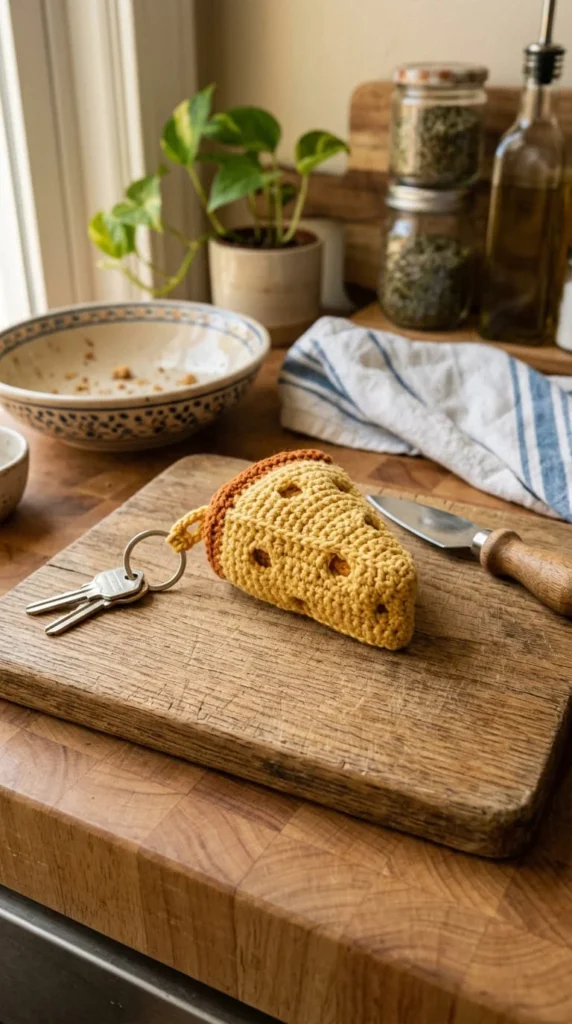
A cheese wedge keychain is a simple triangular prism shape, but the small embroidered or crocheted holes scattered across its surface are what make it instantly recognizable rather than just a plain yellow triangle.
Holes can be created a couple of different ways: some makers work small eyelet-style gaps directly into the stitch pattern, while others simply embroider small dark ovals onto a solid surface after the fact. The embroidered approach is faster and more forgiving for beginners.
A few notes on getting the proportions right:
- Keep holes irregular in size and placement, since real cheese holes vary a lot
- A thin strip along one edge in a slightly different, waxy-looking yarn suggests the outer rind
- Avoid placing holes too close to the edges, since real cheese holes tend to cluster more toward the center
This is one of the quicker projects on this list, making it a good option when you want a finished, recognizable food keychain without a long crafting session.
21. A Waffle With a Deep Grid Texture
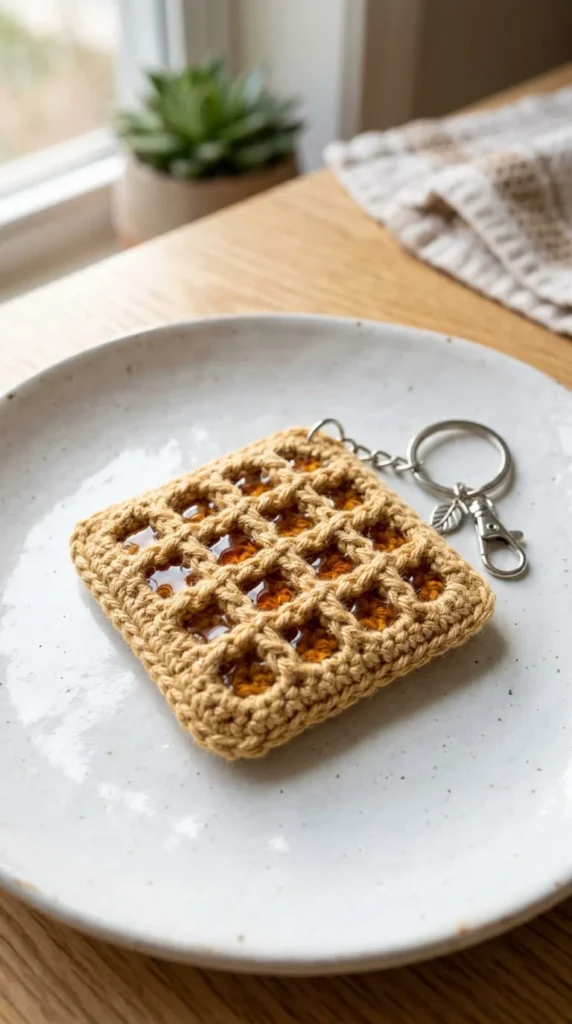
Waffles bring a different textural challenge than most food keychains, since the deep grid pattern needs to actually create visible depth rather than just being suggested with embroidery. Working the square base in a textured stitch — often a combination of front-post and back-post double crochet — creates raised ridges that form the classic grid when worked in a repeating pattern.
Once the grid texture is finished, small syrup “pools” are added into a few of the indentations using a glossy embroidery thread, concentrated more heavily toward the center where syrup naturally collects.
A few things that make this project work well:
- Consistent ridge spacing matters more here than in most other projects, since an uneven grid looks obviously off
- Leave some squares syrup-free rather than filling every single one, for a more natural distribution
- A slightly golden-brown color gradient, darker at the edges, suggests a well-cooked waffle
Because the textured stitch technique used here is more advanced than most other projects on this list, it’s worth practicing the grid pattern on a larger swatch before attempting it at keychain scale.
Conclusion
Food keychains reward a bit of planning about which techniques you want to practice next, whether that’s the layered stacking of a burger, the spiral coiling of a cinnamon roll, or the simple flat shapes of toast and cheese. Start with whichever project matches your current comfort level, keep a small stock of safety eyes, fiberfill, and keyrings on hand, and let each finished piece guide you toward the next shape you’re curious about. Whether you’re stitching these for your own bag, a themed gift set, or a growing shop, the best way to find your signature food keychain is to pick one from this list and start today.