
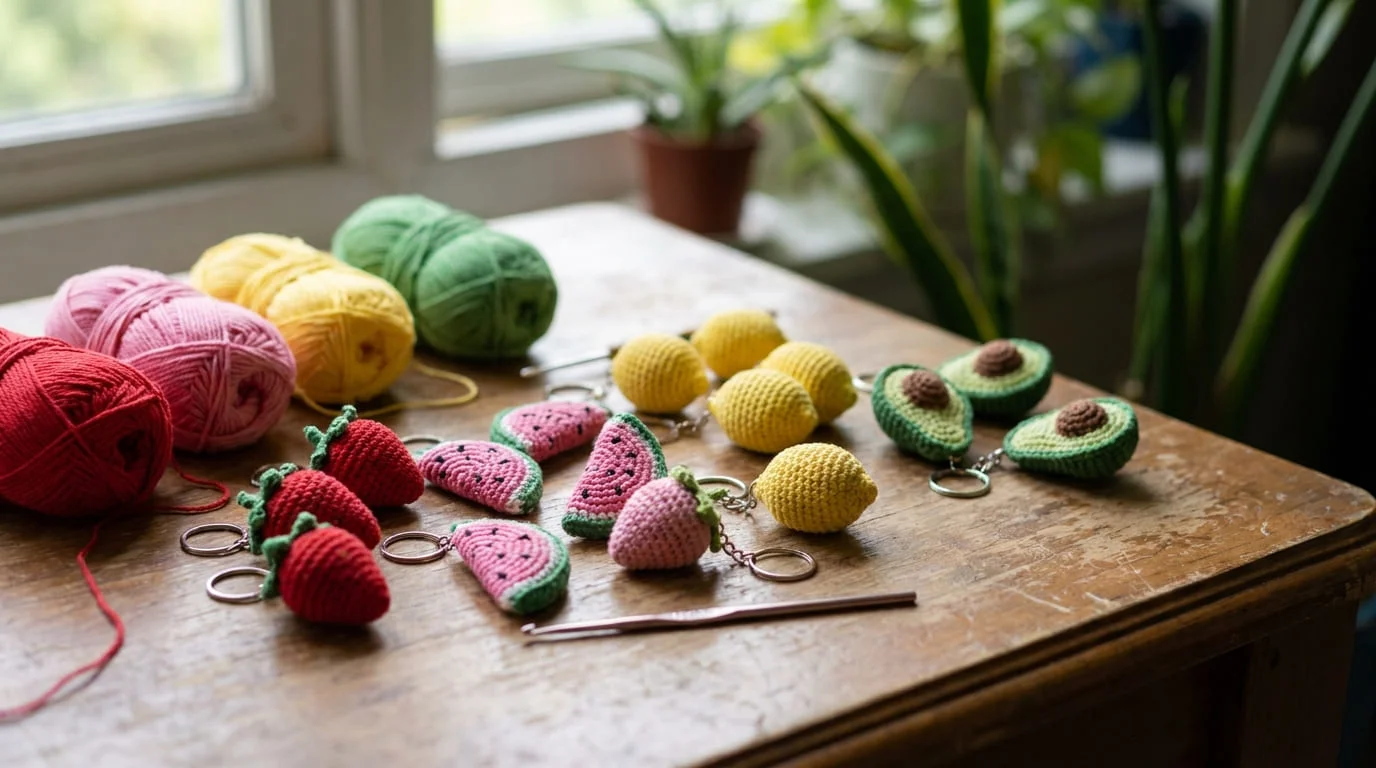
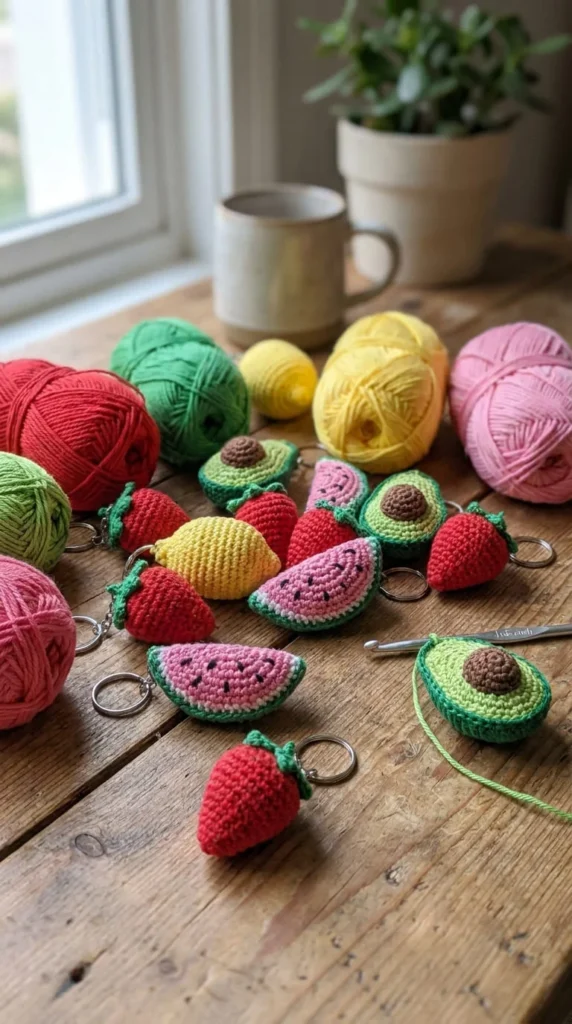
Crochet fruit keychains have turned into one of those small projects that quietly takes over a yarn stash. They stitch up fast, use almost no material, and turn into something a friend will actually ask to buy off your bag. If you’ve been scrolling patterns and feeling unsure where to start, this list breaks the whole trend down into fruit-by-fruit ideas — from five-minute citrus slices to plush character fruits with tiny faces and limbs. Whether your goal is a quick gift, a stack of craft fair inventory, or just a satisfying weekend project, you’ll find a fruit here that fits your skill level, your yarn drawer, and your keyring.
1. The Classic Watermelon Slice That Started It All
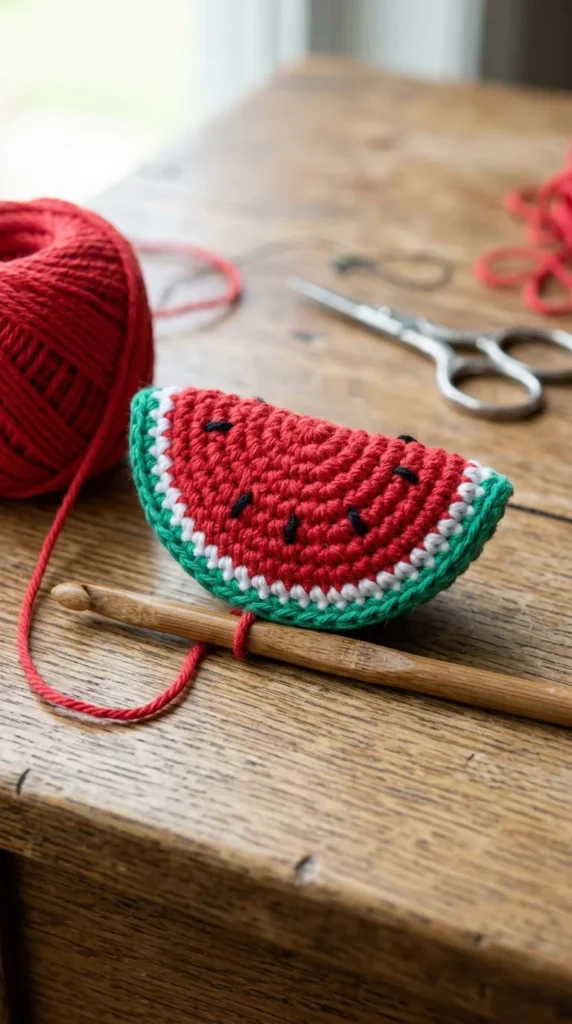
Nobody talks about crochet fruit keychains without mentioning the watermelon slice. It’s become the unofficial gateway project for this whole category, and for good reason. The shape is simple: a rounded triangle worked flat, with a green rind, white pith line, and red center dotted with a few black embroidered seeds.
Most versions take under an hour, even for someone who has only made a handful of amigurumi pieces before. You don’t need a magic ring for this one since it’s worked flat rather than in continuous rounds, which makes it a forgiving first project.
A few things make the difference between a flat watermelon that looks amateur and one that looks polished:
- Seed placement — scatter them unevenly rather than in a straight line for a more natural look
- Rind shading — a thin strip of white between the green and red adds realism
- Edge finishing — a single crochet border around the curve keeps the shape clean
Once you’ve made one, the pattern repeats easily in pink for a “candy watermelon” variation or in yellow for a mini lemon slice using the same base shape.
2. A Plump 3D Strawberry With Texture You Can Feel
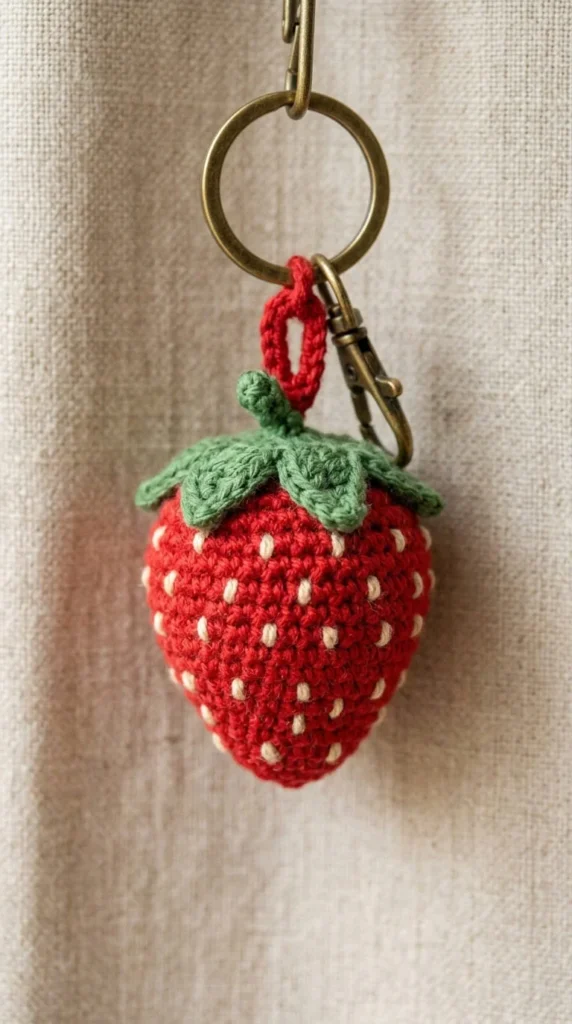
Strawberries are having a real moment in this niche, and it’s not just about looks. The shape lends itself to a satisfying textured surface that flat fruit slices can’t match.
Instead of embroidering seeds on top of smooth fabric, many strawberry patterns use a bobble or puff stitch technique so each seed pokes out slightly from the surface. Run your thumb over a finished one and you’ll actually feel the bumps — that tactile detail is part of why this shape photographs so well for online shops.
The construction itself is straightforward continuous-round amigurumi: work the body in decreasing rounds toward the tip, stuff lightly, then attach a green calyx on top made from five or six small petal stitches joined in a circle.
Tips that make this one shine:
- Use a red variegated yarn for subtle color depth without extra work
- Keep stuffing light so the shape stays slightly soft rather than rigid
- Attach the leafy top with a few whip stitches rather than gluing, so it holds up on a keyring
This is a strong pick if you want something that reads as “handmade quality” rather than just cute.
3. A Mini Pineapple With Surprising Detail for Its Size
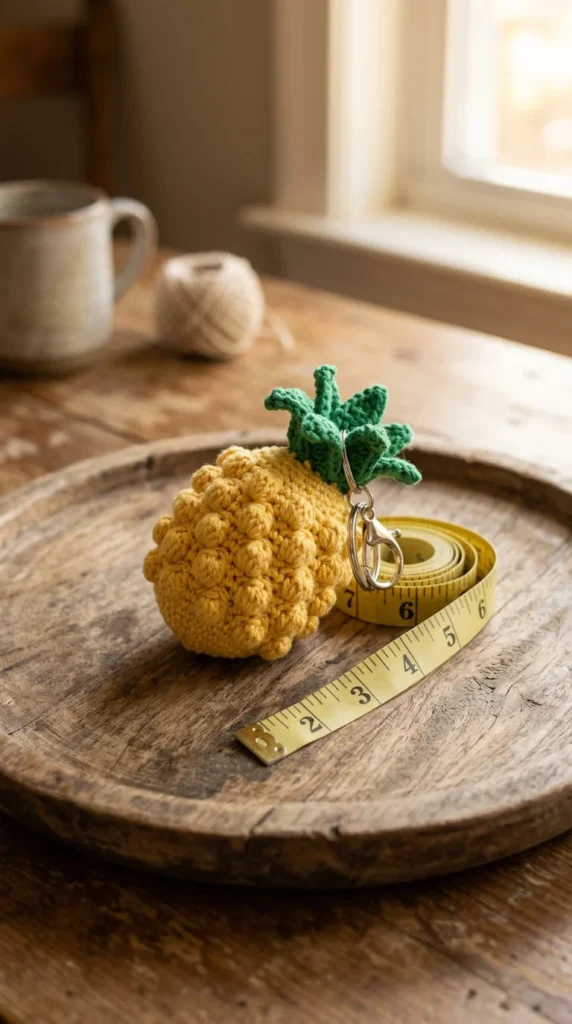
Pineapples look intimidating from a distance, but the keychain-sized version is much simpler than the diamond-textured full amigurumi versions you may have seen elsewhere. Most mini patterns use a basic oval body with a bobble stitch or textured single crochet to hint at the criss-cross skin pattern, rather than actually crocheting each diamond.
The crown is the fun part. A small cluster of five or six pointed leaves, worked flat and folded slightly, gives the top its signature spiky look without needing wire or stiffening.
Because the body is worked in continuous rounds, this one does use a magic ring start, so it’s a good next step once you’re comfortable with the basics from a flat project like the watermelon slice.
A few notes that help the shape hold up:
- Firm stuffing keeps the oval body from collapsing under keyring weight
- Yellow with a thin gold-toned yarn creates a richer, less flat-looking skin
- Leave the leaf cluster slightly loose rather than gluing it flat, so it has movement
This one tends to stand out visually among a set of round fruit charms because of its distinct silhouette.
4. Tiny Grape Clusters That Use Almost No Yarn
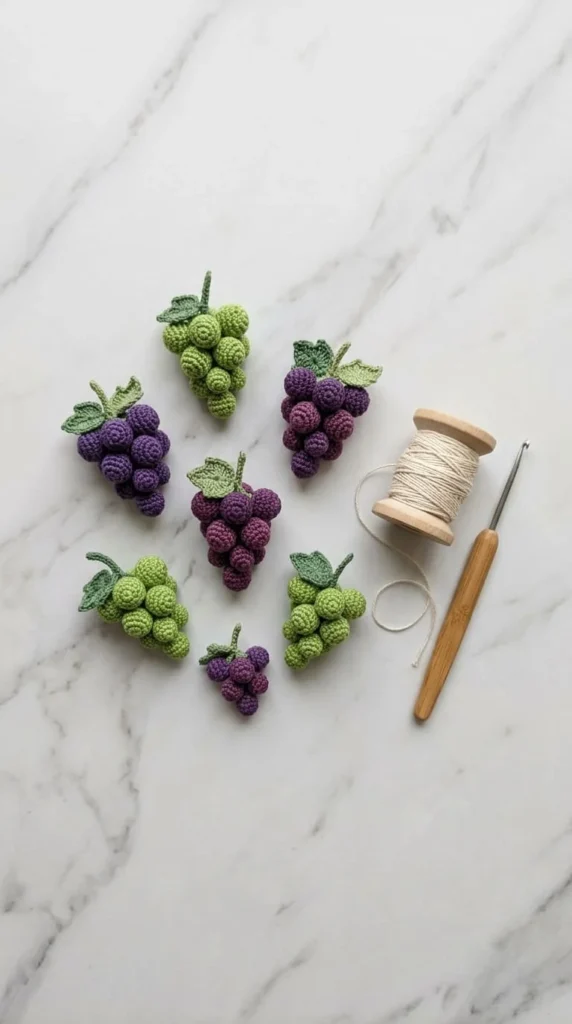
If your yarn stash is mostly scraps, grape clusters might be the most efficient fruit keychain on this list. Each individual grape is worked in just four or five rounds — barely more than a sphere — which means a cluster of eight or nine grapes still uses a small amount of yarn overall.
The technique that makes this project satisfying is the assembly. Rather than stuffing each grape separately with fiberfill, some crocheters leave the last grape’s tail long and use it to sew the whole bunch together in a tight, natural-looking cluster before adding a small stem and a leaf at the top.
Color choice changes the whole personality of this keychain:
- Deep purple reads as classic Concord grapes
- Green feels lighter and works well for spring or summer gift sets
- Mixed purple and green in one cluster gives a more realistic, farmers-market look
Because each grape is so small, this is also a great project for practicing consistent tension across many repeated pieces, which pays off once you move to larger amigurumi work.
5. The Halved Avocado That Doubles as a Conversation Piece
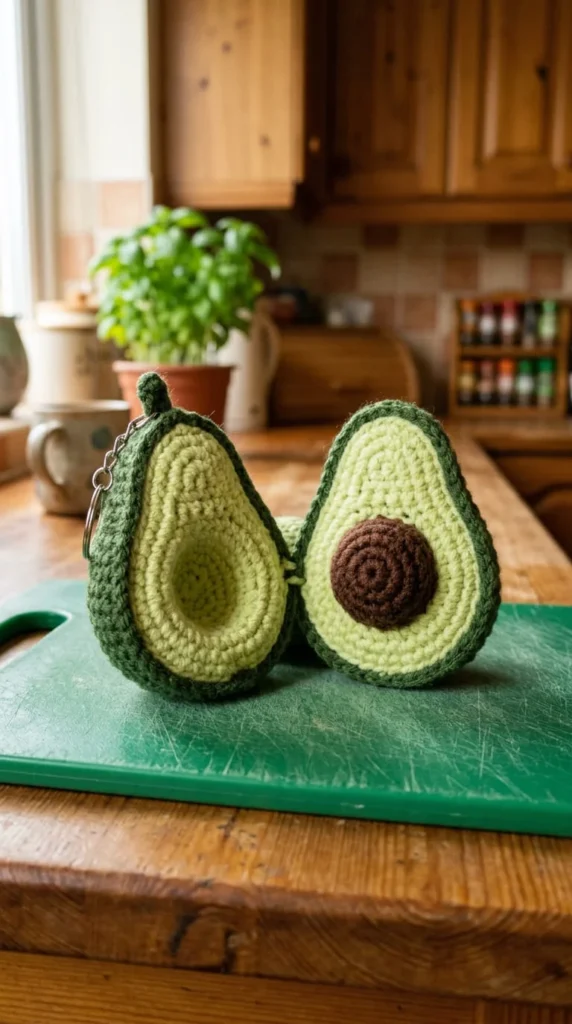
Avocados work differently from most fruit on this list because the split-open version is more popular than the whole one. Two curved halves, one showing green flesh and a brown pit, the other left plain — it’s a shape that reads instantly even from across a room.
The pit is usually a separate small sphere in brown yarn, either sewn into a shallow indentation or left loose enough to sit in a rounded pocket, depending on the pattern. Both approaches work, though sewing it down holds up better on a keyring that gets tossed in a bag daily.
What makes avocado keychains a good pick for beginners moving past their first flat project:
- The shape uses basic increases and decreases without any tricky stitch combinations
- Safety eyes are optional here, so it’s a good low-pressure project if you’re not ready to place them yet
- The two-tone green-to-yellow-to-brown gradient can be achieved with just three yarn colors
This one also sells well in pairs, since a “you’re avo-cuddly” style gift tends to land better as a matched set than a single charm.
6. Whole Orange and Segmented Slice, Side by Side
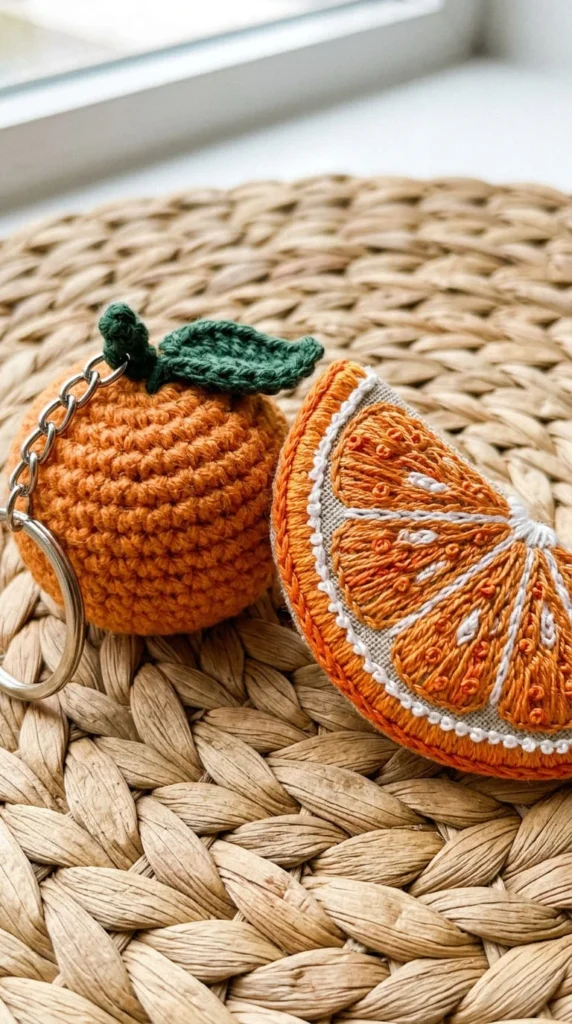
Citrus fruits split naturally into two keychain styles, and making both from the same pattern family is a smart way to double your output without learning new techniques. The whole orange is a simple sphere with a tiny green stem knot on top. The slice version is flat, with embroidered segment lines radiating out from the center like spokes on a wheel.
The segment lines are where this project earns its detail points. Rather than crocheting each wedge separately, most patterns embroider thin white lines over an orange base using a simple straight stitch, which is far faster than piecing the slice together from individual segments.
A few things worth knowing before you start:
- Keep segment lines slightly uneven — perfectly straight lines actually look less realistic
- A tiny rind border in white between the orange flesh and outer peel adds depth
- The whole orange needs stuffing; the slice version usually doesn’t
Because oranges are so recognizable even at small scale, this is a reliable pick for craft fair tables where shoppers are browsing quickly and need to identify the fruit at a glance.
7. Lemon Slices Sized for Real Comparison
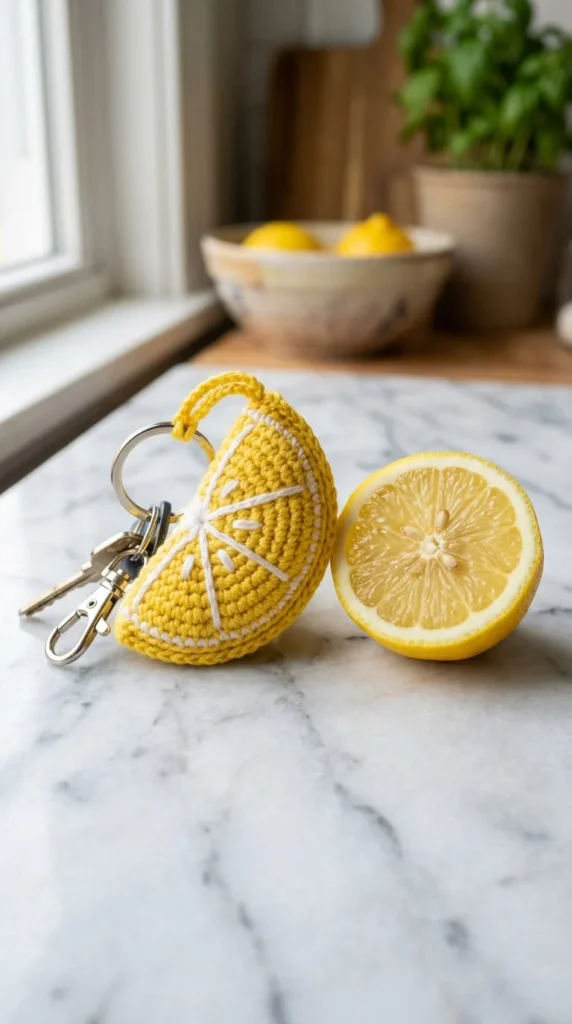
Lemon slices follow the same construction logic as orange slices, but the pale yellow-to-white color palette gives them a completely different feel — softer, and often more popular for spring and summer color schemes.
One detail that separates a good lemon slice from a flat-looking one is the rind. Rather than a single yellow ring, many patterns use two shades: a brighter yellow outer rind and a paler, almost white inner ring before the segmented center begins. That subtle gradation is what makes the finished piece look dimensional even though it’s worked flat.
Sizing matters more with lemons than with most other fruit on this list, since an oversized lemon slice starts to look unrecognizable. A finished diameter around two inches tends to read clearly as “lemon” without looking cartoonish.
Ways to make a set feel cohesive:
- Pair a lemon slice with a lime version in the same pattern, just swapped to green
- Add a tiny embroidered seed or two off-center for realism
- Use a slightly fuzzy cotton-acrylic blend yarn for a softer finished texture
This pairing works especially well as a two-piece gift set for someone who loves citrus-themed kitchen decor.
8. A Curved Banana That’s Easier Than It Looks
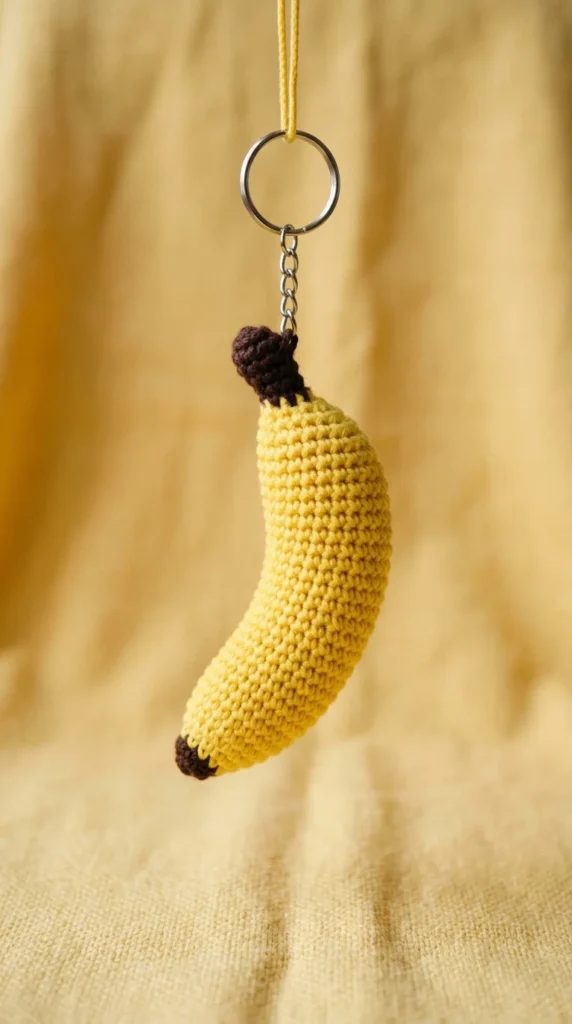
Bananas intimidate some beginners because the curved shape seems harder to control than a round or flat fruit. In practice, the curve comes from simple asymmetric shaping — adding a few extra stitches along one side while decreasing on the other — rather than any advanced technique.
Most patterns work the banana in one continuous piece from tip to tip, then add small brown detail marks at each end to represent the stem and blossom scar. Those two tiny details do most of the work in making the shape instantly recognizable as a banana rather than a generic yellow curve.
What tends to trip people up, and how to avoid it:
- Stuffing unevenly — add slightly less filling near the ends so the curve holds naturally rather than looking rigid
- Skipping the brown tips — leaving them off makes the shape read as an odd yellow blob instead of a banana
- Using a stiff yarn — a slightly drapey yarn helps the curve settle into a believable shape
Because bananas photograph well in a row of three or four, this is a strong choice for anyone building out a themed keychain display for a craft booth or online shop listing.
9. A Blush Peach With a Gradient Worth the Extra Step
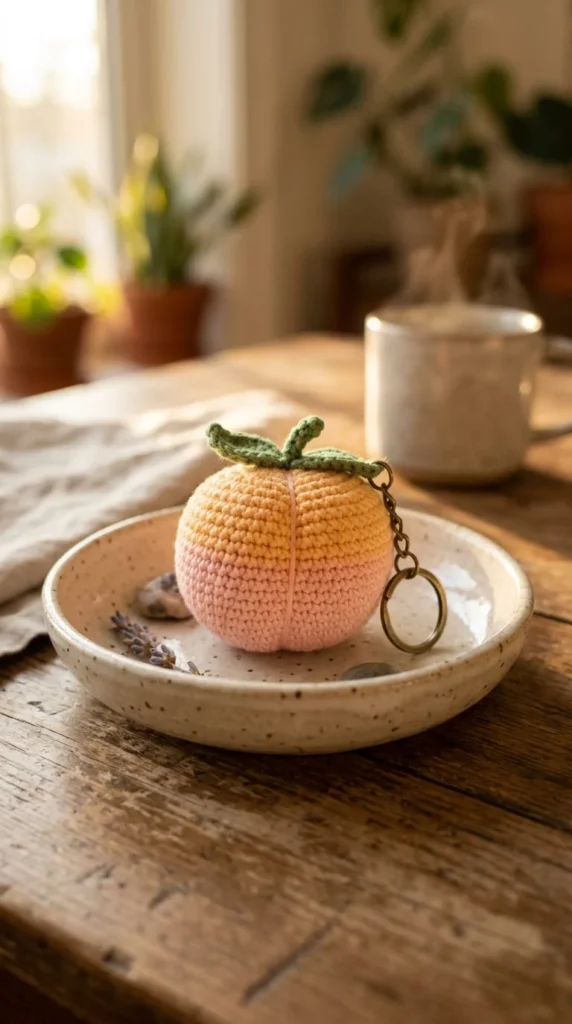
Peaches don’t show up as often in fruit keychain roundups, which makes them a good pick if you want something that stands out from the usual watermelon-and-strawberry lineup. The shape itself is a simple sphere, but the color gradient is what takes a little more planning.
Rather than switching yarn colors abruptly, a soft-transition peach uses two or three colors blended over a handful of rounds — pale yellow at the base moving into a blush pink near the top. If you’re not comfortable color-changing mid-round yet, working in solid blocks of color still looks fine, just slightly less realistic.
A small vertical crease line, embroidered or worked as a single row of slip stitches down one side, is the detail that sells the shape as a peach rather than a plain ball.
Practical notes:
- A small felt or fuzzy leaf at the top finishes the look without much extra effort
- Peach fuzz can be mimicked with a brushed or bouclé-style yarn if you want texture
- This shape reuses easily for apples with a color swap and a slightly flatter top
Because it’s less common, a peach keychain often gets more attention at a craft fair table simply for being different.
10. Kiwi Slices for a Pattern With Built-In Texture
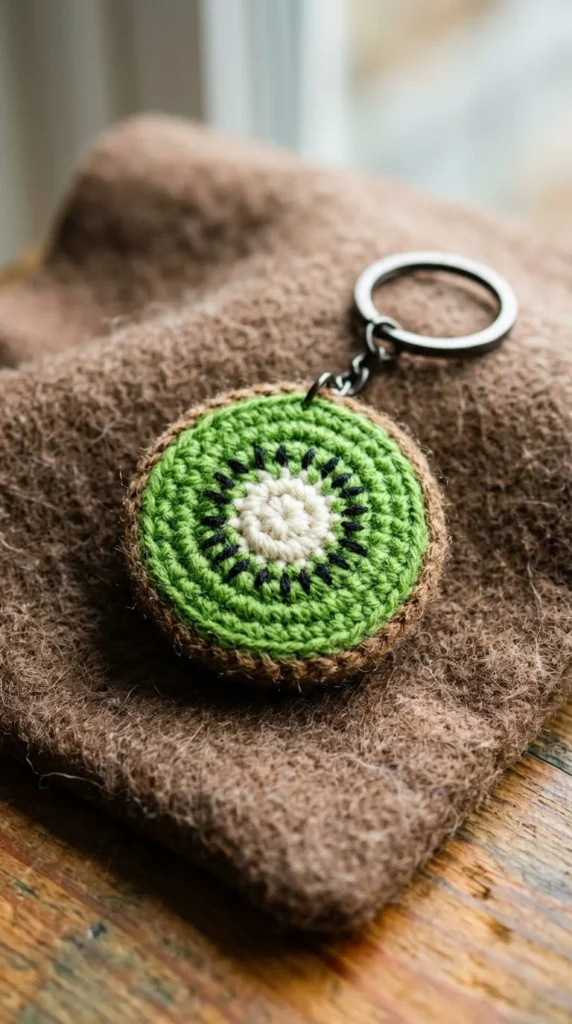
Kiwi slices bring something the other citrus and melon slices don’t: a naturally busy, textured center that looks impressive but doesn’t actually take much extra skill to make. The ring of tiny black seeds around a white center core is achieved with simple french knots or small straight stitches, not any special crochet technique.
The base shape is the same flat circle used for watermelon and orange slices, which makes this an efficient addition if you’ve already made a few slice-style keychains. Swap the color palette to a fuzzy brown rind, bright green flesh, and white center, and the pattern mechanics stay nearly identical.
Getting the seed ring right is mostly about spacing rather than stitch count:
- Space seeds evenly around the white center in a single ring
- Keep seeds small — oversized dots start to look like polka dots instead of kiwi seeds
- A slightly fuzzy brown yarn for the rind edge adds a nice contrast against the smooth green center
Kiwi keychains tend to sell well as part of a “tropical fruit” bundle alongside pineapple and mango pieces, since the green tones complement each other visually.
11. A Tomato Character With Arms, Legs, and Personality
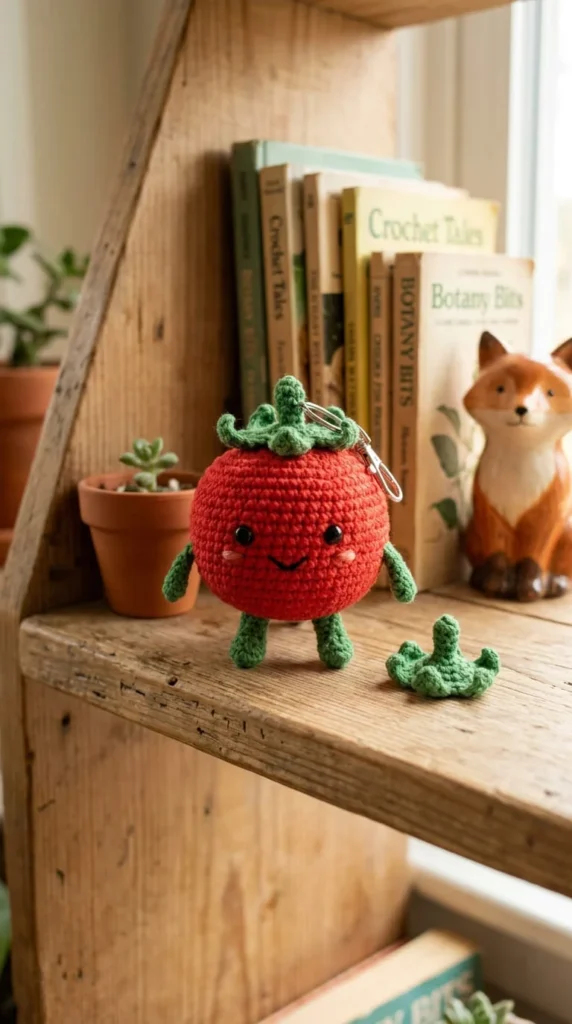
This is where fruit keychains stop being just food shapes and start becoming little characters. A round tomato body gets a pair of tiny crocheted arms and legs stitched on, along with an embroidered or safety-eye face and a small green stem cap on top.
The body itself is beginner-friendly continuous-round amigurumi. The limbs are the part that takes a bit more patience, since each one is worked separately in just a few rounds and then sewn on individually — four small pieces total for a full character.
Facial expression is what really sets these apart from one keychain to the next:
- A simple smile with two dot eyes reads as cheerful and works for most gift occasions
- Slightly raised eyebrow stitches give a more playful, mischievous look
- Blush marks embroidered on the cheeks add warmth without much extra effort
Because the limbs and face are interchangeable across fruit shapes, once you’ve made one character tomato, the same technique transfers directly to a character strawberry, orange, or pear with almost no adjustment needed.
12. The Pear Duck Hybrid That Breaks the Mold
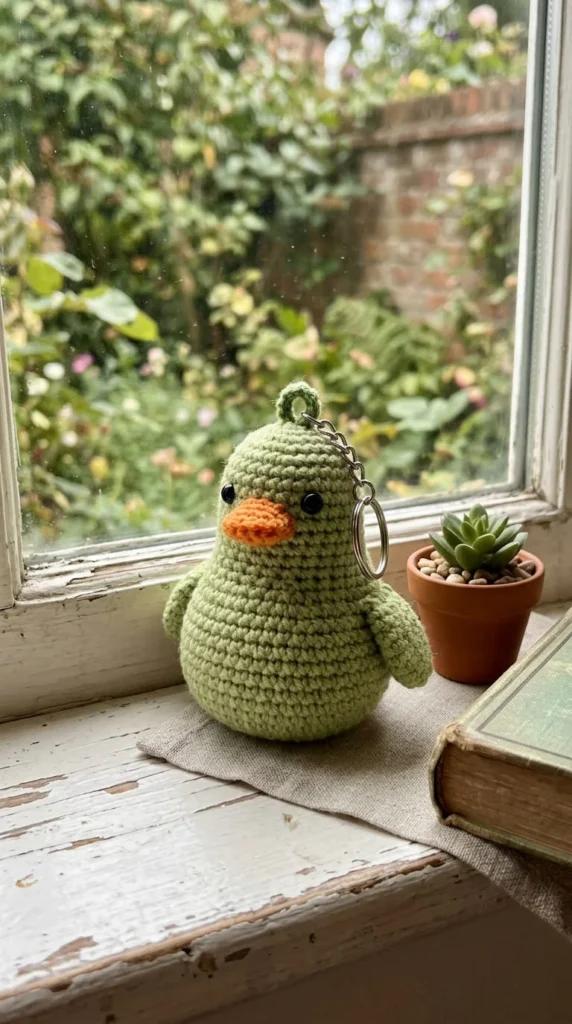
Somewhere between a fruit and an animal, the pear duck has become one of the more unexpected favorites in this niche. The base shape is a classic pear silhouette — narrow top, rounded bottom — but with a small orange beak, two stubby wing shapes, and simple round eyes added on.
What makes this project approachable is that none of the individual pieces are complicated on their own. The beak is just a small folded triangle, the wings are flat teardrop shapes stitched on either side, and the eyes can be safety eyes or simple embroidered dots depending on your preference.
A few details that make the hybrid read clearly as “pear duck” rather than just an odd-shaped bird:
- Keep the pear shape dominant — the duck features should feel added on, not the main structure
- Position the beak slightly downward for a gentler, more approachable expression
- A pale yellow-green body color keeps the pear identity clear even with the added features
This one tends to get the most reaction on social media out of any fruit keychain style, simply because it’s unexpected. It’s a good project when you want something to stand out in a sea of standard fruit slices.
13. Blueberries in Bulk for a Quick Batch Project
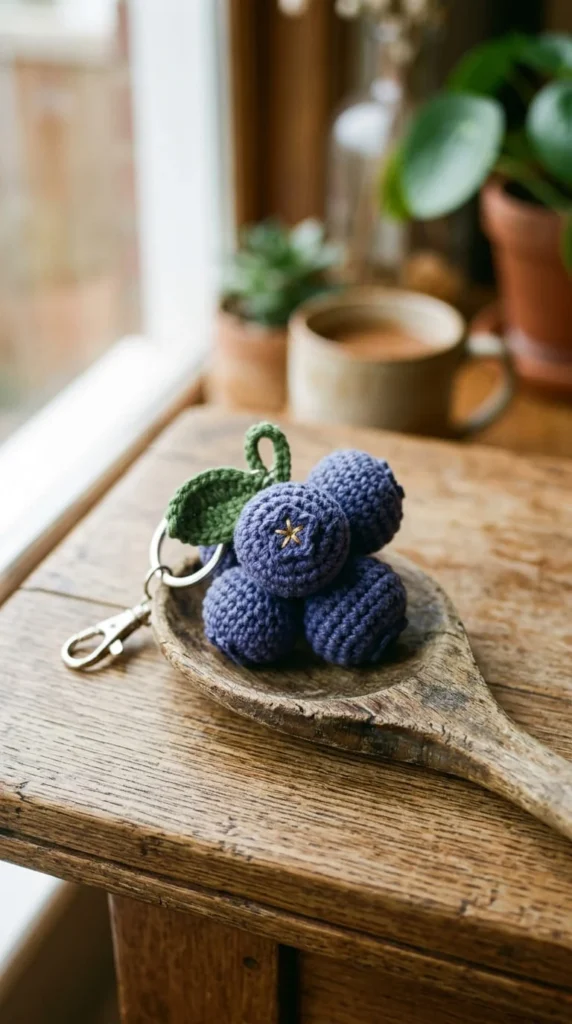
Blueberries are the fastest project on this entire list, which makes them worth including even though a single one is almost too small to be its own keychain. The real appeal is making a small cluster of three or four berries attached to one keyring.
Each berry is a tiny sphere in deep blue or purple yarn, finished with a small embroidered star pattern on top using five short straight stitches radiating from a center point — the signature blueberry crown. That detail takes seconds but makes a huge difference in recognizability.
Because each berry uses such a small amount of yarn, this is a genuinely good scrap-yarn project:
- Leftover sock yarn or fingering weight works well given how tiny each piece is
- Vary the shade slightly between berries in a cluster for a more natural, less uniform look
- A short brown yarn stem tying the cluster together finishes the piece without extra hardware
If you’re prepping inventory for a craft fair and running low on time, a batch of blueberry clusters can realistically be finished in an evening, which isn’t true of most other fruit shapes on this list.
14. Building a Fruit Slice Sampler Set From One Base Pattern
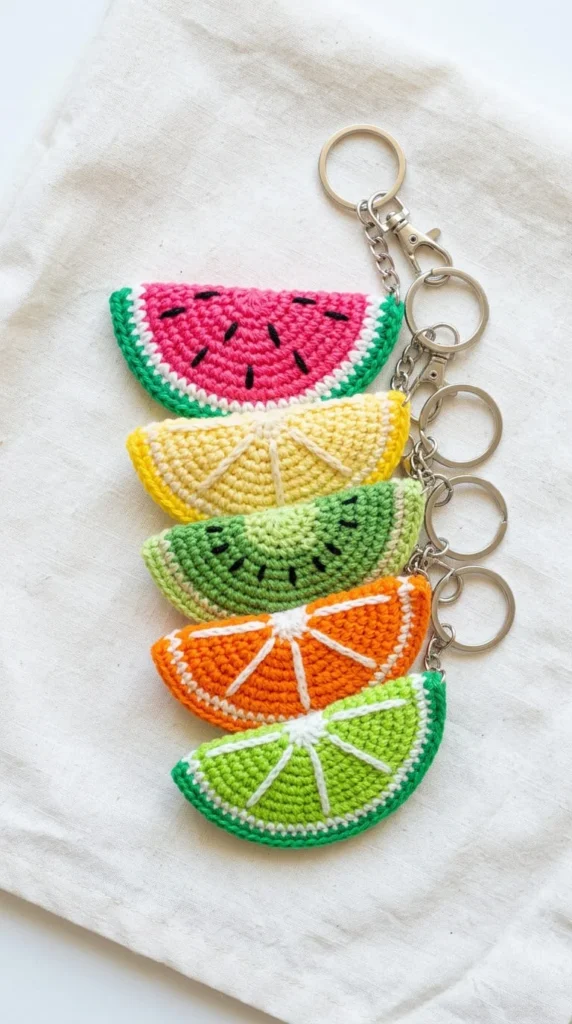
Once you’ve made two or three individual slice keychains, it’s worth stepping back and treating the slice shape as a single reusable template rather than five separate patterns. The flat circle base, rind border, and center detail formula repeats across watermelon, orange, lemon, lime, and kiwi with only color and center-pattern changes.
Working this way as a batch rather than one at a time actually saves time, since you can crochet all five rind circles in a row, then switch to center details for all five, rather than starting and finishing each keychain individually.
A sampler set built this way works well for a few specific purposes:
- Gift sets — five mini fruit slices on individual rings, boxed together
- Craft fair displays — a fanned row draws more attention than single items scattered around
- Teaching yourself color theory — seeing five fruit palettes side by side helps with future color choices
If you’re trying to figure out which fruit shapes to prioritize first, starting with a sampler set is more efficient than picking randomly, since you learn the base technique once and apply it five times with small variations.
15. Matching Your Hook and Yarn to the Fruit You’re Making
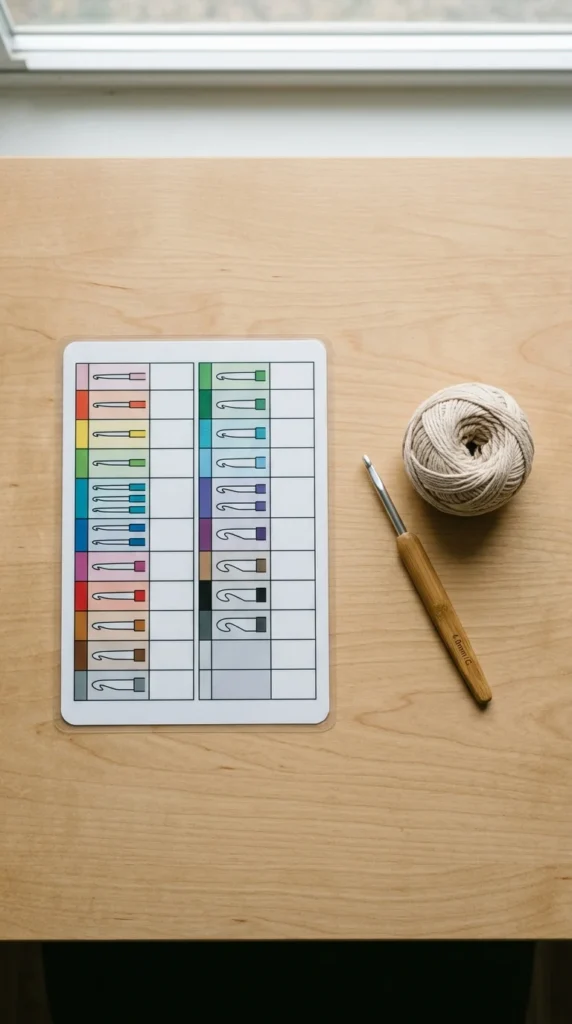
Fruit keychains live and die by tension. Because the pieces are so small, a hook that’s slightly too large for your yarn weight leaves visible gaps between stitches, which is far more noticeable on a two-inch keychain than it would be on a full-size amigurumi doll.
For most sport or fingering weight cotton yarn, a hook between 2.00 and 2.5 millimeters keeps stitches tight enough that stuffing doesn’t peek through. If you’re working with a plush or chenille-style yarn for a softer, larger keychain, sizing up to a 3.0 millimeter hook usually works better, since that yarn is bulkier by nature.
A quick way to check if your combination is working:
- Crochet a small test round and hold it up to light — visible gaps mean your hook is too large
- Cotton yarn gives crisper stitch definition, which matters most on slice-style flat pieces
- Chenille or plush yarn hides minor tension mistakes better, making it a forgiving choice for total beginners
If you only buy one hook size to start this hobby, a 2.5 millimeter steel or aluminum hook paired with standard cotton yarn covers the widest range of fruit patterns on this list without needing to switch tools constantly.
16. Getting Safety Eyes and Stuffing Right on a Tiny Scale
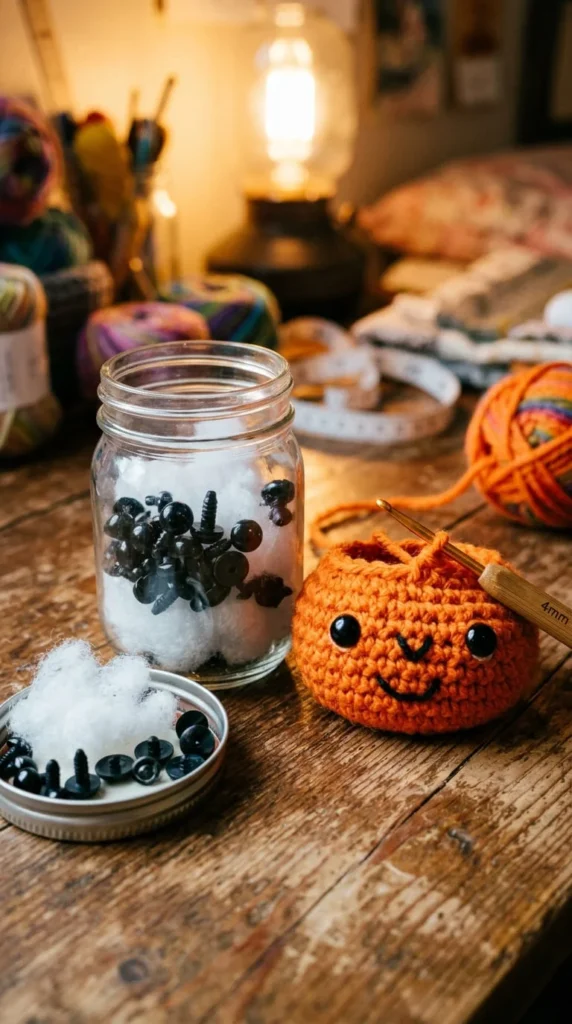
Hardware choices matter more than people expect on fruit keychains, mostly because there’s so little room for error at this size. An 8 millimeter safety eye that looks fine on a regular amigurumi animal can look oversized and slightly unsettling on a two-inch fruit character.
For most character fruit faces, a 6 to 8 millimeter eye works, but sizing down to 5 or 6 millimeters on smaller pieces like individual grapes or blueberries keeps proportions looking natural rather than cartoonish.
Stuffing technique also changes at this scale. Because the finished pieces are so small, overstuffing is a common mistake that leaves visible lumps or stretched stitches:
- Add stuffing in small pinches, checking shape after each addition rather than packing all at once
- Leave slice-style flat pieces unstuffed or very lightly stuffed to preserve the flat silhouette
- Push stuffing toward the center first, then fill outward toward the edges for a more even shape
Getting these two details right — appropriately scaled eyes and controlled stuffing — is often the difference between a keychain that looks handmade in a good way and one that looks unintentionally lumpy or mismatched.
17. Skipping the Magic Ring Without Skipping Quality
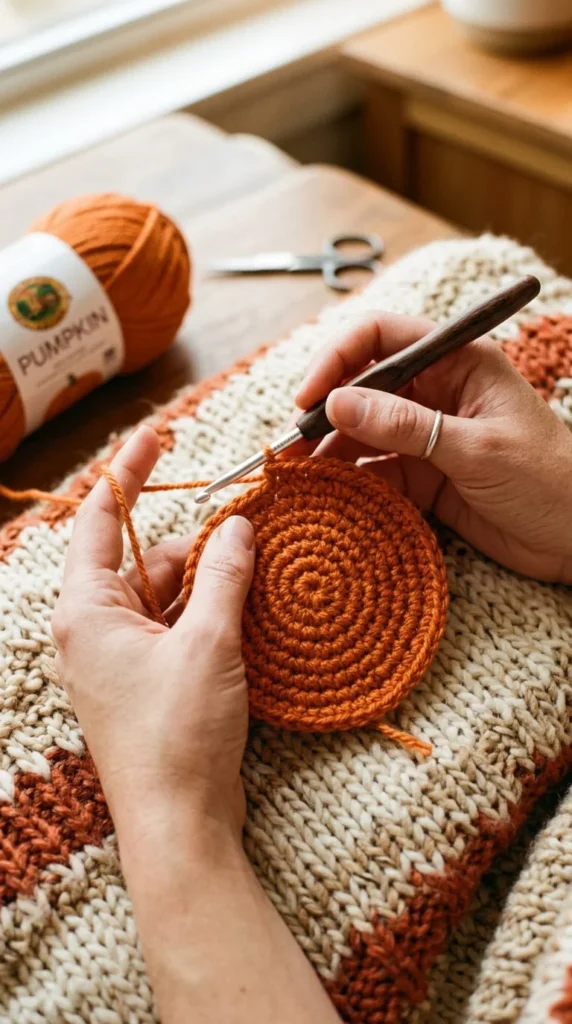
The magic ring intimidates a lot of new crocheters, and it’s genuinely one of the more finicky techniques to learn from a written pattern alone. The good news is that several fruit keychain shapes don’t need it at all.
Flat fruit slices like watermelon, orange, and lemon are typically worked back and forth in rows or built from a simple chain-and-single-crochet starting ring, rather than a true magic ring. That makes them a natural entry point if the magic ring has been holding you back from starting this hobby.
For projects that do call for continuous rounds, like a whole strawberry or grape, a chain-4 joined into a ring with a slip stitch works as a serviceable substitute. It leaves a slightly larger center hole than a magic ring, but on a piece this small, that gap is barely noticeable once stuffed.
A practical starting order for building confidence:
- Start with flat slice patterns to skip ring techniques entirely
- Move to chain-ring substitutes once you’re ready for 3D shapes
- Circle back to the true magic ring later, once you understand why it’s worth learning
There’s no rule that says you have to master every technique before making something you’re proud of.
18. Turning Any Fruit Pattern Into a Phone Charm
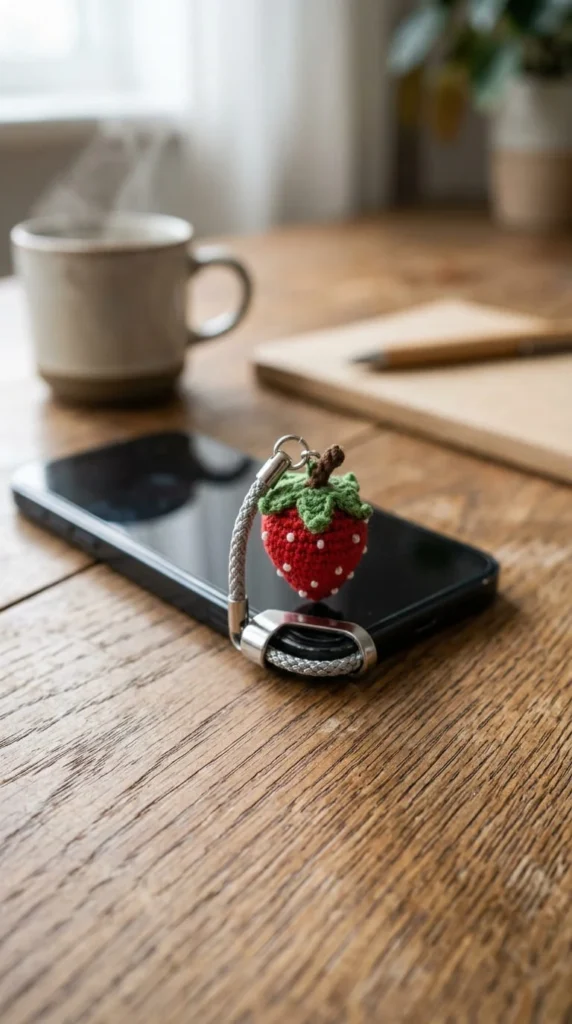
The line between a keychain and a phone charm mostly comes down to hardware, not the crochet pattern itself. Any of the smaller fruit shapes on this list — grapes, blueberries, a single strawberry, a mini lemon slice — work just as well clipped to a phone strap as they do on a keyring.
The main adjustment is attachment point placement. A keychain hangs from a single loop at the top, but a phone charm often benefits from a slightly reinforced loop, since it gets more daily handling and occasional tugging than a keychain tucked in a bag.
A few practical swaps for converting a keychain pattern to a phone charm:
- Use a small jump ring plus a lobster clasp instead of a plain keyring loop for a more secure, swappable attachment
- Reinforce the top loop with a few extra whip stitches through the same point before attaching hardware
- Choose lighter-weight fruits like slices or small berries over heavily stuffed pieces, since phone straps handle less weight comfortably
This conversion is one of the easiest ways to expand a small collection of fruit patterns into two different product categories without learning anything new.
19. Fruit-in-a-Jar Charms as an Unexpected Twist
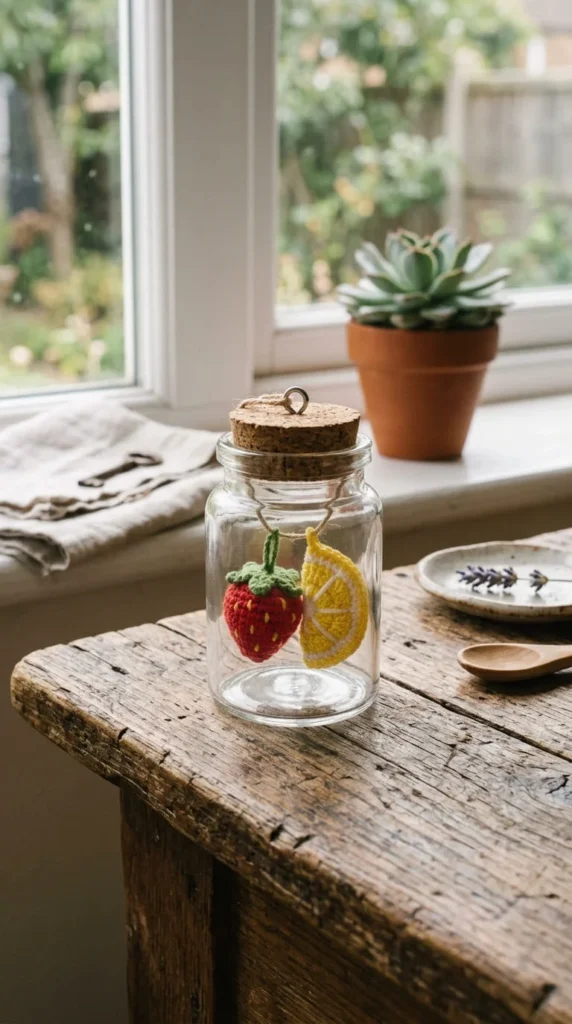
Most fruit keychains hang directly from a ring, but a small trend has emerged around housing the finished piece inside a tiny glass jar instead, with the jar itself becoming the keychain. It’s a simple swap that changes the entire presentation.
The crochet fruit inside doesn’t need any modification — a standard mini strawberry, grape cluster, or lemon slice fits inside most miniature jar pendants sold for jewelry making. The jar lid typically has a small loop or eye hook built in, which is where the keyring attaches.
This format works especially well for a few specific situations:
- Gift-giving — the jar adds a finished, boutique feel without extra crochet work
- Protecting delicate pieces — a jar shields lightly stuffed or unstuffed slices from getting squished in a bag
- Selling online — product photos of a fruit charm inside a glass jar tend to stand out in a feed full of plain hanging keychains
Sourcing the jars is the only real extra step here, and small pendant jars are widely available through craft and jewelry supply sellers, usually sized for anything under about an inch and a half.
20. Mixing Felt and Crochet for Faster, More Detailed Fruit
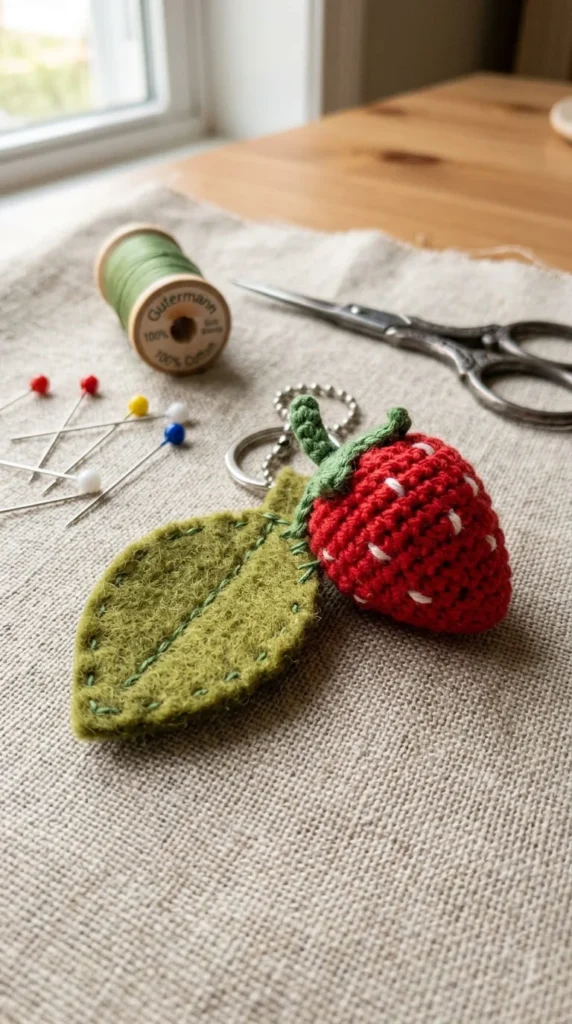
Not every part of a fruit keychain needs to be crocheted. Combining felt with crochet is a practical shortcut, especially for flat details like leaves, stems, and rind patterns that would otherwise take extra rounds to build in yarn.
A crocheted strawberry body paired with a cut felt leaf on top, for example, saves the time of crocheting a five-petal calyx while still looking finished. The felt piece is simply whip-stitched on using thread that matches the yarn color, so the seam is barely visible.
This mixed-media approach makes the most sense for:
- Small pointed details — leaves, stems, and thorns that are fiddly to crochet at a tiny scale
- Flat backing pieces — a felt backing on slice-style keychains adds structure without bulk
- Speeding up batch production — pre-cutting a stack of felt leaves is faster than crocheting them one at a time
If you’re new to combining materials, start with something low-risk like a felt stem on a whole-fruit keychain before attempting a more structural piece like a felt-backed slice, since backing pieces need more precise cutting to lie flat.
21. Pricing and Displaying Fruit Keychains for a Craft Fair
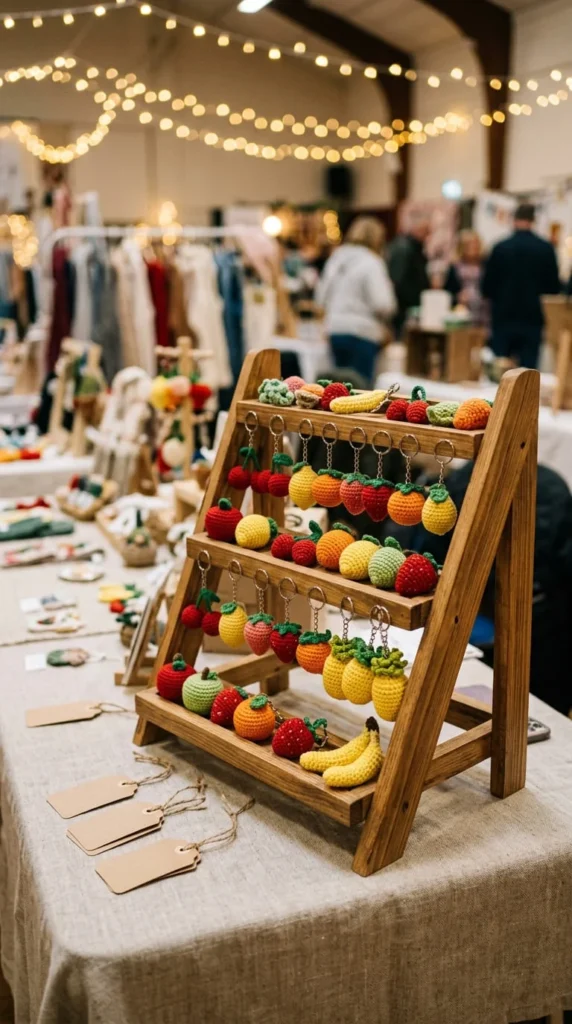
Fruit keychains are small enough to feel like impulse buys, which changes how they should be priced and displayed compared to larger crochet items. A price that feels too calculated tends to slow shoppers down, while a round, simple number keeps browsing moving.
Material cost on most of these projects is genuinely low, often just a small amount of yarn and a keyring, so pricing usually reflects time and skill rather than material expense. Simpler flat slices typically sell for less than fully stuffed character pieces with limbs and faces, since the labor difference is real and shoppers generally understand that.
Display choices that tend to help sales at a physical table:
- Group by fruit type rather than scattering randomly, so shoppers can compare styles quickly
- Use a tiered stand so smaller pieces don’t get lost flat on a table
- Keep a few finished pieces attached to actual bags or backpacks nearby, so customers can picture them in use
Bundling three or four related fruits — like a citrus trio or a berry cluster set — at a slight discount compared to buying individually often moves more inventory than pricing every single piece separately.
Conclusion
Crochet fruit keychains work because they scale to exactly the amount of time, yarn, and skill you actually have. A flat watermelon slice takes under an hour and barely dents a yarn stash, while a limbed tomato character or a jar-housed strawberry charm gives you somewhere to grow once the basics feel easy. Start with whichever fruit matches your current comfort level, keep a small stash of safety eyes and stuffing on hand, and let one finished piece lead naturally into the next. Whether you’re making these for your own keys, a handmade gift set, or a growing craft fair table, the fastest way to find your favorite is simply to pick a fruit from this list and start stitching today.