
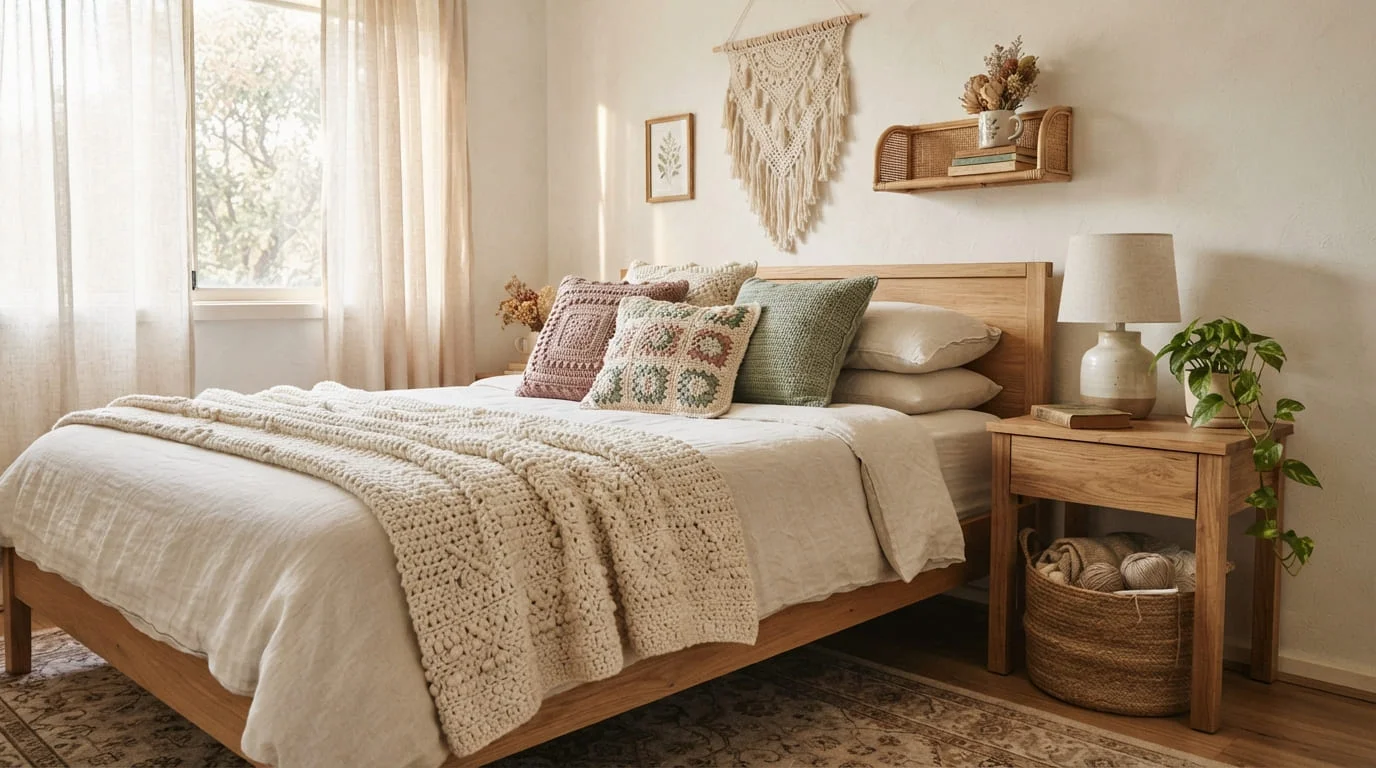
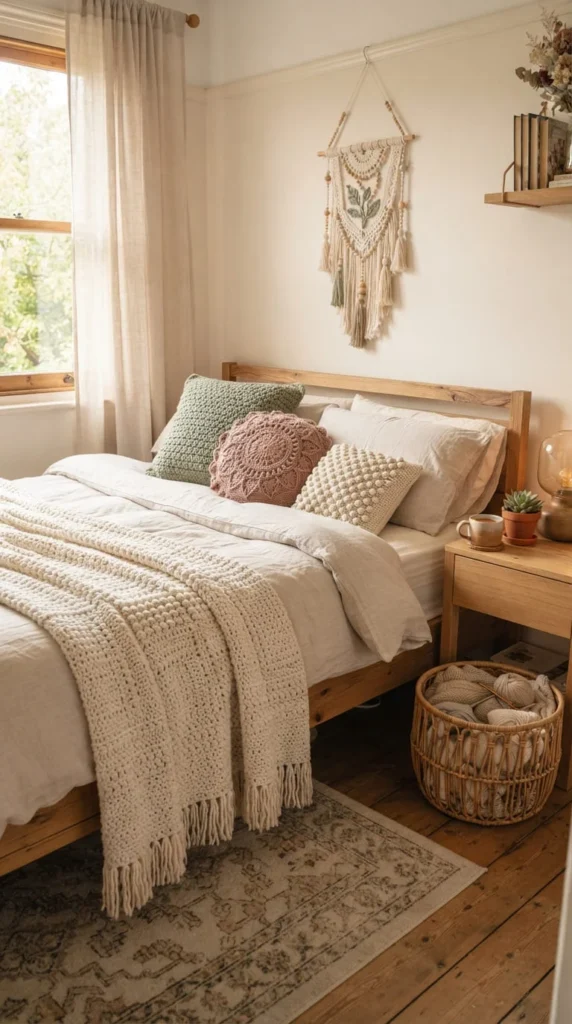
Crochet can change the mood of a bedroom without replacing furniture or spending heavily on a full redesign. The right crochet bedroom decor adds tactile texture, gentle color, handmade character, and useful storage while keeping the room calm and comfortable. You can start with something small, such as a cushion cover or bedside mat, then build toward larger pieces like a granny-square throw, wall tapestry, curtain panel, or upholstered crochet headboard. The best results usually come from repeating a limited color palette and varying the stitch texture rather than covering every surface with yarn. Cream, oatmeal, sage, clay, dusty rose, muted blue, and warm brown work beautifully for a soft bedroom, while one stronger accent shade can give the room personality. The ideas below range from quick stash-yarn projects to larger weekend pieces, with practical styling tips for making each project feel intentional rather than crowded.
1. Layer a Muted Granny-Square Throw Across the Bed
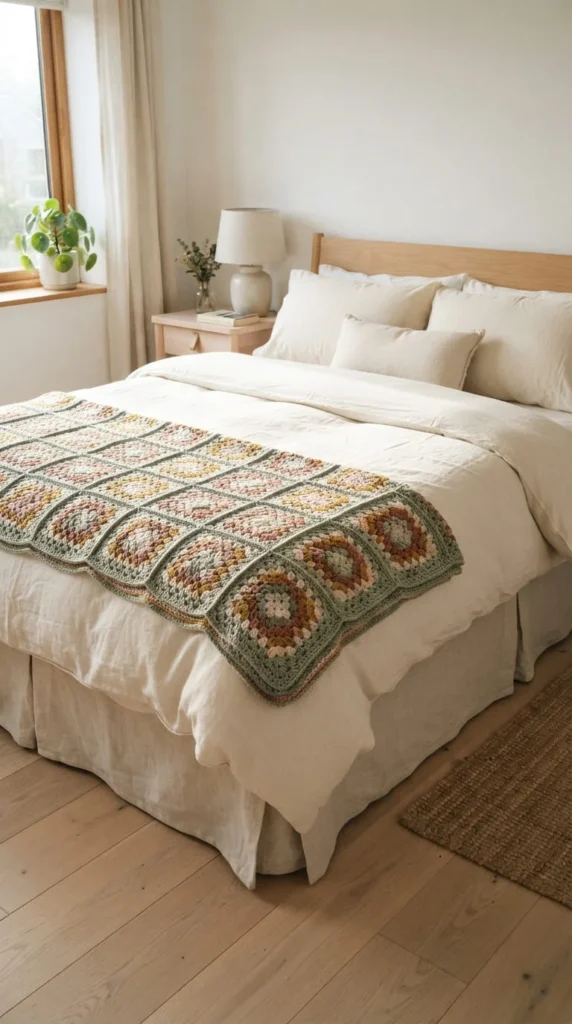
A granny-square throw gives a bedroom an immediate handmade focal point without covering the entire bed. Rather than using dozens of unrelated colors, choose three or four quiet shades that already appear in your room.
Cream, oatmeal, sage, dusty pink, terracotta, muted mustard, or faded blue can create a softer finish than bright rainbow squares. Keep one yarn color consistent around the outer round of every motif. That repeated border helps separate the colors while making the finished throw feel coordinated.
For a beginner, making individual squares can feel less intimidating than crocheting one large blanket. Finish a few motifs during short evening sessions, block them to the same measurements, then arrange everything on the floor before joining.
Try placing the finished throw across the lower third of your bed instead of pulling it up to the pillows. This leaves plenty of plain bedding visible and stops the crochet texture from overpowering a small room.
For easier washing, acrylic or cotton-acrylic yarn can be practical. If you use several yarn colors, test a small swatch before washing the completed project.
A leftover square can later become a matching mini cushion, giving the room a subtle repeated motif.
2. Add Bobble-Stitch Pillows for Tactile Texture
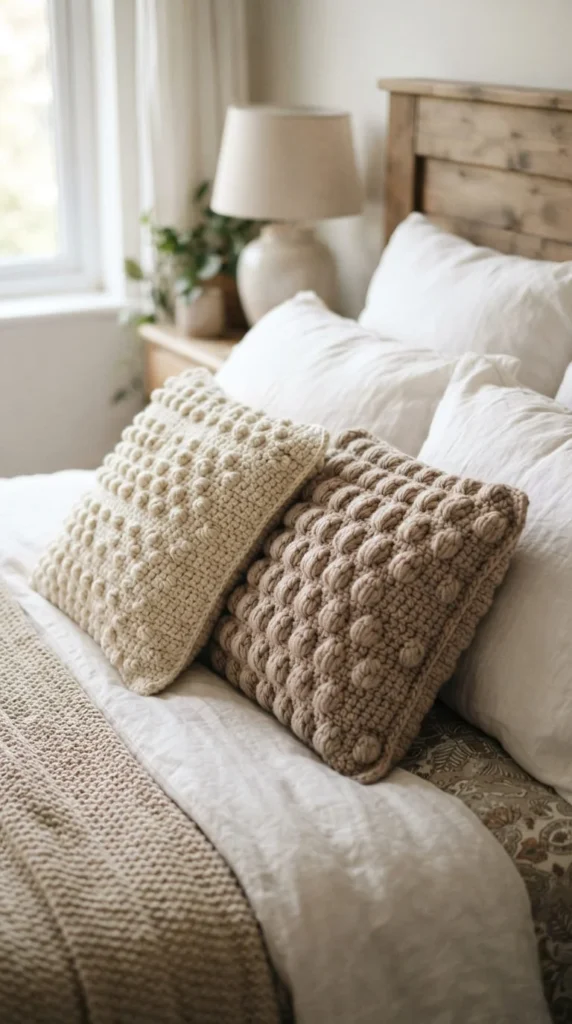
If you want noticeable crochet texture without committing to a blanket, start with pillow covers. Bobble and puff stitches create raised patterns that catch soft bedroom light beautifully.
A single cream bobble cushion can work against plain sage, beige, charcoal, or white bedding. For more color, pair one textured cushion with another made in a simpler stitch. Keeping the shapes different prevents the bed from looking overly matched.
Crochet the cover around an existing pillow insert so you already know the finished dimensions. A removable envelope-style back is useful because the insert can come out before washing.
For a modern look, use bobbles sparingly. A row of raised dots, a geometric diamond, or a simple arch can look calmer than covering the entire surface.
Medium-weight yarn is usually easier to control than extremely fluffy yarn, particularly if you are still learning how to maintain even tension. Place a stitch marker at the beginning of each row if textured sections make counting difficult.
Try making one statement cushion first. Live with it on the bed for a few days before creating more. That small pause makes it easier to judge whether the room wants another crochet texture or simply more negative space.
3. Crochet a Scalloped Runner for the Nightstand
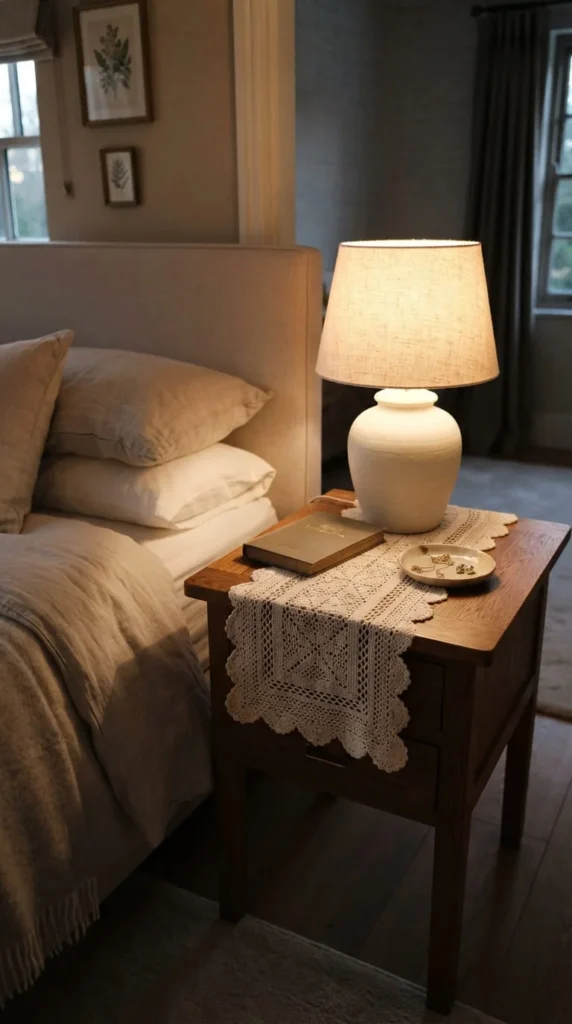
A full tablecloth can feel heavy in a bedroom, but a narrow crochet runner gives a nightstand texture while leaving plenty of wood or painted surface visible.
Make the runner slightly narrower than the furniture. Around two-thirds of the tabletop width often creates a neat, framed appearance. A simple solid center with a shell or scalloped edge works well because the decorative detail stays visible without interfering with lamps, books, glasses, or chargers.
Cotton yarn is a practical choice for this project. It creates defined stitches and usually sits flatter than fuzzy fibers.
Choose a shade that contrasts gently with the table. Ivory crochet looks soft against dark walnut. Clay or muted olive can bring warmth to pale oak. On a painted white nightstand, oatmeal or cocoa adds just enough separation.
If you want the runner to stay flat, block it after finishing. Pin the damp piece into shape on a suitable surface and allow it to dry completely before placing it on the furniture.
You can also make a smaller matching coaster for a water glass. Repeating the same edging on both pieces creates a quiet connection without turning the bedside table into a full crochet display.
4. Turn an Empty Wall Into a Crochet Tapestry Feature
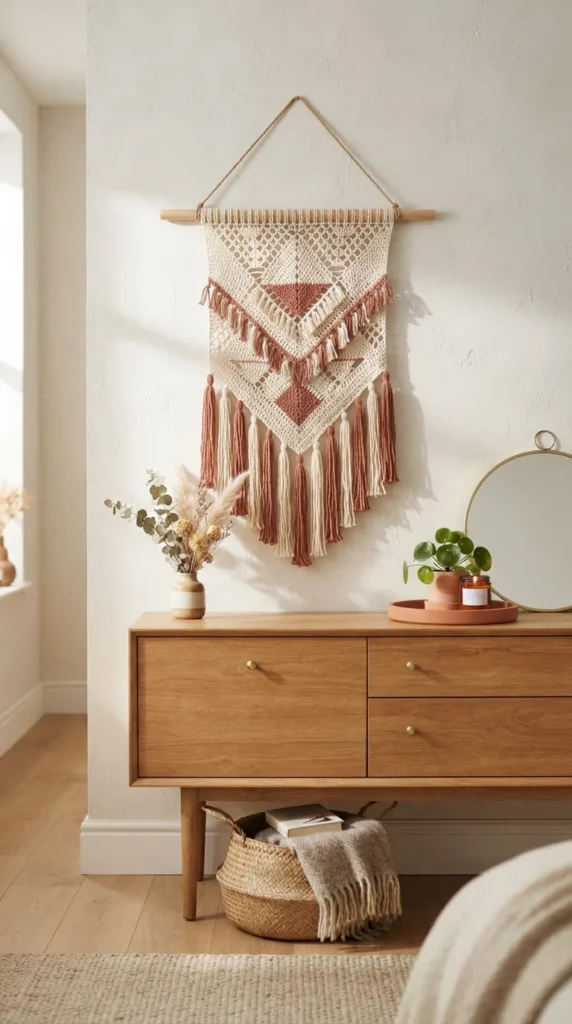
A crochet wall hanging is useful when a bedroom wall feels bare but framed prints seem too hard or formal. Yarn gives the surface movement and shadow while keeping the room visually soft.
Measure the open wall area before choosing your pattern. A tapestry should have breathing room around it rather than stretching from furniture edge to furniture edge.
For a calm aesthetic, try geometric openwork, simple arches, botanical shapes, or alternating solid and lace sections. Mount the finished crochet onto a smooth wooden dowel, branch, or slim rod.
Tassels can add length when the wall is tall, but they are optional. A clean lower edge suits more minimal bedrooms.
If you rent, a lighter wall hanging has an advantage over heavy framed decor. Depending on its size and weight, it may work with removable wall hooks made for the surface involved.
Blocking matters here because uneven edges are much easier to notice when a crochet piece hangs vertically. Shape the completed panel before attaching it to the rod.
Position it above a dresser, reading chair, or clear section of wall rather than directly behind piles of objects. The surrounding empty space becomes part of the design and helps the stitches remain visible.
5. Soften Window Light With Filet Crochet Curtains
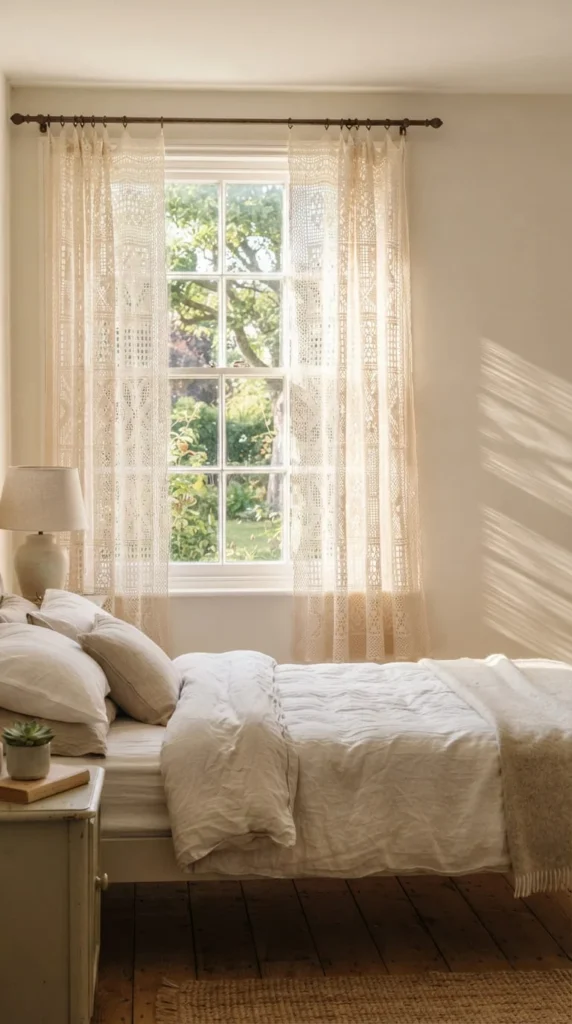
Filet crochet curtains bring pattern to a bedroom without introducing another heavy fabric. Their open spaces allow daylight through, producing small shadows that change as the sun moves.
This idea works particularly well with cotton yarn and simple repeating motifs. Grids, leaves, diamonds, arches, and understated floral shapes can all appear decorative while still allowing the window to feel light.
You do not have to crochet a full floor-length curtain. A café-style panel across the lower half of a window is a much smaller project. Another option is a short crochet valance across the top.
Before starting, measure both the window and the rod. Make a swatch and wash it before calculating your final width because some fibers can change after laundering.
For a relaxed appearance, allow a little extra width so the panel gathers gently rather than hanging completely stretched.
Privacy is another factor. Open crochet does not replace an opaque curtain in a bedroom facing nearby homes or a busy street. Pair it with a roller shade, plain curtain, or other suitable window covering when privacy is required.
Cream and warm white keep the look airy, while muted sage or dusty rose can create a more decorative cottage-style window.
6. Place a Chunky Crochet Rug Beside the Bed
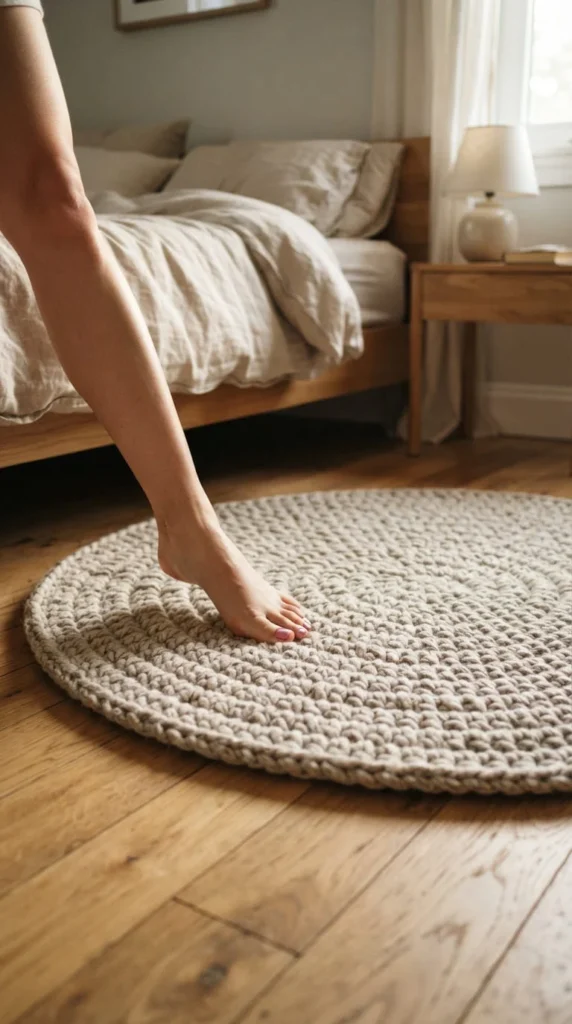
A bedside rug gives crochet a functional role while making the first step out of bed feel softer. Because the piece sits low in the room, you can use heavier texture without making the bed itself look busy.
For a compact bedroom, consider a round rug around the side of the bed rather than a large rectangle. A long narrow runner also works beside a single or double bed.
Thick cotton cord, fabric yarn, or another sturdy yarn made for floor projects will hold its shape better than a delicate garment yarn. Use dense stitches so toes and furniture legs are less likely to catch in large openings.
Neutral colors are practical for a rug because they work with changing bedding. Oatmeal, mushroom, warm gray, cocoa, and muted olive can all ground lighter bedroom colors.
Safety matters on smooth flooring. Place a suitable non-slip rug pad underneath the finished piece rather than relying on the yarn itself for grip.
Check the rug regularly for loose ends or stretched stitches. Bedroom floor pieces receive friction that decorative blankets do not.
If a full rug sounds like too much crochet, make a small circular mat first. It can sit beside the bed, under a reading chair, or near a dressing table.
7. Add Crochet Lace Along a Bed Canopy
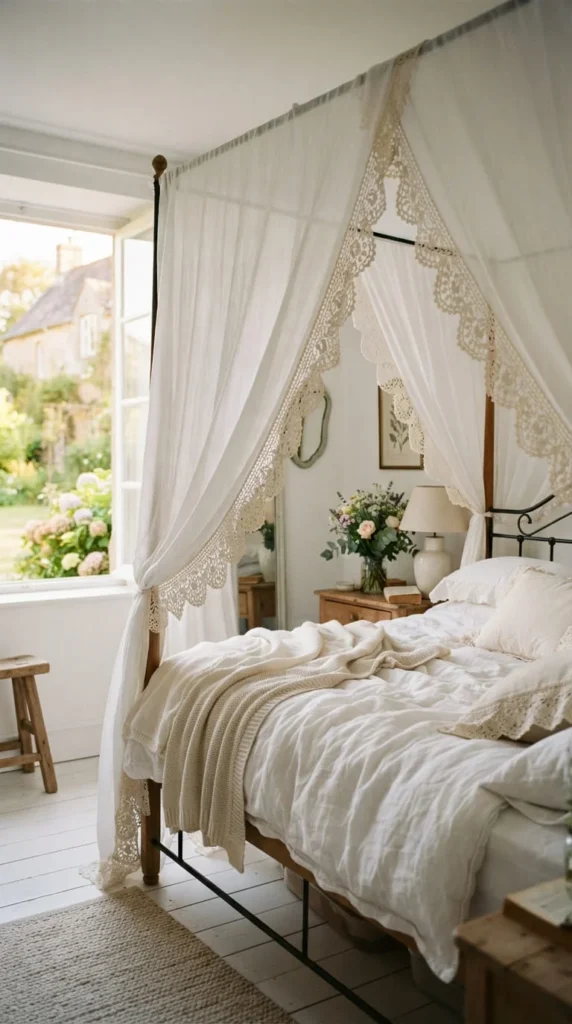
A full crocheted canopy can involve a lot of yarn and work, but a crochet border gives a similar handmade mood with far less material.
Start with a plain lightweight canopy or sheer fabric panel. Crochet a narrow lace strip separately, then attach it along the lower edge using small, evenly spaced stitches.
Scallops, shells, picot edging, tiny flowers, or repeating arches all work well. Keep the pattern relatively open so the finished canopy remains airy rather than visually heavy.
Warm white and cream are natural choices, though a pale blush or muted green border can create a delicate color accent above neutral bedding.
Before attaching the crochet, lay the fabric flat and pin the edging in position. This lets you check whether the lace length matches the fabric without pulling either piece.
Keep hanging fabric safely away from lamps, candles, heaters, ceiling fans, and other heat or moving sources.
This idea is especially useful for bedrooms where the main bedding already has color or pattern. The crochet appears as a quiet detail rather than another large competing feature.
For an even smaller project, add lace only to the canopy opening instead of going around every edge.
8. Make a Removable Crochet Headboard Panel
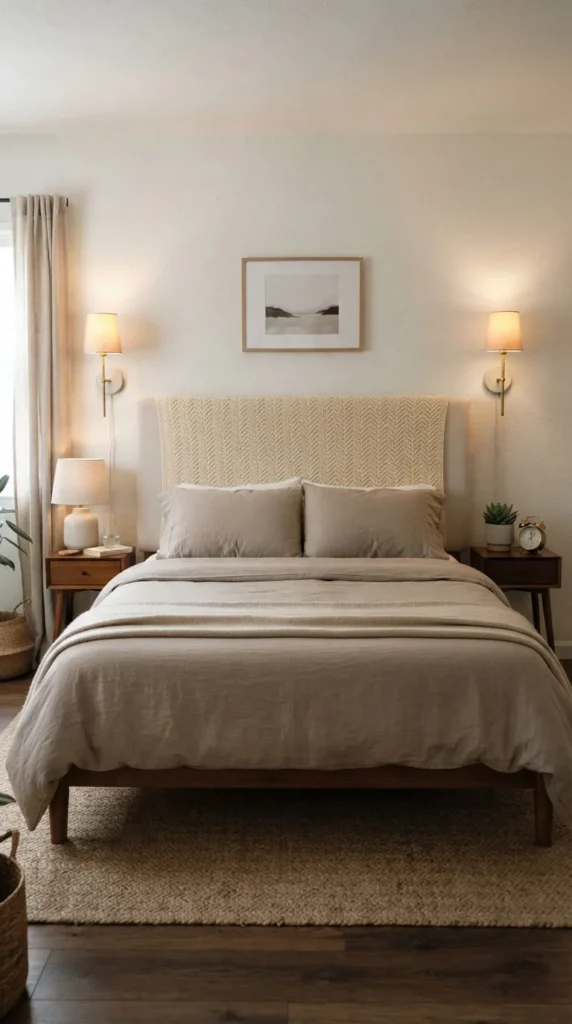
A crochet headboard panel can soften a plain bed frame and create texture exactly where the eye naturally lands.
Instead of permanently covering the headboard, make a removable rectangle that slips over it or attaches at the back. This makes cleaning easier and lets you change the room later.
Choose a stitch pattern that looks attractive from several feet away. Ribbing, moss stitch, subtle chevrons, or a simple geometric texture can work better than very tiny decorative details.
Measure the headboard carefully, including its depth if your cover wraps around the sides. Make a small swatch before calculating the final stitch count.
A medium or bulky yarn can shorten the project while producing enough structure to lie smoothly. Avoid heavily shedding fibers near pillows.
For color, use either a shade close to your wall for a quiet result or one darker tone for gentle contrast. Cream on warm beige, olive on ivory, or cocoa against pale taupe can all work.
If a full-width panel feels like too much work, crochet a narrower decorative strip that runs across the center of the headboard. You still get a handmade focal point without making an upholstery-sized project.
9. Hide Bedroom Clutter in Structured Crochet Baskets
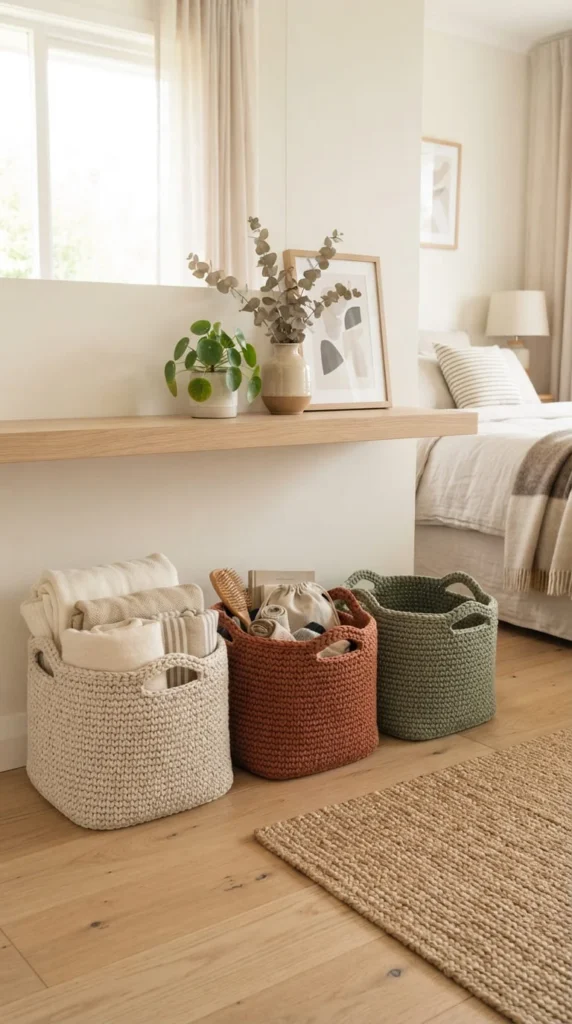
Storage works harder when it also looks like part of the room. Crochet baskets can hold spare blankets, scarves, chargers, hair accessories, yarn, or other small bedroom items while adding another tactile surface.
The main challenge is structure. Loose stitches may create a pretty basket that collapses when filled.
Use tight single crochet, sturdy cord, doubled yarn, or a firm basket yarn. A reinforced base can help larger designs stand upright. Some makers also add a removable rigid insert between layers where appropriate.
Match basket size to the job. Small shallow baskets work well for dresser items. Medium baskets can sit on shelving. A larger floor basket can hold rolled throws.
Color-blocking is a simple way to make the basket feel designed. Try a darker lower third with a lighter upper section, or work the entire basket in one neutral shade and add small contrasting handles.
Measure the shelf or cubby before crocheting. A beautiful basket that is two centimeters too wide quickly becomes frustrating.
For a cleaner bedroom, group several loose objects into one basket instead of using many tiny containers. The room looks calmer, while the crochet still adds warmth and texture.
10. Create a Wall-Hanging Pocket Organizer
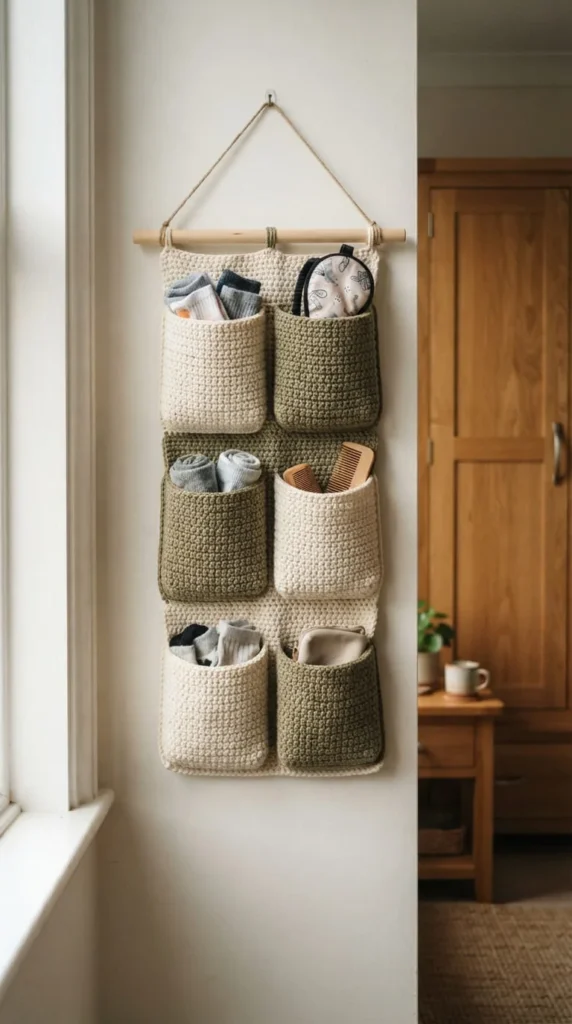
A hanging organizer uses unused vertical space, making it handy in bedrooms with small nightstands or limited drawers.
Start with a firm crochet backing panel. Then attach several pockets sized for what you actually plan to store. Small pockets can hold charging cables, glasses, sleep masks, scrunchies, or jewelry pouches. Larger pockets can carry socks, notebooks, or lightweight accessories.
Dense stitches are better than open lace for the pockets because small items can push through large gaps. Reinforce the upper edge where the panel connects to its dowel or rod.
Before crocheting, arrange your intended items on a table and estimate suitable pocket sizes. That simple step produces a much more useful organizer than choosing dimensions at random.
Keep heavy objects elsewhere. Crochet wall storage is best for light bedroom items.
A two-color design can make the organizer more decorative. For example, use oatmeal for the backing and muted clay for pocket edges. Another option is a single-color piece with different stitch textures across each pocket.
Hang it beside a dresser, inside a wardrobe area, or near a desk. Keeping the organizer close to where the objects are used makes it much easier to maintain.
11. Frame a Plain Mirror With Crochet
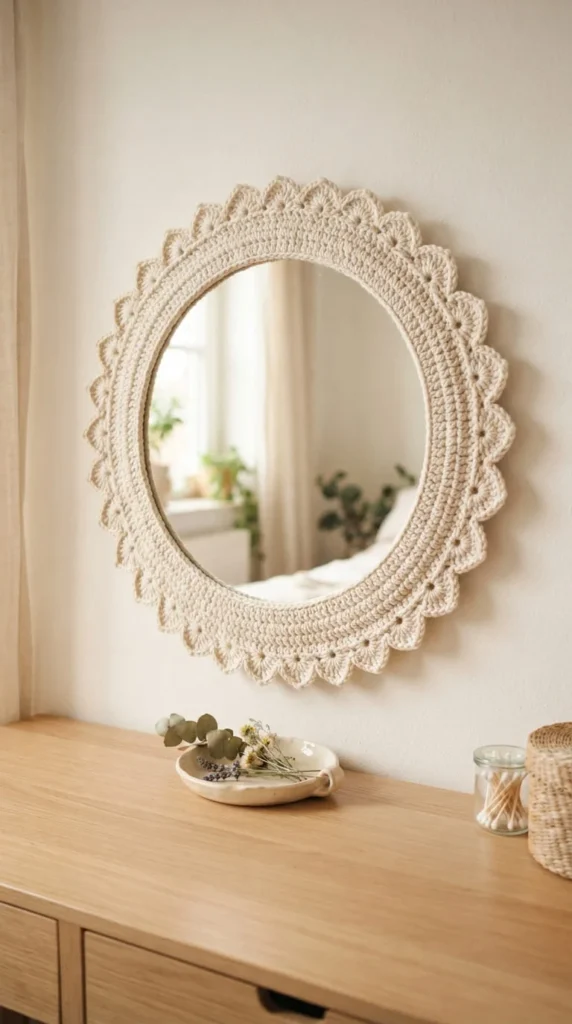
A basic round mirror can become a handmade accent with a removable crochet frame. This is a good project for using small amounts of yarn left from pillows or blankets.
For a minimal result, crochet a simple ring around the outside edge. If you prefer romantic decor, add scallops or small petal shapes around the border.
The crochet should stay clear of the reflective surface so the mirror remains practical. Measure the outside circumference carefully and test the fit as you work.
A removable design is easier to clean. Depending on the mirror shape, the crochet can wrap around the edge like a fitted sleeve or attach to a separate lightweight frame surrounding it.
Repeat a color already used elsewhere in the room. A sage mirror edge can connect visually with a sage cushion. Cream around the mirror can echo an ivory throw.
Avoid placing thick yarn where it interferes with wall mounting hardware.
This idea works especially well above a vanity or dresser, where the crochet becomes part of a small styling zone. Keep the objects below the mirror simple so the stitched border gets visual space.
For a tiny version, decorate a small tabletop mirror rather than a large wall piece.
12. Give a Bedside Lamp a Crochet Shade Sleeve
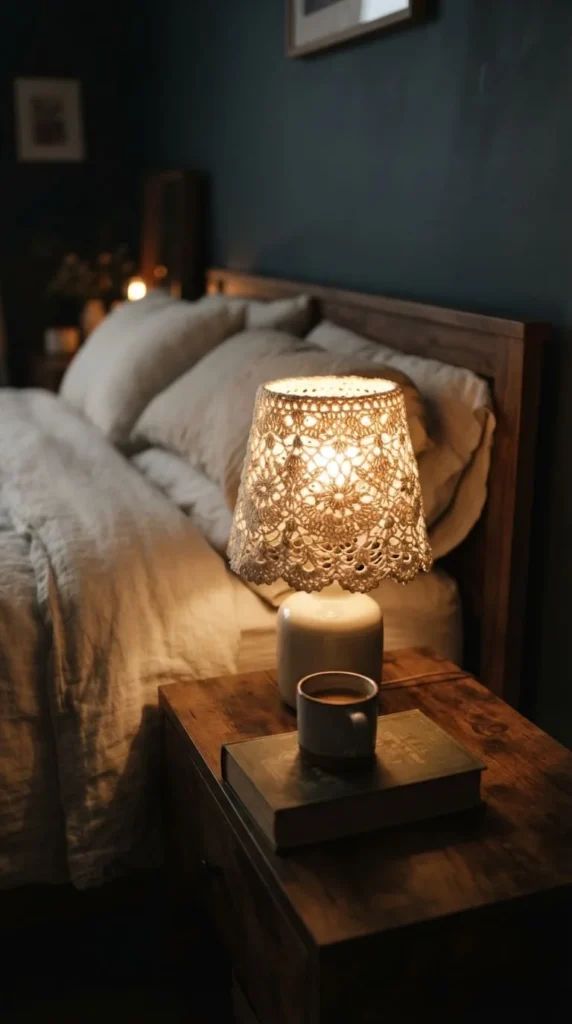
A crochet lampshade sleeve can create beautiful patterns when light passes through open stitches, especially during evening hours.
Choose an existing lampshade with a simple shape. Crochet a removable sleeve that fits around the outside without sagging or bunching.
Open geometric stitches, vertical lace, or small repeating shells can cast gentle shadows. Natural cotton in cream or beige gives the light a calm appearance, while muted rust or olive produces a stronger decorative accent.
Take care with heat. Use the lamp only with a suitable low-heat bulb, such as an LED that is compatible with the fixture, and keep the yarn away from the bulb, socket, and other hot components. The crochet should cover only an appropriate exterior shade surface.
Before making the full sleeve, crochet a small sample and hold it near the unlit shade to see how much of the original material remains visible.
A sleeve is useful because it can be removed for cleaning or seasonal changes.
If your lamp has an already decorative base, keep the crochet simple. If the lamp is very plain, a more detailed lace pattern can become the visual feature without taking up any extra floor or tabletop space.
13. Cover a Floor Pouf With Chunky Crochet
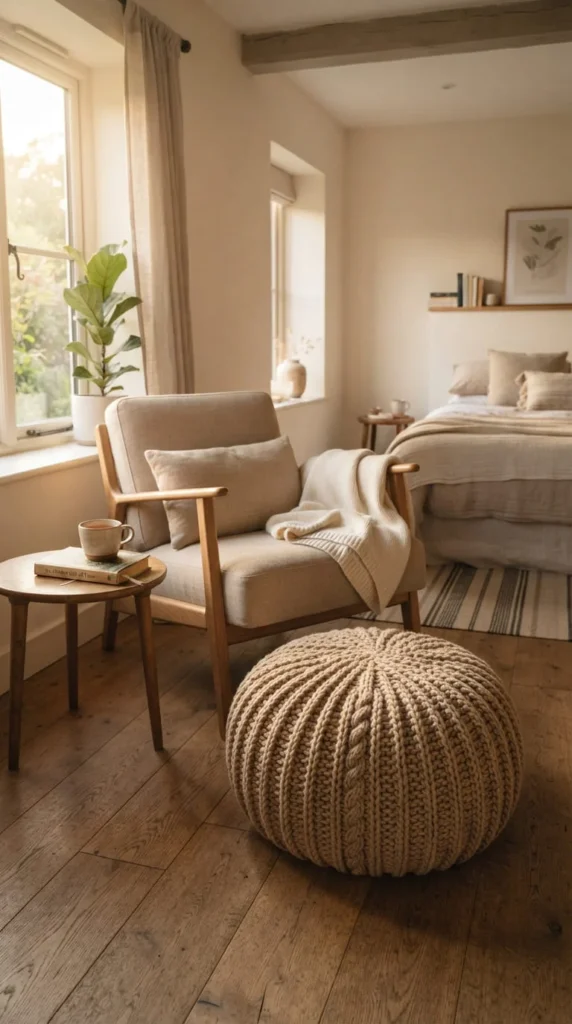
A crochet pouf introduces a larger block of texture without adding another blanket to the bed. It can work as casual seating, a footrest, or a soft surface beside a reading chair.
If you already own a plain pouf, crochet a fitted removable cover instead of making the entire piece from scratch.
Chunky yarn works well because the stitches remain visible from across the room. Ribbing, large moss stitch, or simple spiral rounds can create enough texture without complicated pattern changes.
Choose a color that grounds the room. Warm beige, brown, charcoal, olive, or deep clay can balance pale walls and bedding.
A removable cover is also useful for cleaning. Add a concealed opening underneath so the cover can come off without stretching it over the widest part of the pouf.
If the pouf will be used often, select a yarn that can handle friction rather than an extremely delicate or fuzzy fiber.
Keep the surrounding floor area uncluttered. A pouf looks intentional when it has a clear purpose beside a chair, vanity, or bed.
For a smaller project, cover a compact footstool using the same idea. It delivers similar texture with much less yarn.
14. Hang a Small Crochet Flower Garland Above the Bed
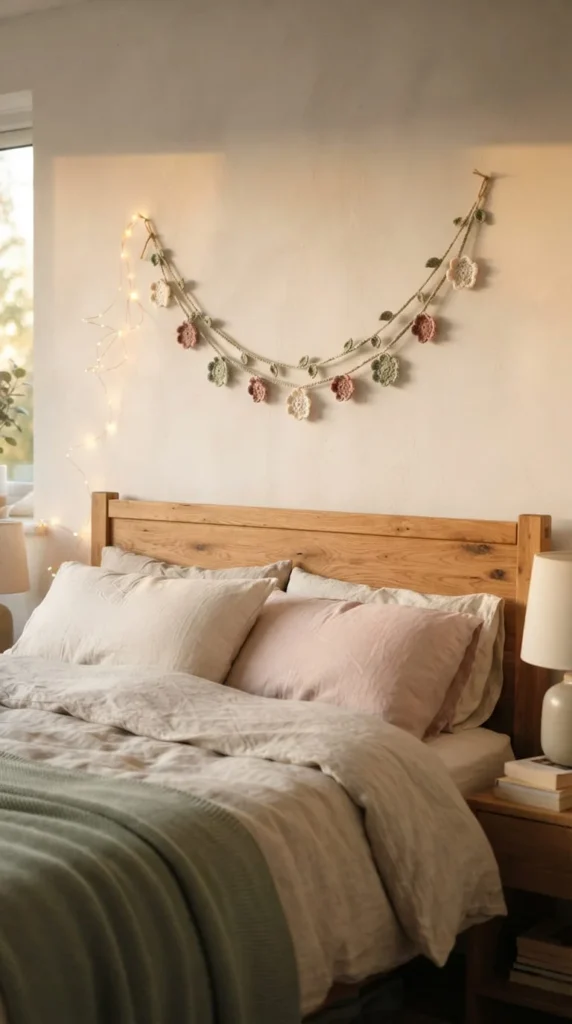
Crochet flowers can become surprisingly elegant when the color palette stays restrained. Instead of making a multicolored garland, choose two or three shades and repeat them in a planned sequence.
Tiny daisies, five-petal flowers, leaves, or simple rosettes can all work. Attach them to a crocheted chain or narrow cord, leaving a little space between each motif.
A garland is a good stash project because each flower uses a small quantity of yarn. It is also easy to stop when the strand reaches the right length.
Hang it above the headboard, along a shelf edge, or around a pinboard. Keep it away from lamps, candles, heaters, and other heat sources.
For a softer bedroom, try cream flowers with sage leaves. Dusty rose with oatmeal can feel warmer. If the room is mostly neutral, one deeper accent such as rust or plum can add character.
Block individual motifs before attaching them if their petals curl more than you like.
Avoid stretching the strand too tightly across the wall. A gentle curve usually looks more relaxed.
You can also make a short version for a small wall rather than running garland across the entire room.
15. Dress Indoor Plant Pots With Crochet Sleeves
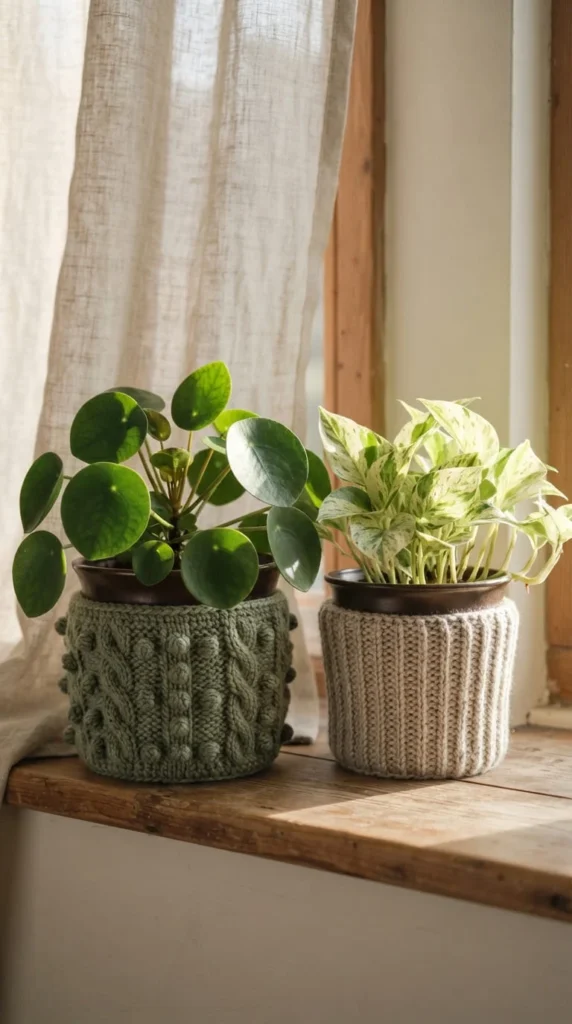
Plant pots often introduce hard ceramic, plastic, or metal surfaces into a bedroom. A fitted crochet sleeve softens that look while repeating the room’s yarn texture in a small way.
Crochet the cover around the outer decorative pot rather than placing yarn where it can remain wet. Water the plant carefully and remove the sleeve if moisture reaches it.
Dense stitches work best because they hide most of the original pot. Ribbing creates a clean modern finish, while a granny-inspired pattern feels more playful.
Choose yarn colors that support the plant rather than compete with it. Sage, oatmeal, cocoa, clay, cream, and charcoal pair naturally with green foliage.
If the pot narrows toward the base, decrease stitches gradually instead of making a straight cylinder. Test the cover during construction so it stays snug without stretching heavily.
This project is especially useful for leftover yarn from a larger bedroom piece. A pot sleeve matching one color from your bed throw can connect distant areas of the room.
Place one or two covered pots on a windowsill, dresser, or plant stand. Too many patterned covers can make the room busy, so allow plain pots to remain part of the arrangement too.
16. Crochet a Bedside Book Sling
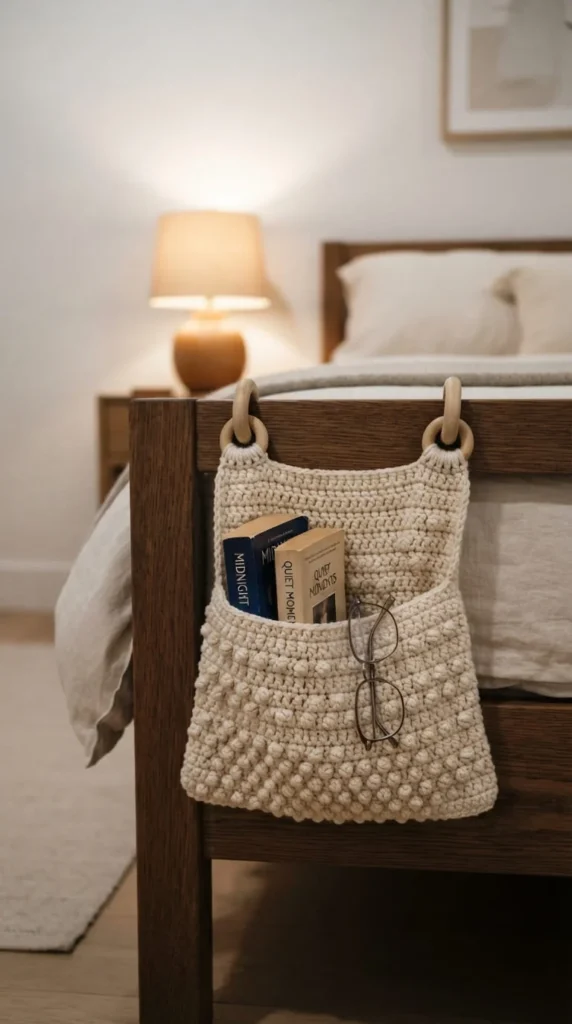
A bedside book sling combines storage and decoration without requiring another piece of furniture.
The idea is simple: crochet a strong rectangular pocket, reinforce its upper edge, and attach it securely to a suitable bed frame or another stable support. The pocket can hold a paperback, e-reader, notebook, sleep mask, or other lightweight bedtime items.
Use firm cotton or another sturdy yarn and work with dense stitches. Decorative openwork may stretch too much once objects are placed inside.
Measure the largest item you expect to store, then add enough room for your hand to reach inside easily. A slightly wider opening is more convenient than a tight pocket.
If the sling tends to sag, add a second layer or crochet the fabric more densely. Keep the load light.
For styling, match the sling to the bed frame or bedding. Cream looks clean against dark wood. Muted olive or clay can give a pale bed frame more character.
Position it where you can reach it while sitting in bed but where it will not interfere with getting in and out.
A smaller version can hang from a bedside chair or another stable furnishing if your bed frame is not suitable.
17. Add a Fitted Crochet Cover to a Stool
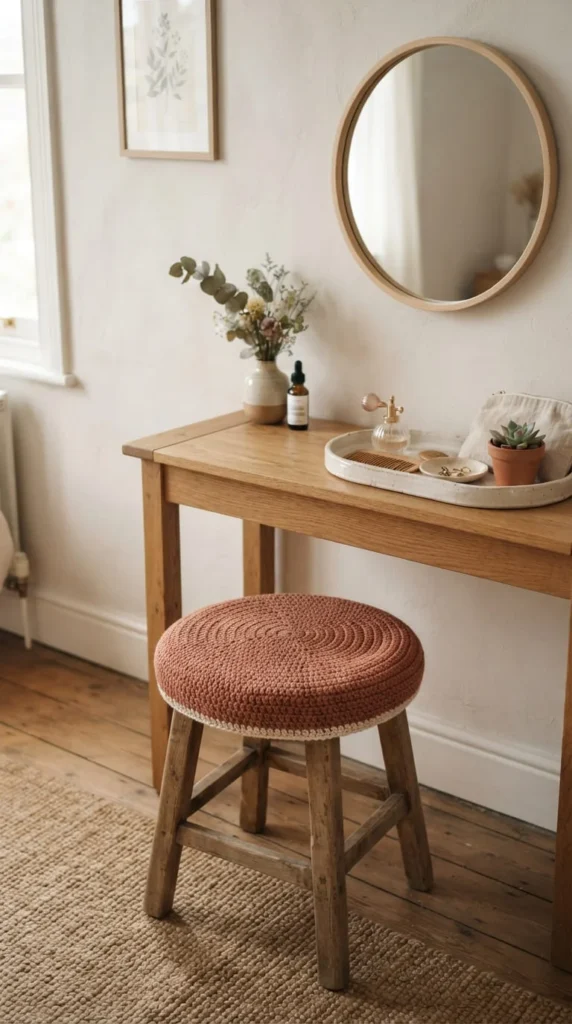
A vanity stool, small bench, or wooden seat is an easy place to add crochet because the project can stay compact and functional.
Measure the seat from edge to edge and crochet a fitted cover rather than a loose decorative cloth. Round stools can be worked in widening circles. Square seats can start from a center square or be made as a flat panel with a fitted border.
A dense stitch creates a more stable sitting surface. Avoid large holes or heavy bobbles where they may feel uncomfortable.
You can attach the cover underneath using a crochet drawstring, elastic casing, or another secure removable method suited to the furniture.
Choose yarn based on use. A decorative stool can carry softer yarn, while a seat used every day benefits from a durable fiber that handles repeated contact.
Color gives you several options. Match the bedding for a quiet result, or introduce a darker accent that appears nowhere else except one small cushion or pot sleeve.
Check the cover regularly if it gets frequent use. Tighten or repair stretched attachment points before they become larger problems.
This is also a smart way to update a scratched seat while keeping the original furniture underneath.
18. Hide a Tissue Box Inside a Crochet Cover
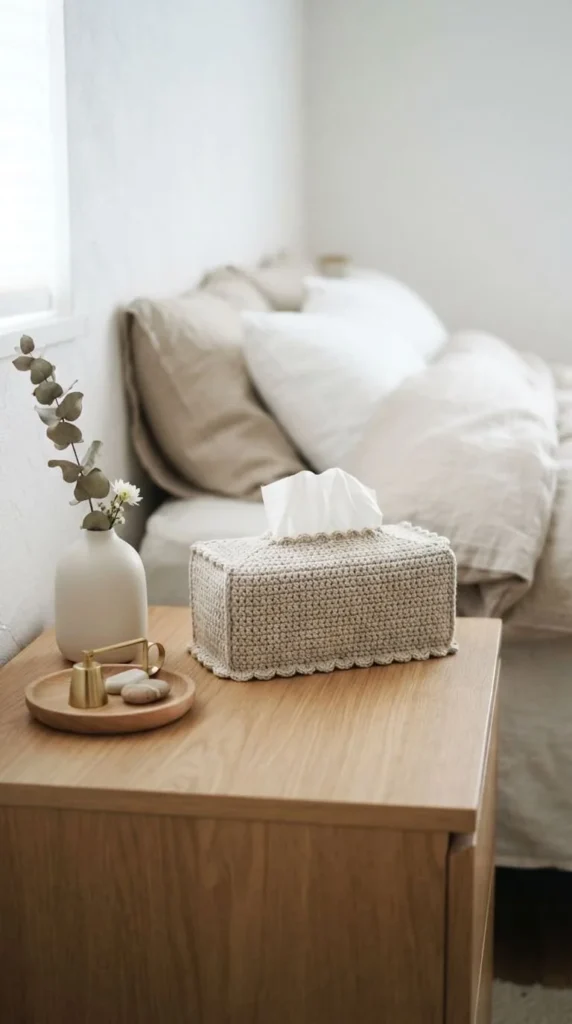
Everyday packaging can interrupt an otherwise calm bedroom. A simple crochet tissue box cover turns a practical object into part of the decor.
Start by measuring the length, width, and height of the box you normally buy. Crochet a fitted rectangular cover with an opening at the top for tissues.
The easiest style uses solid panels joined at the corners. A more decorative version can include a narrow scalloped border or small textured rows near the base.
Cotton yarn gives crisp edges and is easy to work into firm stitches. Keep the body dense enough that the printed packaging underneath does not show clearly through the crochet.
An open bottom makes the cover easy to slide on and off when the tissue box is replaced.
Place it on a dresser or nightstand where it already serves a purpose. Avoid adding extra crochet objects around it simply for decoration. One small functional piece often has more visual impact when surrounded by plain surfaces.
Match the cover with another small accent, such as a coaster or plant sleeve, rather than making every item identical.
For a subtle finish, choose oatmeal, taupe, cream, muted pink, or another quiet shade already used in the room.
19. Mount Mini Crochet Baskets on a Wall Rail
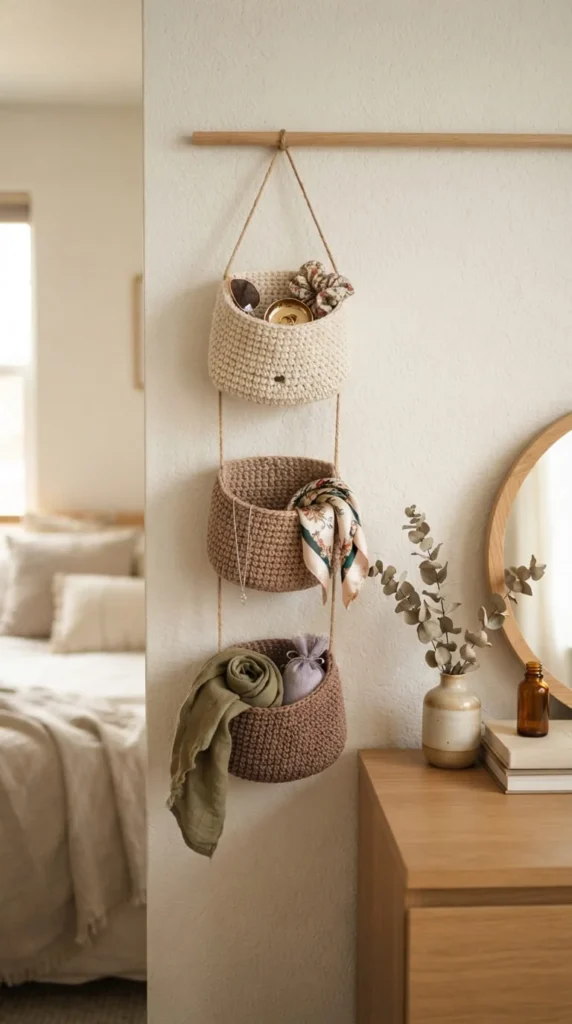
Mini hanging baskets give you flexible storage without the large flat appearance of a traditional pocket organizer.
Crochet each basket separately and hang them from a suitable wall rail, peg system, or stable hook arrangement. Because every basket can be removed, you can rearrange the setup as your storage changes.
Make the base dense and slightly smaller than the upper opening. This helps the basket hold a rounded shape. Firm sides work better than soft fabric for items such as scrunchies, charging cables, lightweight scarves, craft supplies, or small personal accessories.
Use only lightweight contents and secure the rail or hooks according to the product instructions and wall type.
A matching set of three can look neat, but the baskets do not have to be identical. Try one tall basket, one shallow bowl shape, and one medium pocket in related yarn colors.
For a softer aesthetic, use cream with cocoa edging. A retro room might suit rust, mustard, and muted olive.
Leave space between each basket so the wall does not become visually crowded.
This concept is especially handy beside a desk or dresser where small items tend to collect on horizontal surfaces.
20. Make a Crochet Moon-and-Stars Wall Hanging
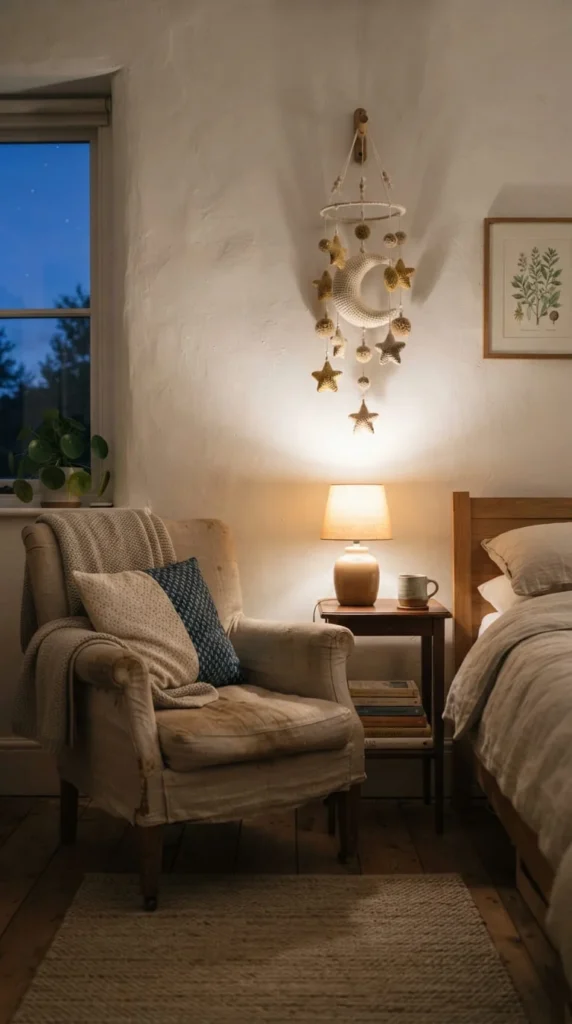
A moon-and-stars hanging can add a dreamy touch without making the bedroom feel overly themed. The key is keeping the shapes simple and the colors controlled.
Crochet one crescent moon as the main piece, then add a few smaller stars at varied lengths underneath. Use firm stuffing only if you want three-dimensional shapes. Flat motifs create a cleaner wall-art effect.
Cream, oatmeal, pale gold, soft gray, dusty blue, or muted lavender can create a night-inspired palette without relying on bright primary colors.
Attach the pieces to a small dowel, embroidery hoop, or sturdy top cord. Keep hanging strings neat and spaced so the motifs do not tangle.
This decor works well in a reading corner, above a small dresser, or on a narrow wall that cannot hold large artwork.
If you prefer a more minimal bedroom, use only one crescent with two stars. More motifs do not automatically make the piece better.
Block flat shapes before assembly so their points and curves look defined.
Keep all hanging yarn safely away from open flames, heaters, fans, and locations where it could become caught on moving objects.
21. Build a Small Coordinated Crochet Bedroom Collection
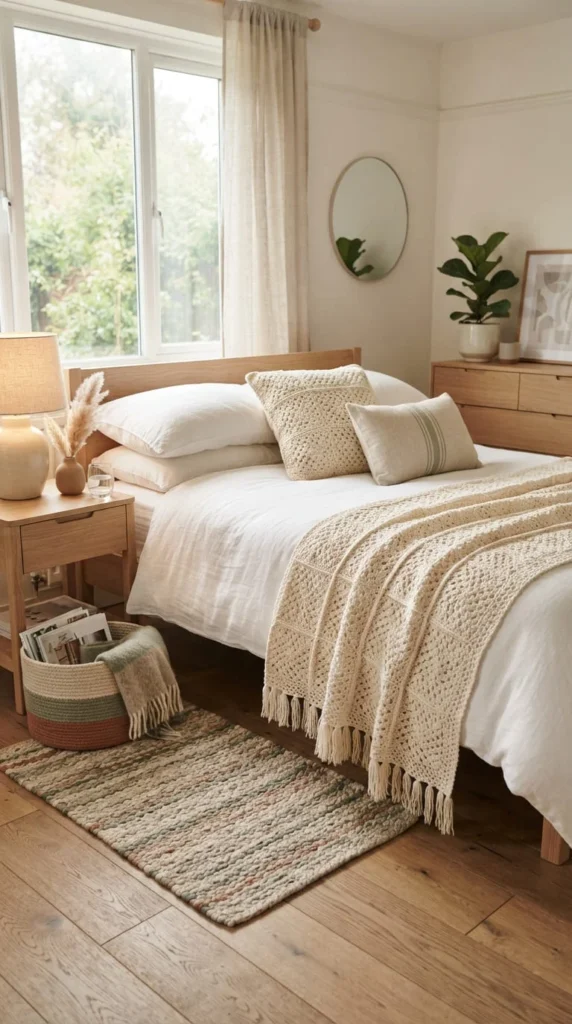
The most polished crochet bedrooms usually rely on repetition rather than sheer quantity. Instead of making many unrelated projects, create a small collection that shares colors or stitch details.
Start with one main piece, such as a throw. Pull two or three colors from it for smaller objects around the room.
For example:
- Use the throw’s cream yarn for a bobble cushion.
- Repeat its sage shade on a plant sleeve.
- Use clay yarn for the lower section of a storage basket.
- Add a tiny amount of cream edging to connect everything visually.
The projects do not have to use the same stitch. In fact, varying texture can make the room feel more natural. A granny-square blanket, ribbed basket, and bobble pillow can work together because their colors relate to one another.
Space the crochet around the room rather than placing every handmade piece on the bed. One item near the window, another beside the bed, and another on a dresser creates a visual rhythm.
If you are starting from zero, make the smallest project first. A cushion or basket lets you test the palette before investing yarn and time in a large blanket.
This approach also makes future decorating easier because every new crochet project has a clear color direction.
Conclusion
A soft crochet bedroom makeover does not require covering every surface with handmade yarn. A few carefully chosen pieces can bring warmth, texture, practical storage, and personality while leaving the room calm enough for rest.
Start with the area that feels unfinished. A plain bed may benefit from a granny-square throw or textured cushion. An empty wall could take a tapestry or moon hanging. A cluttered corner may be better served by a structured basket or wall organizer.
Keep your palette limited, measure before starting, choose yarn suited to the way each item will be used, and finish pieces carefully through blocking or secure assembly where appropriate. Small details often have just as much presence as large projects.
Pick one crochet bedroom decor idea that fits your current skill level and make that your starting point. Once it is in the room, use its colors and texture to guide the next project so your handmade bedroom grows piece by piece rather than all at once.