
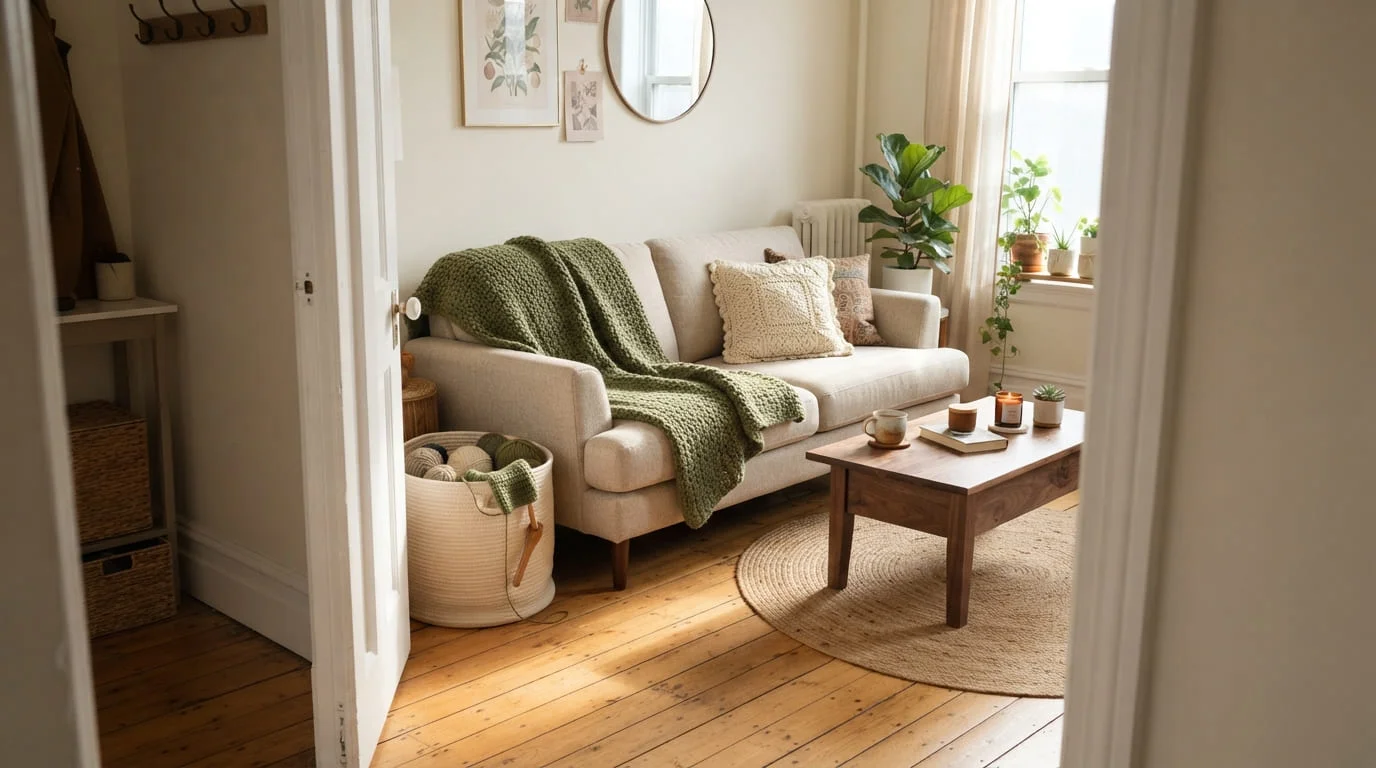
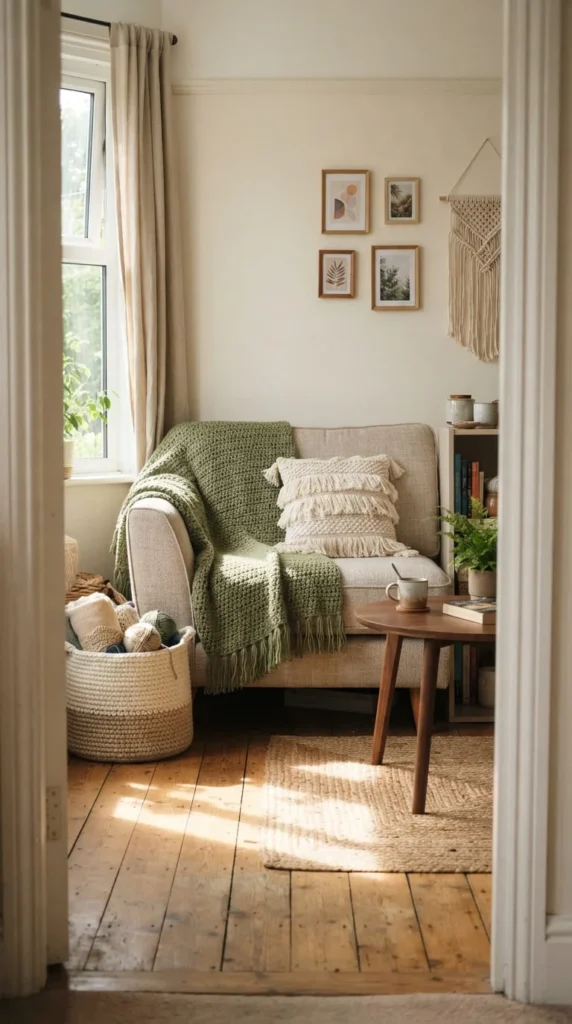
A room can have comfortable furniture and still feel a little bare. Crochet living room decor brings texture into those empty spots: a blanket within reach, a soft cover on a plain cushion, or a basket that gives loose belongings a home. The trick is choosing pieces that suit how you use the room. These 22 ideas cover seating, storage, windows, walls, and small tabletop details, with practical pointers on yarn, sizing, construction, and placement. Start with one corner, borrow colors from something you already own, and let each handmade piece earn its place.
1. Give Your Reading Spot a Moss-Stitch Throw
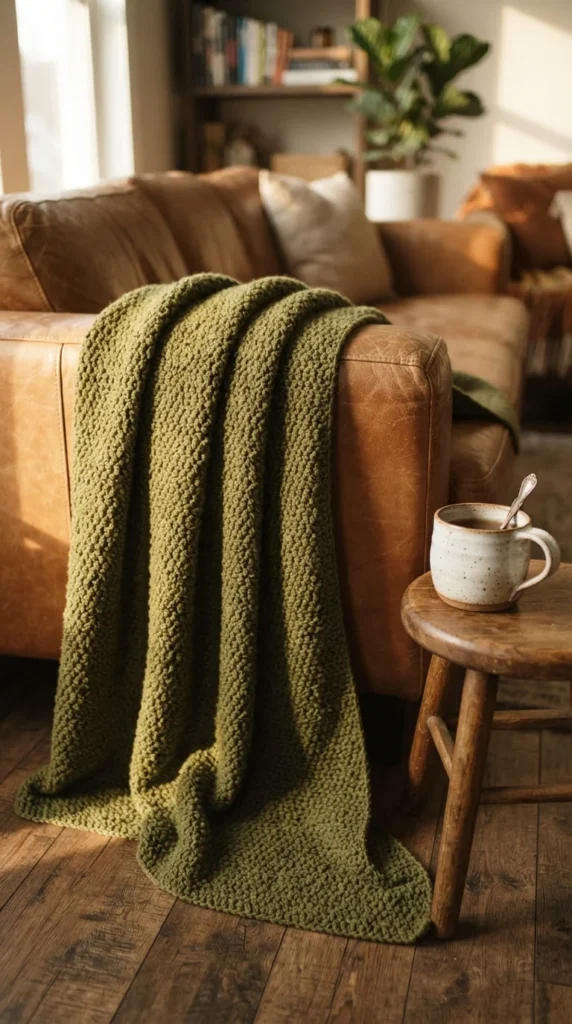
Put a throw where you actually sit with a book. Draping it over the nearest sofa arm makes the blanket easy to reach and gives a plain stretch of upholstery some texture.
Moss stitch creates a small, repeating pattern that suits quiet colors such as olive, oatmeal, or dusty blue. In US crochet terminology, it uses single crochet and chain stitches. Follow a blanket pattern for the starting chain and turning instructions, especially if this is your first large rectangle.
For an adult lap throw, around 40 by 55 inches is a useful starting point. Measure against your own chair before committing. A taller person might prefer extra length, while a small loveseat may suit a narrower blanket.
Choose yarn that feels comfortable against your wrists and neck. Wash and dry a sample according to its care instructions before measuring your gauge. That small check can reveal changes in size or softness before you make the entire throw.
Try one broad stripe near each end instead of frequent color changes. You will have fewer ends to sew in, and the stripe will remain visible when the blanket is folded over the arm.
2. Make One Bobble Cushion the Sofa’s Focal Point
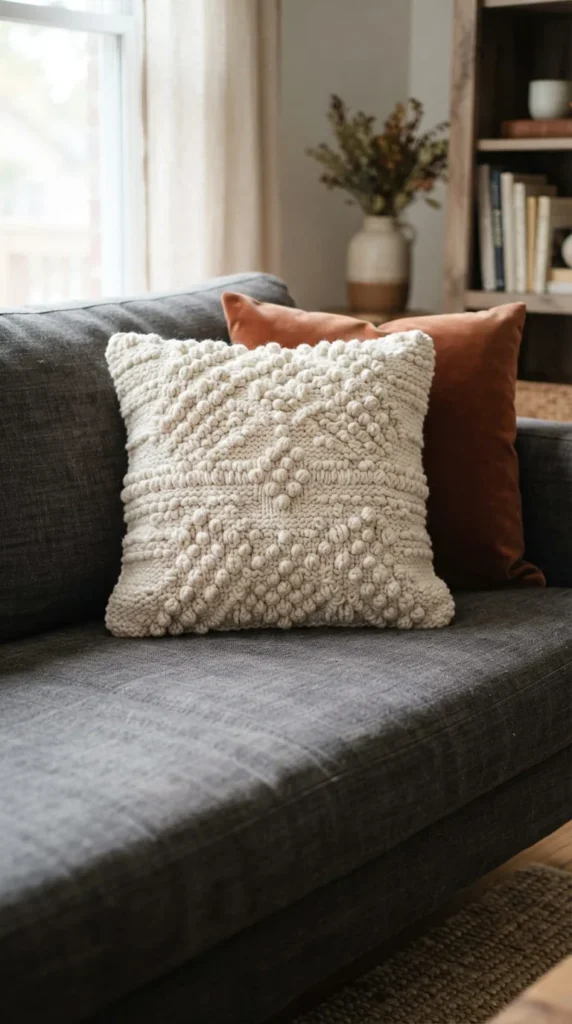
A textured cushion is a manageable way to try crochet on a sofa that already has plenty of color. Use one raised pattern and let the surrounding cushions stay simple.
Bobble stitches work particularly well in a single shade because side lighting reveals their shape. Place bobbles in spaced rows, a central diamond, or a narrow border. A dense field of large bobbles can feel bulky behind your back, so think about where the cushion will be used.
Keep the reverse side smooth. Crochet a plain back panel, or attach the decorative front to a fabric cover if you are comfortable sewing. Either approach gives you a softer side to lean against during a long film.
Measure the insert you already own and follow the chosen pattern’s finished measurements. Crochet fabrics stretch differently, so a washed sample is more useful than guessing from the insert size alone.
An envelope opening makes the cover removable without exposed buttons. Give the overlapping panels enough depth to stay closed around the insert.
For a subtle link to the room, match the cushion to the lightest color in your rug. The connection feels deliberate without making every textile identical.
3. Crochet an Armrest Caddy for Everyday Essentials
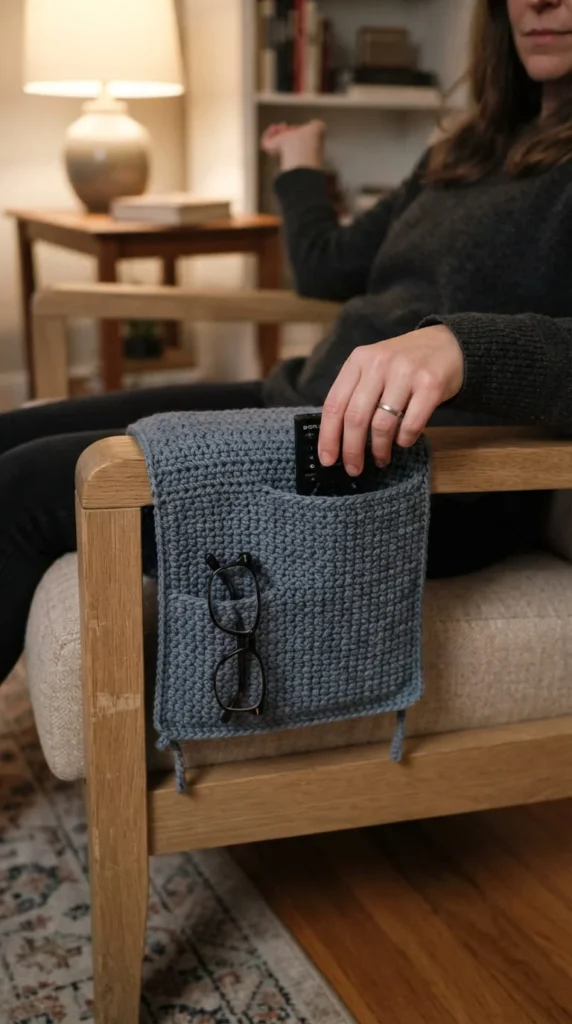
Remotes and reading glasses often end up wedged between cushions. An armrest caddy gives them a visible home while adding a small patch of color beside your seat.
Start by measuring from the inside of the arm, across its top, and down the outside. That measurement sets the length of the main panel. Add a generous section that can tuck beneath a removable seat cushion to help hold the caddy in place.
Use a firm stitch fabric, then sew a second rectangle across the lower outside edge. Vertical seams divide that rectangle into pockets. Size each pocket around a real object, allowing room for your fingers to retrieve it.
Keep the glasses pocket shallow enough that you can grasp the frame without digging. A soft fabric lining can stop small items from catching on the stitches.
Before making the full panel, test a swatch against the upholstery. Smooth leather and rounded arms may let the caddy slide. A fabric backing with suitable grip can help, but the tucked section should still carry the weight.
Choose a color close to the chair for a quiet look. A contrasting pocket border makes the openings easier to spot.
4. Fit a Ribbed Cover Over an Existing Footstool
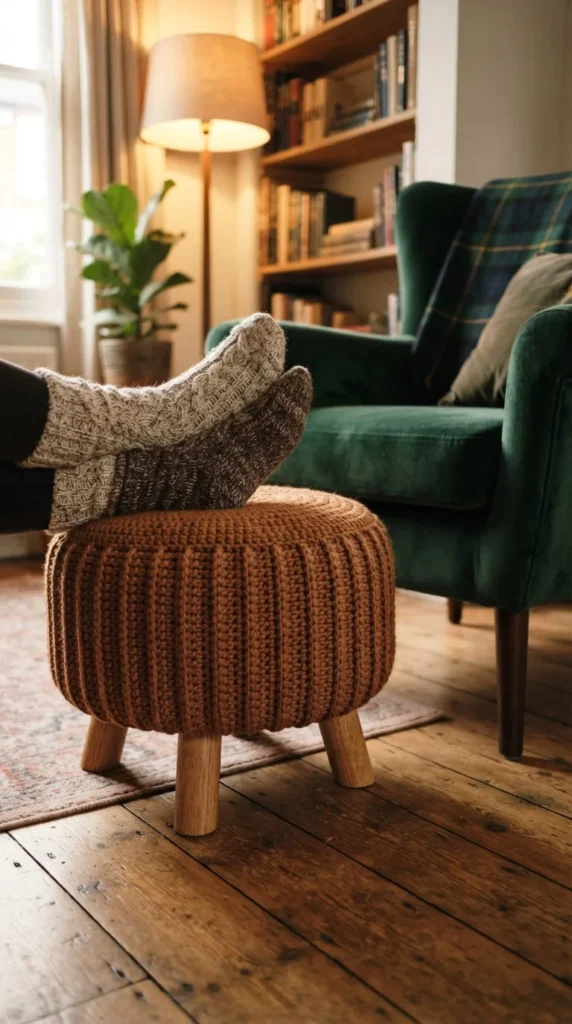
A footstool with tired upholstery can become an appealing crochet project if its frame and padding are still sound. The original stool supplies the support, while the removable cover changes its appearance.
Measure the top, side height, and widest circumference. A round stool may be broader near the middle than at its rim. Sketch those measurements before choosing a fitted-cover pattern.
Ribbed sides add texture without loose fringe brushing against ankles. Depending on the pattern, the ribbing may come from back-loop stitches worked in rows. Check the stretch direction so the finished side panel can wrap around the stool comfortably.
Make the cover removable from underneath. A sewn elastic casing can hold the lower edge beneath the upholstered body while leaving the legs clear. Keep the fastening accessible so laundering does not become a wrestling match.
Try the unfinished cover on before closing every seam. It should sit smoothly when someone rests their feet on it, with no bunching across the top.
A cinnamon, tobacco, or muted mustard shade looks warm beside dark furniture. Use a washable yarn suited to regular handling, and check the underside occasionally for rubbing where the cover meets the frame.
5. Add a Flat Crochet Pad to a Window Seat
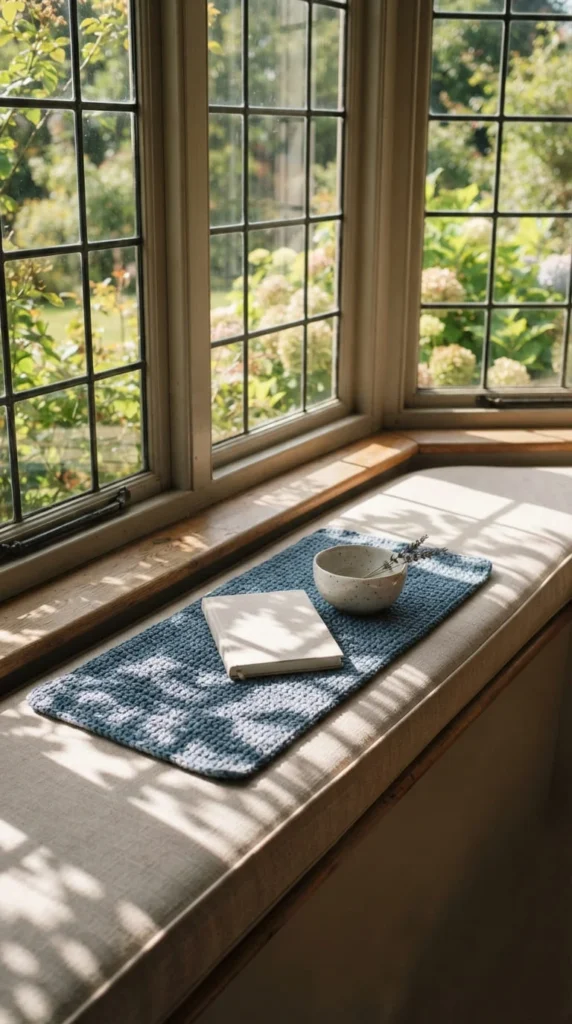
A window seat can look inviting yet feel visually disconnected from the rest of the living room. A tailored crochet pad carries a sofa or rug color over to that quieter corner.
Treat the crochet as the outer layer of an existing padded seat. On a hard bench, the cushion underneath provides the comfort. A thin crochet rectangle by itself will do little to soften a wooden surface.
Choose a relatively flat stitch that feels pleasant when sat on. Large knots, heavy seams, and raised motifs can press into legs. A dense half-double-crochet fabric is one option if it suits the yarn and cushion.
Trace an unusually shaped seat onto paper before you begin. Bay windows sometimes have angled ends, and a simple rectangle may hang awkwardly over the front corners. Compare your pattern with the template as the piece grows.
Attach the finished panel to a removable fabric cushion cover with hand stitching around the edge. This keeps it from shifting every time someone stands up.
Use a slightly darker border where shoes or hands often touch the seat. It frames the pad and makes that busy front edge a little more forgiving between washes.
6. Shape a Small Catchall for the Side Table
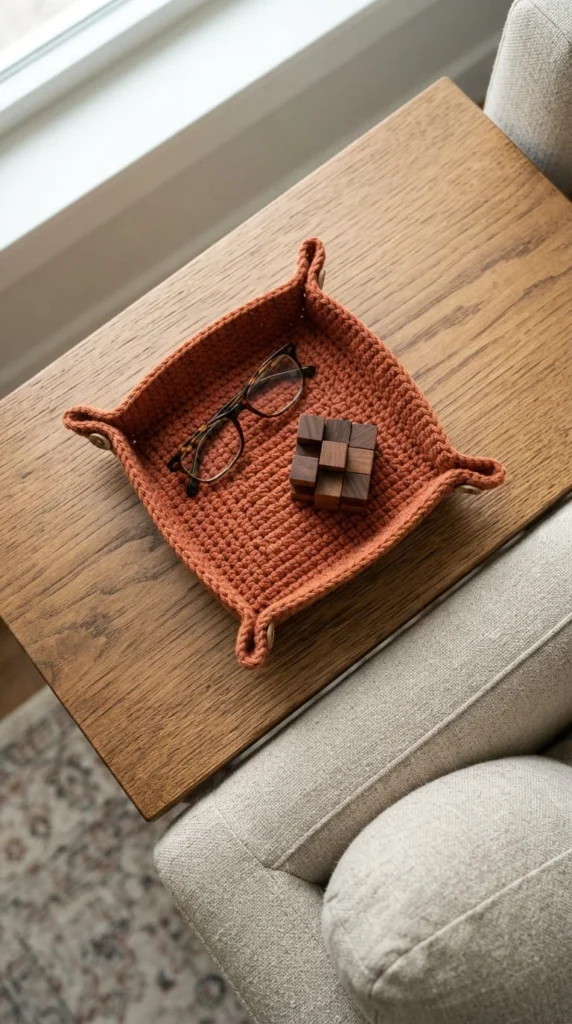
Small belongings can make a side table feel crowded even when there are only three or four of them. A shallow crochet tray gives those objects a boundary and leaves the remaining surface easier to use.
For a simple construction, crochet a firm square, pinch each corner upward, and stitch those pinches in place. The corners create low walls. Test the shape with scrap yarn before choosing the finished size.
An eight-inch square makes a modest starting piece, though the usable base will be smaller once the sides are formed. Measure your glasses or other regular contents so they can lie comfortably inside.
Keep the sides low enough to see everything. A catchall works best when it invites you to drop something in and retrieve it just as easily.
Cotton cord can create a firmer fabric than soft blanket yarn, but the result still depends on your stitch and tension. If the tray slumps, try a smaller hook within a comfortable working range or add a removable fabric-covered insert.
Repeat the table’s warm wood tone with clay or caramel yarn. For a pale room, a dark plum tray can give tiny everyday objects a clear visual home.
7. Build a Color Palette with Flat Cotton Coasters
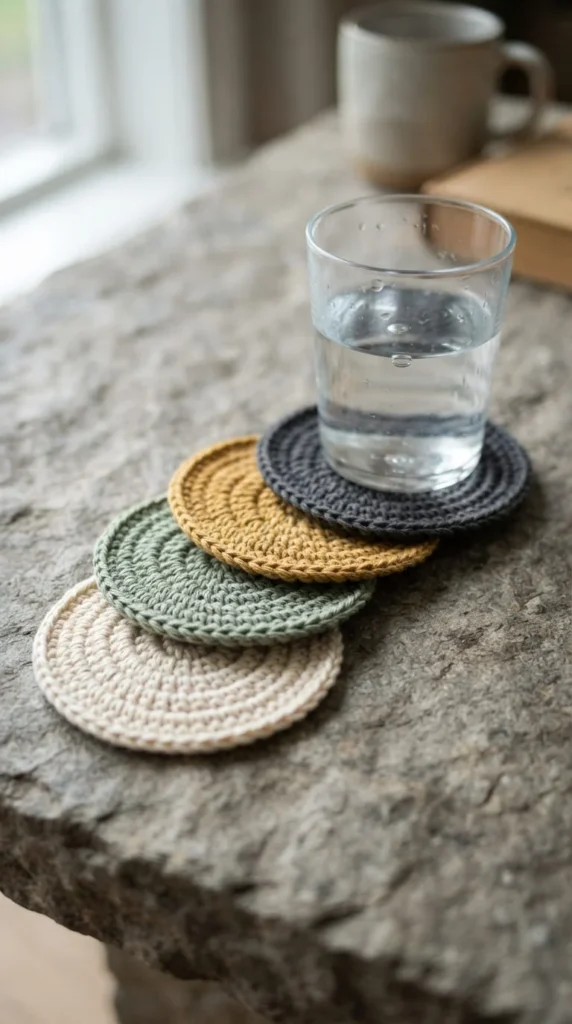
Coasters let you test a color combination before committing to a blanket or cushion. Make four in related shades and live with them on the coffee table for a few days.
Try cream, sage, ocher, and charcoal in a room with oak furniture. Give every coaster the same shape and border so the set feels connected even though the colors differ.
Aim for a finished surface wider than your largest everyday mug. Keep the center flat, with joins and yarn ends tucked away from the area supporting the cup. Raised flowers and thick bobbles are better placed elsewhere.
If you crochet circles, follow the pattern’s increase sequence and check them on the table as you work. A ruffled or cupped piece can make a drink wobble. Correct the shaping before adding a decorative edge.
Cotton is a practical choice for absorbent coasters, but wet fabric can still pass moisture through. On furniture vulnerable to water marks, pair the crochet with a suitable cork-backed coaster underneath.
Store the set in a small dish where guests can find it. Once you settle on your favorite shade, use that color in one larger piece elsewhere in the room.
8. Use a Narrow Runner to Break Up a Long Console
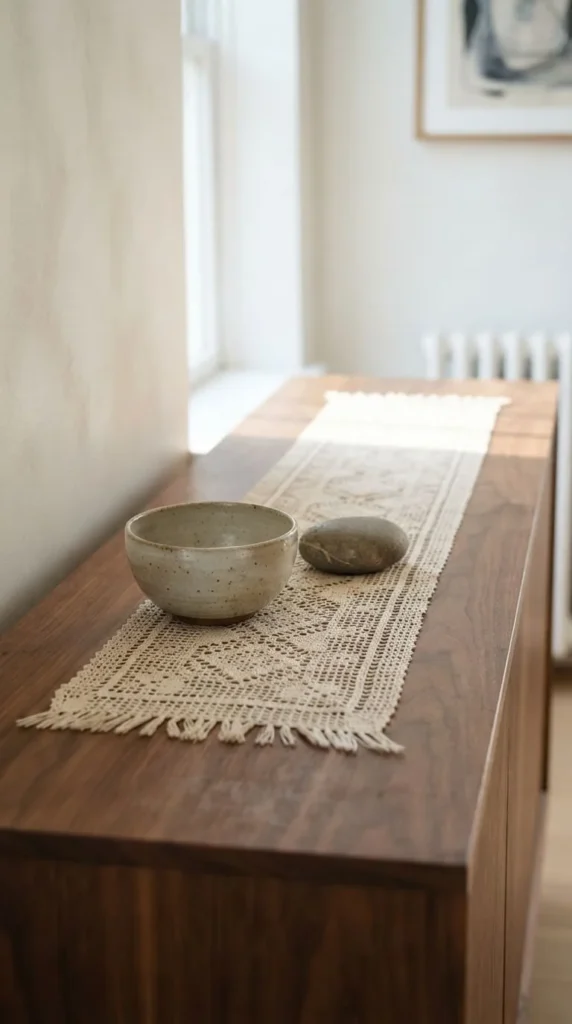
A long console can look bare through the middle even when its ends hold lamps or books. A crochet runner draws attention along the surface and gives a small group of objects somewhere to sit.
Measure the clear tabletop between the items that will stay in place. For a restrained look, make the runner narrower than the table and stop it short of both ends. Exposed wood around the fabric keeps the furniture’s shape visible.
Filet crochet offers a light, open grid, while a solid stitch produces a quieter band of texture. If you choose filet, follow a chart with a simple geometric motif that remains readable at the runner’s actual size.
Test the arrangement before choosing the final length. Lay down a folded tea towel, add your bowl or vase, and move the group until it feels balanced. The towel acts as a useful size placeholder.
Objects with narrow feet can sit unevenly on openwork. Put those directly on the wood beside the runner, and reserve the textile for broad, stable bases.
Finish the short ends neatly rather than adding long tassels. A clean edge is easier to manage near drawers and gives the console a calmer outline.
9. Give the Tissue Box a Simple Tailored Cover
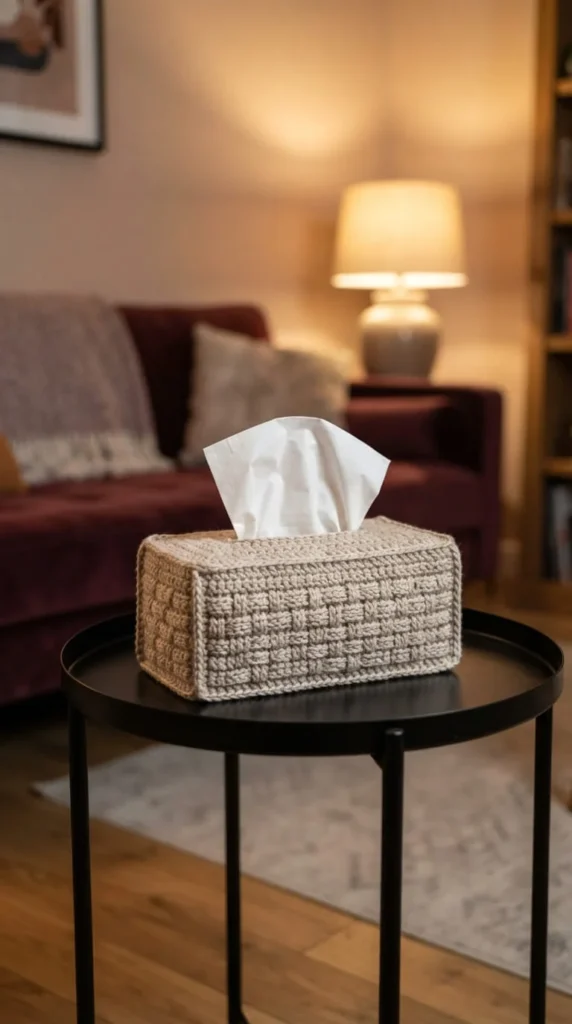
A tissue box is often one of the brightest objects in a carefully chosen living-room palette. A plain crochet cover lets it sit comfortably beside the sofa while keeping it easy to use.
Measure the brand and box size you regularly buy. Record the height, width, depth, and position of the opening. A snug cover made for a cube will not suit a low rectangular box.
Work the top with a slot large enough for tissues to pull through freely. Then follow a box-cover pattern to form the sides, or seam separate panels if you prefer working flat pieces.
Leave the bottom open for easy refills. A close-fitting lower edge usually looks tidier than a long skirt. Check the cover on an actual box before weaving in every end.
Compact stitches help the cardboard design stay less visible. If your fabric is open, a plain fabric lining with a matching slot can create a cleaner finish. Keep the lining secure around the opening.
Try oatmeal with one dark row near the base, echoing a table leg or picture frame. The result is a small, useful detail that quietly ties ordinary household supplies into the room.
10. Make a Blanket Basket That Holds Its Shape
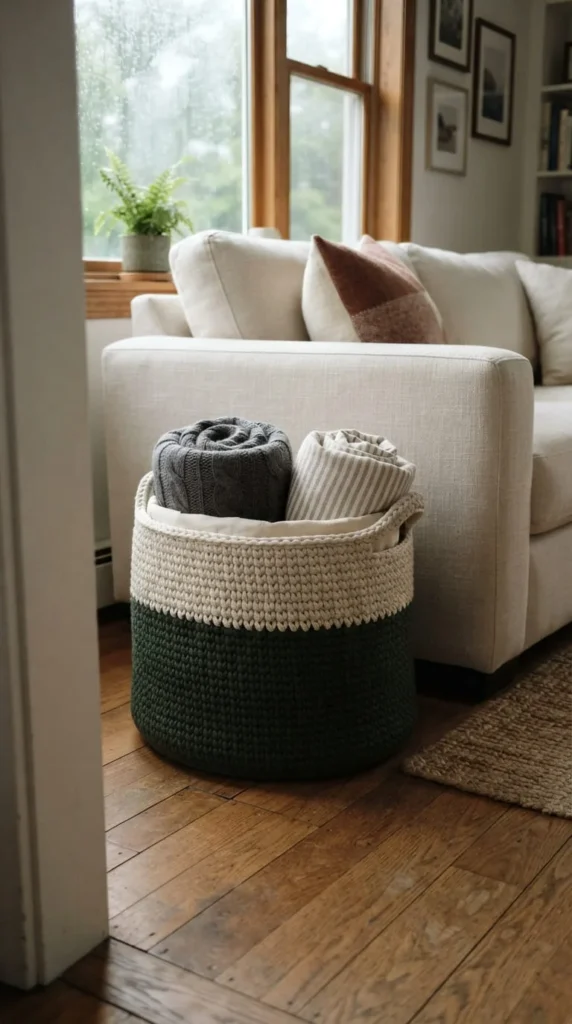
A blanket basket works hardest in rooms where several people share the sofa. Everyone can reach a throw, and clearing the seating takes only a moment.
Choose the basket’s size by rolling the blankets you plan to store and placing them together on the floor. Measure that group, then add a little room so the throws pull out easily. An oversized basket can swallow a small room’s walking space.
For a freestanding design, use a basket pattern written for sturdy yarn or cord. Tight stitches help, but yarn thickness alone does not guarantee firm sides. The material, stitch structure, height, and diameter all affect the result.
Another practical route is a crochet sleeve fitted around a plain basket you already own. The inner basket supplies the structure, making this useful when your preferred yarn is too soft to stand alone.
Give the base a dark color if it will sit directly on the floor. A lighter upper section keeps the basket from looking visually heavy beside a pale sofa.
Treat crochet handles as part of the design unless the pattern supports carrying a loaded basket. Lift a full basket from underneath, especially when it contains heavy throws.
11. Dress a Plain Plant Pot with a Removable Sleeve
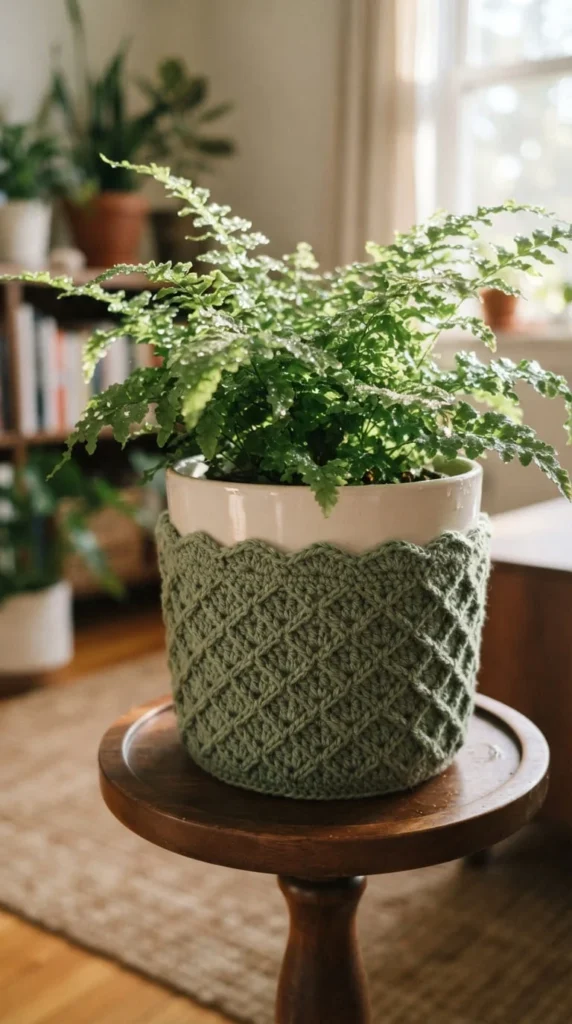
Plant containers do not always match, especially when a collection grows one pot at a time. A crochet sleeve lets an inexpensive outer pot share the room’s colors without repotting the plant.
Fit the sleeve around a waterproof cachepot that holds the nursery pot. Keep yarn away from drainage water. Remove the plant for watering, allow excess water to drain, and return it to a dry outer pot.
Measure the pot’s widest circumference and height. Tapered pots may require shaping, so choose a pattern with a similar profile. A straight tube can bunch around a narrow base or slip down a smooth surface.
Stop the sleeve below the rim so it can slide off easily. That small exposed edge also creates a pleasing contrast between ceramic and yarn.
For a leafy plant, try a restrained stitch in stone, sage, or muted terracotta. Busy multicolored motifs can compete with the leaves, while a simple rib or narrow stripe gives the container its own detail.
Make the sleeve easy to remove for washing and for checking the pot underneath. If it becomes damp, take it off and dry it fully before putting it back on display.
12. Arrange a Small Bouquet of Crochet Stems
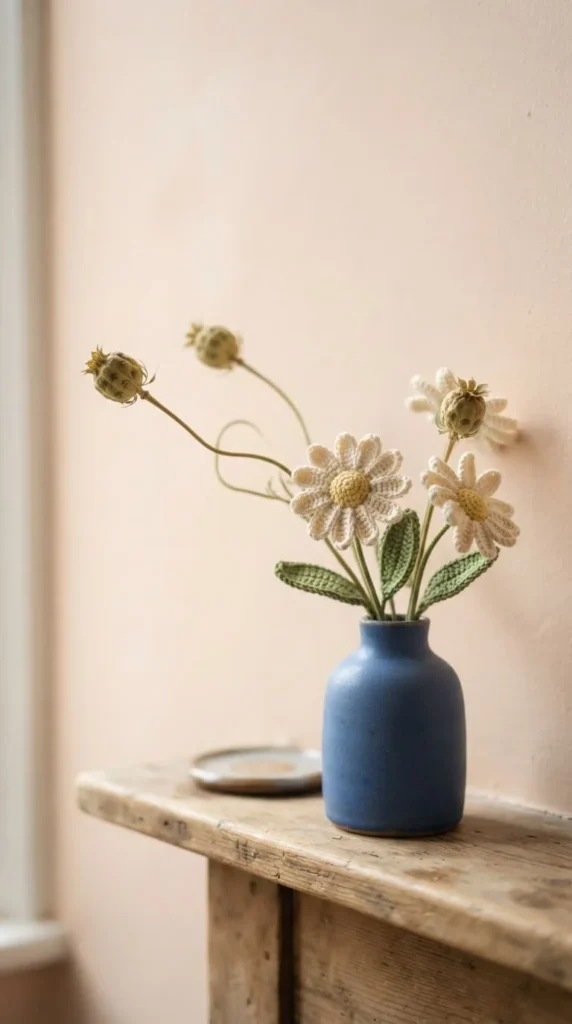
A few crochet flowers bring color to a shelf that is too dim for the houseplants you want to grow. The appeal comes from the shaped petals and visible stitches, so give each stem enough space to be seen.
Start with three flowers and two simpler stems, such as leaves or rounded seed heads. Repeating one flower shape keeps the arrangement calm. Slightly different stem heights help the bouquet feel less rigid.
Match the flower size to the vase opening. Large blooms crowded into a tiny neck look top-heavy. Lay paper circles above the vase first to judge the scale before crocheting several flowers.
Use a flower pattern that explains stem support and assembly. If it includes craft wire, cover the ends securely within the construction and keep the finished arrangement out of reach of small children and pets.
A weighty vase helps support the stems. Check its balance with the completed bouquet, particularly if you angle several flowers toward one side.
Try cream petals, muted ocher centers, and olive leaves in a blue vase. Brush away dust gently with a soft brush, and keep leftover yarn for repairing a petal or replacing a damaged stem.
13. Fill a Narrow Wall with a Crochet Landscape
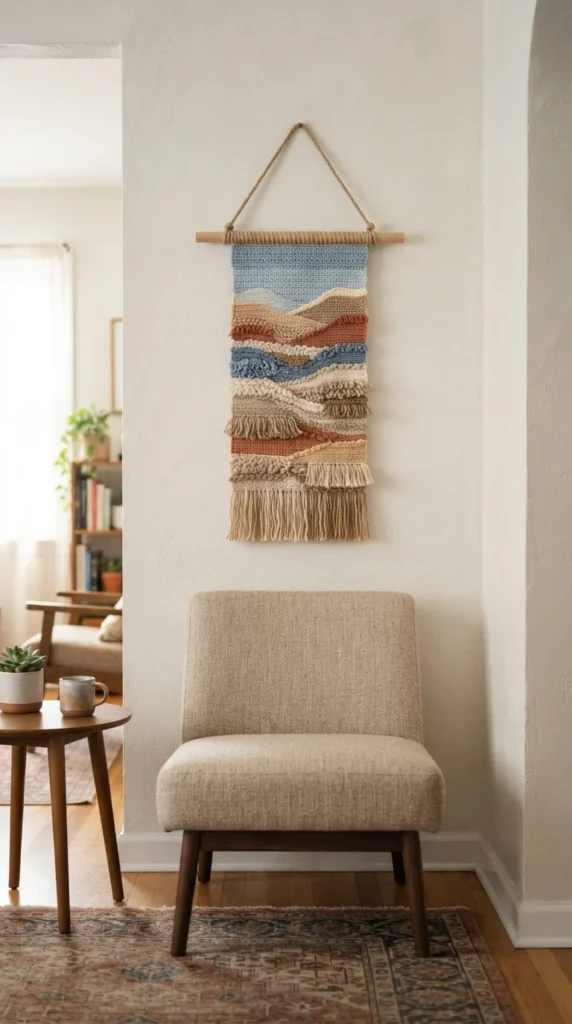
The strip of wall beside a bookcase can be awkward to decorate. A tall crochet panel uses that vertical space and brings soft texture near the hard edges of shelves.
Create a simplified landscape with broad bands of sand, clay, and blue. Three or four shapes are enough to suggest hills and sky. Small details can disappear when the piece is viewed from across the room.
Draw the design on squared paper and choose a crochet method suited to colorwork. Follow the technique’s instructions for carrying or changing yarn so the back stays manageable and the edges remain tidy.
Before starting, tape a paper rectangle to the wall. Check the size from your usual seat, where you will see the hanging most often. Leave breathing room between the panel and neighboring furniture.
Attach the upper edge evenly to a smooth dowel. A casing or closely spaced loops spreads the weight more evenly than two corner ties. Use wall fittings appropriate for the surface and the completed piece.
Keep the lower edge straight or add a short fringe if it suits the design. Long fringe can distract from the landscape and make a small alcove feel crowded.
14. Frame Small Crochet Pieces as Textile Studies
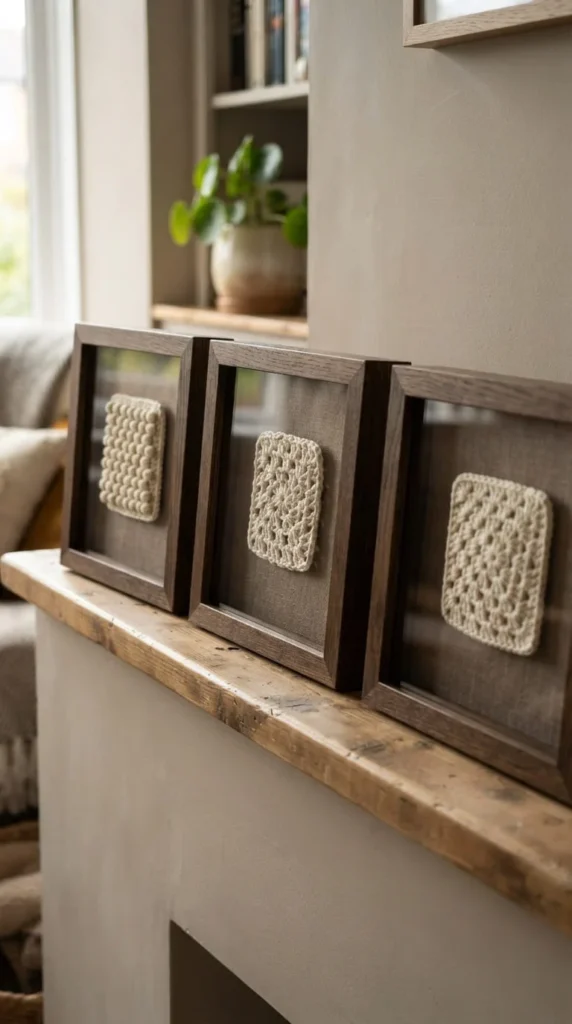
Practice squares often end up in a project bag after their learning job is done. Framing a few turns those small experiments into artwork with a clear connection to your handmade room.
Choose pieces with related colors and different textures. A plain square, a small granny motif, and a raised stitch sample can sit together comfortably when their frames and backing fabric match.
Block each piece according to its fiber care instructions, then let it dry fully. A square that is flat and evenly shaped will be easier to mount neatly.
Stitch the crochet lightly to a fabric backing instead of stretching it tightly across a board. A few discreet attachment points can hold the work while preserving its shape. For a valuable heirloom, ask a textile framer about suitable conservation materials.
Use a deep frame if the stitches have height. Leave space between the crochet and the glazing so the texture remains visible rather than being pressed flat.
Try the arrangement on a picture ledge before fixing anything to the wall. Three small frames can fill the space above a compact sideboard, and you can exchange the samples as your crochet skills or room colors change.
15. Add a Scalloped Border Around a Framed Mirror
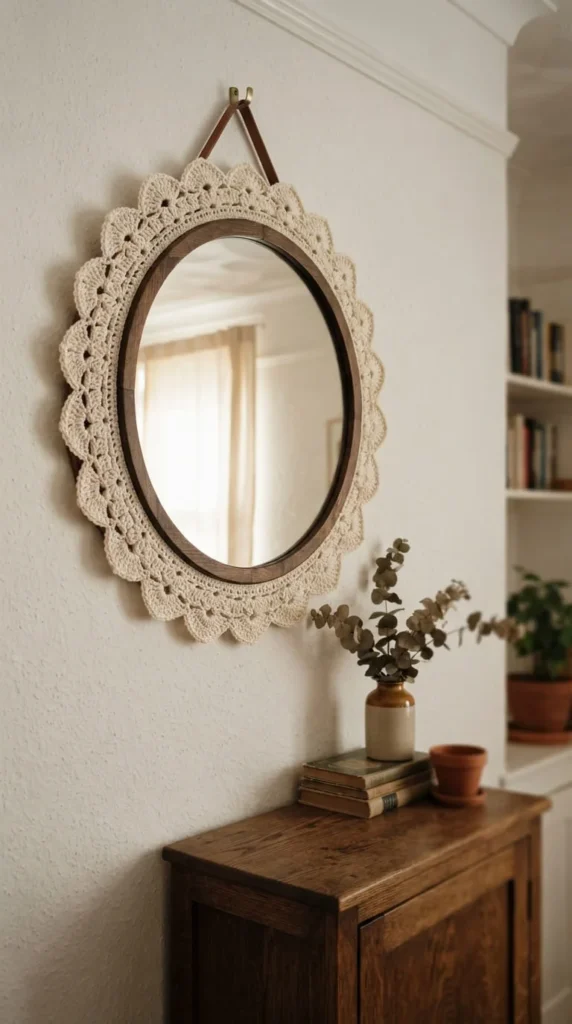
A plain framed mirror can carry a crochet accent without losing its clean shape. A narrow scalloped border softens the outline and works especially well near straight furniture, such as a rectangular cabinet.
Choose a mirror with a substantial existing frame. Make a separate crochet ring sized to that frame, then test the fit before adding the decorative outer round. The inner edge should leave the reflective surface clear.
Start with small scallops. Large loops can droop or hide too much of the frame, particularly on a small mirror. A paper outline helps you judge the intended outer diameter against the wall space.
Let the original hanging hardware support the mirror. The crochet is an ornament and should carry no glass or frame weight. Attach it through discreet sewn tabs or another removable method compatible with the frame’s finish.
Use a firm cotton yarn for visible stitch definition. If the border curls, revisit the stitch count and shaping instead of pulling it into place under tension.
An ivory border on pale wood creates a quiet detail. Deep blue around a dark frame makes a stronger statement. Keep nearby wall decorations simple so the scalloped silhouette has room to show.
16. Hang a Light Cafe Curtain Across a Small Window
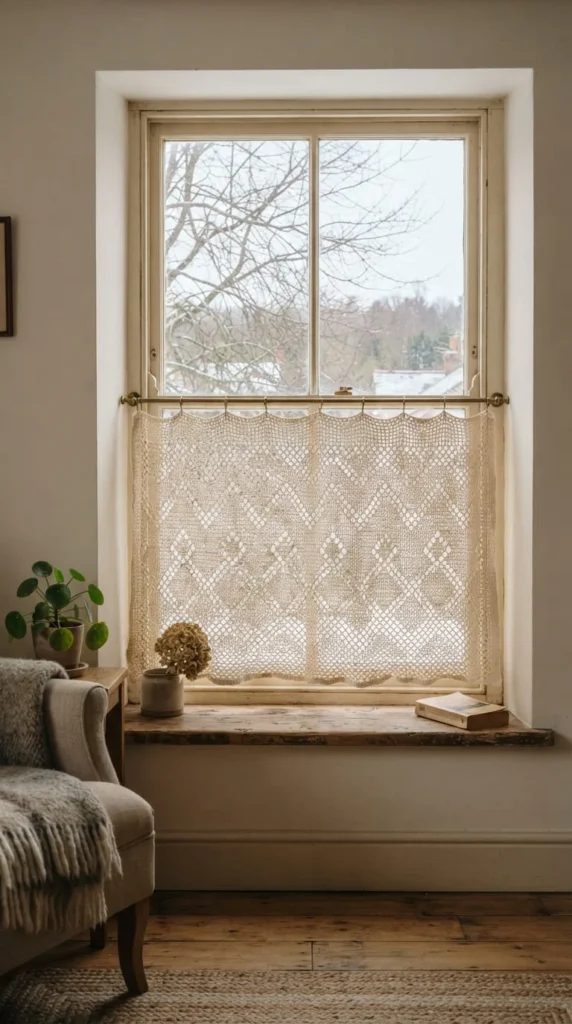
A crochet cafe curtain adds pattern at window height while leaving the upper glass open to daylight. It suits a small street-facing window or a living-room nook where full curtains would feel bulky.
Measure the span of the rod and decide how much gathering you want. A nearly flat panel shows a geometric pattern clearly. A wider panel produces folds, which may hide parts of a detailed motif.
Fine cotton yarn creates a lighter-looking curtain than thick yarn, but it also means more stitches across the same width. Make a sample large enough to judge both the pattern and the work involved.
Check the view from outside after dark. Open crochet offers decoration and some screening, but the gaps allow views through. Use a separate blind or curtain when dependable privacy is required.
Choose a rod and fittings suited to the window and the finished curtain’s weight. Allow the panel to hang for a trial period before setting its final length, since some fabrics lengthen under their own weight.
A simple diamond or square repeat gives the light an interesting pattern. Keep the lower edge just above the sill so it stays clear of dust and condensation.
17. Gather Plain Curtains with Wide Crochet Bands
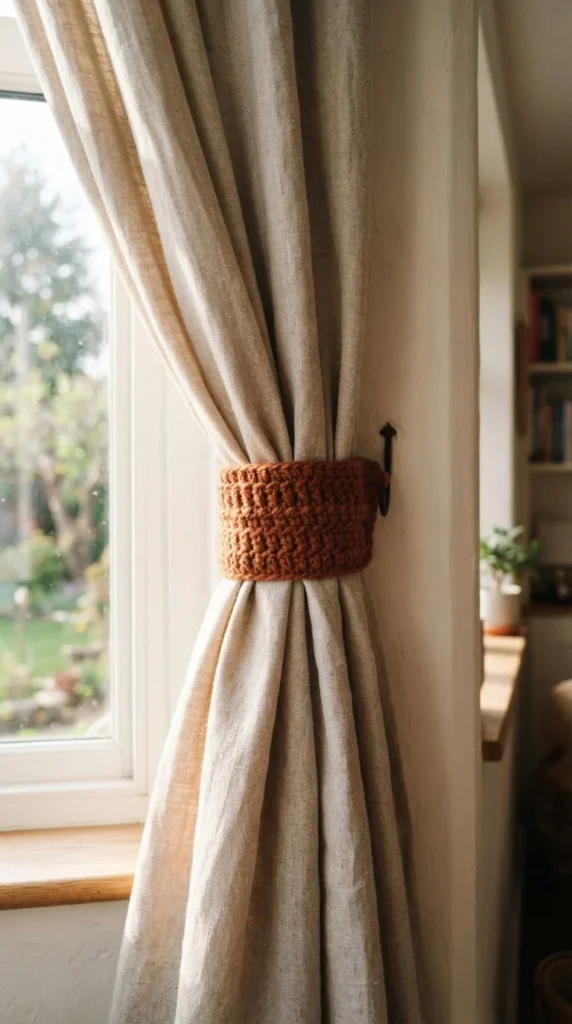
If you like your existing curtains, a pair of crochet tiebacks can add a handmade detail with very little yarn. Their small scale makes them a good place to repeat an accent color from across the room.
Wrap a strip of paper around the gathered curtain at the intended height. Mark where it reaches the wall hook, then use that length as a guide. Heavy drapes take more room than light sheers.
Work a broad, flat band with a compact stitch. A wider band spreads the gathering across the fabric, creating softer folds than a thin cord. Keep decorative ridges on the outward-facing side so the curtain sits comfortably inside.
Make the two bands to the same finished measurements. Lay them together before attaching any loops, since a small difference can leave one curtain sitting higher or tighter than the other.
Use secure wall fittings and keep loops short and out of children’s reach. For accessible low windows, a fixed fabric band without a dangling cord is a tidier choice.
Try rust against natural linen, plum against pale gray, or oatmeal against navy. Position both tiebacks at the same height, then step back to adjust the curtain folds.
18. Place a Small Crochet Rug Beside a Reading Chair
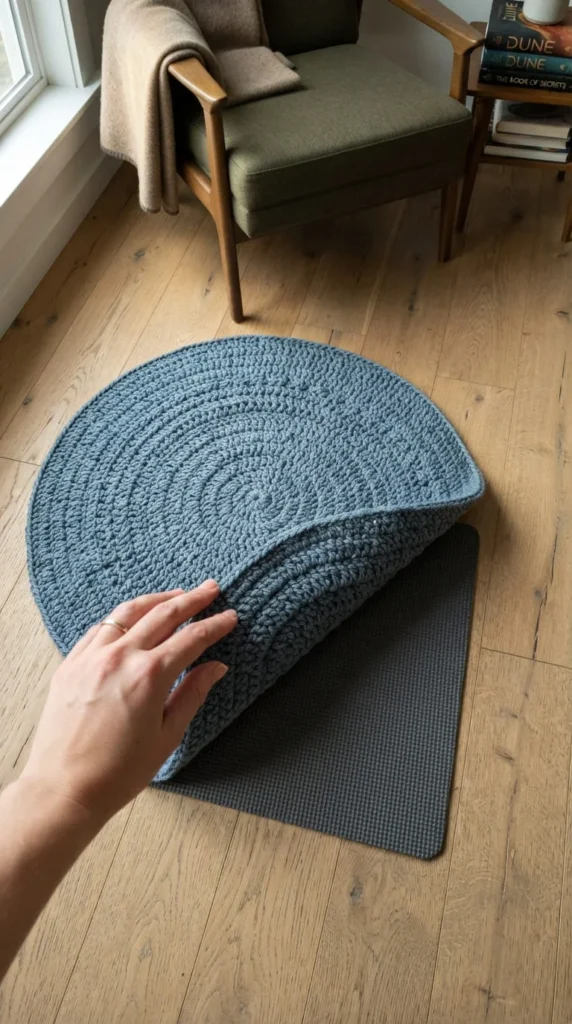
A little rug gives a reading corner its own footprint. A half-moon shape can sit beside a chair without extending far into the room, while a small oval works well in a wider nook.
Start with a rug pattern designed for floor use. Yarn choice affects thickness, weight, and laundering, and a basket cord may feel uncomfortable under bare feet. Handle a sample before buying enough material for the full piece.
Lay a paper template on the floor and move the chair as you normally would. Check that the rug will stay clear of door swings, chair legs, and the busiest route through the room.
Use a nonslip rug pad suitable for your flooring. Crochet can move on smooth surfaces, even when the finished piece feels heavy. Test the rug carefully before regular use and keep the edges flat.
Avoid raised motifs where feet will land. A consistent surface is easier to stand on and simpler to clean. Follow the yarn’s washing instructions, accounting for the rug’s wet weight and your machine’s limits.
Choose a medium tone that sits comfortably against the floor. Dusty blue on warm wood creates a clear boundary without making the small corner feel busy.
19. Cover a Draft Stopper with Soft Ribbing
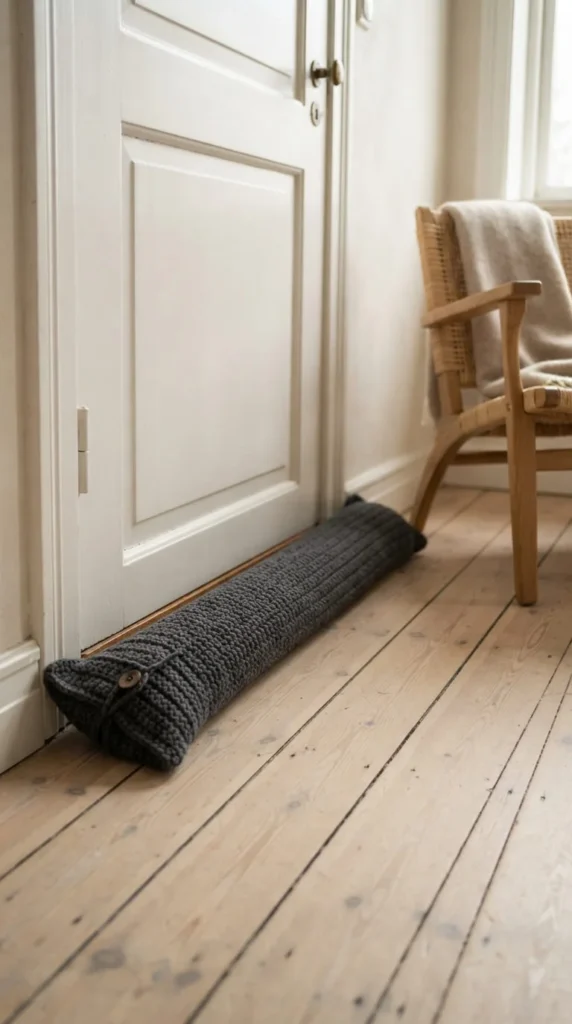
A crochet-covered draft stopper brings texture down to floor level and can make a chilly seating area more comfortable when air enters beneath a nearby door. The filling and fit determine how well it blocks that gap.
Measure the door width and check the space along its lower edge. A narrow fabric tube may suit a small gap, while a larger gap calls for a fuller insert. Follow an established draft-stopper design for its shape and filling.
Use a tightly woven inner sleeve to contain the filling. The crochet layer forms the removable outer cover. This separation makes it easier to clean the part that touches the floor without disturbing the entire insert.
An envelope closure at one end keeps the cover simple. Position the opening away from the most visible side, and fit the cover closely enough that it does not twist around the insert.
A dark heathered yarn is forgiving near dusty floor edges. Ribbing gives the long shape some detail without adding loose fringe that catches under the door.
Move the stopper aside before opening the door and keep exits unobstructed. Place it only at a suitable draft gap, leaving any required ventilation openings clear.
20. Turn Plain Bookends into Tiny Crochet Houses
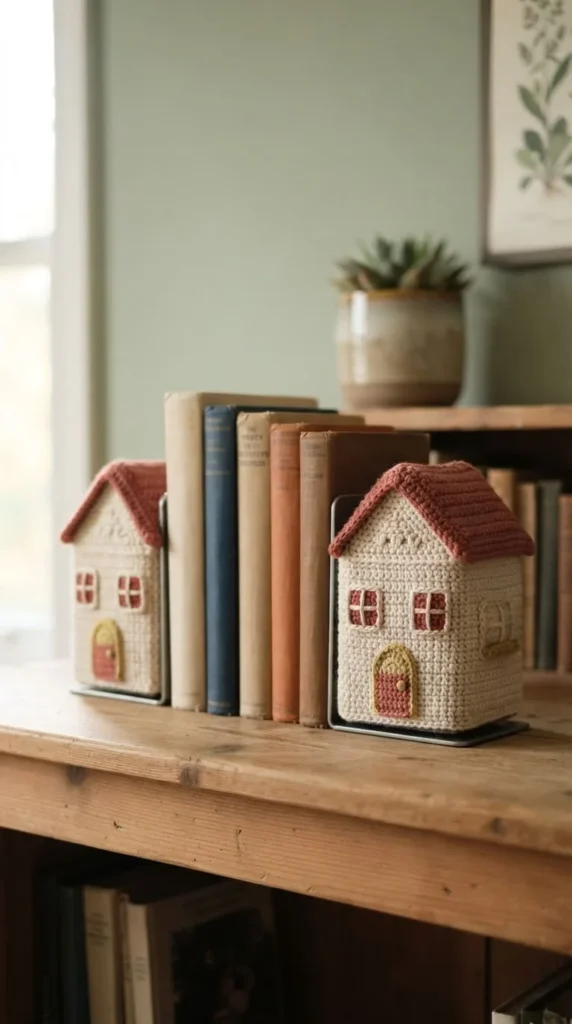
Bookends can carry a playful crochet detail while still doing a practical job. Dress a sturdy pair with little house fronts and let them frame a short row of books on an open shelf.
Use the existing bookends as the structural base. Measure their upright faces, then sketch a house shape that fits around each one. A rectangular lower panel and a small peaked top give a recognizable outline with little decoration.
Crochet the pieces firmly and add stitched doors or windows. Embroidered details keep the surfaces flat, which helps the covers sit neatly beside book covers and shelf edges.
Make each decorative jacket removable. Short tabs around the upright can hold the panels together while leaving the bookend’s base flat against the shelf. Keep yarn away from the underside and from any gripping surface that helps the bookend stay put.
Test the finished pair with the books you plan to display. The original supports should remain stable, and the covers should not pull them out of position.
Use two related house colors, such as cream and muted brick. A small difference between the facades gives the shelf character without requiring a whole village of ornaments.
21. Bring Back the Crochet Chair-Back Protector
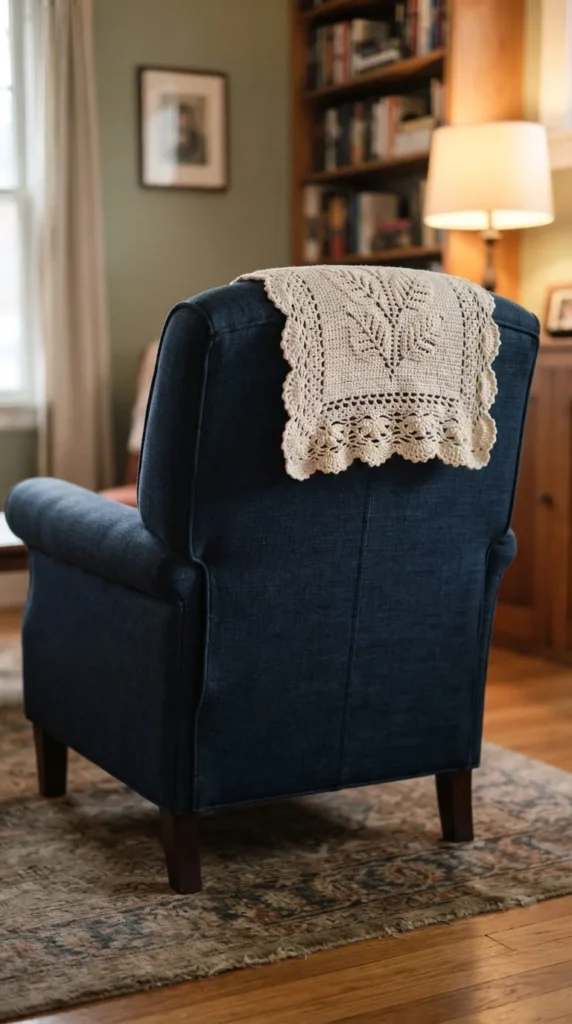
A chair-back protector is an old-fashioned detail with a useful purpose: it places a washable layer where hair and hands often touch the upholstery. In a simple color, it can feel right at home in a modern reading corner.
Measure the chair’s upper back and decide where the lower edge should fall. Make a paper version first, drape it over the chair, and sit down. That quick trial shows whether the size and position feel comfortable.
Choose a flat central motif with a plain border. Keep heavy texture away from the headrest area, where raised stitches may become uncomfortable. A small leaf design or open geometric panel adds enough interest.
The rear portion should hang far enough down to help balance the front. If it slides on your upholstery, try a suitable removable nonslip fabric backing before adding any fastening. Avoid adhesives or pins that could mark the chair.
Select yarn with care instructions that suit regular laundering. Make the protector easy to lift off, wash, and return to its place.
Ivory against navy creates a clear, traditional contrast. For a quieter version, use a shade only slightly lighter than the chair and let the stitching supply the detail.
22. Keep One Shelf for a Small Seasonal Crochet Display
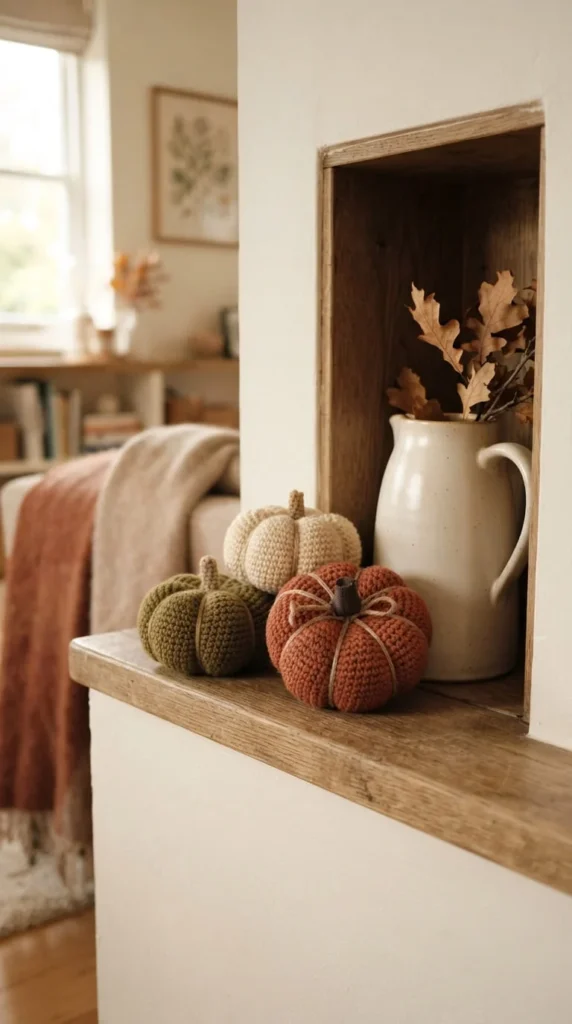
Seasonal decorating can stay simple when it has a clear boundary. Reserve one shelf section for a few crochet ornaments, then keep the rest of your living room arranged as usual.
For autumn, make three small pumpkins in different heights using clay, cream, and olive yarn. The rounded shapes sit comfortably beside books and pottery, and the restrained colors work beyond bright orange holiday schemes.
Follow a pumpkin pattern for shaping and stuffing. Add the segmented lines with evenly spaced strands drawn around the finished form. Adjust those strands gently so the sections look rounded without distorting the base.
A crocheted or sewn fabric stem keeps the ornament soft. Check that each pumpkin sits securely on the shelf before placing it near an edge. In a home with young children, keep decorative pieces with detachable parts out of reach.
Arrange the tallest pumpkin at the back, then leave a little empty shelf around the group. A small display is easier to appreciate when neighboring objects do not crowd its outline.
Store the pieces clean and fully dry in a lidded box after the season. The same shelf can later hold crochet stars or spring leaves, with no room-wide rearranging.
Conclusion
The most satisfying crochet living room decor earns its place through comfort, usefulness, or a detail you enjoy seeing every day. Choose one project that solves a small problem or finishes an overlooked spot. Measure that space, test your yarn, and work with colors already present in the room. A well-fitting cushion cover or a handful of flat coasters can be a rewarding start. Pick the piece you will use most, gather your materials, and make that corner feel more like home.