
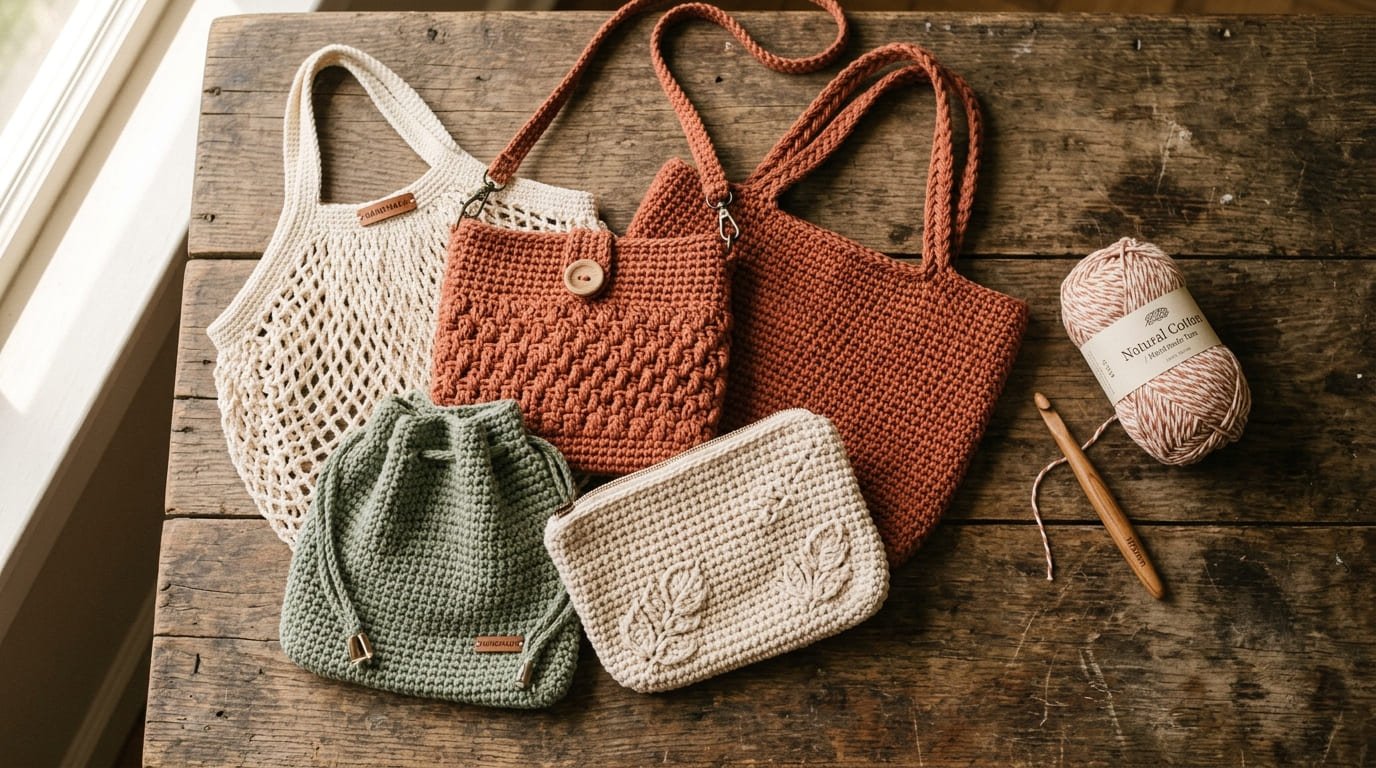
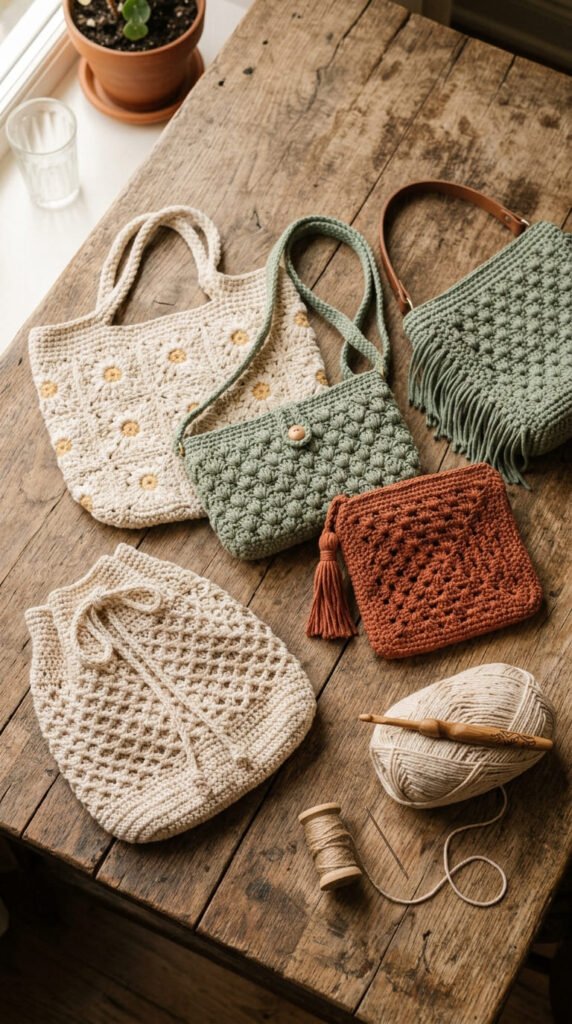
Crochet bags are having a moment, and it’s easy to see why. They’re cheap to make, simple to learn, and every finished piece looks like something you’d find in a boutique. If you’re new to yarn crafts, this list gathers 25 beginner-friendly bag ideas that use basic stitches, common yarn, and short project times. Whether you want a market tote, a beach bag, or a small crossbody, you’ll find a pattern style here that matches your skill level and your budget.
1. Classic Single Crochet Tote
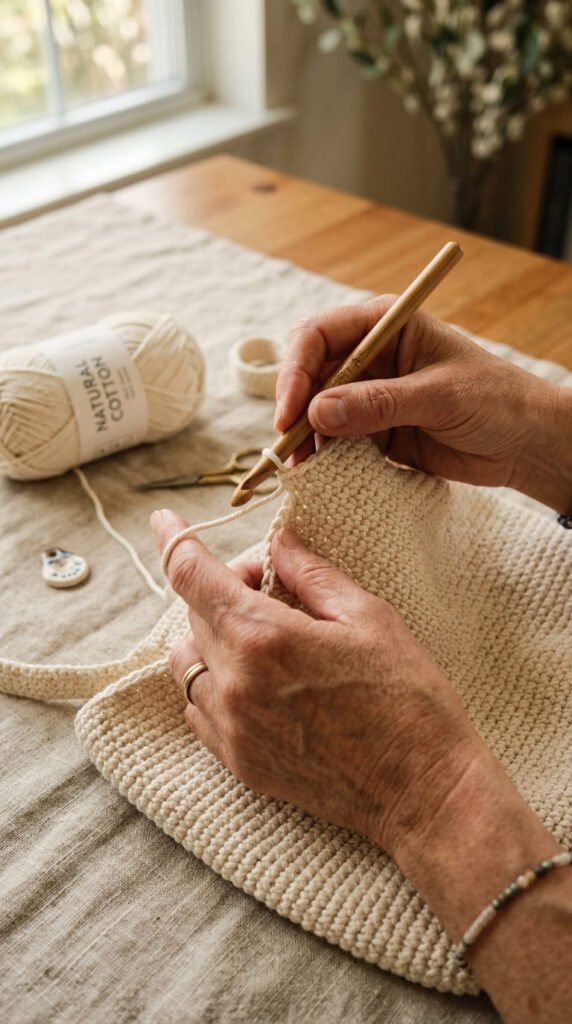
This is where most beginners start, and for good reason. Single crochet creates a tight, sturdy fabric that holds its shape without any lining. You just work in a spiral from a flat base, then straight sides, then straps. No counting complicated stitch patterns. No shaping charts. Grab a medium-weight cotton yarn like Lily Sugar’n Cream — it’s inexpensive and easy to find at any craft store. A single skein costs under five dollars and stretches surprisingly far. Use a 5mm hook for a fabric that’s dense but still workable on your hands. Budget tip: buy yarn in bulk multi-packs when your local store runs a sale; cotton doesn’t go bad, so stock up for future bags. A basic 14-by-10-inch tote takes about 300 yards of yarn and a weekend of casual crocheting. Skip fancy stitch patterns for your first attempt. Get comfortable with tension and spacing first. Once you’ve made one tote, you’ll understand the bones of nearly every bag pattern that follows. This is the foundation piece worth mastering early.
2. Mesh Market Bag
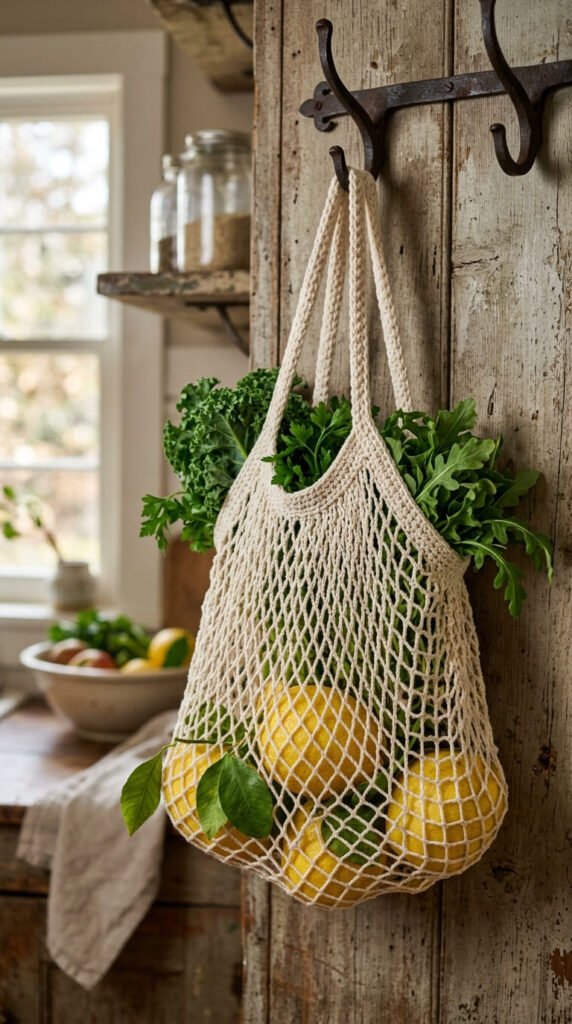
Grocery runs get a style upgrade with a mesh market bag. This pattern uses a simple chain-1, skip-1, double crochet repeat that creates an open, stretchy weave. It’s genuinely one of the fastest bag styles to finish. Cotton yarn works best here since it holds shape even when wet or heavy. Budget tip: this pattern uses less yarn than a solid tote, so a single skein often covers the whole bag. Try Cascade Nifty Cotton Splash or a similar affordable cotton blend. The mesh design means you can fit oddly shaped groceries without stretching the stitches out of place. Handles are usually just longer sections of the same mesh pattern, folded and reinforced with a few rows of single crochet. This keeps everything in one continuous piece — no separate strap sewing required. A full-size bag needs roughly 400 yards of yarn. If you’re short on time, work up a mini version first as practice. It’s a forgiving pattern that hides small tension mistakes in its open structure, making it perfect for someone still learning gauge.
3. One-Rectangle Beach Bag
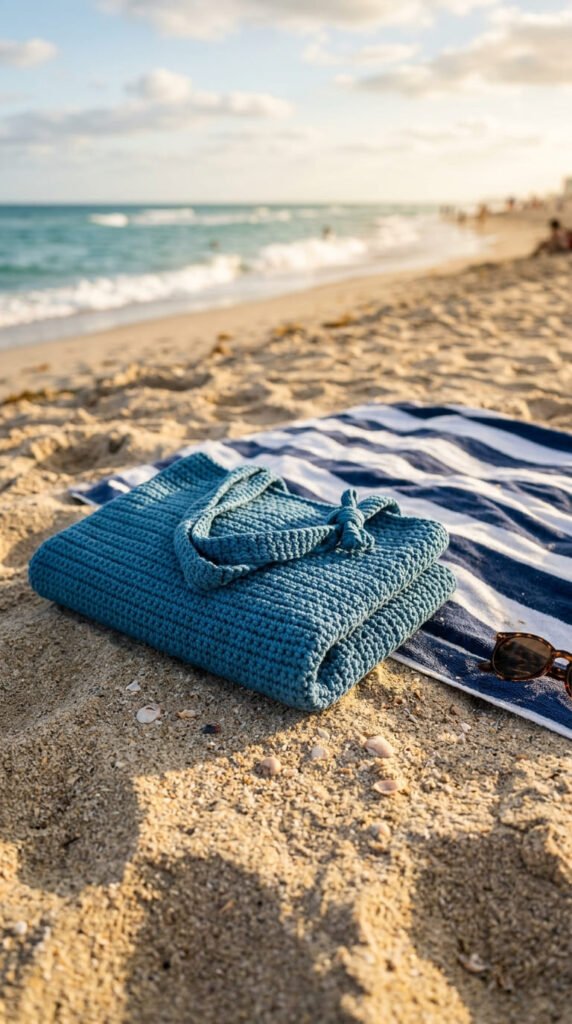
If seams intimidate you, this pattern removes that worry completely. You crochet one long rectangle, fold it in half, and seam up the two sides. That’s it. No shaping, no counting rounds, no complicated increases. It’s the simplest bag construction that still looks polished when finished. Pick a bold color like turquoise or coral for a beach-ready look. Budget tip: this uses minimal yarn, so it’s a great project for using up partial skeins from other projects. Add straps by crocheting two short chains and attaching them with a few stitches on each side. A basic version takes under three hours for an experienced beginner. Use sc or hdc stitches depending on how dense you want the fabric. Sc gives more structure; hdc drapes softer. Either works fine for a casual beach tote that just needs to hold a towel and sunscreen. This project works well as a first “real” bag after practicing swatches, since mistakes are easy to spot and fix before seaming.
4. Granny Square Tote
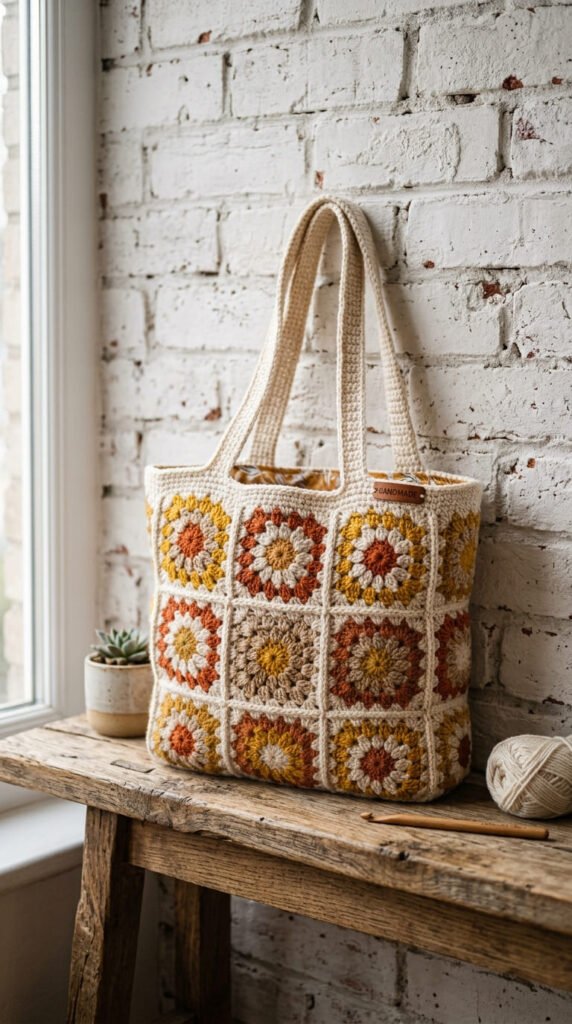
The granny square is a classic for a reason — it’s beginner-friendly and endlessly customizable. Make three to six squares, seam them together, and you’ve got a retro-style tote that’s trending again in 2026. Each square only takes about 20 minutes once you know the pattern. Mix leftover yarn colors for a scrappy, patchwork look that costs almost nothing extra. Budget tip: this is the perfect project for using up yarn scraps sitting in your stash. No need to buy new skeins. Seam the squares with a simple whip stitch or slip stitch — both are easy for beginners to learn in a few tries. Add a lining if you plan to carry heavier items, since granny square fabric has more gaps than solid stitching. A cotton-poly blend interfacing works well and costs just a few dollars at any fabric store. This bag style also makes a great gift since the color combinations feel personal and handmade. Once you know the basic square, you can scale up to a bigger bag or down to a small pouch.
5. A4 Book Tote
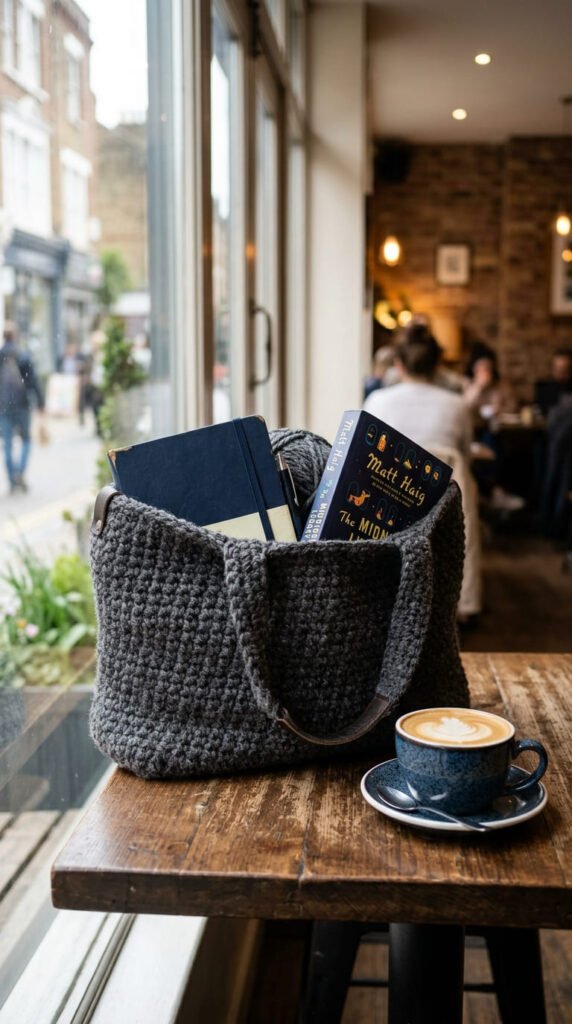
Practical and simple, this bag is sized to fit A4 papers, notebooks, or a small laptop. It’s worked in rounds of single crochet with a flat rectangular base, so the shape stays boxy instead of slouchy. Aim for roughly 15 inches wide and 12 inches tall for a good everyday fit. Budget tip: use a solid neutral color like gray or navy so it pairs with anything, meaning you only need one bag instead of several. A firmer cotton yarn holds the rectangular shape better than a soft acrylic. Reinforce the top edge with two extra rows of sc to prevent sagging around the opening. Straps should sit close together at the top for a structured, briefcase-like carry. This is a great project for students or anyone who commutes with books or a tablet. Because the base is flat, it also stands upright on its own when set down, which makes packing and unpacking easier. Expect to use around 350 yards of yarn for a standard size, keeping total cost under ten dollars.
6. Shell Stitch Textured Bag
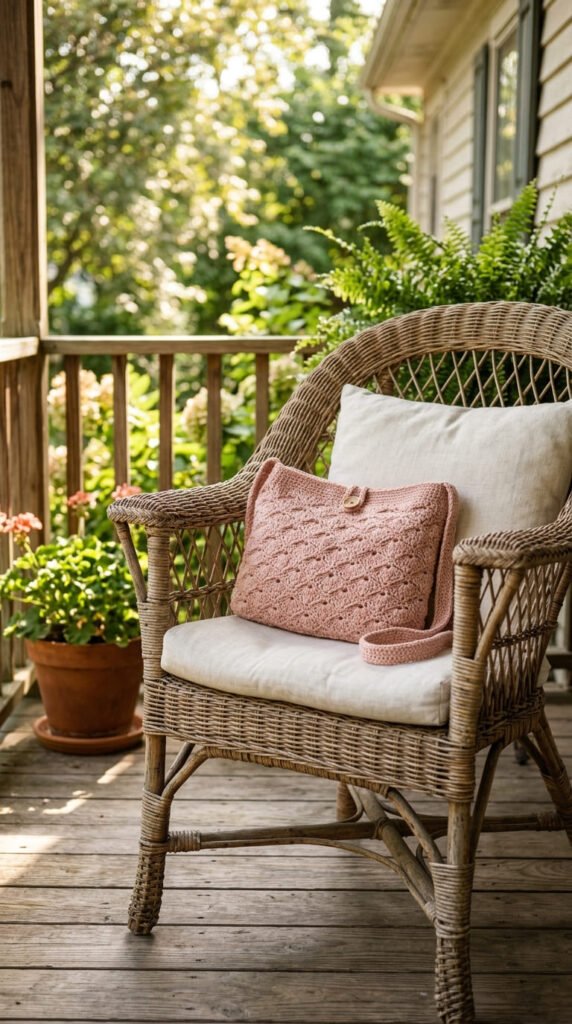
Want texture without a complicated chart? The shell stitch repeats a simple pattern of clusters and gaps, giving your bag visual depth while staying beginner-friendly. It looks far more advanced than it actually is to make. Practice the repeat on a small swatch first so your hands get used to the rhythm. Budget tip: shell stitch uses slightly more yarn per row than plain single crochet, so buy one extra skein to be safe. A soft pastel color like blush or lavender makes the texture pop even more. Line this bag if you’re storing anything with sharp edges, since the open shell pattern has small gaps between clusters. A basic cotton-poly lining fabric works fine and is cheap at any fabric store. This pattern also looks great as a clutch if you skip the straps and just add a snap closure. Beginners sometimes find shell stitch confusing at first glance, but after two or three rows, the repeat becomes second nature. It’s a good next step once you’ve mastered plain sc and want to try something a little fancier.
7. Raffia Summer Bag
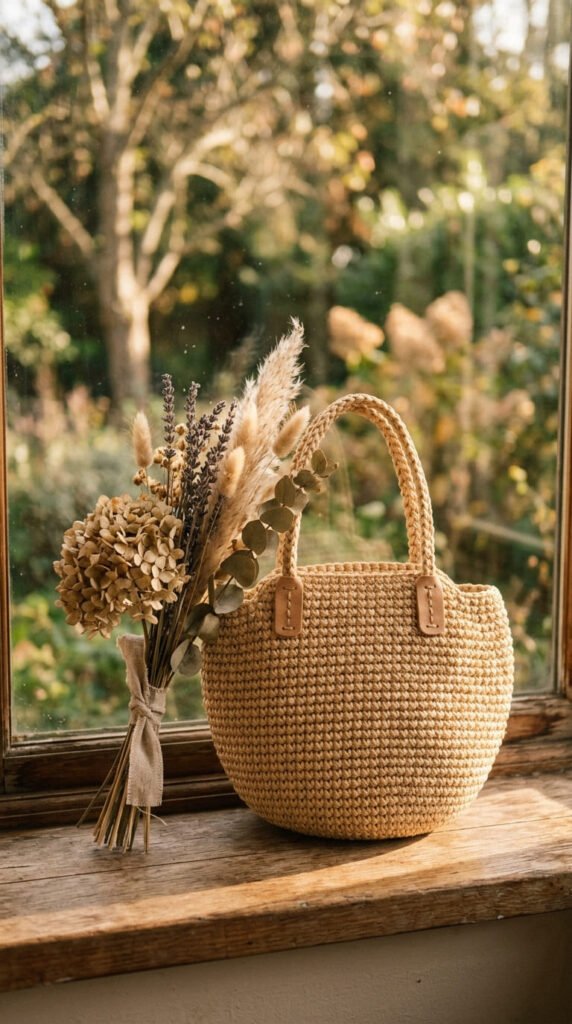
Raffia yarn creates bags that hold their shape without any lining or stiffener needed. The material itself is naturally rigid, which makes it perfect for round, structured summer totes. It crochets up a bit stiffer on your hands than cotton, so take breaks if you’re new to the material. Budget tip: raffia yarn can run pricier per skein than cotton, so start with a small bag design to test if you like working with it before committing to a bigger project. A round base with straight sides in single crochet gives you a classic basket-bag look. This style pairs well with wide, flat straps rather than thin cord handles, since raffia doesn’t drape softly like cotton does. No interfacing or fabric lining is typically needed, which saves both money and time. This bag style photographs beautifully for anyone who sells handmade items online, since the natural fiber has an upscale look despite the low cost. Expect a learning curve if you’ve only worked with soft yarns before — raffia takes some getting used to.
8. Striped Color-Block Tote
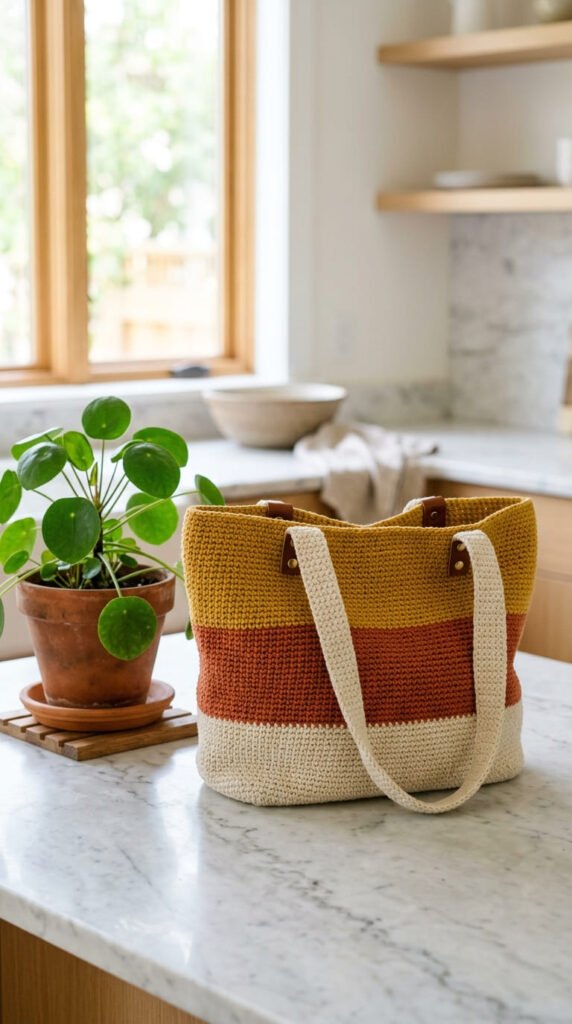
Stripes are the easiest way to add visual interest without learning a new stitch. Just switch yarn colors every few rows while continuing your basic sc or hdc pattern. A three-color formula — one for the body, one for the base, one for the straps — creates a coordinated look that feels intentional. Budget tip: this is another great scrap-yarn project, since stripes only need small amounts of each color. Weave in yarn ends as you go instead of leaving it all for the finish; it saves time later. Bold color combos like mustard and rust feel current for 2026, while navy and cream stay classic. Carry your working yarn up the side of the bag between stripe changes to avoid cutting and rejoining constantly. This trick keeps your inside seam neater and saves yarn. Stripes also help beginners track row count, since each color change marks a clear checkpoint. If you lose your place in a plain-colored bag, stripes make it much easier to spot where you left off.
9. Crossbody Moroccan Lattice Bag
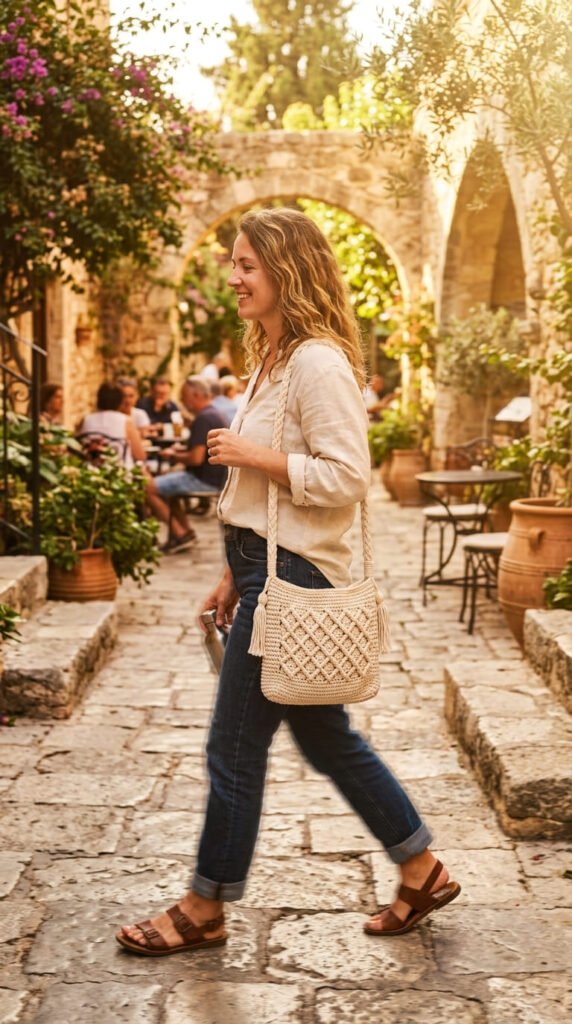
This style takes a bit more patience but delivers a statement piece. The lattice texture comes from a simple repeat of front-post and back-post stitches, which create a woven look on the front panel. It’s not hard, just a little slower to work through. Budget tip: since this bag is smaller than a tote, it uses less yarn overall, making it a good project if you’re working with a pricier specialty yarn. Add a long adjustable strap for comfortable crossbody wear — aim for roughly 45 to 50 inches so it fits most body types. A magnetic snap closure, sold cheaply at any craft store, keeps the bag secure without any complicated hardware installation. This project works well as a step up once you’re comfortable with basic stitches and want to try something more textured. The finished bag makes a great gift since it looks store-bought despite costing just a few dollars in materials. Take your time on the front panel; it’s the focal point of the whole design.
10. Strawberry Puff-Stitch Purse
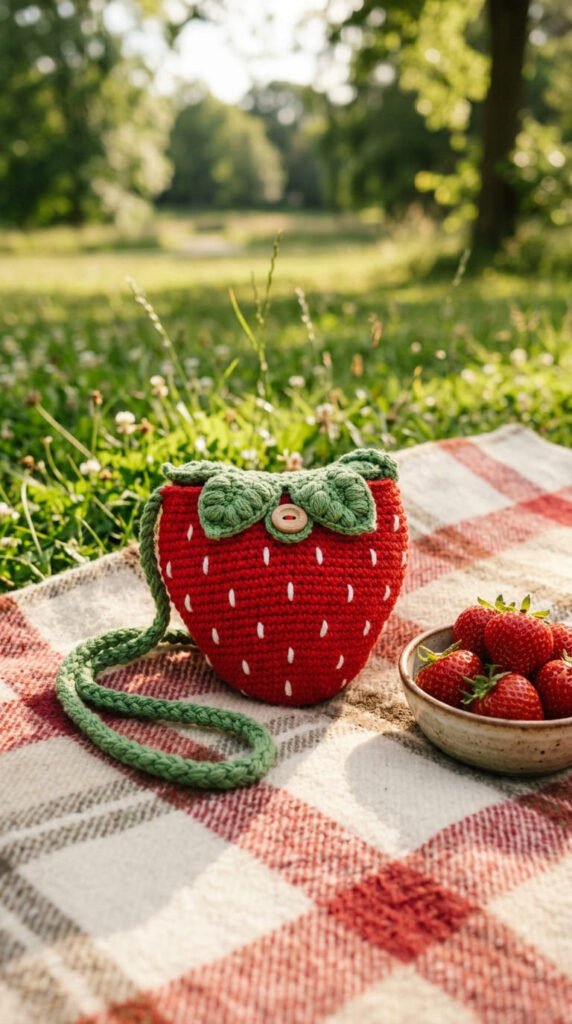
Playful and small, this purse is a fun weekend project rather than an everyday carry bag. The puff stitch creates a bumpy, textured surface that mimics a strawberry’s seeds when worked in red yarn. Green yarn at the top forms simple leaf shapes. Budget tip: this tiny project uses less than one skein of yarn, making it one of the cheapest bags on this list to complete. It’s also a great way to practice puff stitches before using them on a bigger project. Add a short chain strap or a wristlet loop depending on how you plan to carry it. Kids love these as a first crochet gift, and they’re small enough to finish in an afternoon. This pattern also works well in other fruit shapes if you swap the color scheme — try yellow for a lemon or purple for a plum. Because it’s a novelty piece, don’t worry about the stitches being perfectly even. The playful shape hides small inconsistencies naturally.
11. Chunky T-Shirt Yarn Bag
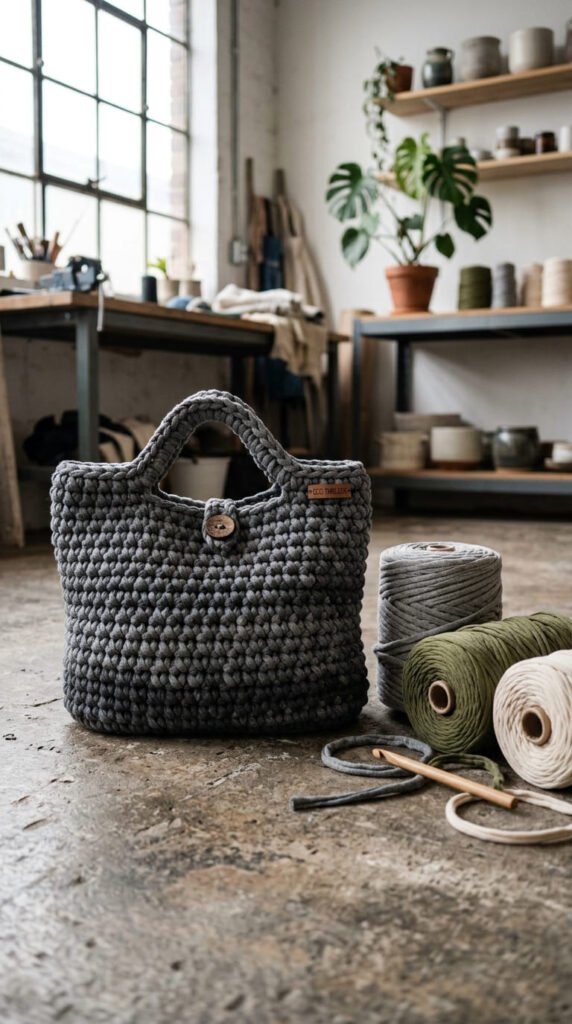
T-shirt yarn is thick, fast to work with, and often made from recycled fabric scraps. A bag made from this material comes together in just a few hours because each stitch covers so much ground. Budget tip: you can make your own t-shirt yarn from old shirts you’d otherwise throw away, cutting your material cost to nearly zero. Cut shirts into continuous spiral strips and wind them into a ball before starting. Use a large hook — 8mm or bigger — since the yarn is much thicker than standard cotton. The finished fabric is naturally rigid, so this bag holds its shape without lining or stiffener. It’s a great weekend project if you want a quick win without a long-term commitment. The chunky texture also gives a modern, textural look that stands out from typical thin-yarn totes. This style works especially well for market bags or beach totes, where a rugged, casual look fits the occasion. Just watch your tension, since t-shirt yarn can vary in thickness depending on your cutting technique.
12. Filet Crochet Initial Bag
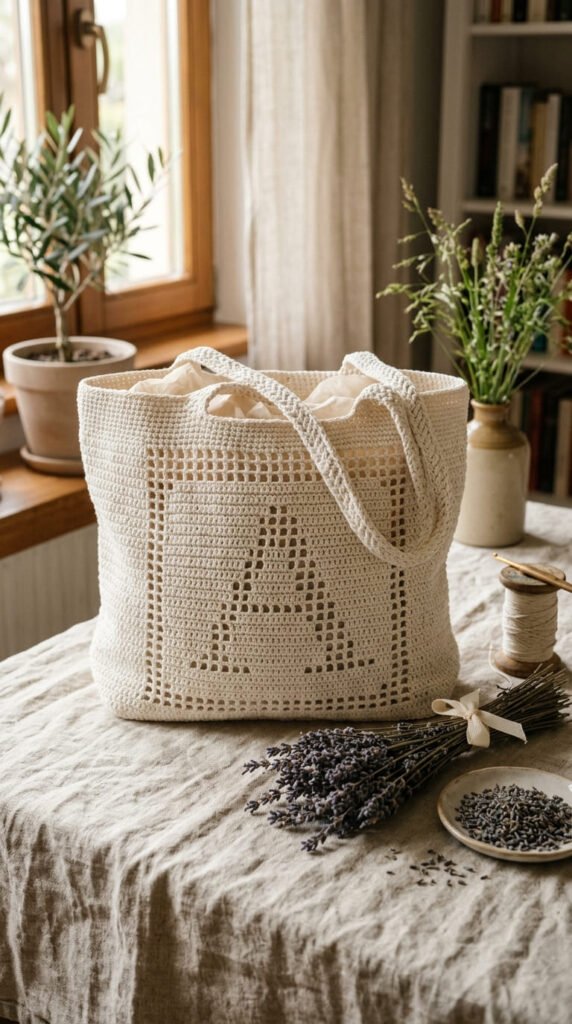
Personalize your bag with a filet crochet monogram — a technique that uses a grid of open and filled squares to spell out letters or simple shapes. It sounds complicated, but it’s really just following a chart, square by square. Budget tip: free filet alphabet charts are widely available online, so you won’t need to buy a pattern for this feature. Work the monogram panel first as a swatch to confirm your letter looks right before attaching it to a full bag. A plain white or cream cotton yarn makes the pattern most visible, since the light shines through the open squares. This bag makes a thoughtful handmade gift, especially for a birthday or new home. Beginners might find the charted counting tricky at first, but sticking to a single large letter keeps it manageable. Once the panel is done, attach it to a basic sc tote using a simple whip stitch around the edges. This combination of a personalized front panel and an easy bag body balances a special touch with an approachable skill level.
13. Two-Tone Drawstring Pouch Bag
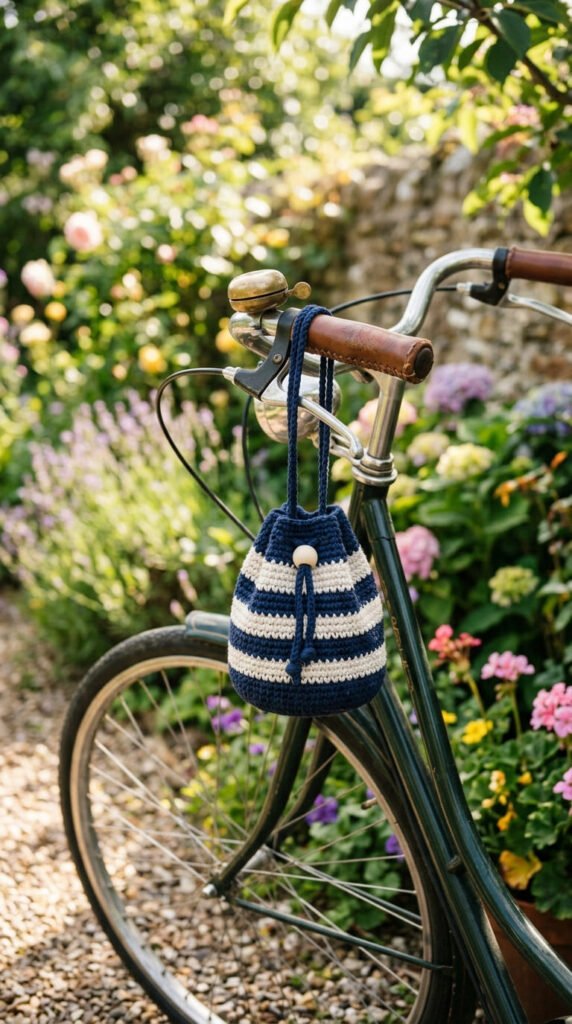
A drawstring closure adds function without adding difficulty. This bag style uses a basic sc body with eyelet holes near the top for the drawstring cord to pass through. Budget tip: skip buying a separate cord — crochet a simple chain length instead and thread it through the eyelets for a matching, cost-free closure. Two contrasting colors, like navy and white, make the bag feel more finished without any extra stitch pattern needed. Just switch yarn at the halfway point of your rounds. This style works well as a small crossbody or a simple pouch for carrying essentials on a walk. The drawstring keeps contents secure without needing a zipper or snap, which are trickier for beginners to install. A basic version takes just a couple hours and less than 150 yards of yarn total. This is a good confidence-building project if you’ve only made flat pieces so far, since it introduces basic shaping around an opening. Add a small tassel to the drawstring ends for a decorative finishing touch.
14. Scallop Shell Edge Tote
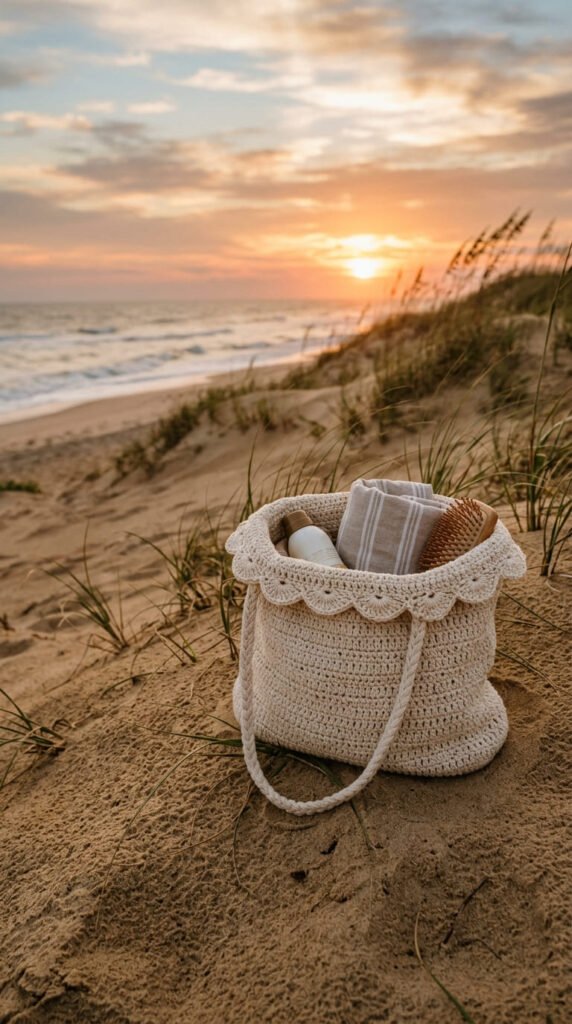
A scalloped edge turns a plain tote into something that looks intentionally designed. You crochet the main bag body in basic sc, then add one decorative round of shell stitches along the top opening. It’s a small addition that makes a big visual difference. Budget tip: this technique only needs a small amount of extra yarn for the edging round, so it barely adds to your total material cost. Use a contrasting color for the scallop trim if you want it to stand out, or match it to the body for a subtle finish. This is a great pattern for someone who wants a slightly elevated look without learning a whole new stitch throughout the entire bag. The scallop trim also naturally reinforces the top edge, which helps prevent stretching around the opening over time. Pair this bag with simple twisted-cord straps for a beachy, relaxed feel. This project is a good middle step between a totally plain tote and a fully textured bag, letting you practice detail work in a small, manageable section.
15. Reversible Two-Sided Tote
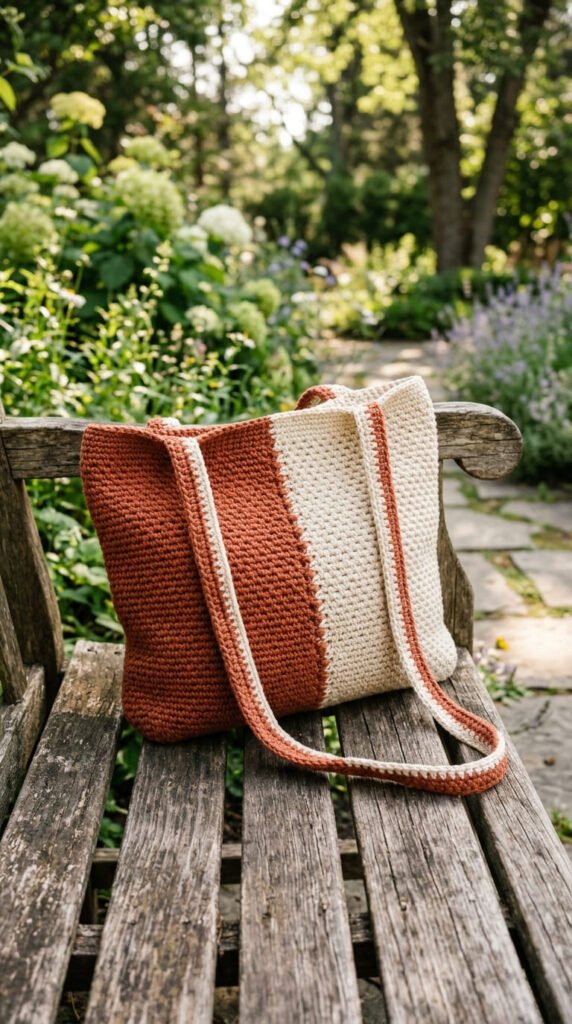
Get two bags in one with a reversible design. This involves crocheting two identical panels in different colors, then joining them together so the bag can be worn inside-out for a completely different look. Budget tip: this project essentially doubles your bag options without doubling your effort, since both sides use the same basic pattern repeated in two colors. Seam the panels together around the edges, leaving the top open, and attach straps that work with both color orientations. A neutral color on one side and a bold color on the other gives you the most flexibility for different outfits or occasions. This is a great gift idea since it feels like two presents in one. Beginners can handle this project easily since it’s really just two flat panels and a seam — no new stitches required. Make sure both panels are exactly the same size before seaming, or the bag will look uneven when flipped. This is a smart way to get more value out of your crocheting time.
16. Basket-Weave Stitch Tote
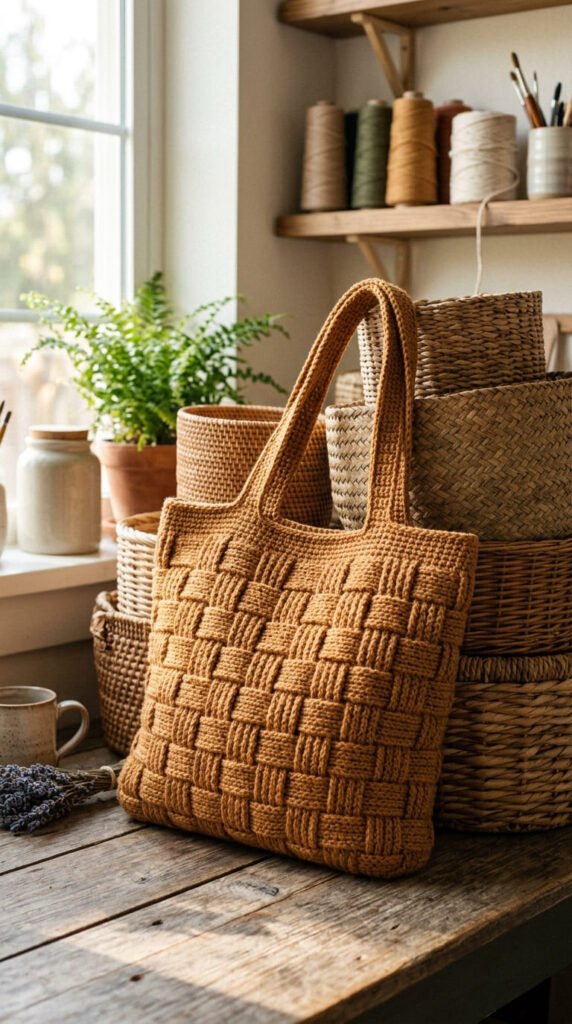
The basket-weave stitch uses front-post and back-post double crochet to create a woven, textured look that mimics actual basket weaving. It’s a repeat pattern, so once you learn the first few rows, the rest follows the same rhythm. Budget tip: this stitch uses slightly more yarn than plain sc, so grab an extra skein if you’re working with a smaller cotton put-up. A warm caramel or tan color enhances the basket-like appearance the most. This bag style pairs naturally with a rounded base and straight sides, giving it a structured, boxy shape. Reinforce the top edge with a couple rows of plain sc to keep the opening from stretching, since the textured stitch pattern alone isn’t quite as tight. This is a good intermediate step for beginners who’ve mastered basic stitches and want to try front-post and back-post techniques for the first time. The finished look resembles a woven market basket, making it a versatile bag for both grocery trips and casual outings.
17. Mini Wristlet Pouch
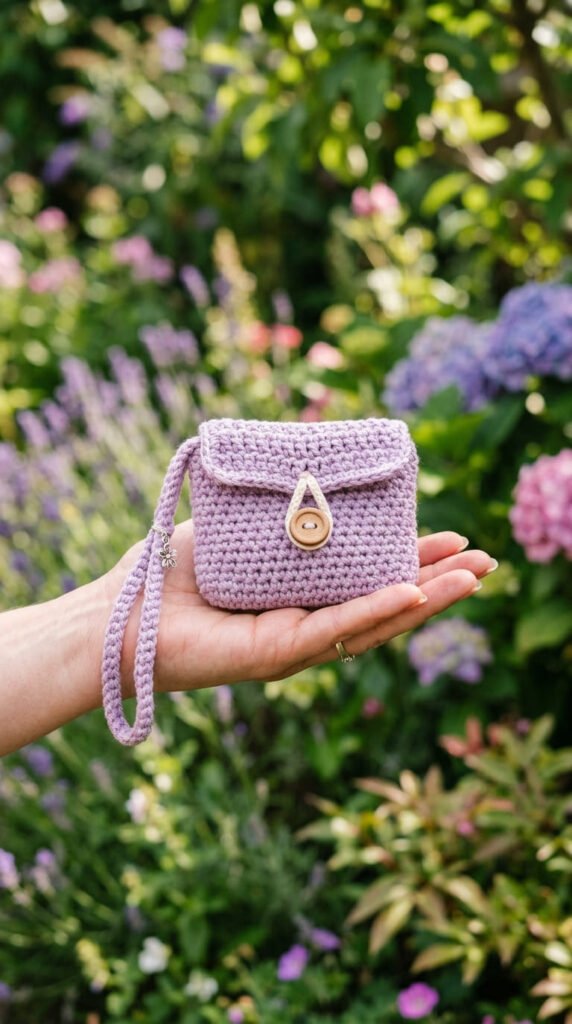
Sometimes you just need a small bag for your phone and keys. This mini wristlet is worked in a single evening and uses less than one skein of yarn. Budget tip: this is the ideal project for using up small leftover balls of yarn that aren’t enough for a full bag. Work a small rectangle in sc, fold and seam the sides, then add a short wrist loop instead of long straps. A snap or button closure keeps everything secure inside. This project is perfect for testing a new stitch pattern or color combination before committing to a bigger bag, since the small scale means less risk if something goes wrong. It also makes a quick, thoughtful gift for a friend’s birthday or as a stocking stuffer. Beginners can finish this project start to finish in under two hours once they know basic sc. Add a small button embellishment or a tassel for extra detail without much extra effort. This little pouch is proof that a small project can still look polished and complete.
18. Rainbow Stripe Beach Tote
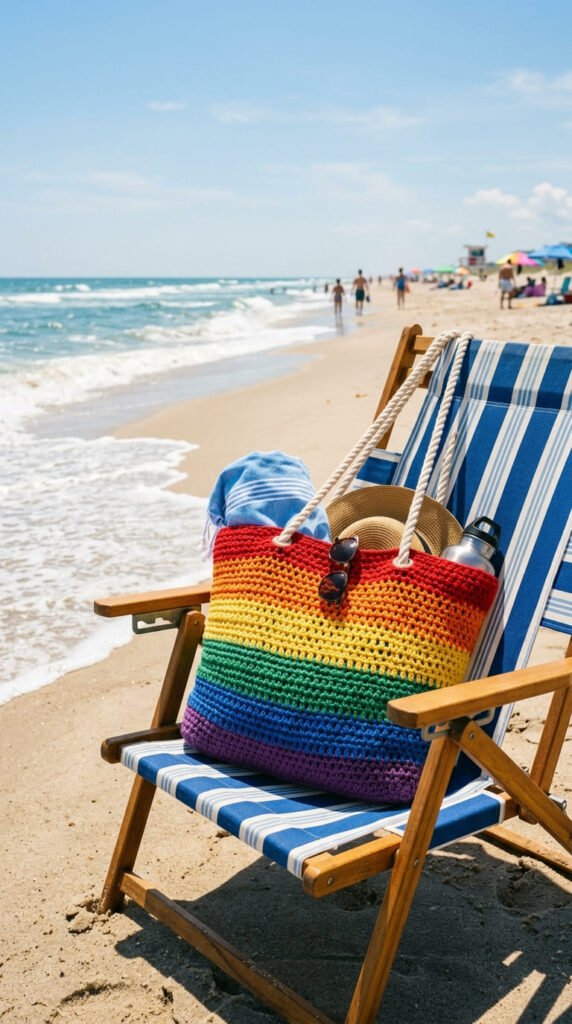
Bright and cheerful, this tote uses five or six colors in thin stripe repeats to create a rainbow effect. It’s still just basic sc or hdc — the color changes do all the visual work. Budget tip: buy a multi-pack of small cotton skeins in assorted colors instead of full-size skeins, since stripes only need small amounts of each shade. This keeps your total cost low while giving you plenty of color variety. Change colors every two or three rows for the most even rainbow look. Carry unused colors up the inside of the bag between stripes to avoid constant cutting and weaving in ends. This bag is sized larger than a typical tote, since it’s meant to carry beach gear like towels and sunscreen. A wide base helps it stand upright in the sand. This is a fun, low-stress project since mismatched stripe widths still look intentional and playful rather than like a mistake. Kids and adults both enjoy the bold, cheerful result.
19. Herringbone Stitch Shoulder Bag
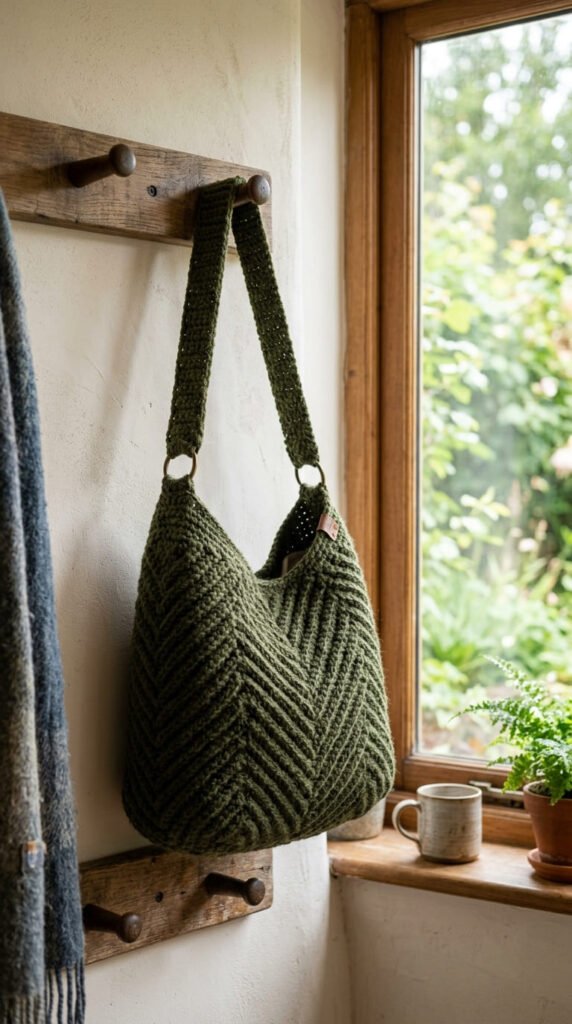
The herringbone stitch creates a diagonal, woven texture that looks far more complex than the actual technique. It’s a slight variation on standard hdc that shifts the hook insertion point slightly, creating the diagonal lines. Budget tip: practice this stitch on a small swatch first using scrap yarn before starting your actual bag, since the technique takes a few rows to get comfortable with. Once you’ve got the hang of it, the rest of the bag moves quickly. A deep olive or forest green color makes the diagonal texture stand out clearly. This bag pairs well with a single shoulder strap rather than two handles, giving it a more structured, purse-like silhouette. Reinforce the strap attachment points with extra stitching, since shoulder bags carry weight differently than hand-carried totes. This is a good project for someone ready to move past basic stitches and try something with more visual texture. The herringbone pattern also hides yarn imperfections well, making it forgiving for less-than-perfect tension.
20. Scrap Yarn Patchwork Tote
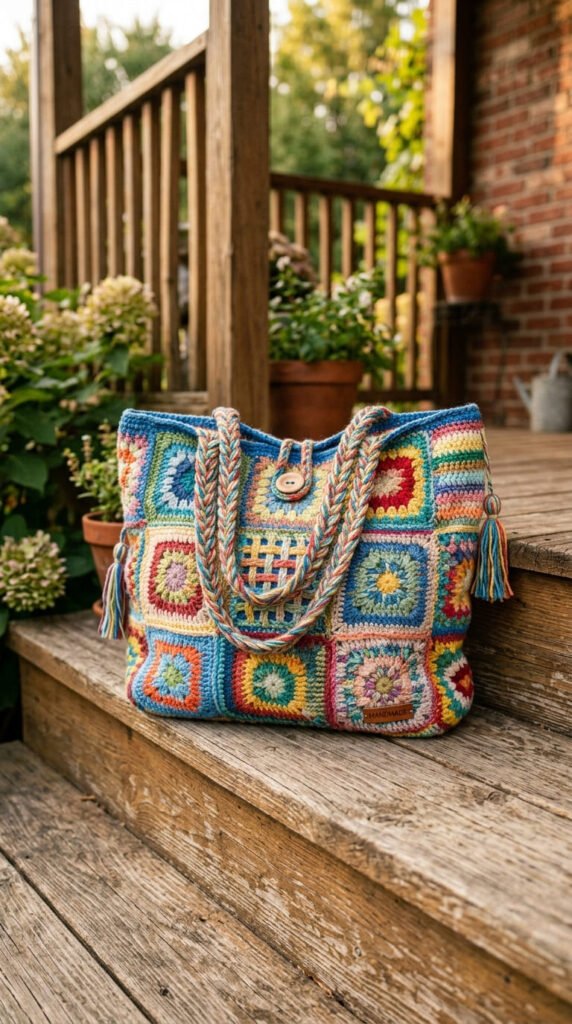
This bag exists specifically to use up every leftover ball of yarn sitting in your stash. Work random-length stripes or blocks in whatever colors you have on hand — there’s no wrong combination here. Budget tip: this is essentially a zero-cost project if you’ve been crocheting for a while and have scrap yarn piling up. Mix different yarn weights if needed, just adjust your hook size slightly for thicker sections to keep the fabric consistent. The random, colorful result has a genuine handmade charm that feels intentional rather than mismatched. This is also a great teaching project for kids learning to crochet, since mistakes and color changes blend naturally into the design. Add a simple sc border around the entire bag once finished to clean up any uneven edges between color sections. This project proves that a beautiful bag doesn’t require buying anything new. It’s also a satisfying way to finally clear out that basket of yarn odds and ends you’ve been saving “just in case.”
21. Waffle Stitch Everyday Tote
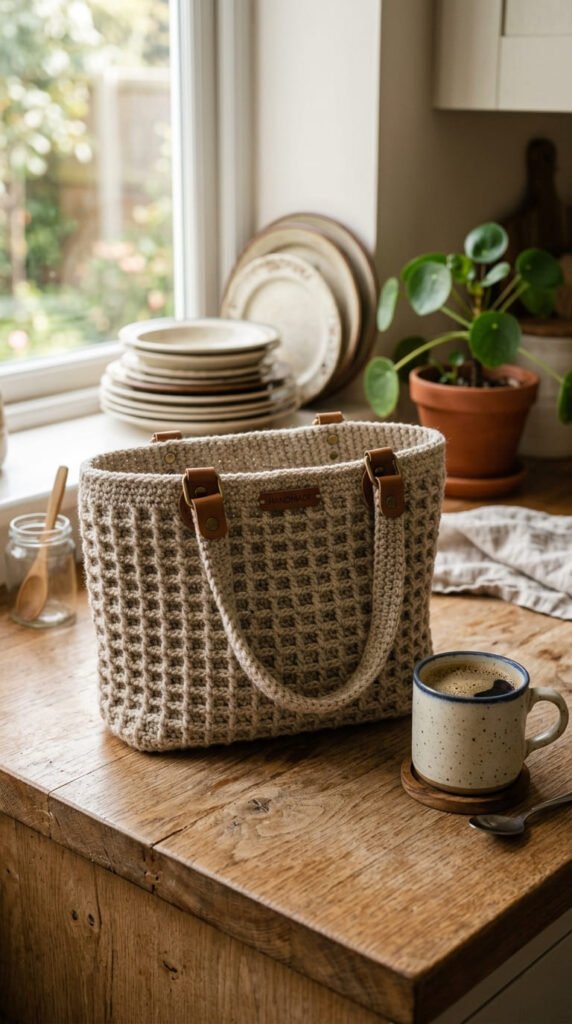
The waffle stitch creates a grid-like, dimpled texture using a repeat of front-post double crochet and regular stitches. It looks intricate but follows a simple two-row repeat once you get started. Budget tip: this stitch uses a bit more yarn than plain sc, so plan for one extra skein if you’re working with smaller cotton put-ups. An oatmeal or cream color highlights the waffle texture best under natural light. This bag works well as a daily-use tote since the dense, textured fabric holds its shape and resists sagging. Reinforce the base with an extra round of sc for added durability if you plan to carry heavier items regularly. This pattern is a good next step once you’re comfortable with basic front-post stitches, offering more texture without a steep learning curve. The finished look has a cozy, tactile quality that feels different from smooth stockinette-style crochet fabric. It’s a practical, everyday bag that still looks a little special.
22. Ribbed Bucket Bag
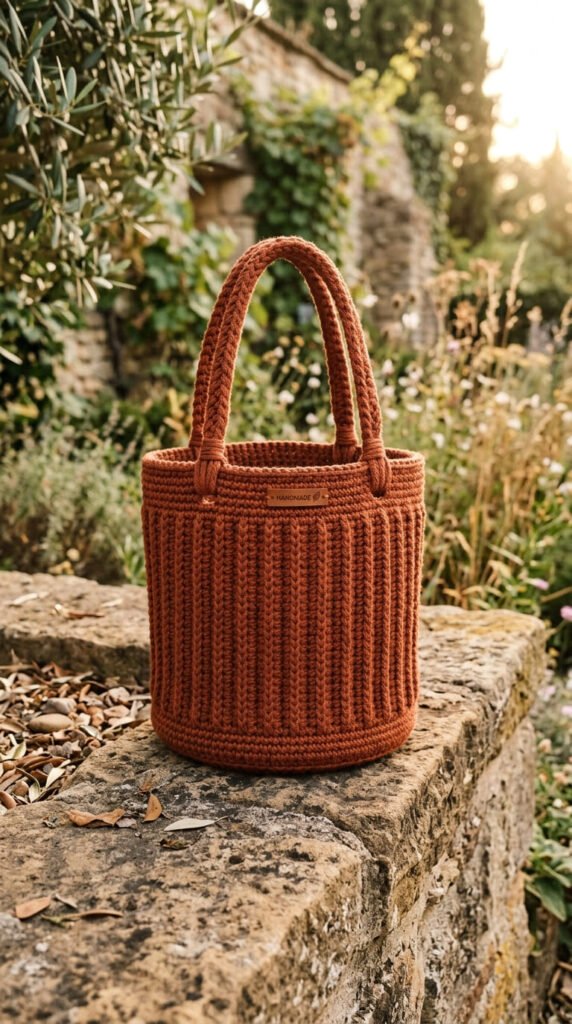
Ribbing gives this bag a rounded, structured shape that stands up on its own. Worked in the back loop only, the ribbed effect creates vertical lines around the bag’s circumference. Budget tip: this shape uses a standard amount of cotton yarn, so any basic worsted-weight skein works fine without needing anything specialty. Start with a flat circular base, then switch to back-loop-only single crochet for the sides to create the ribbed texture. A drawstring or simple flap closure at the top keeps the bucket shape practical for everyday use. Rust, mustard, or deep green colors suit this rounded silhouette particularly well. This bag holds its shape better than a typical slouchy tote, making it a good choice for carrying items that need to stay upright, like a water bottle or sunglasses case. The technique is simple enough for beginners once they understand back-loop-only stitching, which just means inserting your hook into one loop instead of both. This small change creates a noticeably different, more structured fabric.
23. Lace Edge Evening Clutch
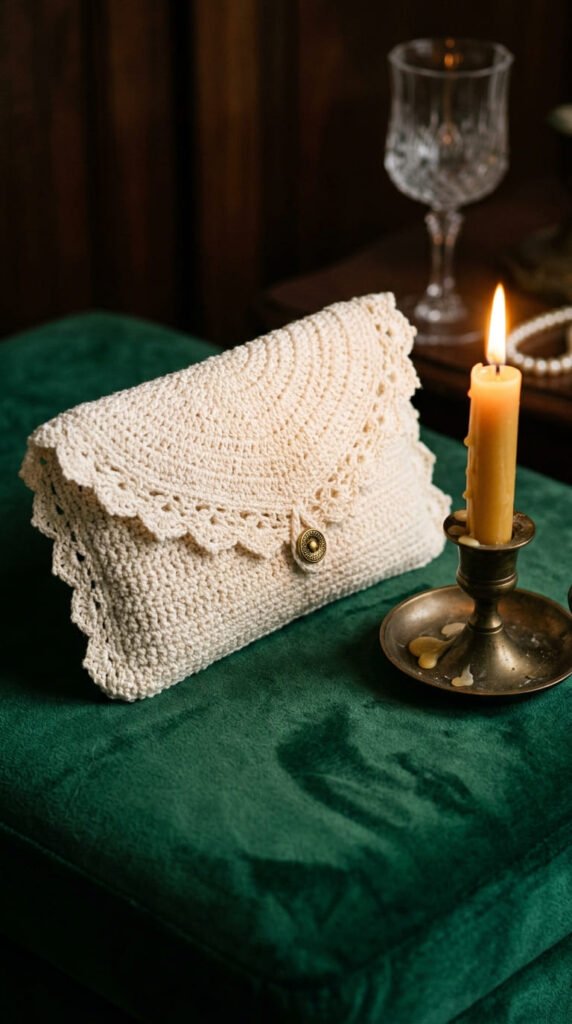
For a dressier option, this small clutch pairs a plain sc body with a simple lace trim along the top edge. The lace section uses basic chain loops rather than a complicated pattern, so it stays approachable for beginners. Budget tip: a clutch this size needs very little yarn, making it an inexpensive way to try a fine or lightweight cotton thread you might not want to commit to for a bigger project. An ivory or soft gold color gives the piece an elegant, dressed-up feel suited for evening events. Add a simple snap or magnetic closure rather than a zipper, since zippers are trickier to sew into crochet fabric neatly. This project works well as a quick gift for a wedding guest or bridesmaid, since it looks refined despite the low cost and short time investment. Line the inside with a scrap of satin or cotton fabric to keep small items like lipstick or cards from snagging on the stitches. This little clutch proves crochet can dress up just as easily as it dresses down.
24. Adjustable Long-Strap Hobo Bag
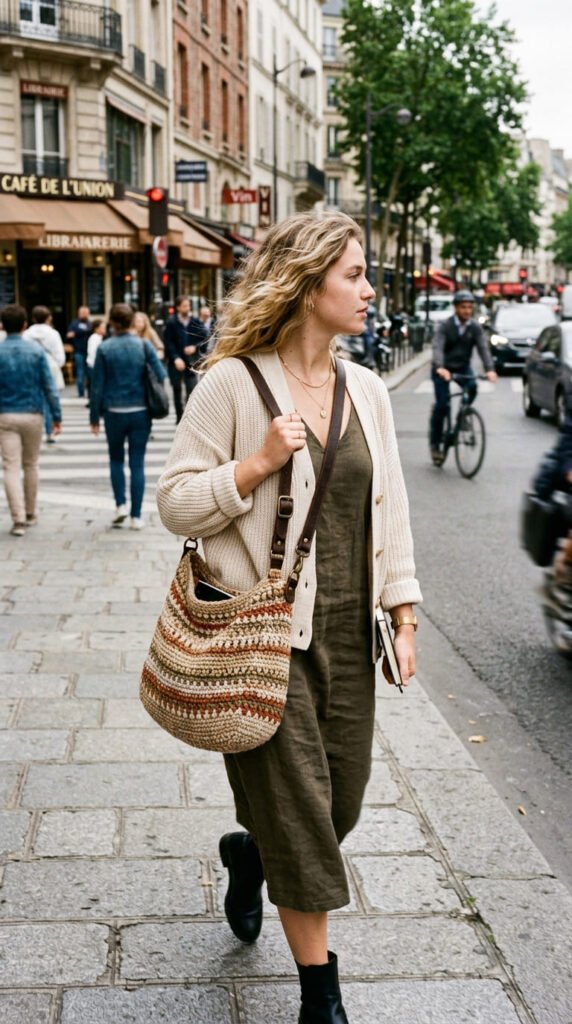
The hobo bag shape is soft and slouchy, worked in hdc for extra drape compared to a stiffer sc tote. A long single strap, adjustable with a simple slip-knot loop system, lets you wear it crossbody or over one shoulder. Budget tip: this bag uses a soft, affordable acrylic-cotton blend yarn well, since drape matters more than rigidity here, and blended yarns often cost less than pure cotton. Work the body in one continuous round shape, then add the strap as a long single chain reinforced with a row of sc along its length for strength. This bag carries a more relaxed, casual look compared to structured totes on this list. It’s a comfortable option for daily errands since the long strap distributes weight across the body instead of the hand. Beginners can handle this project easily, since hdc is barely more complex than sc and the shaping stays simple throughout. This is a good bag to make in a weekend if you want something wearable and practical rather than decorative.
25. Interchangeable Strap Convertible Bag
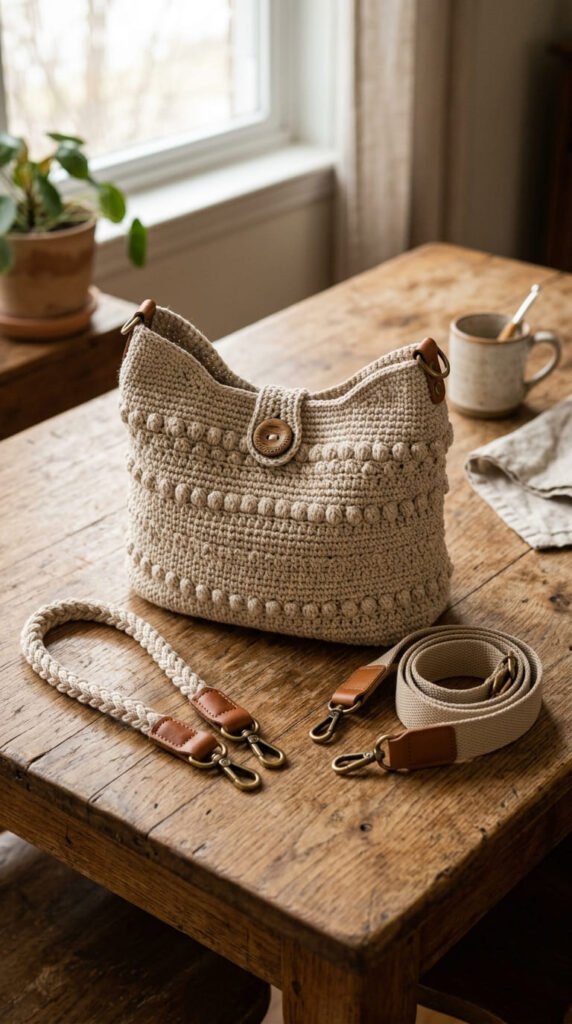
This final design solves a common problem: wanting different carrying styles without making separate bags. Crochet the main body once, then make two different straps — a short handle pair and a long crossbody strap — both attached with simple clasp hardware instead of sewn directly on. Budget tip: buy a set of inexpensive swivel clasps from a craft store; they cost just a few dollars and let you switch straps in seconds. This turns one project into a bag that works for multiple occasions, saving both time and yarn compared to making two separate bags. The main body can use any basic stitch pattern from earlier on this list, since the real feature here is the interchangeable hardware system. This is a great final project once you’ve built confidence with the basics, since it combines simple crochet work with a small amount of hardware attachment. It also makes an excellent gift, since the recipient gets flexibility built into one handmade piece. This bag represents everything beginner crochet can achieve: practical, customizable, and entirely handmade from start to finish.
Conclusion
Twenty-five bags, one skill set. Every pattern on this list builds from the same handful of basic stitches — single crochet, half-double crochet, and a few simple texture variations. Once you’ve made your first tote, the rest becomes a matter of swapping colors, yarn types, and small details to create something new each time. Start with a cheap cotton skein and a basic hook, pick whichever design speaks to you, and give yourself a weekend to finish it. You’ll end up with a bag that costs a fraction of a store-bought version and carries a little more meaning because you made it yourself.