
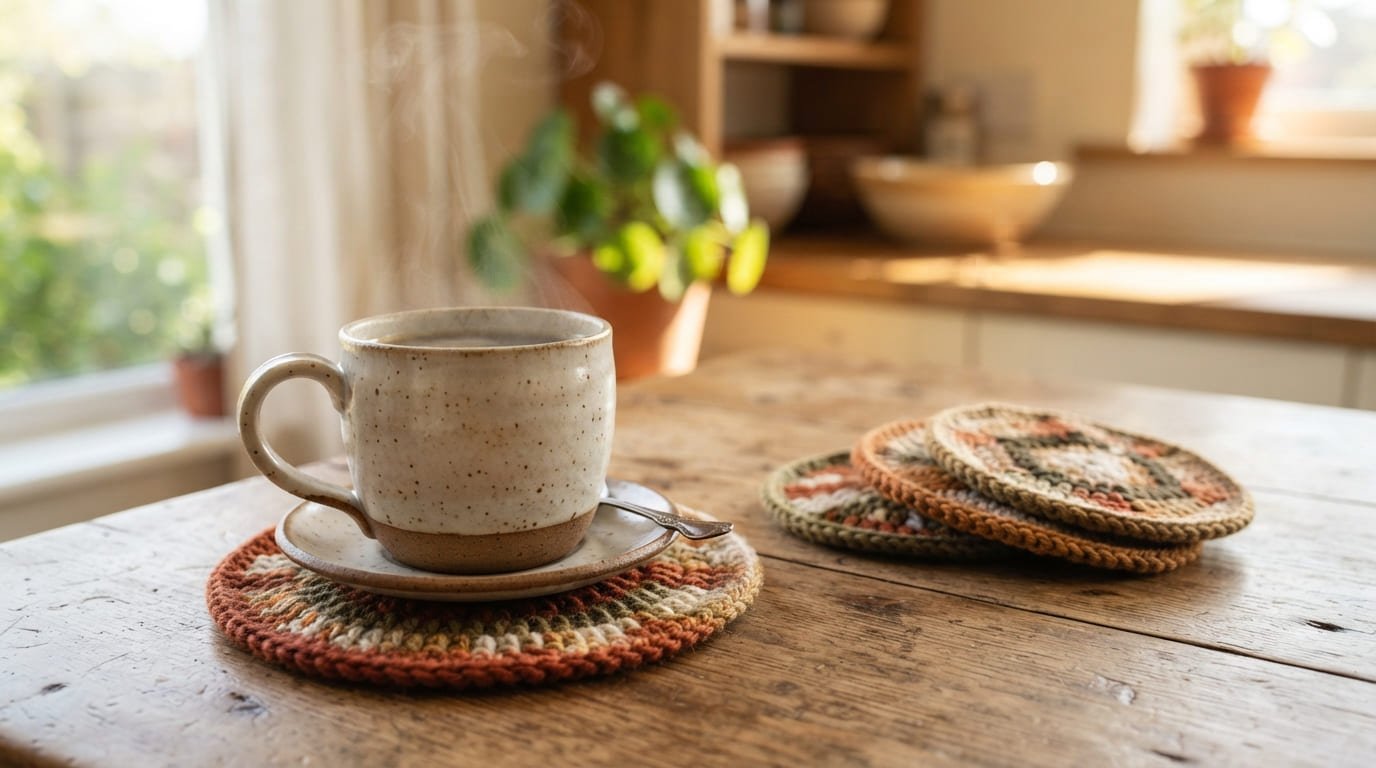
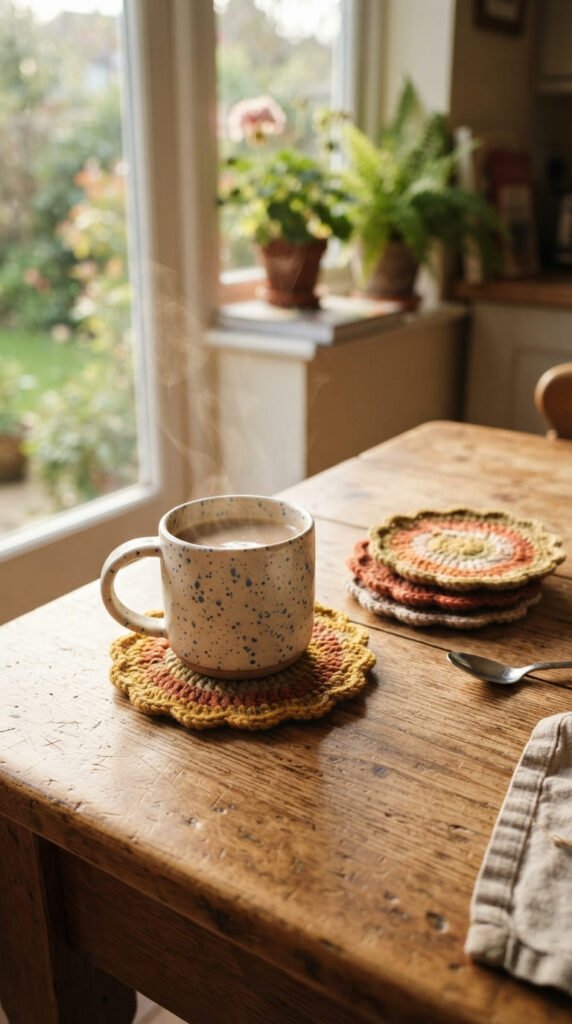
If your coffee mug has ever left a ring on your favorite table, or you’re just looking for a small project that uses up leftover yarn, crochet mug coasters are one of the most satisfying things you can make. They’re quick, they’re forgiving of mistakes, and they turn an ordinary coffee corner into something that feels handmade and personal. Some crocheters call them coasters, others call them “mug rugs” — a slightly larger version sized to hold both a mug and a cookie or biscuit. Either way, this list walks through 22 crochet mug coaster ideas that range from five-minute beginner rounds to textured stitch patterns, seasonal designs, novelty animal shapes, and lacy vintage styles. Whether you’re stitching a quick gift, restocking your own kitchen, or thinking about selling a few at a craft fair, there’s an idea here you can start today with whatever hook and yarn you already have on hand.
1. Classic Granny Square Mug Rug for Retro Charm
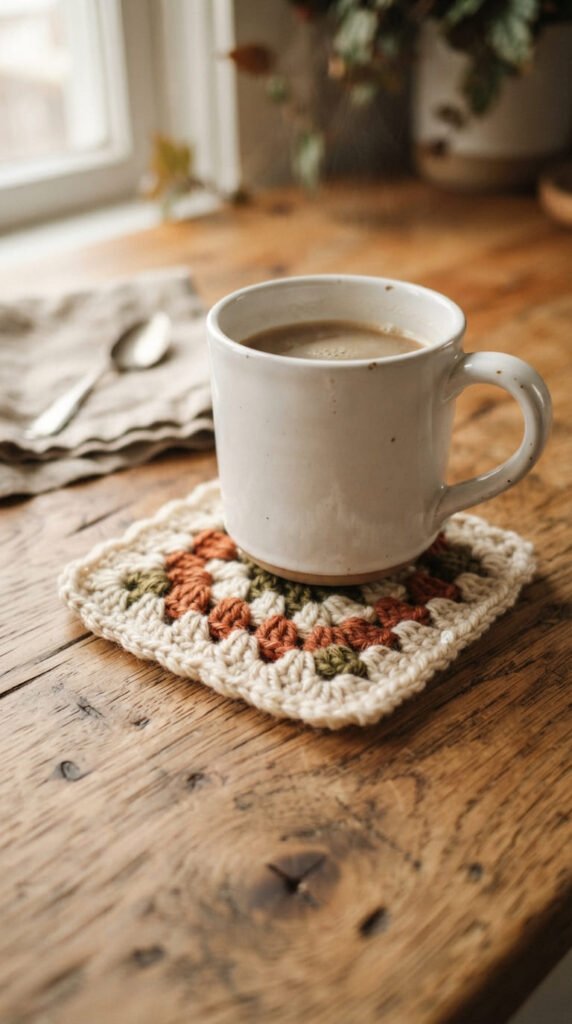
The granny square is one of the first things most people learn to crochet, and it happens to make an excellent mug rug. Working in rounds with two or three color changes gives you a small, sturdy square that lies flat almost automatically because of how the stitch pattern distributes tension evenly across the piece.
What makes this idea worth revisiting is how customizable it is. A single granny square finished around 5 inches works as a coaster on its own, while two squares joined side by side create a rectangular mug rug with room for a small plate or cookie.
Color pairing tips:
- Stick to three colors max for a cohesive look
- Use a neutral like oatmeal or cream as your base round
- Save your brightest yarn for the final round to frame the piece
Because the pattern is so well known, it’s an easy project to hand off to someone learning to crochet for the first time. It also uses very little yarn, so it’s a natural way to test out a new color combination before committing to a bigger project like a blanket.
2. Seed Stitch Coaster for Texture Without the Fuss
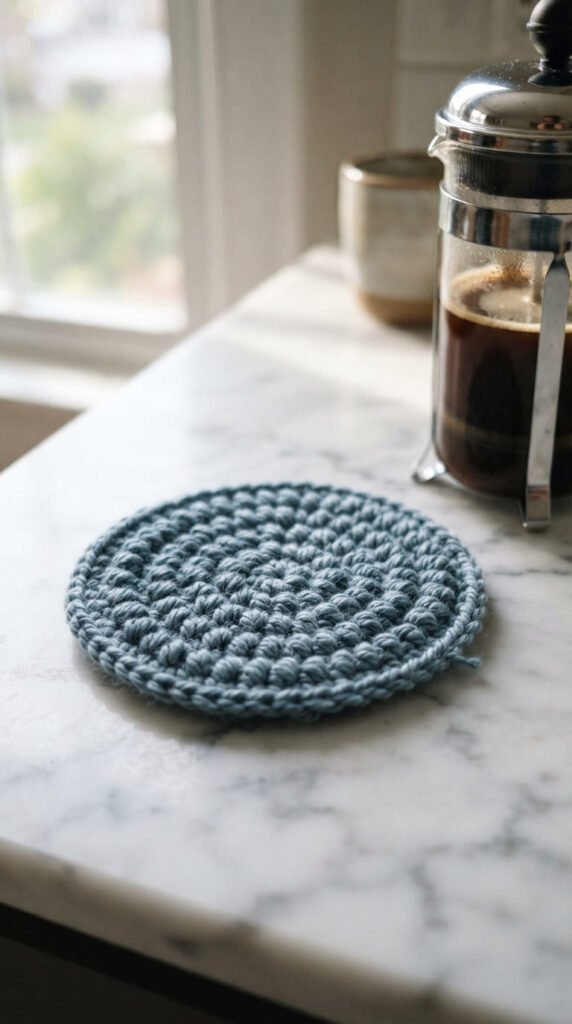
Seed stitch, sometimes called moss stitch in crochet circles, alternates single crochet and chain stitches to create a bumpy, tweed-like surface. It looks more complicated than it is — the repeat is only two stitches wide, which makes it easy to memorize after the first row.
The texture does more than look nice. Because the surface isn’t flat, condensation from a cold glass or a slightly damp mug bottom has somewhere to go instead of pooling and soaking straight through.
Why this stitch works well for coasters:
- Naturally dense fabric that resists curling
- Textured surface hides small tension mistakes
- Works up quickly in worsted weight cotton
A 4.5-inch round in this stitch takes most crocheters under twenty minutes once they’re past the first two rows. Try working it in a single solid color to let the texture be the star, or alternate two closely related shades — like sage and olive — every other row for subtle striping that doesn’t compete with the stitch pattern itself.
3. Overlay Mosaic Heart Coaster as Your First Colorwork Project
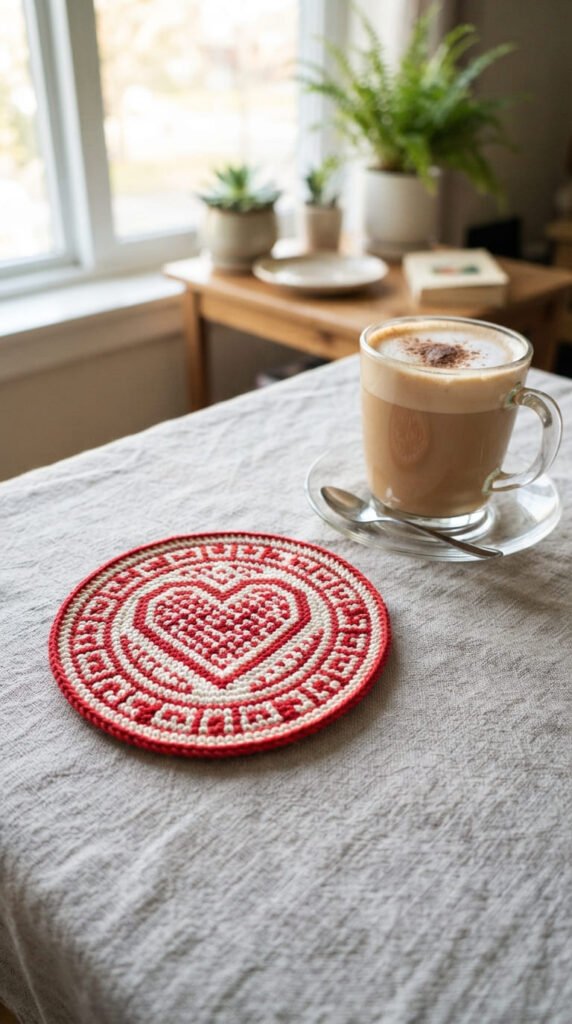
Mosaic crochet has a reputation for being intimidating, but overlay mosaic specifically was designed to be approachable. You only ever work with one color per row, and the contrasting color appears because you’re crocheting into stitches from two rows below rather than switching yarn constantly.
A heart shape is a natural starting point because the design is symmetrical and forgiving. If one side comes out slightly wider than the other, it still reads clearly as a heart rather than looking like a mistake.
Getting started:
- Choose two yarns with high contrast, like navy and white
- Follow a chart rather than written instructions if you’re new to mosaic
- Count your stitches at the end of every row before moving on
This technique produces a noticeably firmer, thicker fabric than single-color crochet, which happens to be ideal for a piece that has to sit flat under a warm mug. Once you’ve made one heart coaster, the same skill transfers directly to diamonds, stars, and initials for a more personalized set.
4. Waffle Stitch Coaster for Extra Cushioning
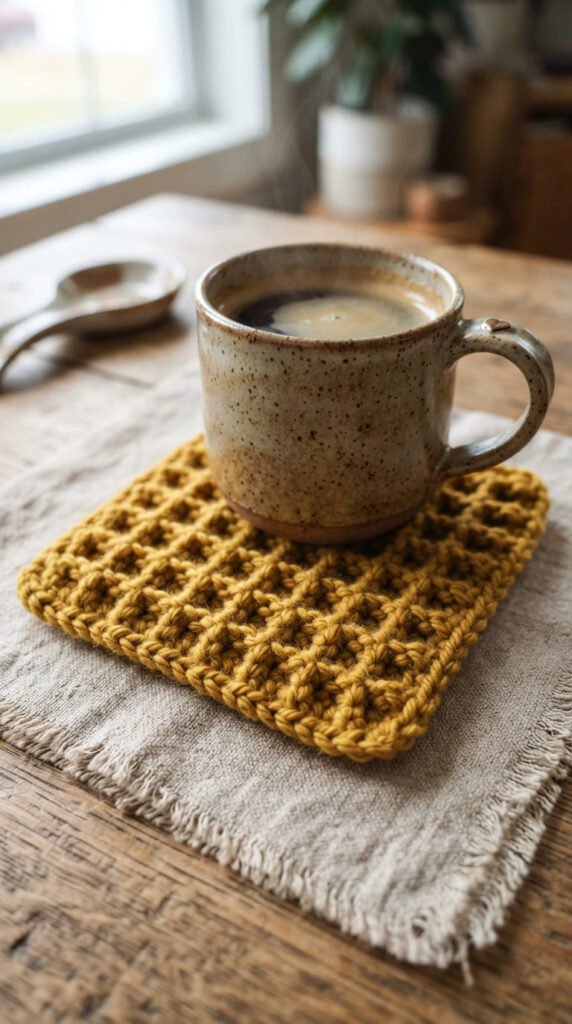
Waffle stitch combines front post and back post double crochet stitches to build a grid of raised squares, similar in look to an actual waffle iron pattern. It’s thicker and spongier than most other coaster stitches, which gives it genuinely useful insulating properties.
This matters more than it sounds like it would. A thin coaster barely slows down heat transfer, so a table can still feel warm to the touch under a hot mug. The extra loft in waffle stitch actually creates a small air gap that helps.
Best uses for this pattern:
- Coasters for very hot drinks like tea or espresso
- Gift sets where a “substantial” feel matters
- Practicing front post and back post stitches before a bigger project
The trade-off is that it takes a bit longer to work than flatter stitches, and it uses more yarn per coaster. It’s worth it for a small set of four to six pieces meant for daily use rather than decoration, since the extra thickness holds up well to repeated washing without flattening out.
5. Fringed Rustic Mug Rug for a Mini Rug Look
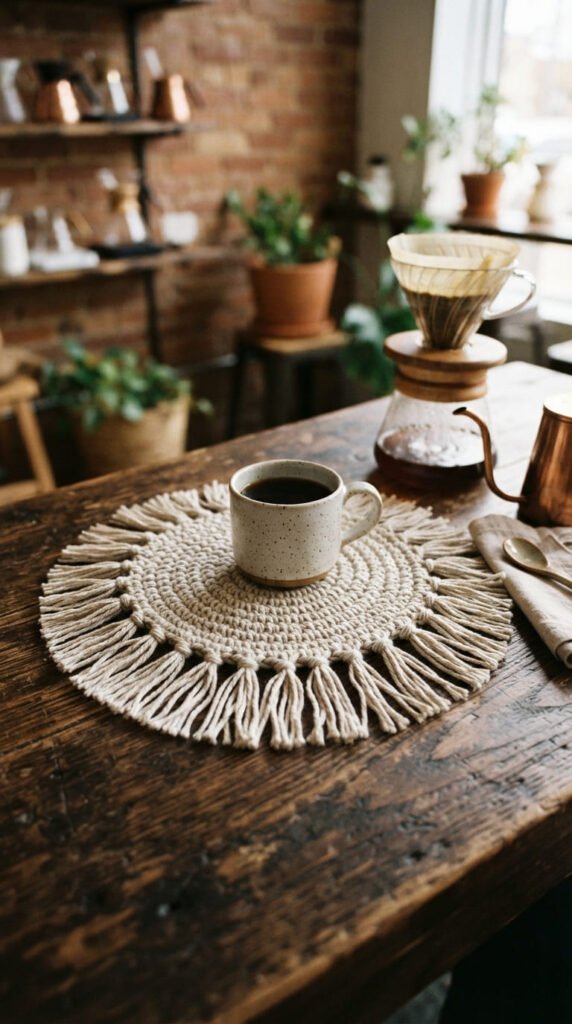
Adding fringe turns a flat coaster into something that looks like a miniature area rug, which is exactly the appeal of this style. The base is usually a simple rectangle worked in single or half double crochet rows, with the fringe attached afterward along both short ends.
How to attach clean fringe:
- Cut strands about 6 inches long for a 5-inch-wide rug
- Fold each strand in half and pull the loop through with a crochet hook
- Pull the yarn ends through the loop and tighten close to the edge
- Trim all strands to an even length once every piece is attached
The base color and the fringe color don’t have to match. A cream-colored base with rust-colored fringe, for example, gives the piece a woven, textile-inspired look rather than a purely crochet one. This style photographs especially well for gift-giving or selling online, since the fringe adds visual movement that a flat coaster doesn’t have. Comb the fringe lightly with a fine-tooth comb before trimming for a fuller, less stringy finish.
6. Autumn Leaf Coaster as a Seasonal Statement Piece
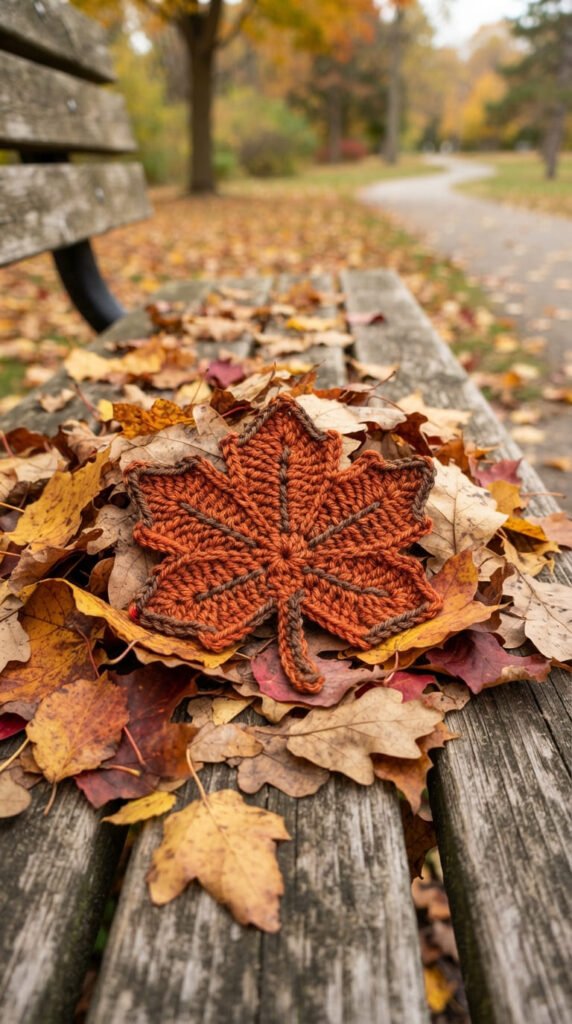
A leaf-shaped coaster is worked flat, usually starting from a center chain and building outward in rows that increase and decrease to form pointed lobes. It’s a satisfying shape to watch develop because the leaf silhouette becomes obvious after just a few rows.
Color combinations that read clearly as “leaf”:
- Rust orange with a single brown vein stitched down the center
- Deep gold fading to olive green at the stem
- Burgundy with a contrasting cream edge
Because this shape doesn’t lie perfectly flat the way a circle or square does, blocking matters more here than in most other patterns. Pin the finished leaf to a towel-covered surface while slightly damp and let it dry completely before using it under a mug. This single extra step is the difference between a leaf coaster that curls at the tips and one that sits properly.
These make a natural small gift bundled with a bag of coffee or a box of tea in September and October, and a set of four or five in slightly different fall shades looks intentional rather than mismatched on a table.
7. Pumpkin Patch Coaster Set for a Fall Coffee Corner
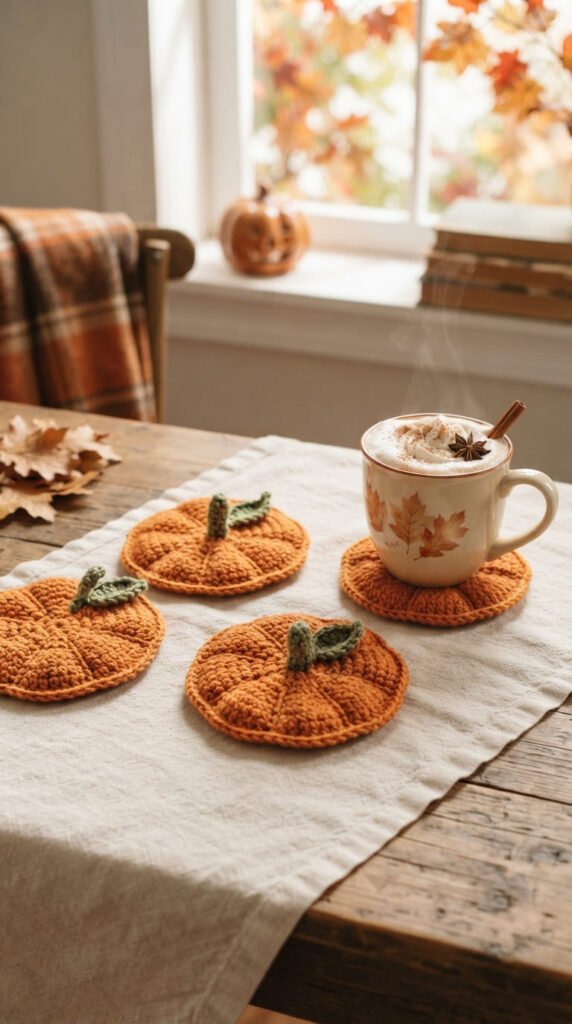
This idea takes a basic circle worked in double crochet and adds vertical ribbing by working through the front loop only on certain rounds, which creates the characteristic pumpkin grooves without any special stitch. A short crocheted or wrapped stem finishes the look.
Building a full “patch” set:
- Make three or four pumpkins in slightly different shades of orange
- Vary the size by adding or skipping a round on some pieces
- Add one smaller white or cream pumpkin for contrast
The front-loop-only technique is worth learning on its own, since it shows up in a lot of other novelty crochet shapes beyond pumpkins. Working only through the front loop leaves the back loop free, which is what creates that ridged, sculptural line running from the center out to the edge.
A pumpkin set like this works well displayed in a shallow bowl near the coffee station when not in use, rather than stacked flat, since the shape itself becomes part of the seasonal decor even before a mug lands on top of one.
8. Shamrock Coaster for a Small Dose of Luck
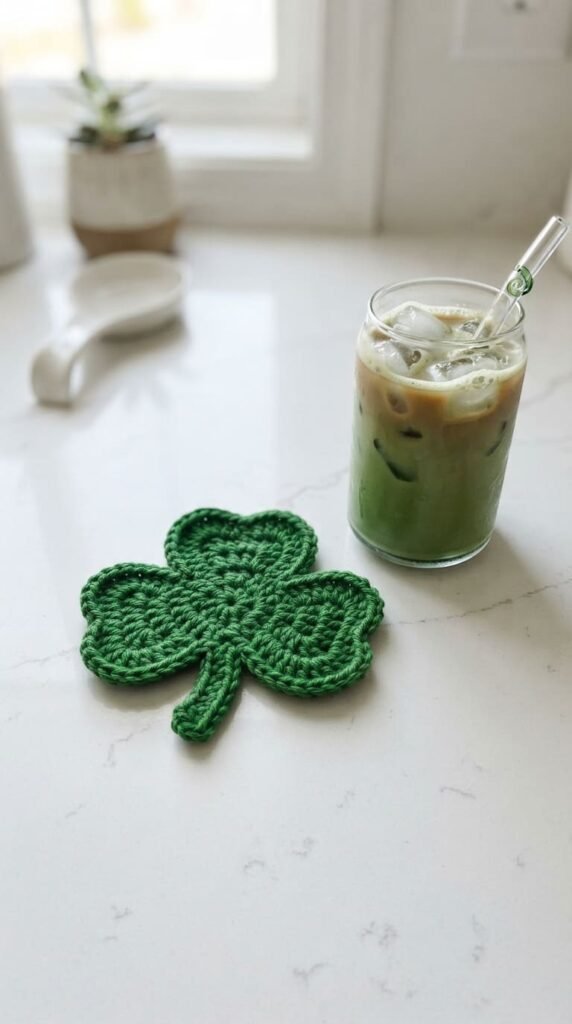
A shamrock coaster is built from three small connected circles or puff-stitch clusters joined at a center point, with a short stem crocheted or chained below. It’s a compact project, usually finished in under fifteen minutes once you’re comfortable with the basic circle.
Two ways to build the clover shape:
- Crochet three separate small circles, then whip-stitch them together at the center
- Work all three lobes in one continuous piece using strategic increases and decreases
The first method is easier for beginners because each circle is a familiar, self-contained step. The second method produces a smoother, more seamless result but takes more practice to get the proportions even across all three lobes.
A single shamrock coaster is a nice small gift on its own, tucked into a card for someone’s birthday if it happens to fall in March. Making a set of four or six in varying shades of green — from mint to forest — gives a table a cohesive but not overly matchy look for St. Patrick’s Day gatherings without needing any other decorations.
9. Christmas Wreath Coaster for a Festive Table Accent
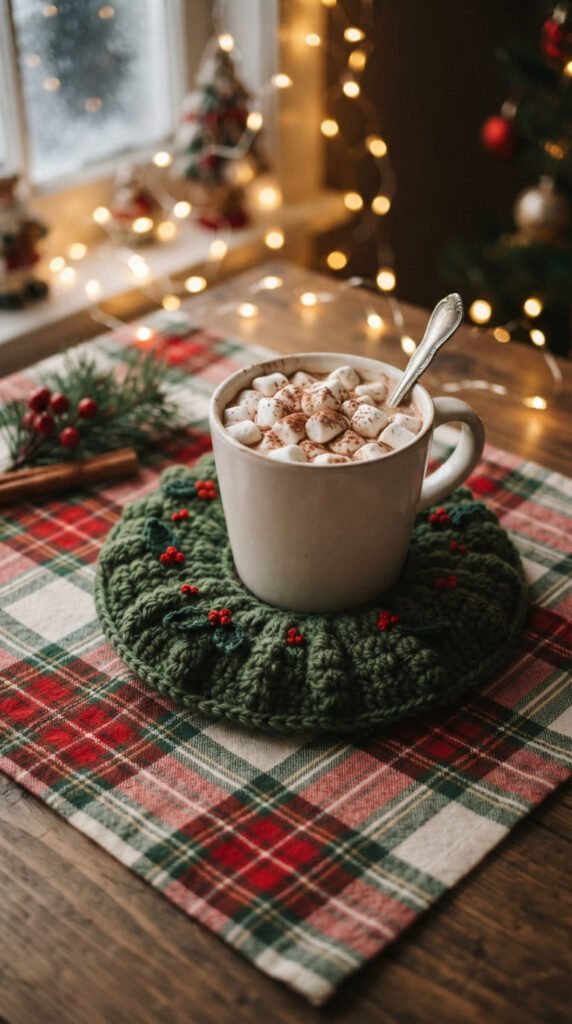
This design starts with a simple ring, worked with a slightly larger hook than the yarn weight calls for, which opens up the stitches enough to leave a visible center hole — the defining feature that makes it read as a wreath rather than a plain circle. Small bobble stitches or tiny attached pom-poms in red stand in for berries.
Assembly order that keeps it simple:
- Crochet the green ring base first and set it aside
- Make three to five small red bobbles or pom-poms separately
- Attach the berries around the ring with a needle and matching thread
- Optionally add a small bow made from ribbon or crocheted chain
Because the center hole is intentional, this coaster works a little differently than others on this list — it’s better suited to smaller mugs or espresso cups where the base of the mug is narrower than the ring’s inner diameter. For larger mugs, reduce the hole size by using one fewer round before starting the outer border. A set of these looks especially good stacked on a shelf when the holidays are over, since the wreath shape holds its form even off a table.
10. Frog-Shaped Novelty Coaster for a Playful Kitchen Character
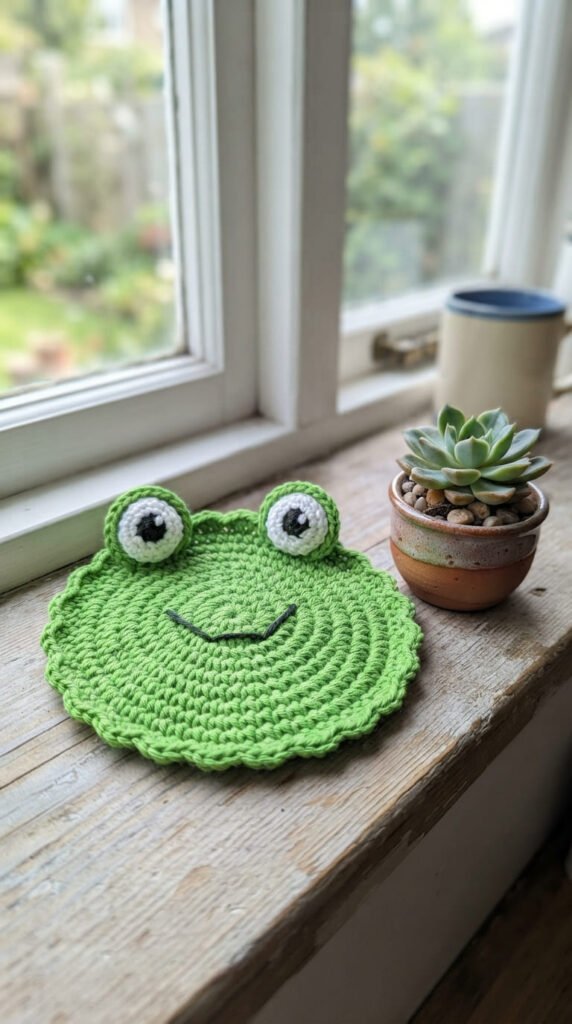
Animal-shaped coasters like this one start as a plain circle worked flat, with the eyes, legs, and other features added as separate small pieces sewn on afterward. The body itself uses the same skills as any round coaster — it’s the assembly that gives it personality.
Parts to prepare separately:
- Two small white circles with black centers for the eyes
- Four short chain-and-fold pieces for the legs
- A tiny pink oval for the mouth, sewn on with a curved line of backstitch
Working the eyes as raised, slightly stuffed circles rather than flat ones makes a noticeable difference in how three-dimensional and expressive the final piece looks. A pinch of stuffing or even a small scrap of leftover yarn tucked inside each eye piece before sewing it shut is enough.
This kind of project appeals to a different audience than the more decor-focused ideas on this list — think kids’ rooms, playful kitchens, or gifts for someone who collects frog-themed items. Once you’ve built the technique for attaching features to a base circle, it transfers directly to other animal shapes like turtles or owls.
11. Sleepy Cat Coaster for a Whimsical Animal Shape
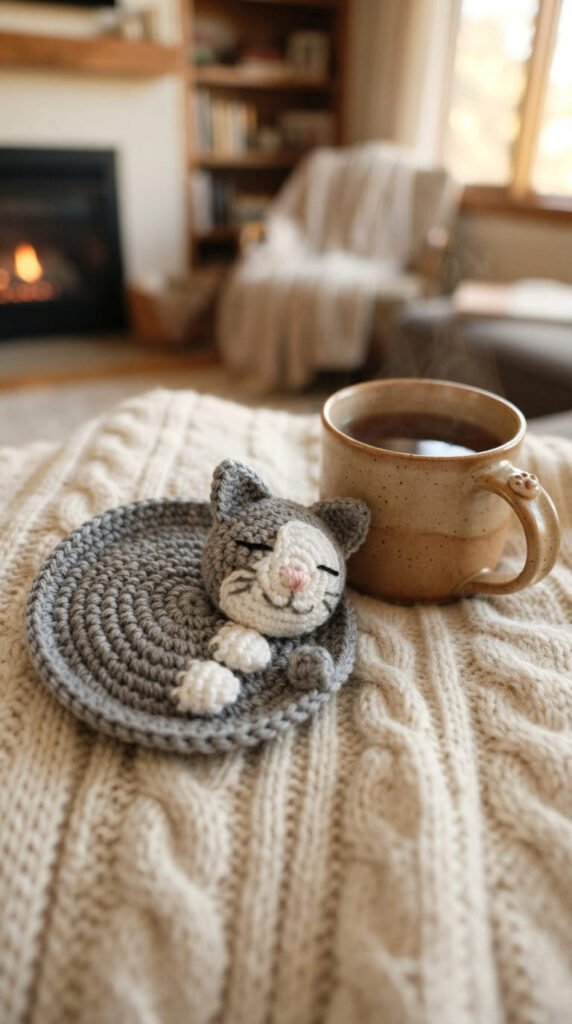
Unlike the frog design, this coaster builds the animal shape directly into the crochet rounds rather than assembling separate pieces. Strategic increases create the curved outline of a cat curled into a sleeping position, with the tail wrapping around one side of the body.
What makes the shape read as a cat:
- Two small pointed ears worked as extra stitches during an early round
- A gentle color change partway through for a two-tone coat effect
- Simple embroidered eyes and whiskers added last, once the shape is blocked
This one takes a bit more attention to the pattern than a plain round coaster, since the increases aren’t evenly spaced the way they are in a standard circle. Following a written pattern or chart closely on the first attempt is worth it — after making one, the shaping logic becomes much easier to adjust freely on the next.
Gray and white or orange tabby coloring are popular choices because they’re instantly recognizable, but this shape also works nicely in solid black or cream for a more subtle, silhouette-style look that still reads clearly as a cat from across the room.
12. Mushroom Coaster for a Cottagecore Coffee Corner

A mushroom coaster is worked as a half-circle or scalloped dome shape in a warm brown or red, with small white puff stitches scattered across the surface to mimic the classic spotted toadstool look. A narrow cream-colored strip below represents the stem.
Building the spotted texture:
- Work the cap in double crochet rounds as normal
- Insert small puff stitches at random intervals on the last two rounds
- Keep spot placement uneven and organic rather than in a perfect grid
This idea fits naturally into the cottagecore and woodland-inspired home decor that’s become common on kitchen shelves and reading nooks. Pairing two or three mushroom coasters of different sizes, rather than making a matching set, tends to look more natural and less manufactured.
Because the dome shape isn’t fully flat like most coasters, this one benefits from a firmer stitch like single crochet worked tightly, which helps it hold its rounded form under the weight of a full mug instead of flattening out over time. A light spray of fabric stiffener on the cap, once fully dry, can help it keep its shape even longer if it’s more decorative than functional.
13. Tapestry Flag Coaster for a Bold Graphic Statement
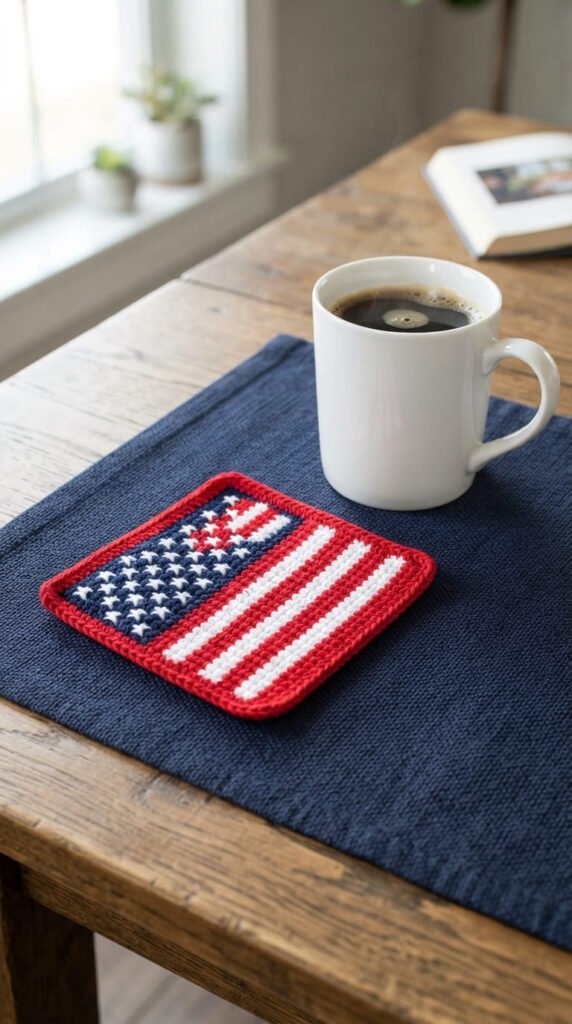
Tapestry crochet carries unused yarn colors along the back of the work as you go, which lets you build clean, pixelated images row by row using single crochet stitches. A flag design is a good starting project because the shapes are simple rectangles and stripes rather than curves.
Tips for clean color changes:
- Switch colors on the last pull-through of the previous stitch
- Keep carried yarn snug against the back but not pulled tight
- Work over the carried strands rather than leaving long floats
The back of a tapestry crochet piece looks noticeably different from the front — a little busier and less tidy — which is completely normal and doesn’t affect how the coaster performs. Because two strands of yarn run through most stitches, tapestry pieces come out thicker and more rigid than single-color coasters, which actually works in their favor for something meant to sit flat on a table.
Once the flag technique clicks, the same skill applies to any grid-based design: initials, simple geometric shapes, or even a tiny pixelated version of a favorite coffee mug logo.
14. Checkered Coaster for a Modern Geometric Look
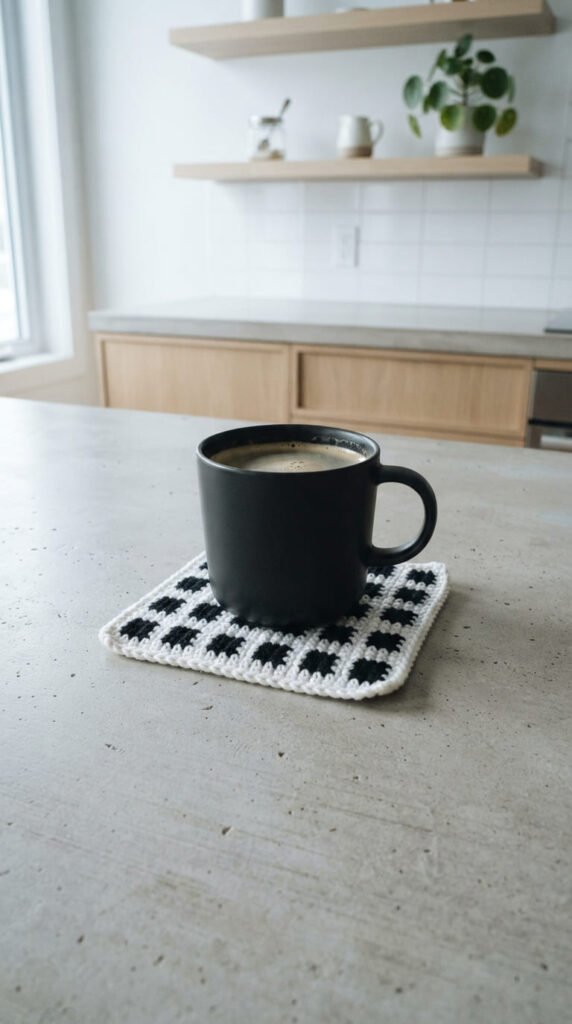
This design uses the same tapestry crochet logic as the flag coaster above, but with a repeating grid pattern instead of a picture. Alternating blocks of two contrasting colors in a simple over-under sequence create the checkerboard effect without needing a complicated chart.
Scaling the pattern to your coaster size:
- A 4-block by 4-block grid suits a 4-inch coaster
- A 6-block by 6-block grid suits a mug rug closer to 6 inches
- Keep each block the same stitch count for even squares
Black and white is the classic combination, but a checkered coaster in two closely related tones — like two shades of blue or gray — gives a softer, more subtle version of the same graphic effect for a home with quieter decor.
This style tends to suit kitchens with a more contemporary or minimalist look better than the softer, textured stitches earlier in this list. It also pairs well as a matched set with a checkered kitchen towel or runner, if you’re building out a coordinated look for a specific corner of the kitchen rather than making one-off pieces.
15. Filet Crochet Lace Coaster for Delicate Vintage Style
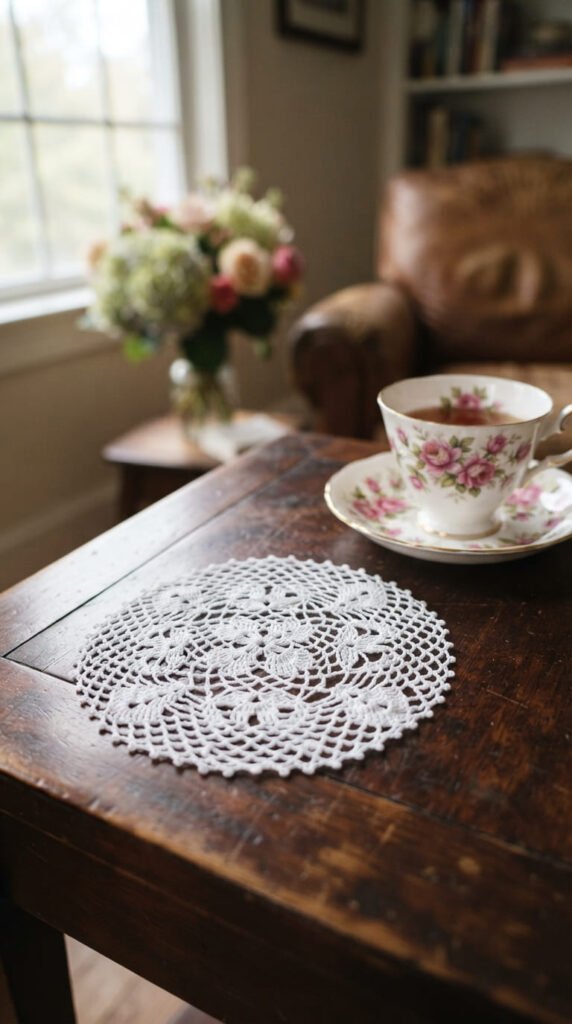
Filet crochet builds an image or pattern out of open mesh squares and solid filled squares, using only double crochet and chain stitches. It has a distinctly lacy, old-fashioned look that fits well with vintage teacups or a more formal table setting.
Why this differs from other coasters on this list:
- The open mesh sections mean it’s more decorative than fully functional
- Best paired with a small saucer or plate underneath for actual spill protection
- Thread-weight cotton yarn gives the most authentic lace look
A small heart, star, or simple diamond motif worked in filet is a manageable starting project, since the grid-based charting is more forgiving of small counting errors than curved designs. Working in a fine crochet thread rather than standard yarn changes the character of the piece considerably — it becomes noticeably more delicate and closer to actual heirloom lace, though it also takes longer to complete.
These make a particularly nice gift for someone who already collects vintage linens or teacups, since the finished coaster looks at home next to inherited lace doilies rather than clashing with them.
16. Doily-Inspired Round Coaster for Old-World Elegance
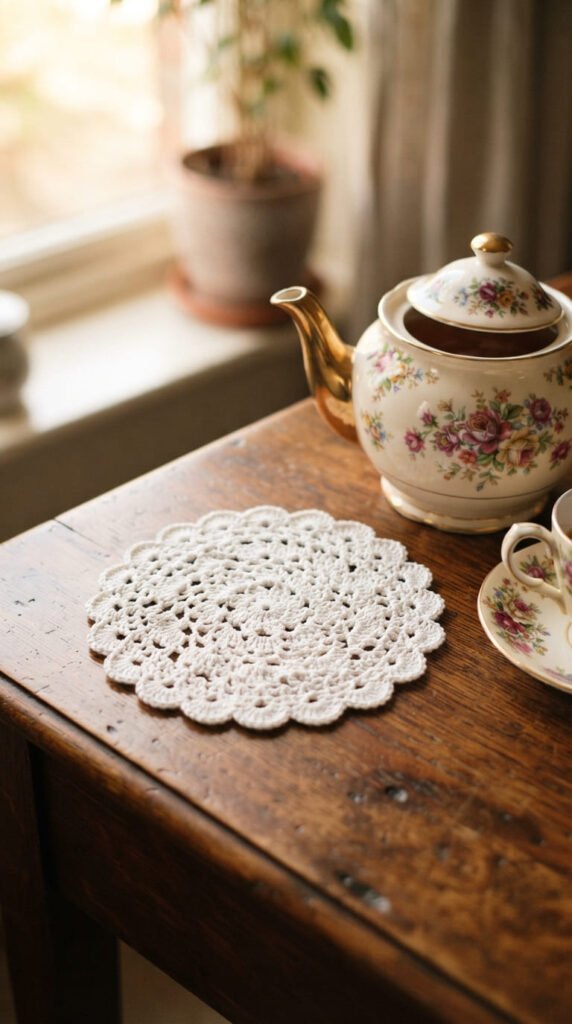
A doily coaster takes the classic scalloped-edge doily pattern and shrinks it down to coaster size, usually finishing between 4 and 5 inches across. The construction works outward from a center ring in rounds, finishing with a picot or shell-stitch border for the scalloped edge.
Keeping a small doily flat:
- Block it firmly while still damp, pinning each scallop point
- Use a slightly smaller hook than usual for a denser, flatter fabric
- Starch lightly if the coaster is more decorative than everyday-use
This is one of the more advanced ideas on this list because the shell-stitch border requires more precise stitch counting than a plain round edge. It’s worth the extra care, though, since the scalloped border is what gives it that recognizable doily silhouette rather than just looking like a plain circle.
A set of these in ecru or soft white cotton fits naturally into a tea-and-coffee station that already leans toward a more classic or grandmillennial style, especially displayed on a small tray rather than tucked into a drawer between uses.
17. Corner-to-Corner Coaster for a Pixel-Style Design
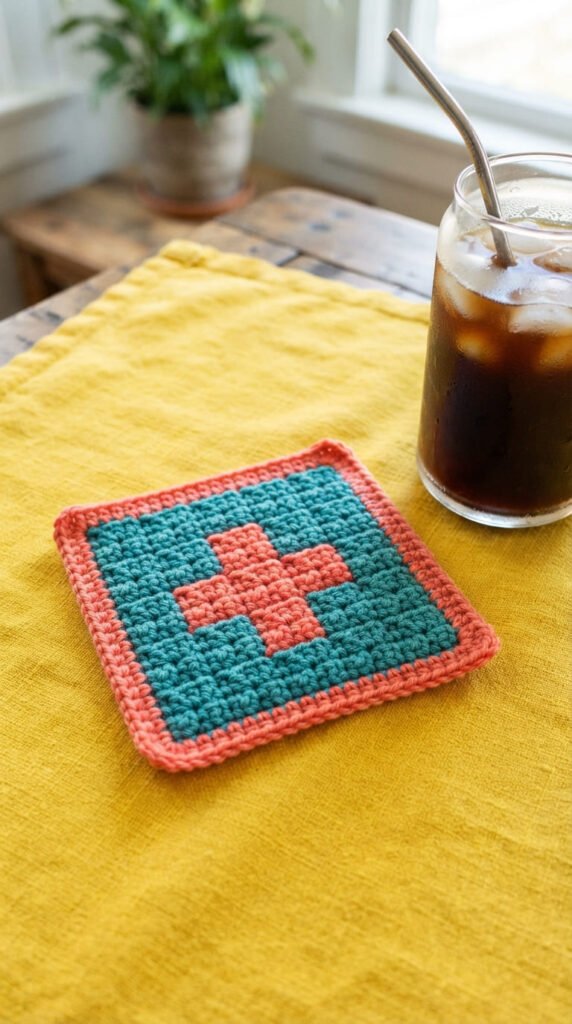
Corner-to-corner crochet, often shortened to C2C, is worked diagonally in small clusters of double crochet stitches rather than in straight horizontal rows. Each cluster acts like one “pixel,” which makes it especially easy to follow a graph pattern originally designed for cross-stitch or pixel art.
Why C2C suits small projects like coasters:
- Diagonal construction naturally produces a square shape
- Color changes happen cleanly at the start of each new block
- Graph patterns are widely available and easy to resize
A simple geometric shape, a single letter, or even a tiny heart works well at coaster scale, since C2C loses detail quickly on very small grids. Sticking to designs with fewer than 100 total blocks keeps the piece from feeling cramped or illegible.
Because each block is worked and then joined to the next, this technique produces a slightly looser, more open fabric than solid tapestry crochet. A coaster made this way benefits from a firm final border round worked in single crochet, which tightens up the edges and helps the finished square hold its shape under regular use.
18. Bobble Stitch Coaster for Dimensional Texture
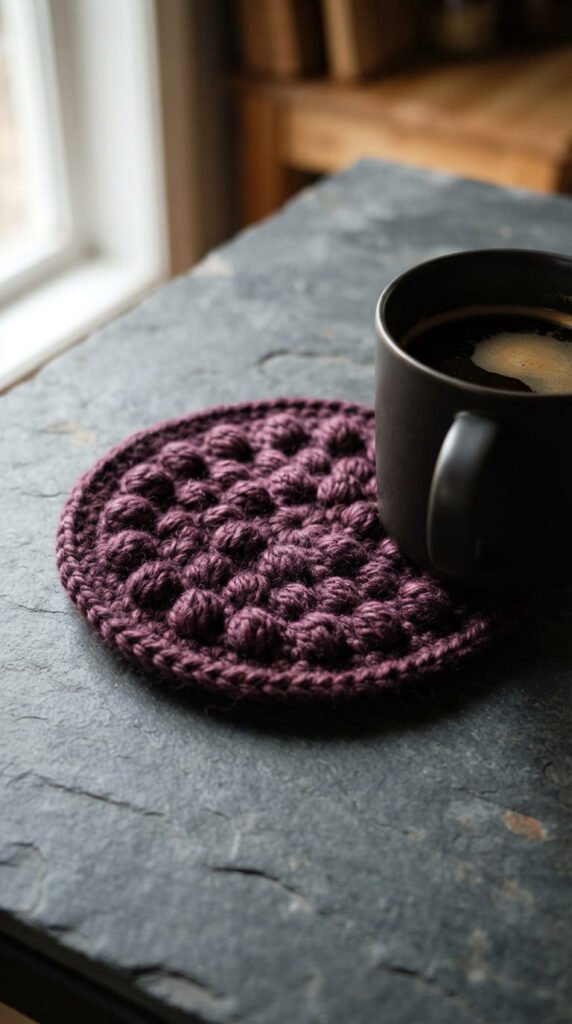
Bobble stitch clusters several incomplete double crochet stitches into one loop, creating a raised bump that stands proud of the surface. Scattered across a plain background of single crochet, these bumps add noticeable texture and visual weight to an otherwise simple round coaster.
Placement patterns worth trying:
- Evenly spaced bobbles in a spiral for a modern, understated look
- Bobbles clustered in the center only, framed by plain rounds
- A random scatter for a more organic, handmade feel
Bobble stitch uses more yarn per row than a plain stitch does, since each bump is made from several stitches worked together, so a coaster in this style typically takes slightly more yarn than a same-sized flat coaster. It’s a good technique to practice for anyone planning a bigger bobble-stitch project like a cushion cover, since the small scale of a coaster lets you get comfortable with the tension before committing to something larger.
A deep, saturated color like plum, forest green, or rust tends to show off the raised texture better than pale pastels, since shadows between the bobbles read more clearly against darker yarn.
19. Scrap Yarn Stripe Coaster for Stash-Busting Color
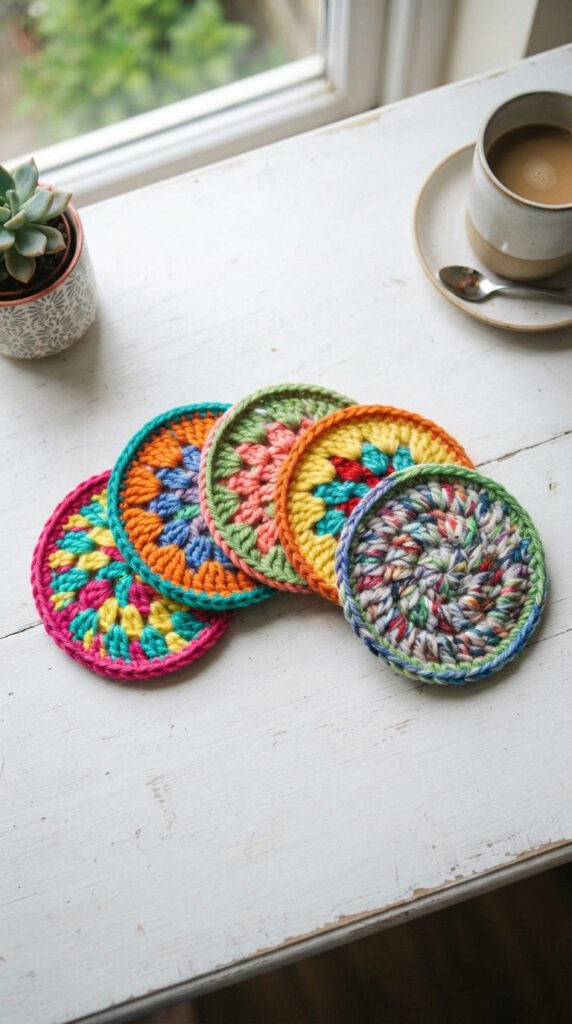
This idea doesn’t call for a specific stitch so much as a specific mindset: use whatever leftover yarn is sitting in your stash, regardless of whether the colors technically “match.” A simple round or square worked in single crochet, changing colors every one or two rounds, turns odds and ends into something genuinely useful.
Making mismatched scraps look intentional:
- Work rounds from darkest to lightest, or the reverse, for a gradient feel
- Repeat at least one color twice across the piece to tie it together
- Finish with a single solid-color border round to visually “frame” the stripes
This is one of the most practical ideas on this list for anyone who’s been crocheting for a while and has accumulated small leftover balls of yarn from bigger projects. Rather than sitting in a bin unused, those scraps become a set of coasters that no one else will have, since the exact color sequence is impossible to replicate on purpose.
A batch of four or five scrap coasters, each with a slightly different color order but the same stitch and size, makes a set that looks curated rather than random once they’re grouped together on a coffee table.
20. Linen Stitch Coaster for a Dense, Absorbent Base
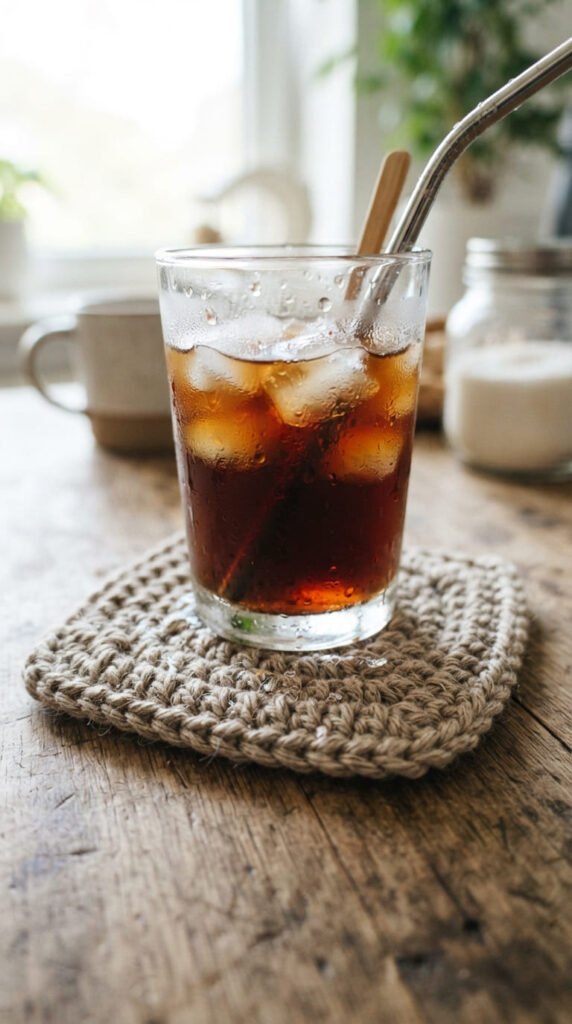
Linen stitch alternates single crochet and chain-one spaces in a way that mimics woven fabric rather than typical crochet loops. The result is unusually flat and tightly packed, which makes it one of the best-performing stitches for actual moisture control rather than pure decoration.
Why this stitch outperforms others for daily use:
- Very little stretch, so it holds its shape under a heavy mug
- Tight construction absorbs condensation instead of letting it pool
- Reversible pattern, so there’s no visible “wrong side”
Because the stitch pattern alternates over two rows, it’s easy to lose track of which row you’re on if you set the project down mid-way. Placing a small stitch marker at the start of each row solves this without slowing down the work.
This is a good stitch to reach for specifically for coasters meant for cold glasses rather than hot mugs, since it’s the condensation from an iced coffee or iced tea that tends to cause the most damage to unprotected wood surfaces. A set in a neutral like oatmeal, sand, or soft gray fits into almost any kitchen without competing with other decor.
21. Matching Coaster and Placemat Set for a Coordinated Corner
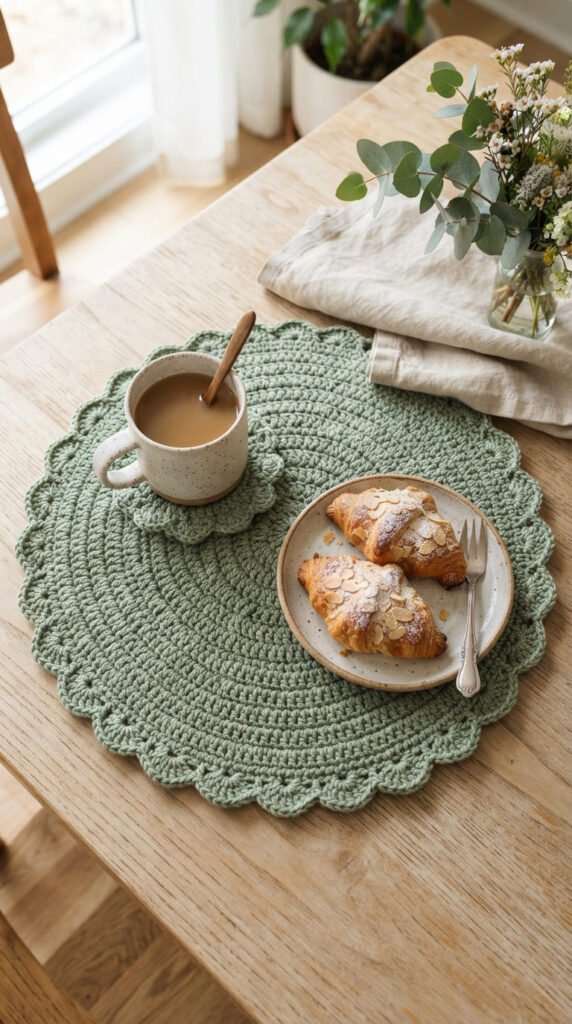
Rather than treating coasters as a stand-alone project, this idea scales up a single coaster pattern into a full placemat using the same stitch and color scheme. A basic single crochet or linen stitch pattern translates directly from a 4-inch coaster to a 12-by-16-inch placemat just by working more rows and rounds.
Planning yardage before you start:
- A single coaster typically uses 30 to 50 yards of worsted cotton
- A matching placemat generally takes 6 to 8 times that amount
- Buy all yarn for a set at once to avoid dye-lot mismatches
Building a coordinated set like this is a good next step once you’ve made a handful of individual coasters and found a stitch pattern you genuinely enjoy working. Rather than switching techniques for the placemat, sticking with a stitch you already know well means the bigger project moves faster and with fewer mistakes.
A full set — placemat, coaster, and even a matching mug cozy — makes a more substantial gift than a single coaster on its own, and works well as a wedding or housewarming present when paired with a nice mug or a bag of coffee.
22. Thread Crochet Mini Coaster for Espresso-Sized Cups
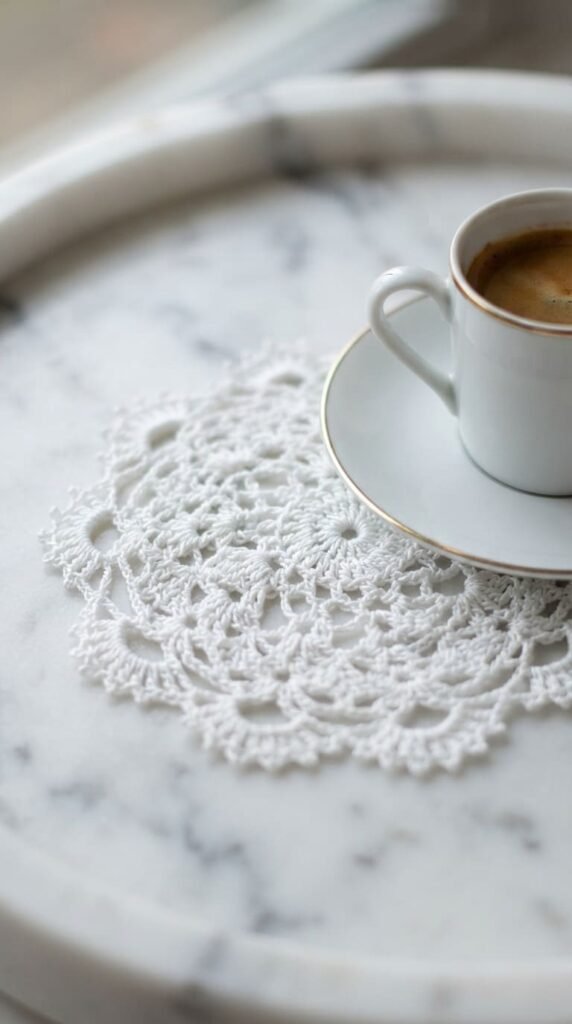
Standard mug coasters, even small ones, are often oversized for a demitasse or espresso cup. This idea scales everything down by working with fine crochet thread and a much smaller steel hook instead of standard worsted-weight yarn and a regular hook.
Adjusting a standard pattern down to thread weight:
- Use a steel hook sized between 1.5mm and 2.25mm
- Expect the finished piece to be roughly a third the size of the same pattern in yarn
- Work a few extra rounds if you want it closer to standard coaster size
Thread crochet takes more patience than yarn work, since the stitches are small and the thread itself is thin enough to require more careful tension. The payoff is a genuinely delicate, almost lace-like finished piece that suits a small espresso setup far better than a bulky yarn coaster would.
This is a nice project for anyone who already enjoys thread crochet or doily-making and wants to apply those skills to something with a practical, everyday use rather than a purely decorative one. A set of four mini coasters in white or ecru thread pairs especially well with a matching set of demitasse cups for after-dinner coffee.
Conclusion
From a five-minute granny square to a slow, careful piece of filet lace, crochet mug coasters cover an unusually wide range of skill levels and styles for such a small project. The best way to use this list isn’t to work through all 22 ideas in order — pick two or three that match your current comfort level and the look of your own kitchen, then branch out from there once you’ve got a feel for the stitches involved. A stack of scrap yarn and an afternoon is really all it takes to end up with a set that’s more personal, and more interesting to look at, than anything bought off a shelf. Grab a hook, pick a color, and start with whichever idea on this list you keep coming back to.