
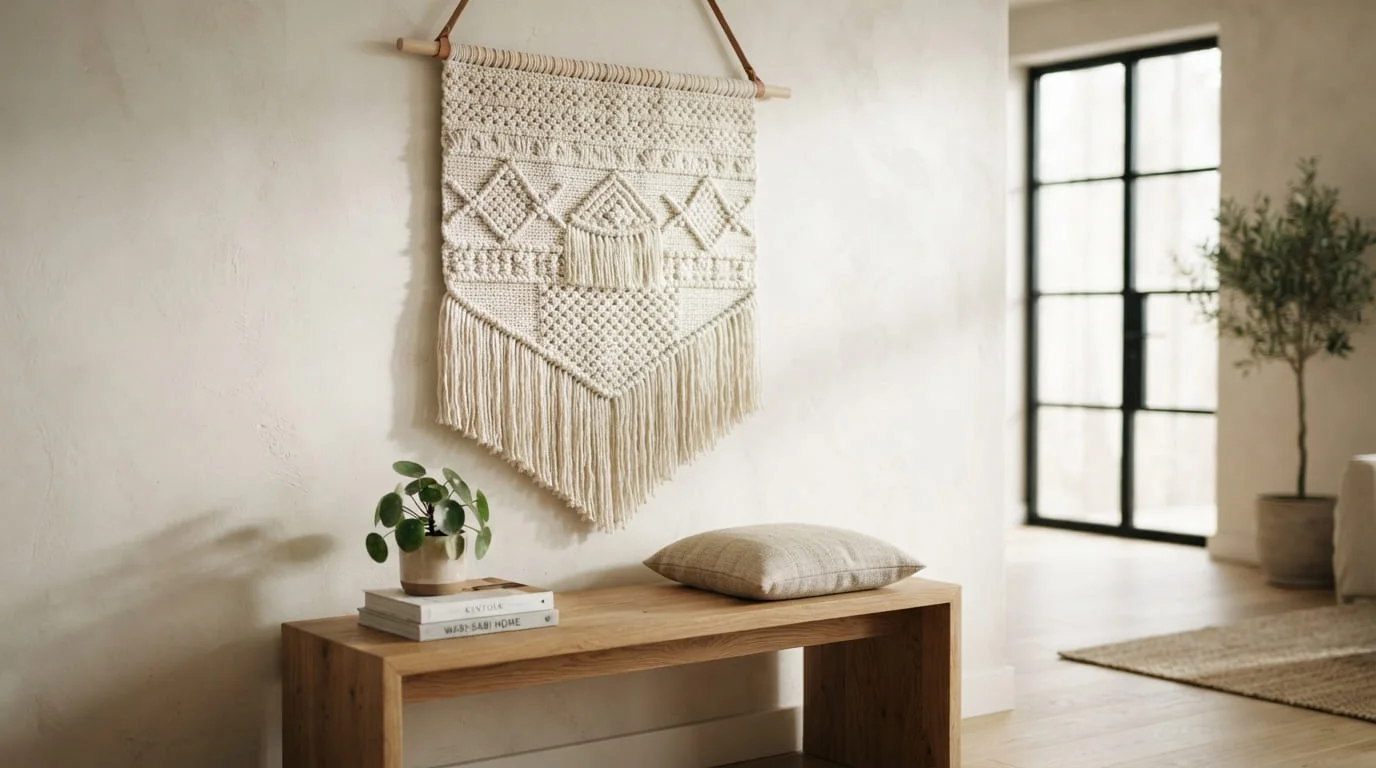
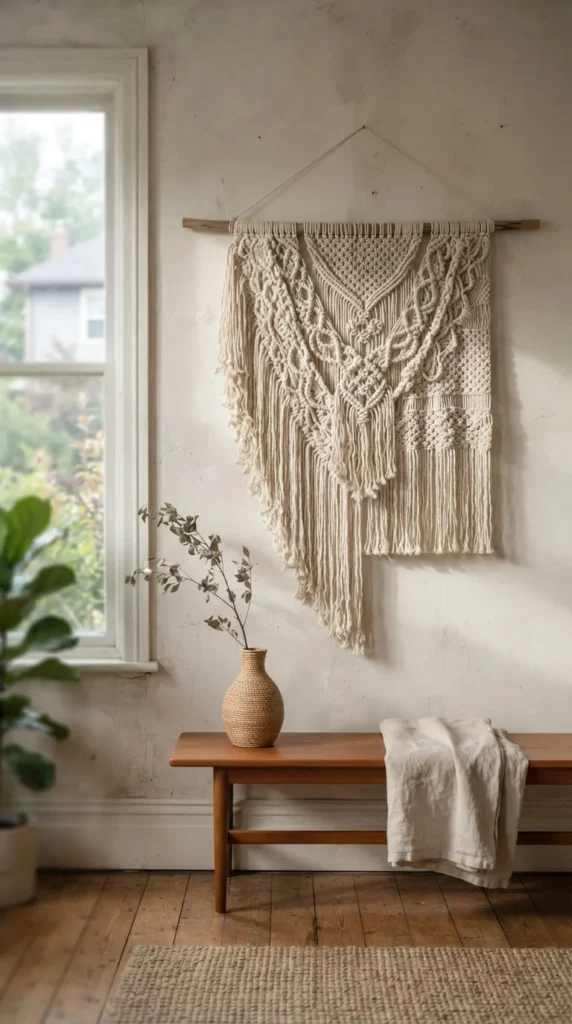
A blank wall is one of the easiest design problems to fix with a hook and some yarn, but most crochet wall decor roundups repeat the same rainbow hangings and dreamcatchers over and over. This list goes a different direction, covering boho wave patterns, geometric panels, granny square gallery walls, appliqué canvases, and a handful of formats most articles skip entirely, like hoop florals and interchangeable seasonal dowels. Each idea includes real construction notes, sizing guidance, and mounting advice, so you’re not just looking at pretty photos but actually walking away with a plan you can start this week.
1. Boho Wave Wall Hangings With Movement
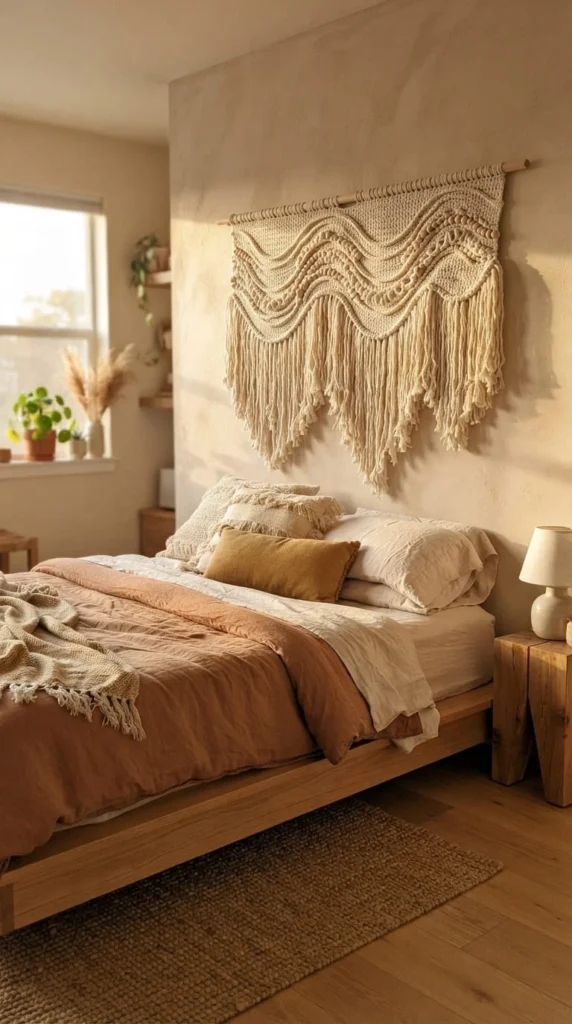
The wave shape is one of the more forgiving wall hanging silhouettes to crochet because it doesn’t rely on precise geometric symmetry. You build it by working rows of varying length, usually in single or half-double crochet, so the bottom edge curves rather than sits flat. That curve is what gives the finished piece its sense of motion on the wall.
Puff stitches worked in a horizontal band partway down the piece add a raised texture that catches light differently depending on the time of day. Keep the yarn to one undyed or lightly heathered color so the shape and texture carry the design instead of a busy palette.
Fringe length matters more here than in most wall hangings. Cut strands unevenly, roughly four to eight inches, so the bottom reads as organic rather than trimmed with a ruler. Comb the fringe out with a metal pet brush once it’s attached — this separates the plies and gives a softer, fuller look than leaving it straight from the skein.
Hang this style on a driftwood branch instead of a straight dowel. The irregular branch shape echoes the wave and keeps the whole piece from looking too structured for a boho space.
2. Minimalist Two-Tone Geometric Panels
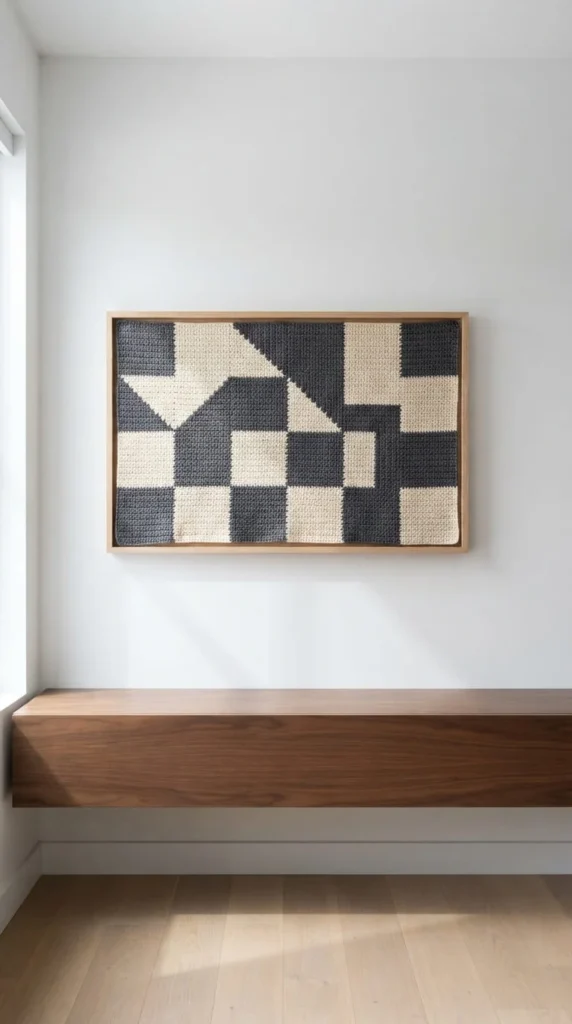
If boho fringe isn’t your style, a flat geometric panel worked in two contrasting colors gives you a completely different look from the same basic crochet skills. Think color-blocked rectangles or a simple stepped diamond shape, worked in dense single crochet so the fabric lies flat without curling.
The two-color approach is what keeps this feeling current. Pick one dark, saturated tone and one light neutral — charcoal and cream, or rust and ivory — and avoid introducing a third color, which tends to soften the graphic effect you’re going for.
Block the finished panel firmly with pins and a light steam pass before mounting, since any curling at the edges will read as sloppy on a design this clean. A wooden frame or a slim floating dowel both work, but skip fringe entirely here — a straight bottom edge is part of what makes this style modern rather than boho.
This is a strong option for a hallway, above a console table, or flanking a doorway in pairs. Because the shapes are simple, it’s also one of the faster wall hanging projects on this list to finish.
3. Granny Square Gallery Walls
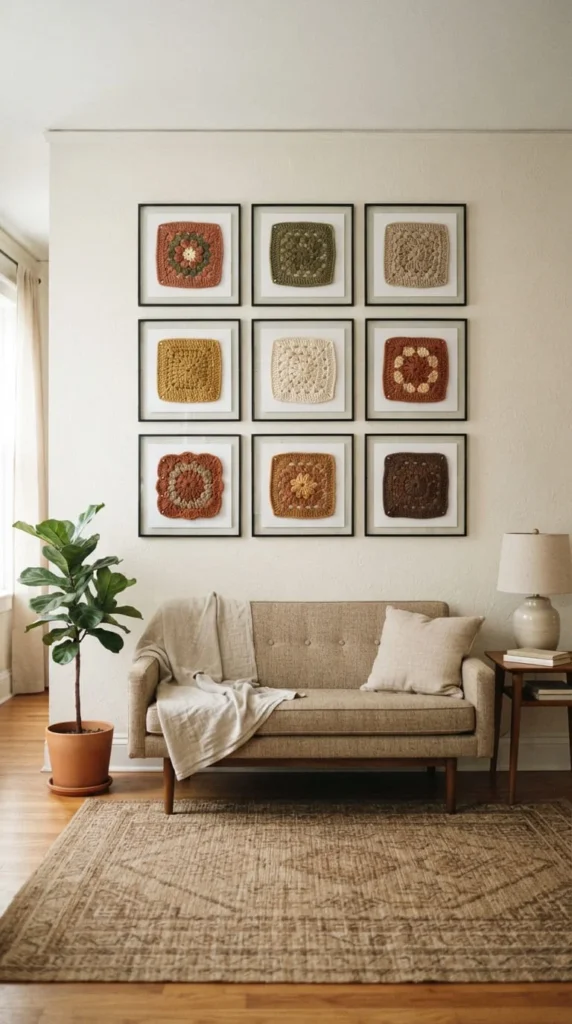
Instead of sewing granny squares into a blanket, frame them individually and hang them as a grid. This reframes a familiar, sometimes old-fashioned motif as intentional art, especially when each square is mounted in a matching thin black or wood frame rather than displayed loose.
Work six to nine squares in a coordinated but not identical color scheme — vary which color sits in the center round while keeping the outer round consistent across all squares. This gives the grid visual rhythm instead of looking repetitive.
To mount a square inside a standard frame, stretch it gently over a same-size piece of canvas or foam board and secure the edges on the back with fabric glue or a few hand stitches before closing the frame. This keeps the square taut and prevents sagging behind the glass.
Plan your grid on the floor first. A 3×3 layout with two-inch gaps between frames is a reliable starting point for most walls. Measure the total grid width against your wall space before hanging anything, and use a paper template taped to the wall to check spacing before committing to nail holes.
4. A Crochet Mandala as a Circular Focal Point
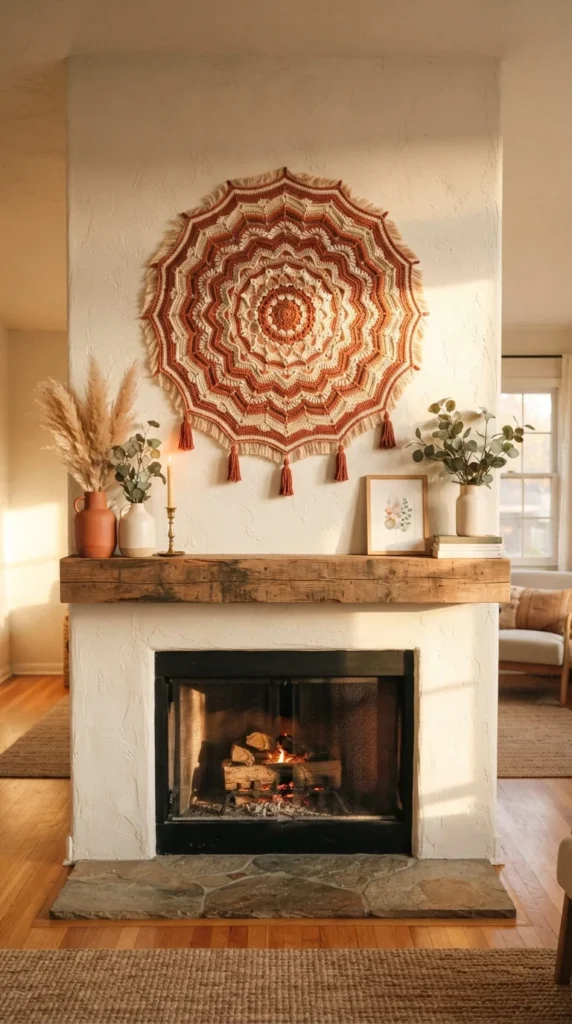
A mandala breaks up a wall full of rectangular frames and furniture lines with pure circular geometry, which is part of why it works so well as a single, standalone focal point rather than one piece among many.
Work the mandala from the center outward in rounds, changing color every few rounds to create the radiating pattern. Using a gradient or ombré yarn is an easy way to get smooth color transitions without weaving in dozens of ends, which is especially helpful if you’re newer to color changes in crochet.
Block the finished mandala over a large plate or a foam circle cut to size, pinning the edges evenly so the piece dries perfectly round. An unblocked mandala tends to ripple at the edges, which undercuts the clean geometric effect you’re after.
For mounting, sew a slim wooden ring or a circle of stiff wire to the back so the piece hangs completely flat against the wall rather than drooping at the bottom like a typical rectangular hanging.
This works especially well centered above a fireplace, a headboard, or a round mirror, where its symmetry echoes the room’s other circular elements.
5. Appliqué-on-Canvas Botanical Art
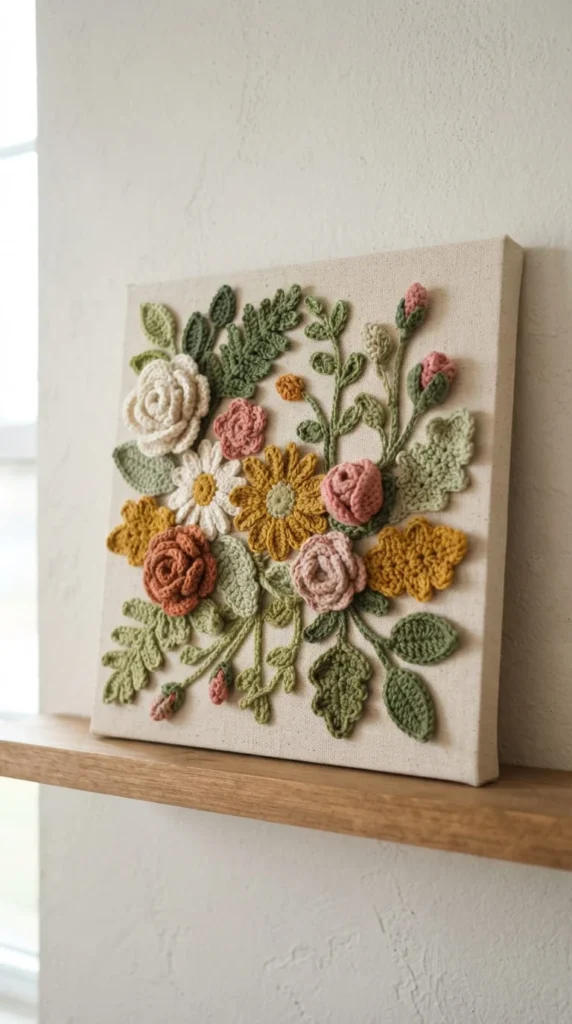
This is a lower-commitment alternative to crocheting one large tapestry from scratch. Instead, you crochet a set of small individual motifs — flowers, leaves, simple stems — and arrange them directly onto a canvas using fabric glue, building a botanical composition piece by piece.
Start with a plain stretched canvas from a craft store, in whatever size suits your wall. Crochet five to eight motifs in a coordinated color palette, then lay them out on the canvas before gluing anything, moving pieces around until the arrangement feels balanced rather than symmetrical.
Fabric glue applied in small dots on the back of each motif, pressed and held for thirty seconds, gives a strong hold without soaking through the yarn or leaving visible residue at the edges. Let the canvas lie flat for a full day before hanging so the glue sets completely.
This format is genuinely useful for people who find the idea of a full tapestry overwhelming. You can build the composition gradually, adding a new motif whenever you finish one, without needing to plan the entire piece in advance.
6. Layered Gallery Walls Using Micro Motifs
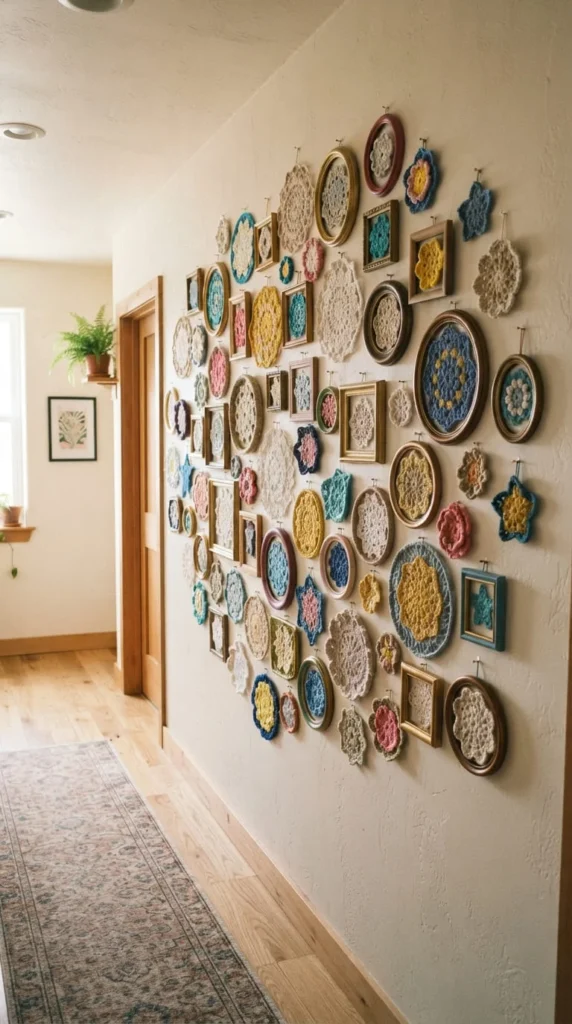
A layered gallery wall takes the granny square grid idea further by mixing motif sizes and shapes instead of keeping everything uniform. Small two-inch circles sit alongside slightly larger hexagons and a few square panels, arranged with intentional overlap in spacing rather than a strict grid.
This format is a genuinely good stash-buster project, since each motif uses a small amount of yarn and you can keep adding pieces over time as your collection grows. It also forgives inconsistency in your crochet skills better than a single large piece would, since small variations between motifs just read as texture.
Mount each piece with a small dot of removable adhesive or a tiny finishing nail, and plan the layout using painter’s tape outlines on the wall before committing. Leave breathing room — resist the urge to fill every gap, since negative space is what keeps a layered arrangement from looking cluttered.
A narrow hallway or the wall beside a staircase are both good candidates for this treatment, since the eye naturally travels along the wall and takes in the full arrangement piece by piece rather than all at once.
7. A Crochet Dreamcatcher With Hoop and Beads
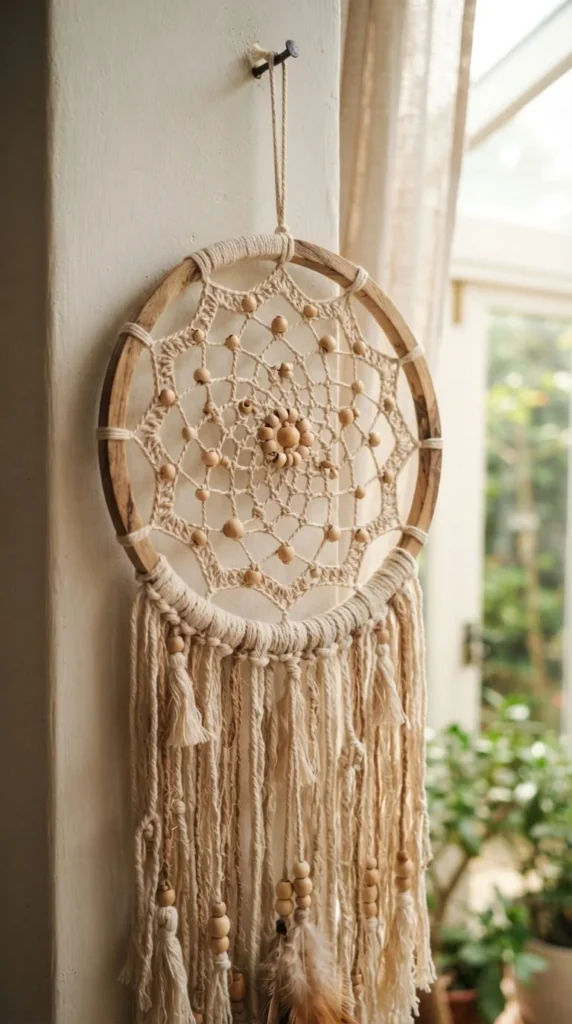
A crocheted dreamcatcher swaps the traditional woven web for a crocheted mesh or filet panel stretched inside a wooden embroidery hoop, giving you the same circular silhouette with a distinctly textile feel.
Crochet a flat circular or web-like panel slightly larger than your hoop’s inner diameter, then stretch it over the hoop and secure the edges with a few small stitches or a line of hot glue along the inner rim. A simple open mesh pattern works better here than a dense one, since the negative space is part of the visual effect.
Add wooden or natural stone beads threaded onto the hanging cords below the hoop, spaced unevenly rather than in a perfect pattern. Finish with fringe trimmed at varying lengths so the bottom edge doesn’t look mechanically even.
Because the hoop itself does the structural work, this piece won’t sag or lose its shape the way an unsupported crochet circle eventually might. It’s also a good project for using leftover fine-weight cotton, since the mesh pattern doesn’t require much yardage.
Hang it near a window where light can pass through the open stitch work for the best effect.
8. A Monstera Leaf Wall Hanging for Plant-Filled Rooms
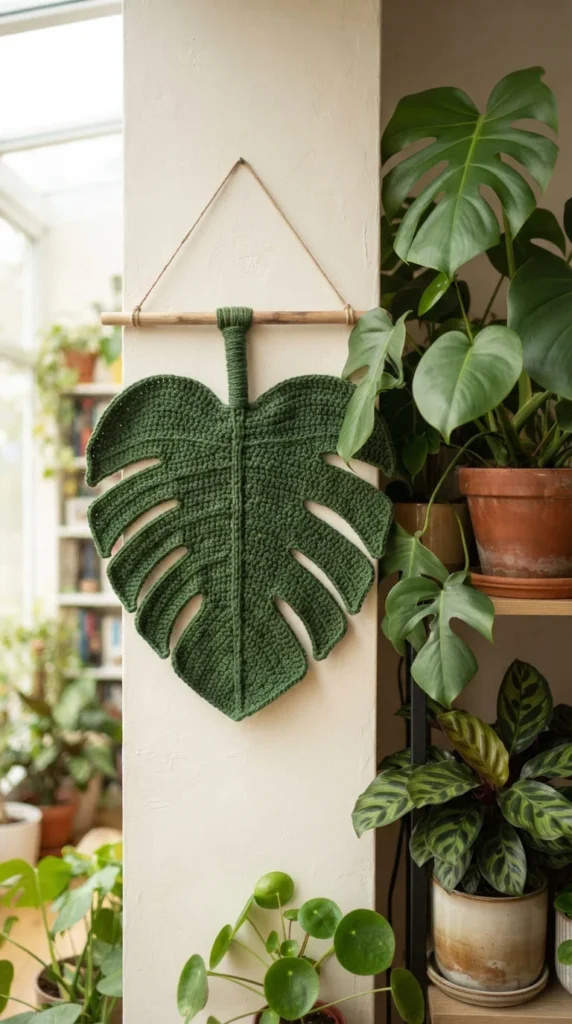
For a room already leaning into plants and greenery, a single oversized crochet monstera leaf gives you a botanical wall accent that doesn’t compete with your actual plants the way a busy floral print might.
Work the leaf using increases and decreases along a center spine to build the characteristic split-edge shape, then use slip stitches or a few strategic short rows to carve the iconic notches along each side. A deep forest green in a matte cotton yarn gives the most realistic, grounded look, though a two-tone leaf with a lighter vein detail worked in surface crochet adds extra dimension.
Stiffen the leaf lightly with a fabric stiffener spray so it holds a gentle three-dimensional curve rather than lying completely flat against the wall, which reads more like a real leaf and less like a flat applique.
Mount it with a single nail or removable hook through a loop at the base of the stem. Because it’s a single shape rather than a full hanging, it works well tucked into a corner or grouped with two or three smaller leaves at different heights for a fuller look.
9. Framed Crochet Art Behind Glass
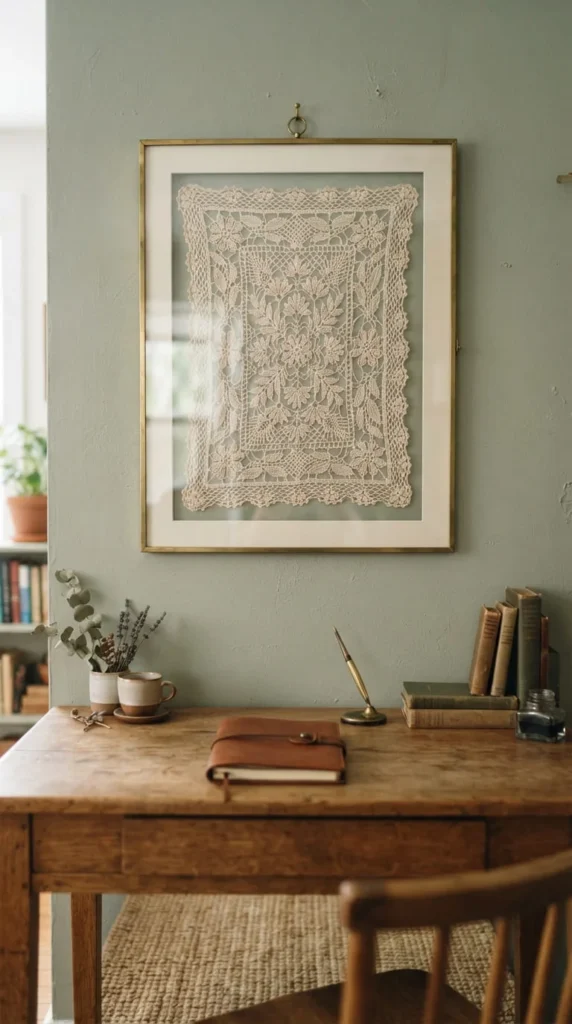
Framing a piece of crochet behind glass, the way you’d frame a print or a piece of embroidery, changes how it reads in a room entirely. It stops looking like a textile hanging and starts reading as considered wall art, which works particularly well for delicate lace-weight pieces that might otherwise look flimsy on their own.
Choose a fine, open lace stitch pattern for this format — a simple filet motif or a lacy round doily worked flat. Dense, chunky pieces don’t suit framing behind glass nearly as well, since the point is to let light play across the open stitch work.
Block the piece thoroughly and let it dry completely flat before framing, then mount it against a neutral mat board using a few small stitches at the corners rather than glue, which can show through fine yarn over time.
A thin brass or black metal frame keeps the focus on the crochet detail rather than a heavy, competing frame edge. This is a strong option for a home office, a reading nook, or anywhere you want a quieter, more refined piece than a typical fringe-heavy wall hanging.
10. A Soft Pastel Rainbow for a Nursery Wall
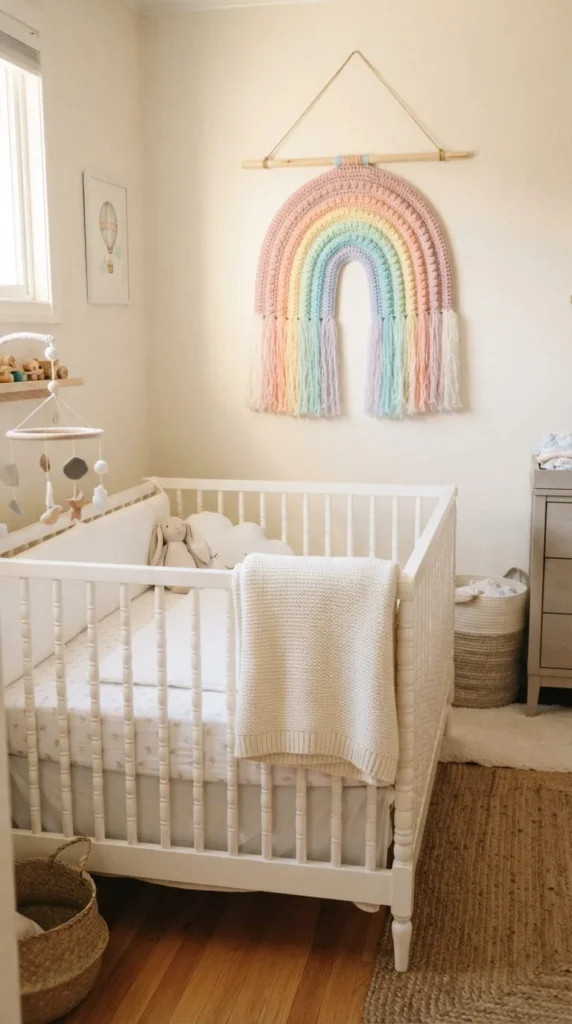
A crochet rainbow is one of the most approachable first wall hanging projects, and a nursery is the room where it makes the most visual sense. Working in muted pastels rather than primary colors keeps the piece feeling calm and current instead of looking like a toy.
Build the rainbow from a series of stacked arches worked in half-double or double crochet, increasing at the outer edges of each row so the curve stays smooth. Four to five color bands is usually enough — more than that starts to look busy in a small room.
Because this piece will hang near a crib, safety details matter more than usual. Keep any fringe short, secure it tightly so strands can’t be pulled loose, and mount the piece well above crib-rail height using a secured wall anchor rather than a single nail.
A wooden dowel slightly wider than the rainbow’s base gives it a clean, finished edge. Pair it with a small crocheted cloud or star as a second, smaller piece nearby for a coordinated look without needing to crochet a second full-scale hanging.
11. Pairing a Vintage Granny Square With a Modern Frame
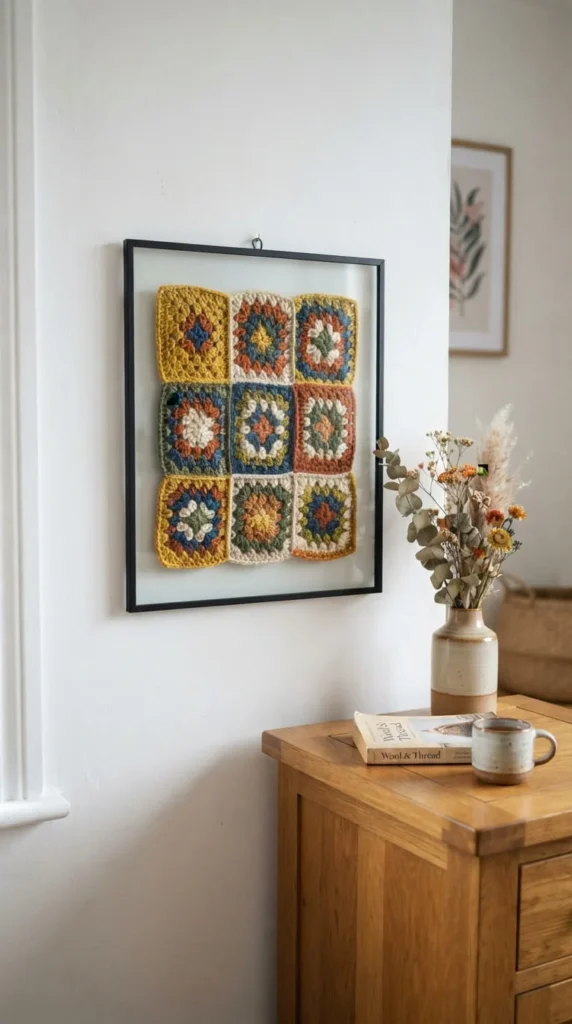
One of the simplest ways to modernize a traditional crochet motif is to change what’s around it rather than the motif itself. A classic multicolor granny square, the kind associated with older crochet styles, looks completely different mounted in a slim black or brushed-metal frame against a plain white wall than it does draped over furniture.
Work the square using a traditional pattern and don’t hold back on color combinations here — the nostalgia of a busier, more saturated palette is part of the appeal in this context. The contrast between the handmade, colorful square and the clean, minimal frame is what creates the updated look.
Mount the square the same way described for the gallery wall format: stretched gently over canvas or foam board and secured from behind. A single framed square works as a standalone accent, or you can hang three in a vertical column for more visual weight.
This is a genuinely good use for an old, unfinished granny square project sitting in a stash somewhere, since a single square is all you need rather than an entire blanket’s worth of squares.
12. Bobble-Stitch Panels as Textural Wall Art
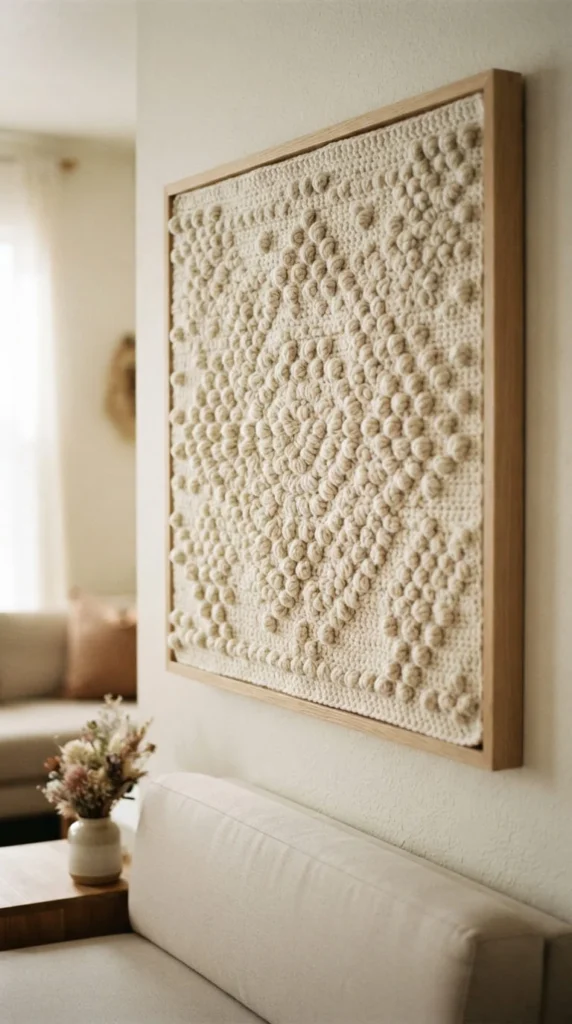
Sometimes the most modern wall decor choice is skipping color and pattern entirely and letting stitch texture do all the work. A flat rectangular panel worked in an all-over bobble or popcorn stitch, in a single cream or oatmeal shade, reads as sculptural rather than decorative.
The key to making this work is scale. Use a bulkier yarn weight than usual so the bobbles are pronounced enough to cast real shadow, and keep the overall panel large enough that the texture doesn’t get lost against the wall — a piece smaller than about two feet square tends to look more like a swatch than a finished artwork.
Block the panel firmly so it hangs flat, and mount it on a simple wooden frame built from stretcher bars, the way you’d stretch a canvas, rather than a loose dowel. This keeps every bobble sitting at a consistent depth and prevents the piece from warping over time.
Light this piece with a single side-angled source, whether that’s a nearby window or a picture light, since directional light is what makes raised stitch texture genuinely visible from across a room.
13. A Crochet Name Banner for a Kid’s Room
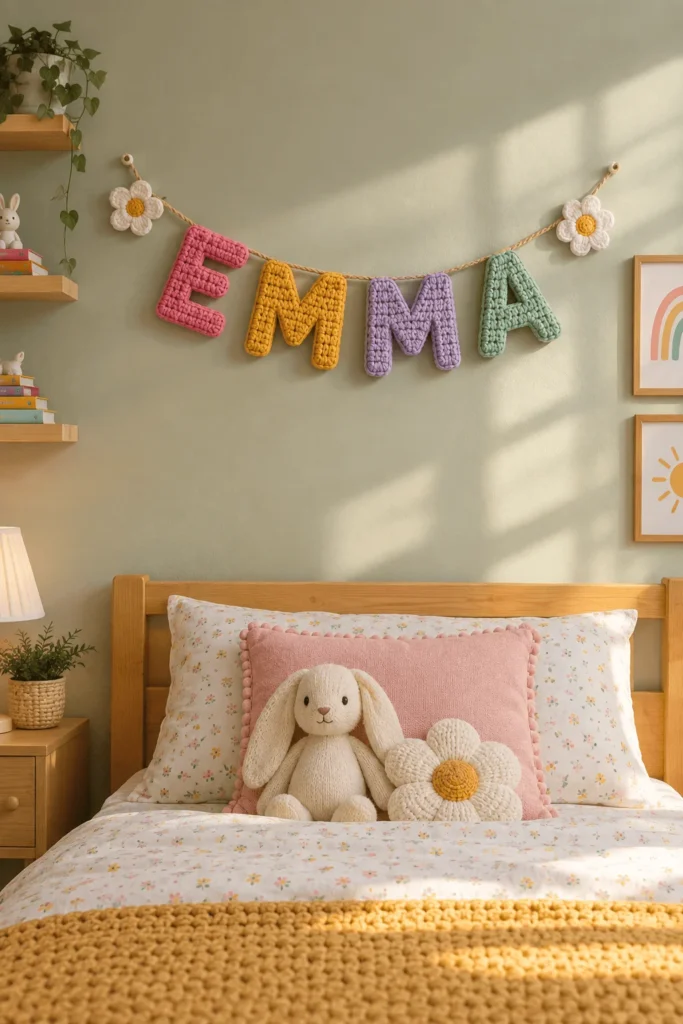
A crocheted name banner gives a child’s room a personalized wall piece that a printed sign can’t match, and it’s a genuinely practical project because it scales with any name length — you’re just adding or removing letters.
Crochet each letter individually as a flat, solid motif using single crochet worked from a simple block-letter grid. Keep letters uniform in height so they line up cleanly once strung together, and use a different color for each letter or alternate between two or three coordinating shades for a playful but not chaotic look.
String the finished letters onto a length of cotton cord or narrow ribbon, spacing them evenly and securing each one with a small stitch or a dab of fabric glue at the top so they don’t slide around once hung.
A few practical notes for a kid’s room specifically:
- Keep the banner mounted well above reach height for younger children
- Avoid any small detachable embellishments that could become a choking hazard
- Wash-test your yarn choice, since kids’ room decor collects dust and occasional sticky fingerprints
This is also one of the easier projects on this list to size up as a gift for a new baby or a room refresh.
14. A Seasonal Interchangeable Dowel System
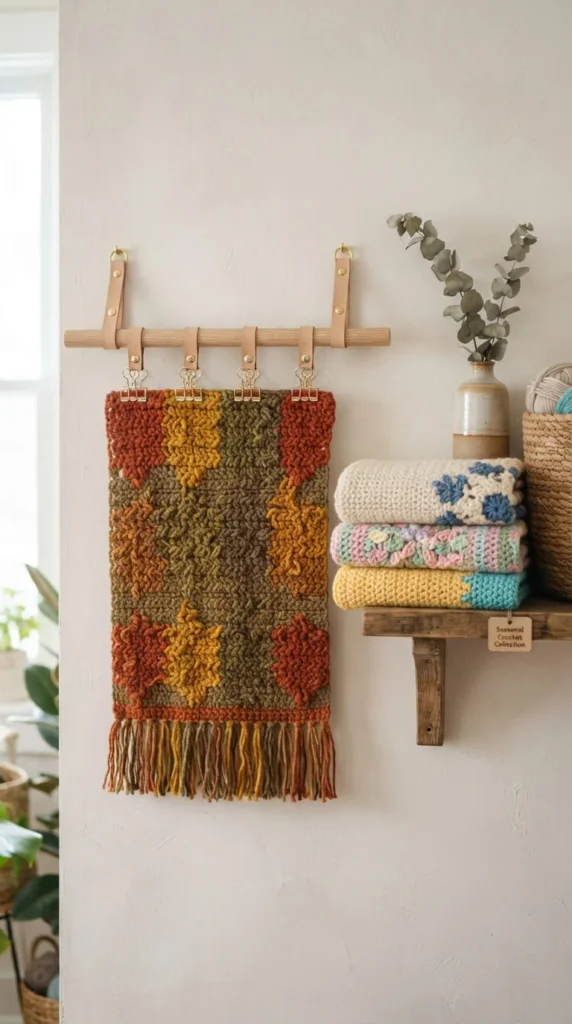
Instead of committing one dowel to one piece forever, mount a permanent dowel and build several smaller crochet panels sized to fit it, so you can swap the displayed piece through the year without adding new hardware every time.
Crochet each panel to the same width, with a row of evenly spaced loops or a folded top edge to slide onto the dowel, so any panel in your collection fits the same mounting point. Vary the color and motif by season: soft greens and simple leaf motifs for spring, warm rust tones for autumn, or a plain neutral panel for everyday use between seasons.
Store off-season panels rolled rather than folded to avoid permanent crease lines, and keep them in a drawer or a labeled box so they’re easy to find when you want to swap the display.
This approach solves a real limitation of most wall hanging projects, which is that a single elaborate piece can start to feel static after a year or two on the same wall. A rotating system keeps the same wall spot feeling refreshed without the cost or time of crocheting an entirely new large-scale hanging each time.
15. Using a Wall Hanging to Disguise a Fuse Box or Panel
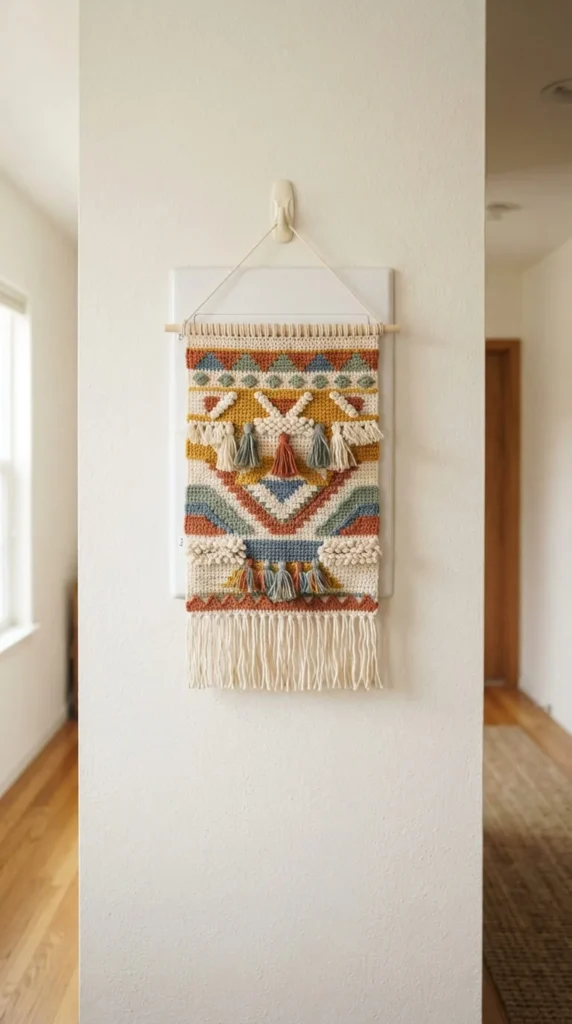
A fuse box, thermostat, or router mounted on a visible wall is a common awkward spot that most decor guides never address directly. A crochet wall hanging sized specifically to that spot is a practical fix that also adds texture to what would otherwise be a dead zone on the wall.
Measure the box and the surrounding clearance first, then crochet a piece with at least three inches of overhang on each side so it fully conceals the object without looking obviously placed there for that purpose. A rectangular panel with straight edges conceals more predictably than an irregular boho shape.
Mount the piece with a hinge-style approach if the box needs occasional access: attach the top edge permanently, but leave the bottom loose or secured with a single removable hook so you can lift the hanging aside instead of taking the whole piece down every time you need the panel.
Choose a slightly heavier-weight yarn so the piece has enough structure and opacity to fully hide what’s underneath, since a very open, lacy stitch pattern will let the box show through in certain lighting.
16. An Ocean-Inspired Wave and Shell Wall Hanging
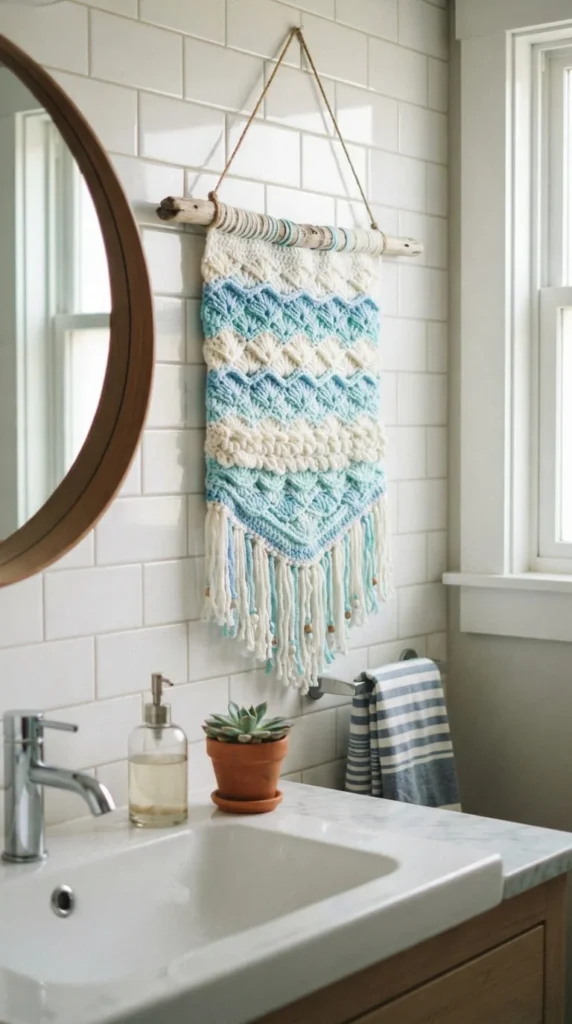
Shell stitch crochet naturally lends itself to a coastal or ocean-themed wall piece, since the stitch’s scalloped repeat already mimics the shape of actual shells and waves without needing any additional embellishment.
Work horizontal bands of shell stitch in shifting shades of blue and white, moving from a deeper navy at the top to a pale, almost white blue at the bottom, to suggest the gradient of water depth. Keep the transitions gradual rather than sharply color-blocked for a more natural gradient effect.
Add a few individual crocheted shell or starfish motifs scattered across the lower portion, attached with a few discreet stitches, for extra dimension without overcomplicating the main panel.
This piece works especially well in a bathroom, where the palette and texture echo tile and water without leaning into anything too literal or novelty-themed. Because bathrooms deal with humidity, stick to a cotton yarn that tolerates moisture better than acrylic blends, and avoid hanging it in direct line of shower spray.
A driftwood-style dowel, rather than a polished wooden rod, reinforces the coastal feel without needing any additional beach-themed props nearby.
17. Embroidery Hoop Florals in a Cluster
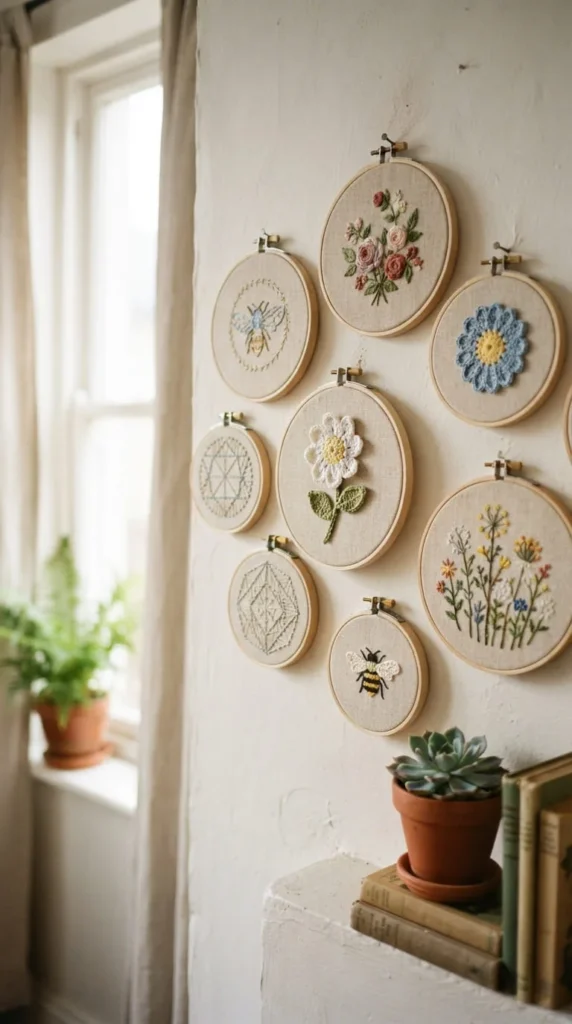
Rather than one large floral tapestry, small individual flower motifs mounted inside embroidery hoops of different sizes give you a flexible, low-commitment way to build floral wall decor gradually, one hoop at a time.
Crochet a single flower motif per hoop, centered against a plain fabric backing stretched taut behind it. Muslin or a solid linen scrap both work well as a backing, since they won’t compete visually with the crocheted flower itself.
Vary hoop sizes between roughly four and eight inches across the cluster, and stagger the mounting heights slightly instead of lining every hoop up on a perfectly straight row. This small adjustment is what makes the cluster look curated rather than mass-produced.
A few flower ideas that read well in this format:
- A simple five-petal daisy in white with a yellow center
- A layered rose worked in spiral rounds
- An open, geometric flower shape for a more modern take
Because each hoop is small, this is another strong stash-buster option, and it’s easy to add a new hoop to the cluster whenever you finish another motif, building the full arrangement over several weekends instead of all at once.
18. A Charted Landscape Tapestry
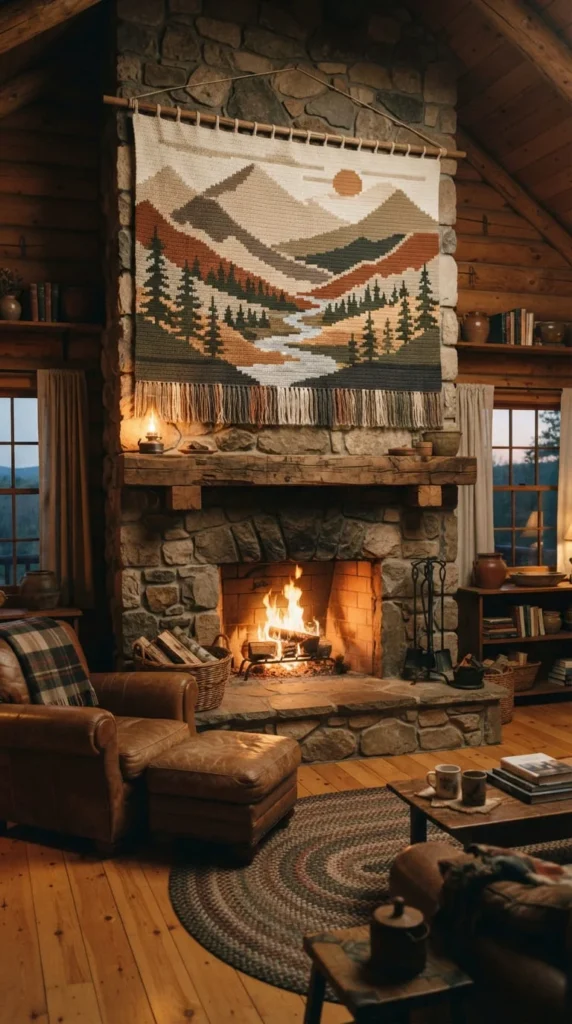
Tapestry crochet, where you follow a charted grid to build an image using color changes within rows rather than shaping the outer silhouette, lets you create genuinely pictorial wall art instead of an abstract or geometric shape.
A simple mountain range or horizon line is one of the more approachable images to start with, since it only requires a handful of color changes per row and a limited color palette — two or three muted earth tones plus a neutral sky color are usually enough.
Work the piece using the intarsia or fair isle carrying method depending on how far apart your color sections sit, and weave in ends as you go rather than leaving them all for the end, which gets overwhelming fast on a large charted piece.
Block the finished tapestry carefully, since tension often varies slightly across a large charted piece and blocking evens out the overall shape before you mount it.
This is a genuinely advanced project compared to most on this list, and it’s worth starting with a small practice swatch of your chosen chart before committing to a full-size piece, so you know your gauge and color-carrying tension in advance.
19. A Macramé-Style Hanging Made Entirely With Crochet
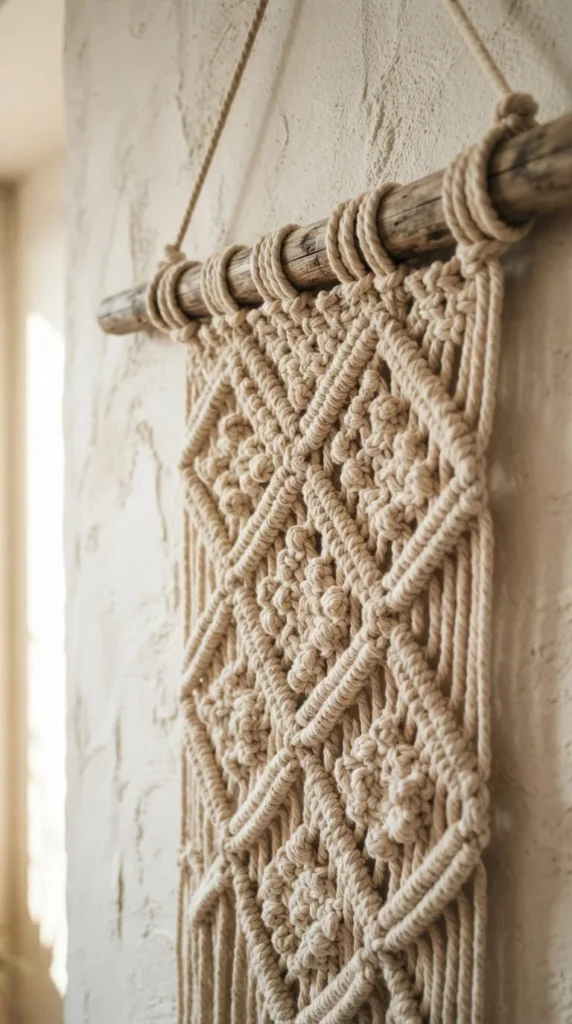
You can recreate the look of macramé knotting using only crochet techniques, which is a good option if you already know how to crochet but haven’t picked up macramé knots specifically. Thick cotton rope or rope-style yarn, combined with an open diamond lattice stitch pattern, gives you a very similar visual result to true macramé.
Work the lattice using a chain-and-double-crochet combination that leaves open diamond-shaped gaps, rather than a dense stitch pattern, since the open structure is what reads as macramé-inspired rather than standard crochet.
Because the rope-style yarn is thick, this project moves faster than it looks like it should, and a good-sized piece can come together in just a few hours once you’re comfortable with the repeat.
Finish the bottom with long, uncut rope tails left hanging free rather than crocheted fringe, which reinforces the macramé look more convincingly than trimmed strands would.
Mount on a thick wooden dowel or branch to match the substantial weight and texture of the rope. This piece works particularly well in a room that already leans boho or natural-material-heavy, where its texture fits right in alongside wood, rattan, and linen.
20. A Diagonal Cluster of Tulip Motifs
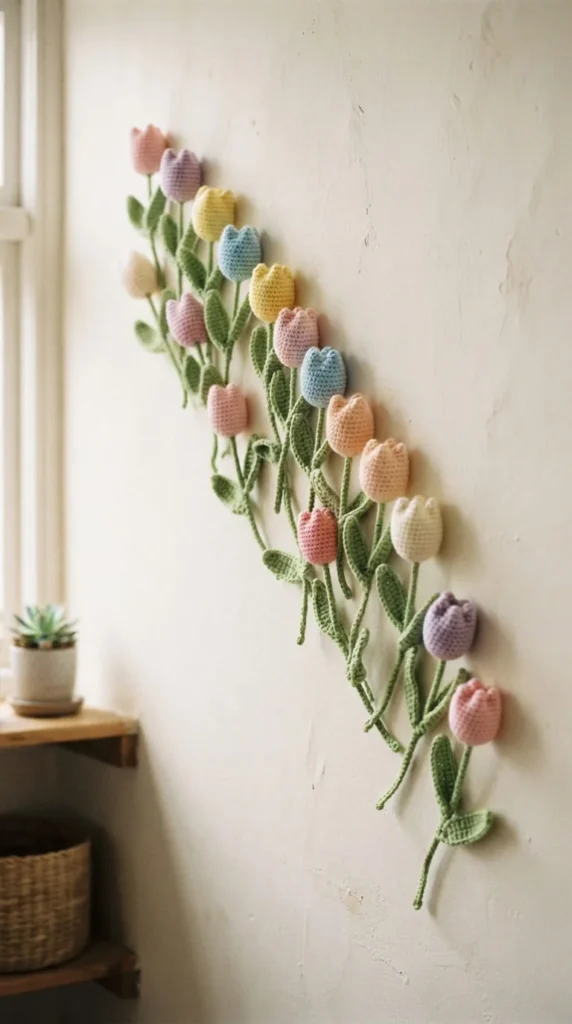
Instead of a symmetrical floral arrangement, a diagonal line of individual tulip motifs moving across the wall gives you a more dynamic, less predictable composition than a centered bouquet-style piece.
Crochet each tulip as a simple cup-shaped motif in a single pastel shade, attached to a straight crocheted stem with one or two leaf shapes worked separately and stitched on at an angle. Vary the tulip color slightly across the set — three or four shades within the same pastel family keeps the group cohesive without being identical.
Mount each tulip individually with a small nail or adhesive hook, working diagonally from lower left to upper right across the wall, spacing them unevenly so the arrangement feels like it’s growing across the space rather than lined up.
This format is a good option for a spring seasonal refresh, since each tulip is small enough to store easily when you want to switch the wall back to a different display later in the year. It also works well scaled down to a single windowsill or shelf if you’d rather not commit to full wall placement.
Conclusion
The best crochet wall decor doesn’t have to mean a single ambitious tapestry taking over an entire wall — some of the strongest ideas here come from small, repeatable pieces like hoop florals, gallery-wall granny squares, or a rotating dowel system that changes with the seasons. Pick one idea that matches a wall you’re actually staring at right now, whether that’s an awkward spot above a fuse box or a blank stretch beside your bed, and build from there. Keep a small stash of neutral cotton on hand so a hoop or a motif is always within reach on a slow afternoon, and don’t be afraid to mix formats — a framed piece next to a small hanging often looks more considered than either one alone. Grab a hook, pick your wall, and get started.