
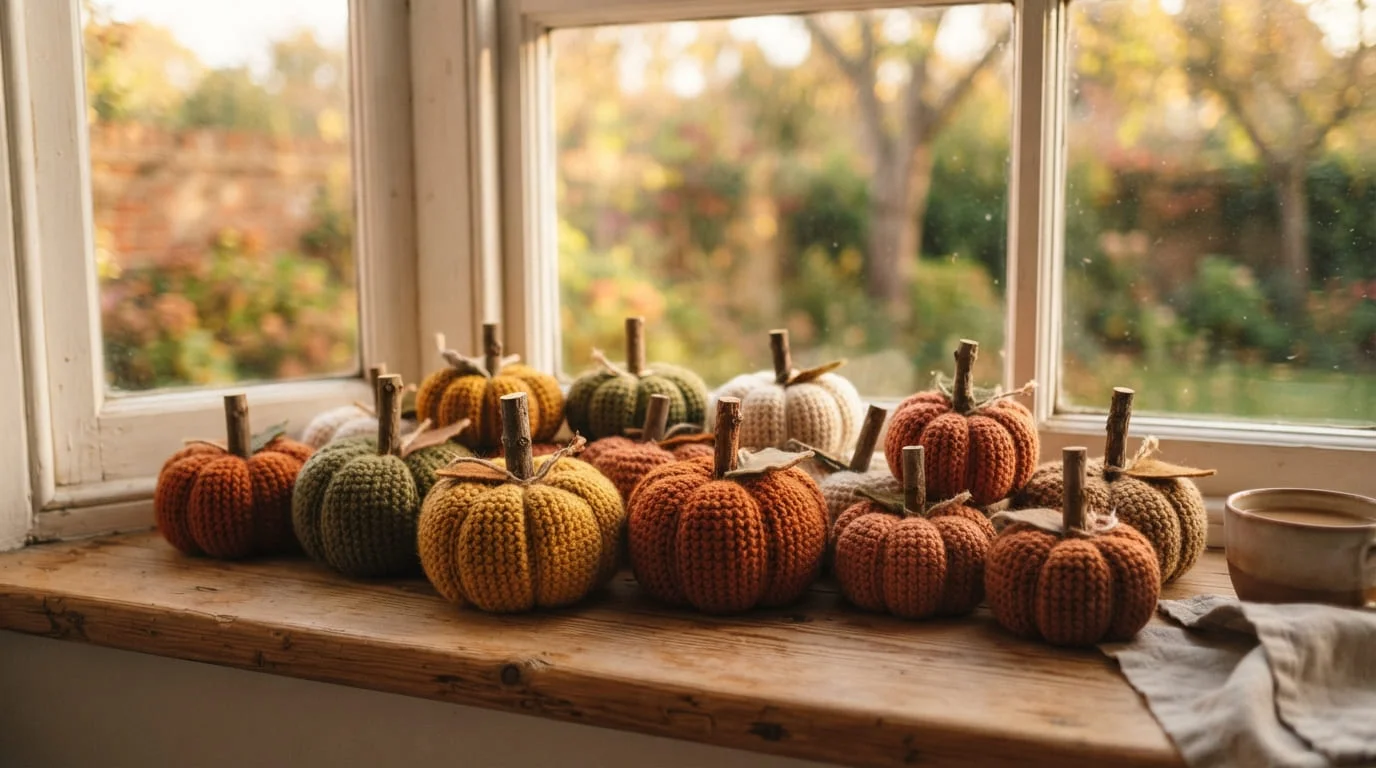
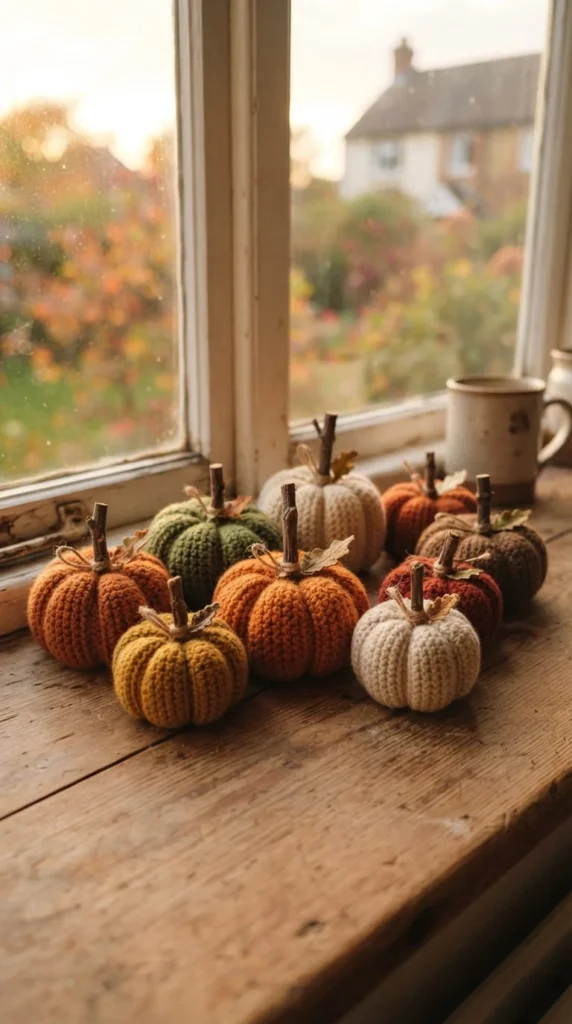
Fall decorating gets expensive fast when you’re buying fresh pumpkins that rot within weeks, which is exactly why crochet pumpkin ideas have become such a popular alternative for anyone who wants that same cozy harvest look without the yearly repurchase. This list moves past the usual orange ribbed pumpkin and covers real texture variety, seasonal styling beyond Halloween, functional projects like baskets and garlands, and a few practical troubleshooting notes on stuffing, stems, and stability that most pattern roundups skip. Whether you’re making one quick pumpkin for a shelf or building a whole seasonal collection to reuse every year, you’ll find a project here that fits your time and skill level.
1. Mini Ribbed Pumpkins in Super Bulky Yarn
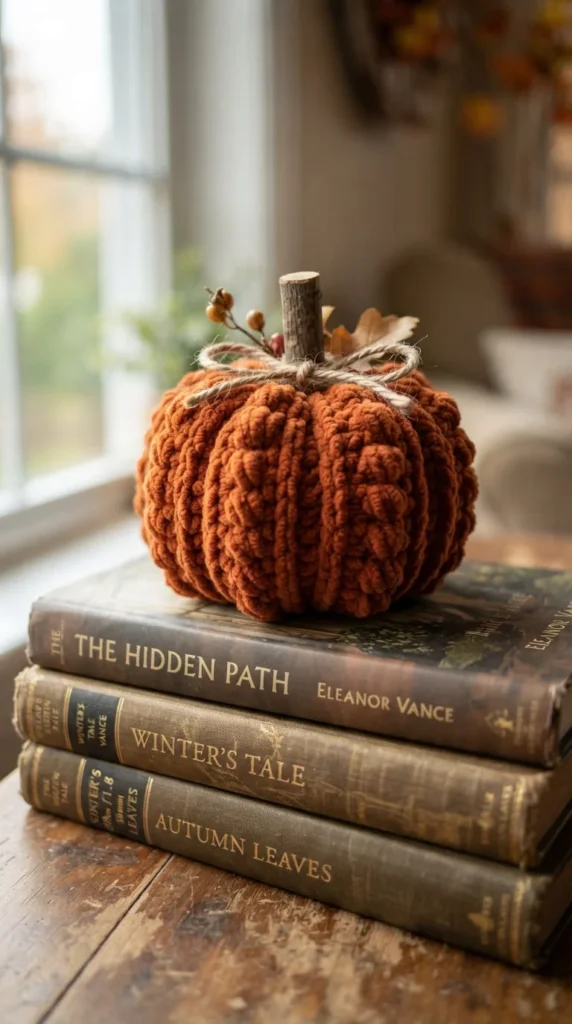
If you’ve never crocheted a pumpkin before, this is the project to start with. A ribbed pumpkin is built from a simple tube worked in front-post and back-post double crochet, which creates the deep vertical grooves that make it instantly recognizable, then cinched and stuffed into shape.
Super bulky yarn is what makes this version fast. A mini pumpkin in this weight works up in well under an hour once you know the pattern, and the thickness of the yarn does most of the visual work for you without needing complicated stitch combinations.
A few notes that make a real difference in the finished look:
- Drop down one hook size from what the yarn label recommends, which tightens your stitches and keeps stuffing from peeking through
- Stuff firmly rather than lightly — a soft, underfilled pumpkin looks deflated once it’s sitting on a shelf
- Cinch the top and bottom center tightly with your yarn tail before adding the stem, since this is what creates the pumpkin’s characteristic flattened top and bottom
Because it’s small and quick, this is also the easiest pattern to repeat in multiple colors if you want a matching set for a mantel or windowsill display.
2. Knobby Bobble-Stitch Pumpkins for Extra Texture
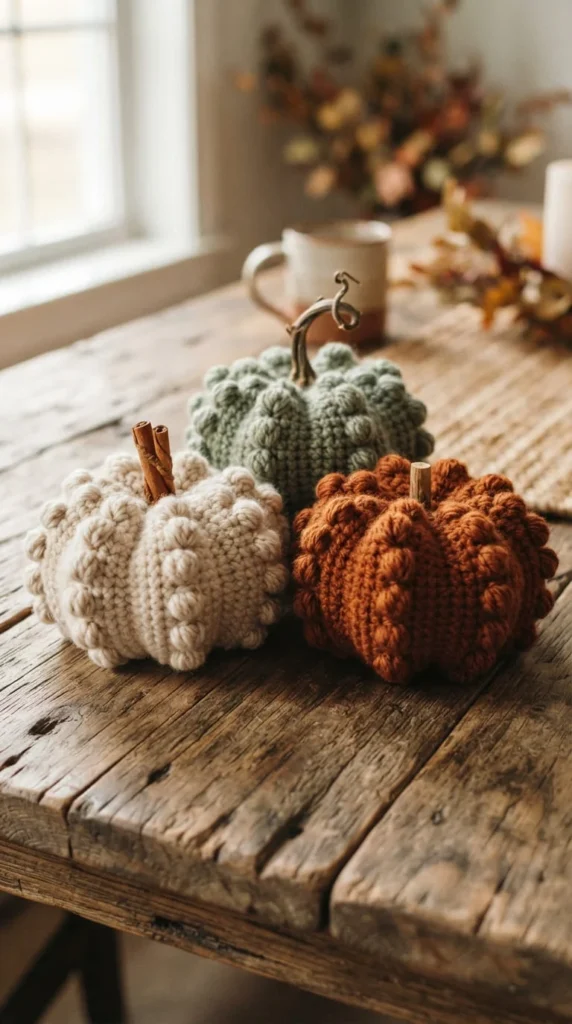
A standard ribbed pumpkin has smooth vertical lines, but a bobble-stitch version adds raised bumps scattered across the surface, giving it a slightly warty, knobby look that mimics heirloom pumpkin varieties you’d find at a real farm stand.
Work the bobbles by completing several incomplete double crochet stitches into the same base stitch, then pulling the loop through all of them at once — this pulls the stitch forward into a raised cluster. Space the bobbles in a staggered pattern across each round rather than stacking them directly on top of each other, which keeps the texture looking organic instead of gridded.
This technique works best with a smooth, solid-color cotton or acrylic blend rather than a variegated yarn, since a busy color pattern competes with the bobble texture instead of highlighting it.
Because the bobbles add bulk, size up your stuffing estimate slightly compared to a plain ribbed pumpkin of the same base pattern, or the finished shape can look lumpy in the wrong places rather than intentionally textured.
These pair particularly well in a mixed cluster with smoother ribbed pumpkins, since the contrast in texture reads as a more curated, less matchy display.
3. Braided Pumpkins With a Diagonal Woven Look
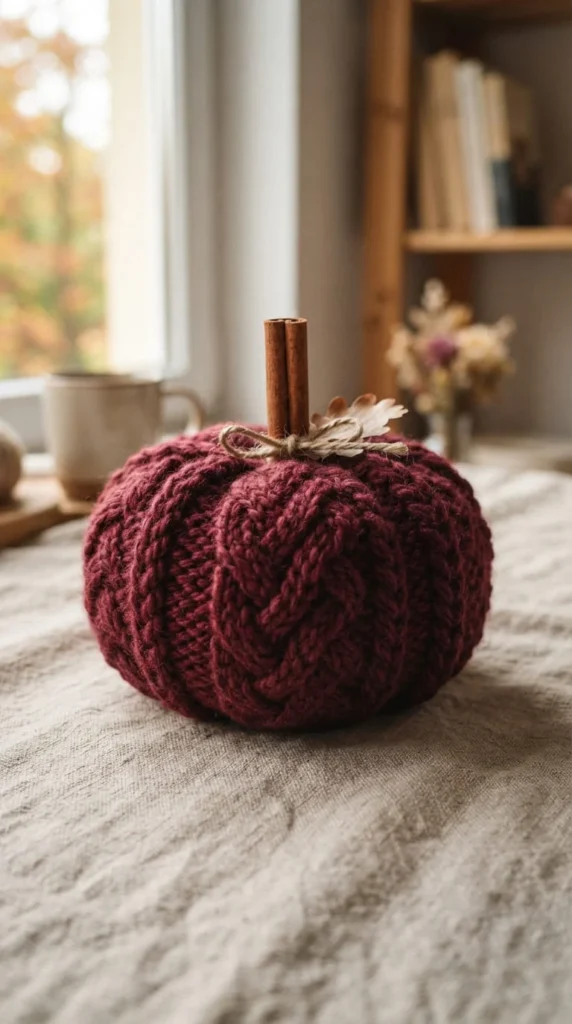
A braided pumpkin uses post stitches worked at an angle across the surface to create a diagonal, almost woven texture that reads as more advanced and intentional than a standard ribbed pattern, even though the underlying technique is a manageable step up for confident beginners.
The diagonal lines come from working front-post double crochet stitches that lean into the stitch from the previous round rather than sitting directly above it, building a spiral effect as the rounds continue. Consistency is what sells this pattern — keep your lean angle even across every round so the diagonal lines stay continuous rather than breaking up partway through.
A solid, deeply saturated color like burgundy, deep olive, or espresso brown shows this texture off far better than a lighter or busier yarn, since the technique relies on shadow and light catching the raised diagonal lines.
Finish this style with a natural cinnamon stick stem rather than a crocheted one. The rustic, slightly irregular shape of a real cinnamon stick complements the woven texture, and it adds a light scent that a purely crocheted stem can’t offer.
4. Waffle-Stitch Pumpkins for a Grid Texture
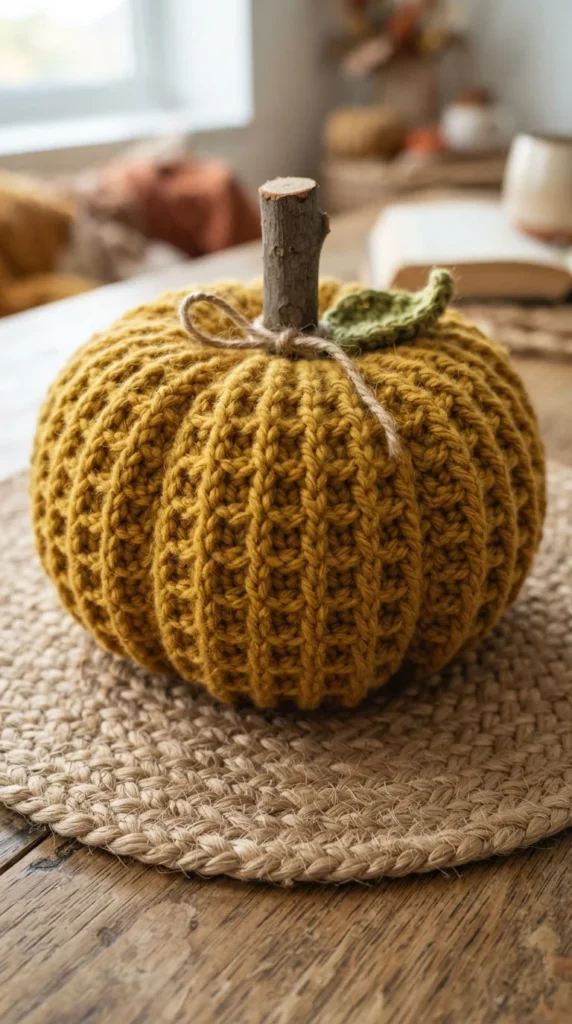
Waffle stitch creates a raised, grid-like texture across the surface of the pumpkin instead of the vertical lines of a ribbed pattern, giving you a genuinely different visual option if you want something besides the standard look.
The stitch is built by alternating front-post and back-post double crochet in a specific repeating sequence across rows, which forms small raised squares once you step back and look at the finished fabric. It takes a bit more attention to your stitch count than a basic ribbed pumpkin, so this is a better second or third project rather than a total beginner’s first attempt.
Because the texture is dense, use a medium or bulky weight yarn rather than super bulky, which can make the waffle pattern look muddy and hard to distinguish at a larger scale.
Mustard, deep gold, or a warm burnt orange all show the grid texture clearly thanks to the way light catches each raised square. A pale or pastel color tends to flatten the visual effect, so save lighter shades for a smoother stitch pattern instead.
This texture also photographs particularly well up close, making it a strong choice if you’re planning to sell finished pumpkins or share process photos online.
5. A Neutral Farmhouse Pumpkin Trio
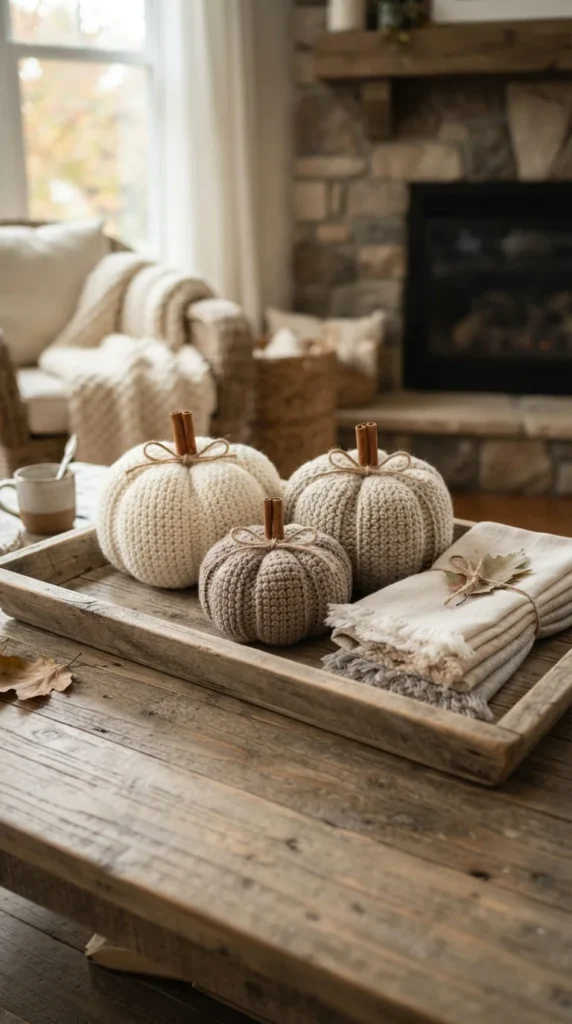
Not every fall display needs to lean into orange and black. A trio of pumpkins worked in cream, oatmeal, and soft taupe fits a farmhouse or neutral interior far better, and it has the added benefit of working as decor well past Halloween, straight through Thanksgiving and into early winter.
Use the same base ribbed or bobble pattern for all three pumpkins so the set feels cohesive, varying only the yarn color and, ideally, the size slightly — one small, one medium, one slightly larger — so the grouping has natural visual hierarchy rather than three identical shapes lined up in a row.
Natural wood stems, rather than anything painted or dyed, reinforce the farmhouse feel. A short length of real branch, sanded lightly and pushed into the top opening before final stuffing, gives a more authentic look than a crocheted stem in this particular styling.
Group the trio with a few real dried elements — wheat stems, dried eucalyptus, or a small stack of linen napkins — rather than surrounding them with typical Halloween props, which keeps the styling consistent with the neutral, understated palette you’re building.
6. Jewel-Tone Pumpkins for a Modern Palette
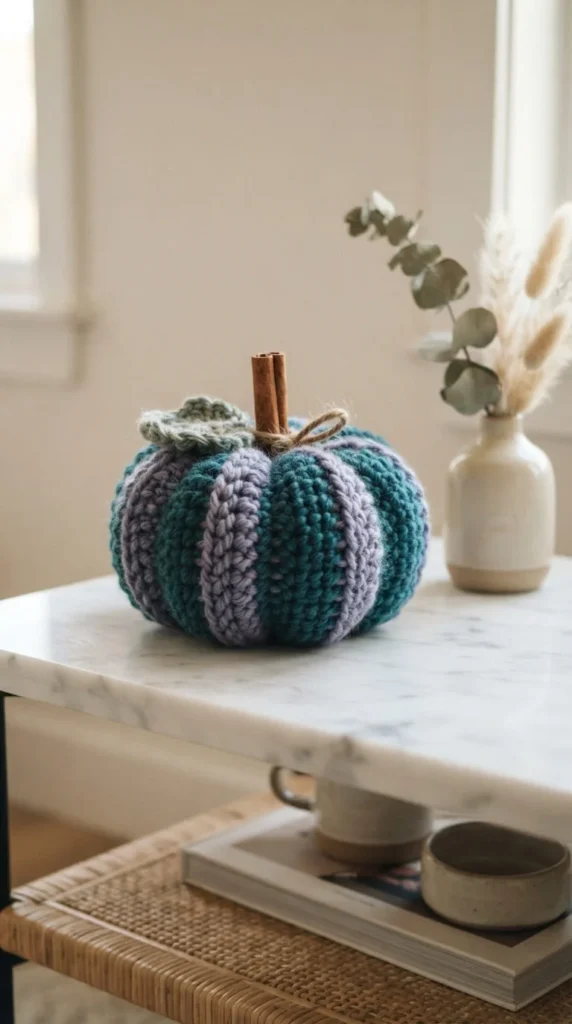
If orange doesn’t fit your space at all, jewel tones like deep teal, plum, emerald, or amethyst give you a pumpkin shape without any of the expected Halloween or harvest color cues. This works particularly well in a modern or eclectic interior where you want the silhouette of fall decor without the traditional palette.
Stick to one saturated color per pumpkin rather than mixing multiple jewel tones into a single piece, which can start to look more like a Christmas ornament than a fall accent. A single deep teal pumpkin, for example, reads as a considered design choice specifically because it commits to one strong color.
Pair a jewel-tone pumpkin with a black or dark wood stem rather than a natural pale branch, since a light stem tends to pull the eye away from the richness of the color and toward an unintended rustic look that clashes with the modern styling.
These work well scattered individually across a room — one on a coffee table, one on a bookshelf, one on a bathroom counter — rather than grouped together, since spreading jewel-tone accents throughout a space reads as more intentional than clustering them all in one spot.
7. A Pumpkin Garland for the Mantel
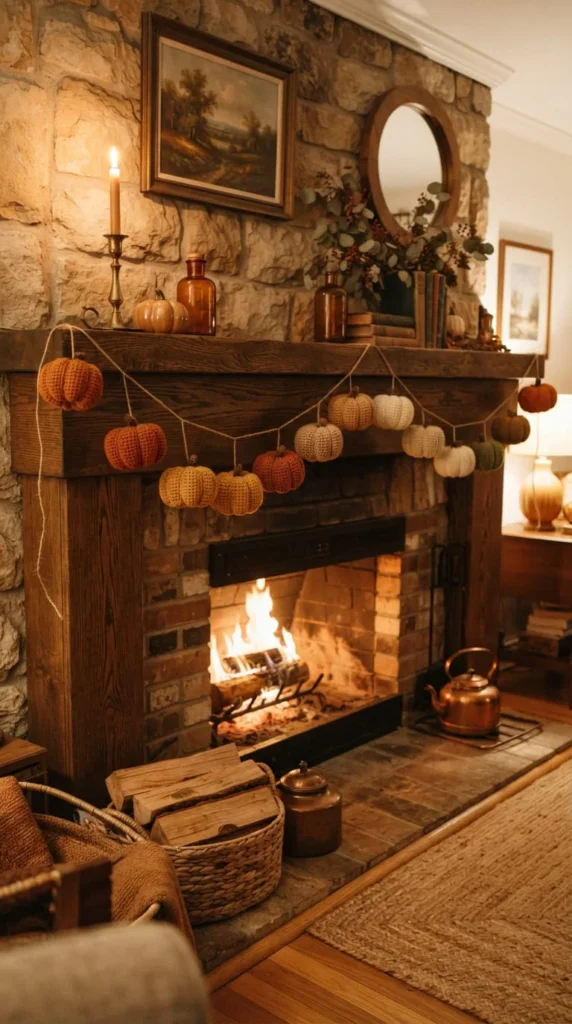
A garland is one of the highest-impact projects on this list relative to the actual crochet time involved, since you’re working several small pumpkins rather than one large piece, and the finished result covers a lot of visual space once strung together.
Crochet six to ten mini pumpkins in a graduated color scheme — deep rust fading into lighter orange, then into cream — so the garland has a visual gradient rather than looking like a random assortment strung together. Thread a length of jute twine or thin cotton cord through the top of each pumpkin, using the stem loop or a small crocheted loop worked specifically for this purpose.
Space the pumpkins with roughly four to six inches of bare cord between each one so the garland drapes naturally rather than looking overcrowded when hung across a mantel or stair rail.
A few practical notes:
- Measure your mantel or rail length before deciding how many pumpkins to make
- Leave extra cord at both ends for securing the garland to hooks or nails
- Store the garland coiled loosely, not folded, to avoid permanent kinks in the cord between seasons
This project also scales easily — add or remove pumpkins to fit a different space next year.
8. A Grapevine Wreath With Crochet Pumpkins
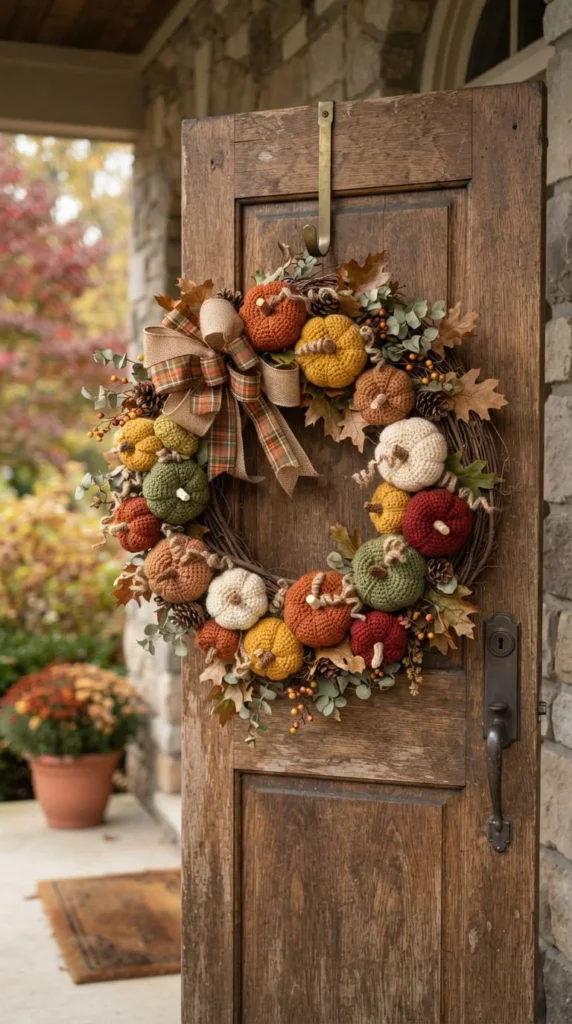
You don’t need to crochet an entire wreath base to get a strong front-door display. Attaching several small crochet pumpkins directly to a plain grapevine wreath gives you the handmade texture without the time investment of building a full crocheted base from scratch.
Start with a basic grapevine wreath form from a craft store, then crochet four to six mini pumpkins in a coordinated but not identical color palette. Attach each one with a short length of floral wire threaded through the base of the pumpkin and twisted securely around the vine, rather than glue, which won’t hold up to outdoor temperature changes as well.
Cluster three pumpkins together on one side of the wreath rather than spacing them evenly around the entire ring — this asymmetrical placement looks more like a styled arrangement than a uniform craft-store display.
If the wreath will hang outdoors, use acrylic or acrylic-blend yarn rather than pure cotton, since acrylic holds up better against humidity and occasional light rain without stretching out of shape or growing mildew over time.
Add a few dried leaves or small dried grasses tucked between the pumpkins for extra texture without much additional effort.
9. A Pumpkin-Shaped Storage Basket
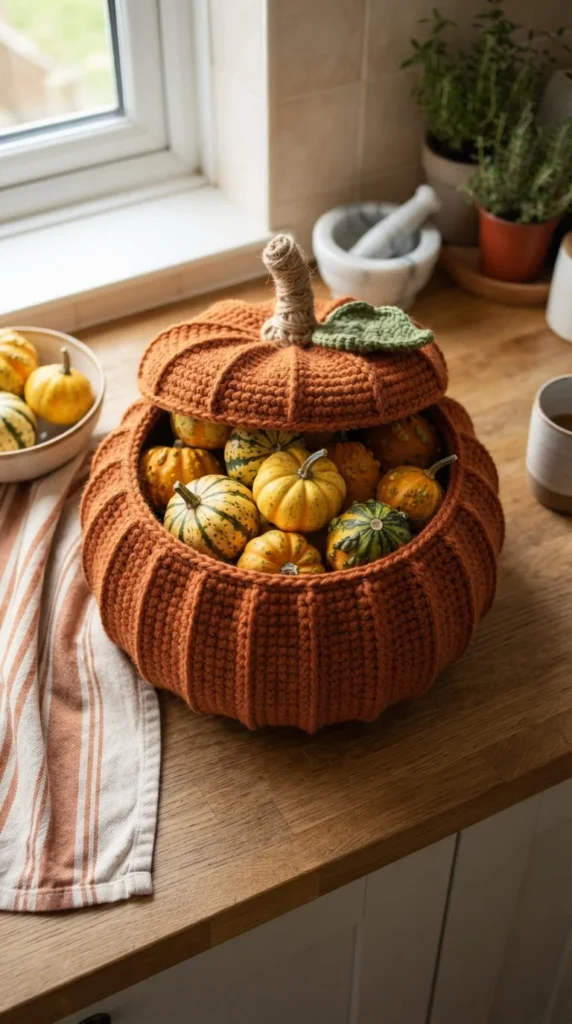
This project turns the familiar pumpkin silhouette into something genuinely functional rather than purely decorative. Instead of stuffing the shape solid, you crochet it as an open-topped vessel with a firm base, giving you a basket that can hold small gourds, mail, or seasonal odds and ends.
Use the same ribbed construction as a standard pumpkin for the lower portion, but instead of closing the top and cinching it, leave the top open and work a few rounds of single crochet to create a stable rim. A firmer cotton or cotton-blend yarn, rather than a stretchy acrylic, keeps the basket holding its shape once it’s filled with any weight.
Reinforce the base with a circle of stiff plastic canvas sandwiched between two crocheted base layers, similar to how you’d stiffen any other crochet storage basket, so it doesn’t sag under the weight of whatever you place inside.
Add a crocheted stem to the side of the rim, rather than the top center, so it reads as a decorative handle detail without interfering with actually using the basket to hold items.
This is a good project for anyone who wants seasonal decor that still earns its shelf space the rest of the year.
10. A Stacked Pumpkin Tower
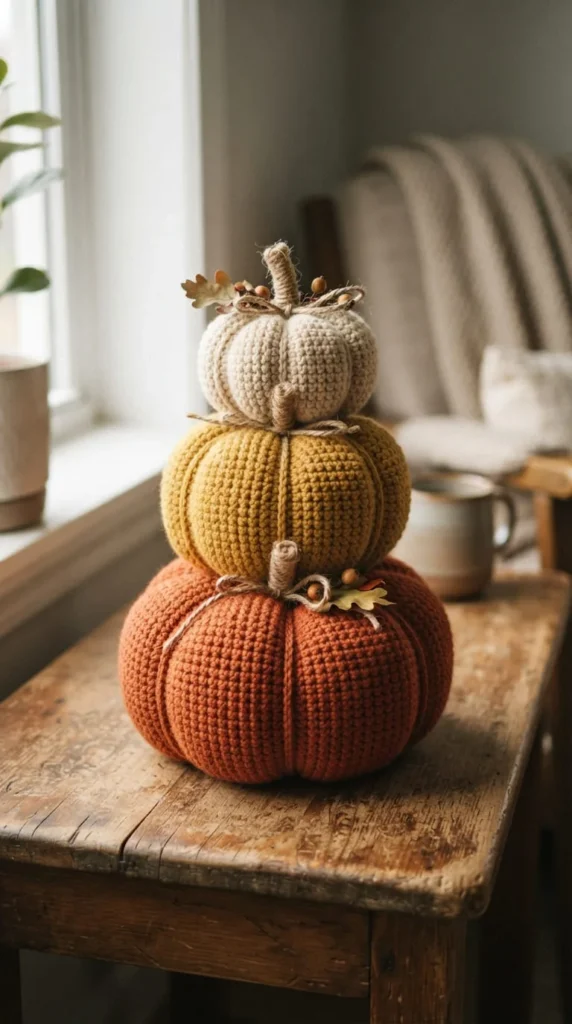
Stacking three pumpkins vertically, largest at the bottom to smallest at the top, gives you a taller, more architectural display using the same small individual projects you’d make anyway, rather than committing to one large oversized pumpkin.
The trick to a stable stack is a flat top and bottom on each pumpkin. When you’re finishing each piece, cinch the top and bottom centers firmly and stuff evenly all the way to the edges, so each pumpkin has a stable, flat-ish surface for the next one to rest on rather than a rounded, unstable top.
For extra security, especially if the stack will sit somewhere it might get bumped, thread a length of sturdy wire or a thin wooden dowel down through the center of all three pumpkins before final assembly, anchoring them together invisibly from the inside.
Align the stems so they sit in a rough vertical line rather than scattered at random angles — this small detail makes the stack read as an intentional tower rather than three pumpkins that happened to end up on top of each other.
A graduated color scheme, darkest at the base and lightest at the top, adds visual polish without much extra effort.
11. A Witch-Hat Pumpkin for Halloween
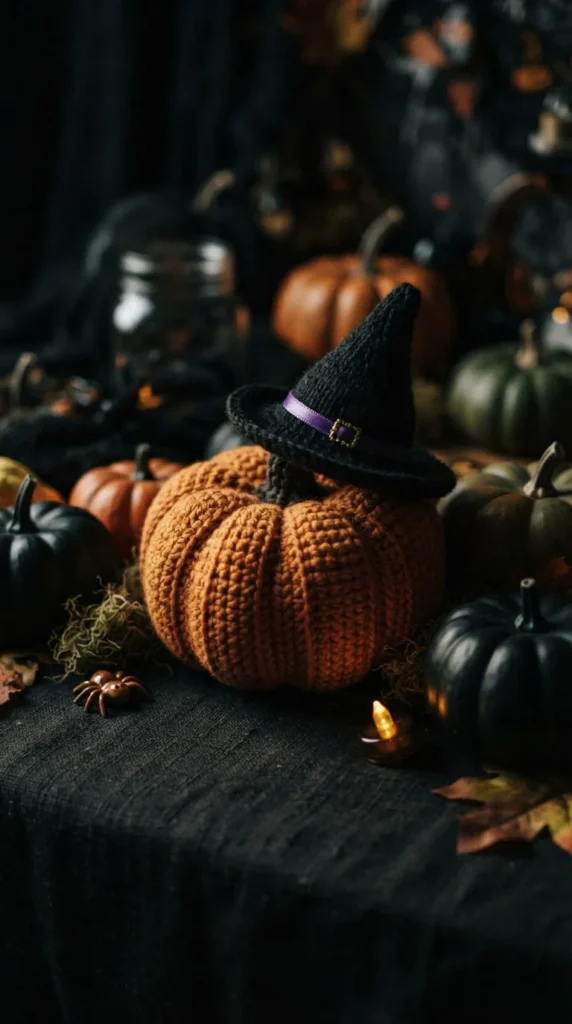
For a Halloween-specific upgrade rather than a general fall pumpkin, a small crocheted witch hat sized to sit on top of a mini pumpkin gives you a quick, distinct seasonal piece without redesigning the whole pumpkin pattern.
Crochet the hat as a simple cone shape worked in increasing rounds from the point down to a wide brim, using black yarn for a classic look or deep purple for a slightly softer take. A small buckle detail, either crocheted separately or cut from a scrap of felt, adds a recognizable finishing touch to the hat band.
Attach the hat with a few small stitches or a dab of fabric glue at an angle rather than perfectly centered, which gives the pumpkin a bit of personality and movement instead of looking stiff.
Group two or three witch-hat pumpkins with a handful of plain ones for a display that reads as Halloween-specific without needing every single piece in the arrangement to carry the theme.
Because the hat is a separate small piece, you can also make several hats and rotate them onto the same base pumpkins, saving yarn and storage space compared to crocheting entirely new pumpkins every year.
12. A Glow-in-the-Dark Pumpkin for Spooky Displays
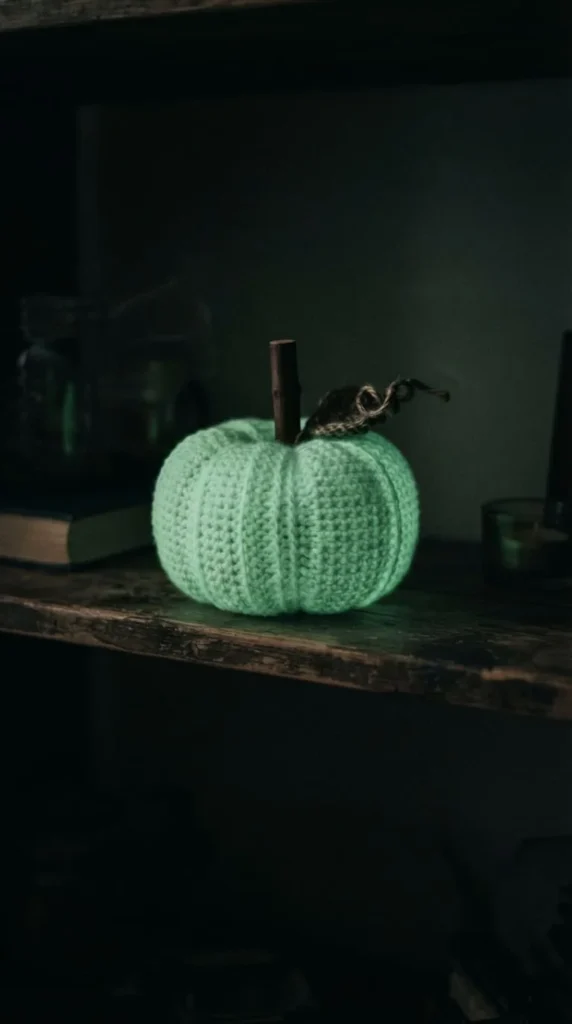
Glow-in-the-dark yarn is a genuinely fun material to work with for a Halloween-specific piece, since the pumpkin looks completely normal in daylight and takes on an entirely different character once the lights go off.
Most glow-in-the-dark yarns are acrylic blends with a phosphorescent fiber woven through them, and they need direct light exposure — sunlight or a bright lamp for several minutes — to charge before they’ll glow. Keep this in mind for display placement, since a pumpkin tucked in a dark corner all day won’t have anything to glow with once evening comes.
Work this pumpkin in a simple, smooth stitch pattern rather than a heavily textured one, since the glow effect is more visible and even across smoother surfaces than across a bumpy or deeply ribbed texture.
A pale green or a very light yellow glow-in-the-dark yarn tends to show the effect most clearly. Darker glow yarns exist but produce a much subtler effect that’s harder to notice from across a room.
This is a strong option for a kids’ Halloween display or a front porch where trick-or-treaters will actually notice the glow after dark.
13. A Plaid or Checkered Colorwork Pumpkin
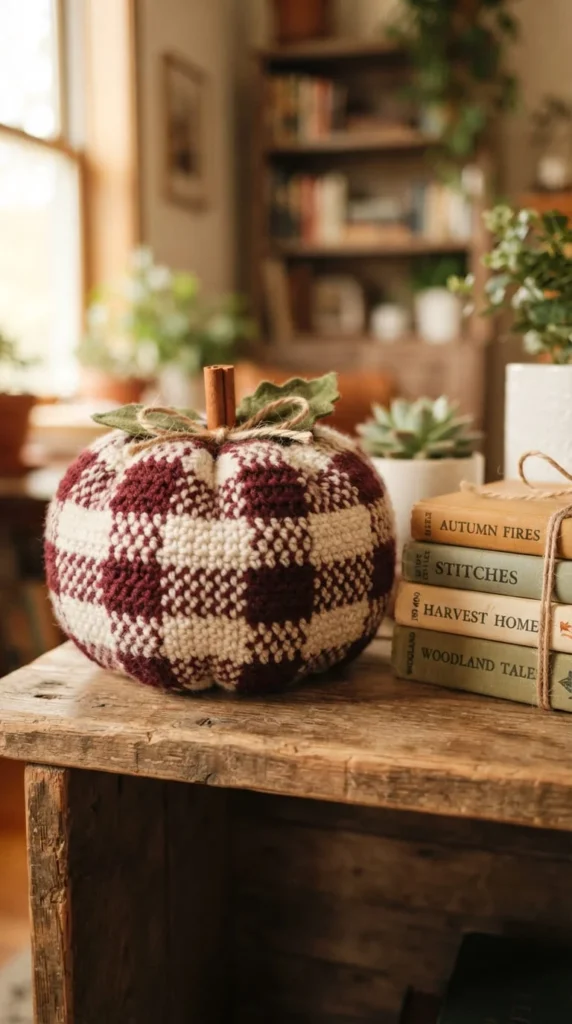
For crocheters who want a more advanced project, working a plaid or checkered pattern into the surface of a pumpkin using colorwork techniques gives you a genuinely distinct, more sophisticated finished piece compared to a solid-color textured pumpkin.
This requires carrying two or more colors across each row using the fair isle or intarsia method, following a simple charted grid rather than shaping the pumpkin through stitch texture alone. Start with a basic two-color checkerboard pattern before attempting anything more complex like a true plaid with multiple overlapping color lines.
Because colorwork tends to pull the fabric slightly tighter than single-color crochet, block the piece gently before final stuffing and shaping to make sure the surface lies smooth rather than puckering around the color changes.
Cream and burgundy, or charcoal and mustard, both give a classic plaid look without needing more than two yarn colors, which keeps the project manageable for a first colorwork attempt.
This style works particularly well as a single statement piece rather than part of a larger cluster, since the detailed pattern deserves to be seen up close rather than lost among simpler pumpkins.
14. An Amigurumi Pumpkin Character
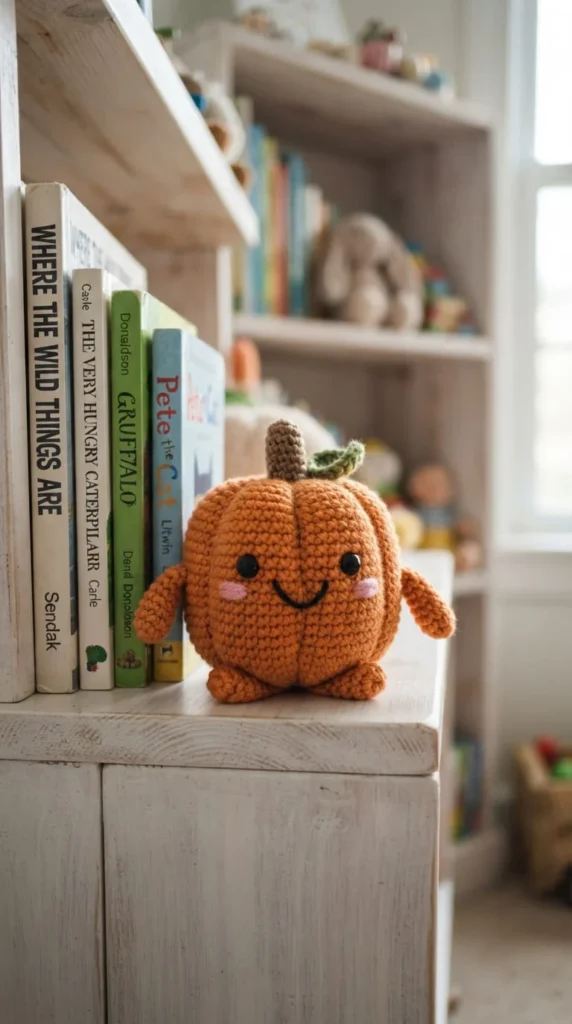
Not every crochet pumpkin needs to be purely decorative. An amigurumi pumpkin built with a simple stitched or embroidered face, small arms, and sometimes tiny legs turns the same basic shape into a character-style toy that works well for a nursery, a kid’s room, or a playful gift.
Start from your standard ribbed or smooth pumpkin base, then add safety eyes or embroidered features rather than anything with small removable parts if this piece is meant for a young child. A simple curved smile, worked in backstitch with embroidery thread, gives the character personality without much extra effort.
Small arms can be crocheted as short tubes and stitched on at the sides, while a hat, a bow, or a tiny scarf gives you an easy way to add personality variations across a set without redesigning the base shape each time.
Keep the stuffing extra firm for a toy-style piece, since it needs to hold up to handling and play rather than just sitting still on a shelf.
This is a strong gift project for a baby’s first fall, a preschool teacher, or anyone who wants their seasonal decor to double as something a child can actually pick up and play with.
15. Mini Pumpkin Keychains and Bag Charms
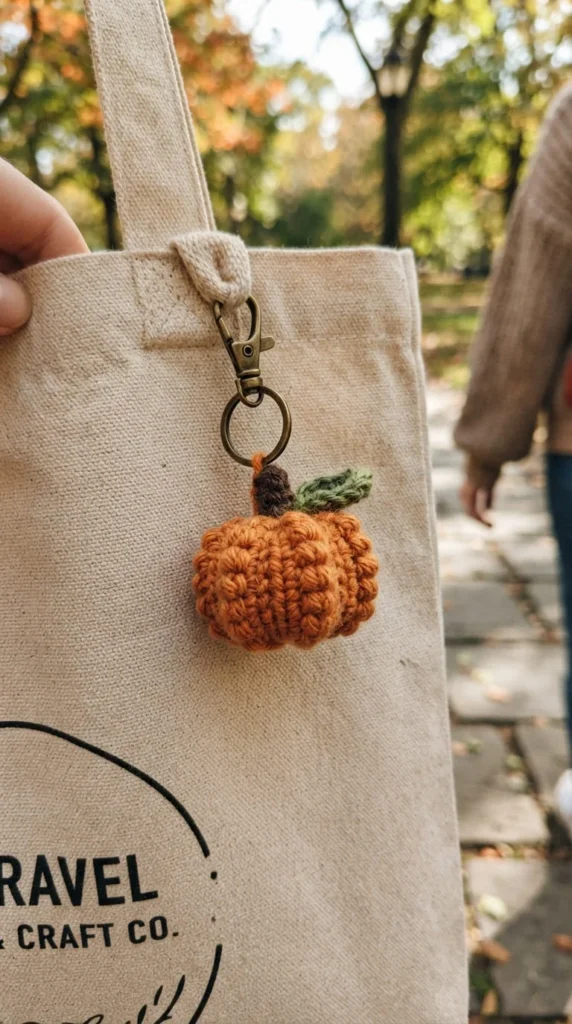
A keychain-sized pumpkin is one of the fastest projects on this list and one of the most practical for gifting, since it doesn’t require wrapping paper or a box — just a small bag or even handing it over as-is.
Scale down your standard pumpkin pattern significantly, working with a fine or light worsted weight yarn and a smaller hook than you’d use for a shelf-sized pumpkin. Stuff it firmly with a small amount of polyester filling, and attach a metal keyring or lobster clasp through a loop at the top rather than relying on the crocheted stem alone to hold up to daily use.
Because these are so quick, they’re an excellent project for using up small amounts of leftover yarn from larger pumpkin projects, and a batch of five or six can realistically be finished in a single evening.
A few gifting ideas:
- Attach one to a canvas tote as a small seasonal accent
- Add several to trick-or-treat bags as a handmade touch
- Include one with a card as a small, low-cost teacher or coworker gift
Because they’re small and inexpensive to make, keychains are also a practical option if you’re building out a set of items for a craft market table.
16. Pumpkin Table Number Holders for Fall Events
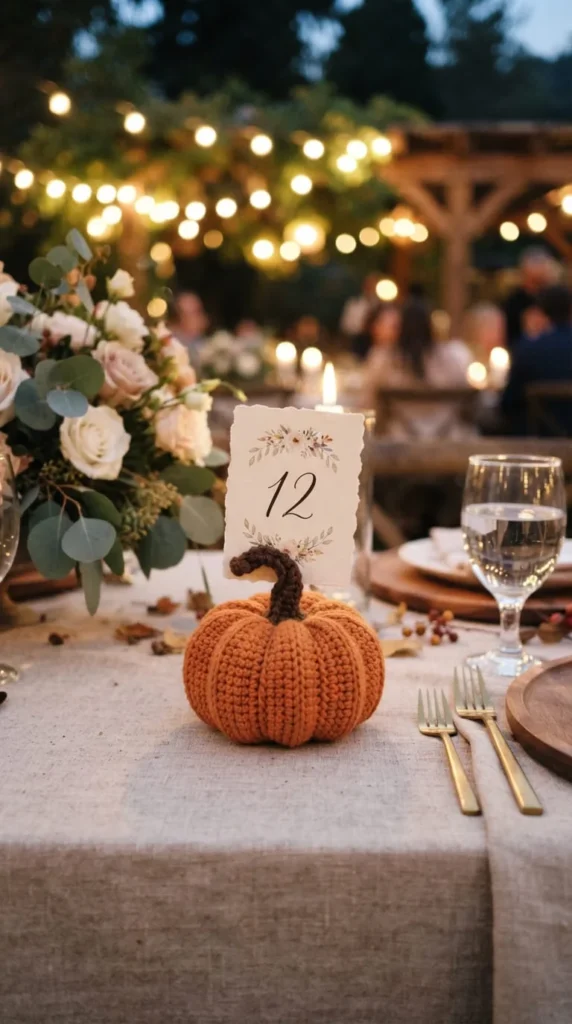
A small crochet pumpkin makes a genuinely useful table number or place card holder for a fall wedding, a Thanksgiving gathering, or any harvest-themed event, and it doubles as a take-home favor once the event is over.
Work a simplified, flatter-bottomed version of your standard pumpkin so it sits stably on a table without rolling, and leave a small gap or slit near the stem where a folded card can be tucked in securely rather than balanced precariously on top.
A neutral color palette — cream, sage, or soft terracotta — fits most event color schemes better than bright Halloween orange, and it’s easier to coordinate across a large number of tables if you’re making a full set.
Because these need to be produced in volume for a real event, this is a good project to batch. Crochet the bodies in one sitting across several evenings, then add stems and finishing details in a second pass once you have a full set ready to assemble.
Guests are far more likely to take home a small handmade pumpkin than a printed paper number card, which makes this a nice way to extend the life of your work beyond a single afternoon.
17. A Weighted Pumpkin Doorstop
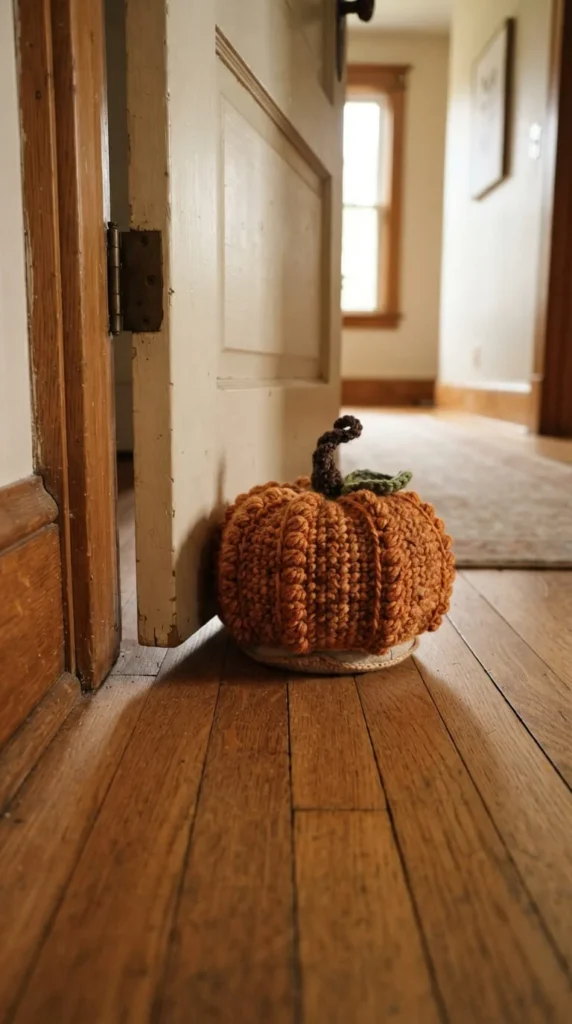
This is a genuinely functional twist on the standard decorative pumpkin. Instead of stuffing the shape with polyester filling alone, you add weight inside so the finished piece can actually prop open a door, which gives your fall decor a job to do beyond sitting on a shelf.
Fill the base half of the pumpkin with dried rice, poly pellets, or clean sand in a sealed plastic bag before adding a layer of regular stuffing around and above it. This keeps the weighted material contained and prevents it from shifting unevenly or leaking if the outer crochet ever develops a small gap in the stitches.
Because this piece needs to sit flat and stable, work the base with a slightly wider, flatter shape than a standard pumpkin rather than a fully round bottom, which will want to roll rather than stay put against a door.
A firm cotton yarn holds up better than a stretchy acrylic for this application, since the piece will see regular handling as it gets moved in and out of doorways throughout the season.
This is a great option for anyone who wants their fall decorating to solve an actual daily annoyance instead of just adding another object to dust.
18. A Muted Autumn Gradient Display
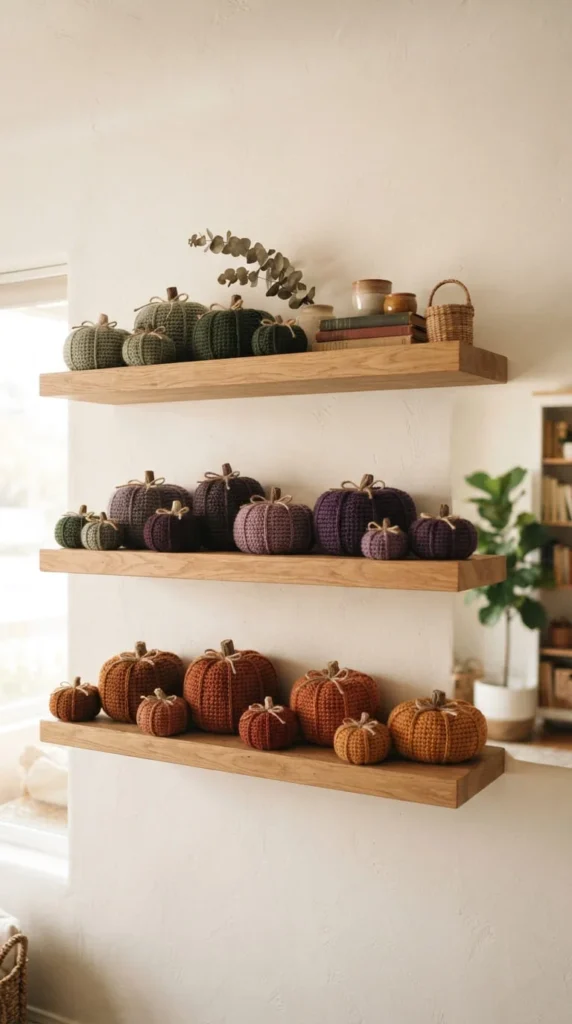
Rather than picking one color and repeating it, arrange a full row of pumpkins in a gradual color progression — deep plum fading into rust, then olive, then a soft mustard — for a display that reads as a single cohesive design rather than a random assortment.
Plan the color order before you start crocheting, and keep the base pattern identical across every pumpkin in the set so the only variable is color. This consistency is what makes the gradient effect read clearly instead of looking scattered.
A floating shelf or a long windowsill works particularly well for this display, since the horizontal surface lets you see the full color transition in one glance rather than the pumpkins being tucked into separate spots around a room.
If you want the gradient effect without committing to eight or nine individual color changes, a hand-dyed or self-striping yarn worked across a single larger pumpkin can achieve a similar smooth transition within one piece, which is a faster option if you’d rather not crochet a full set.
This approach works especially well for anyone who wants their fall decor to feel more like a designed collection than a pile of individually purchased pieces.
19. A Scented Sachet Pumpkin
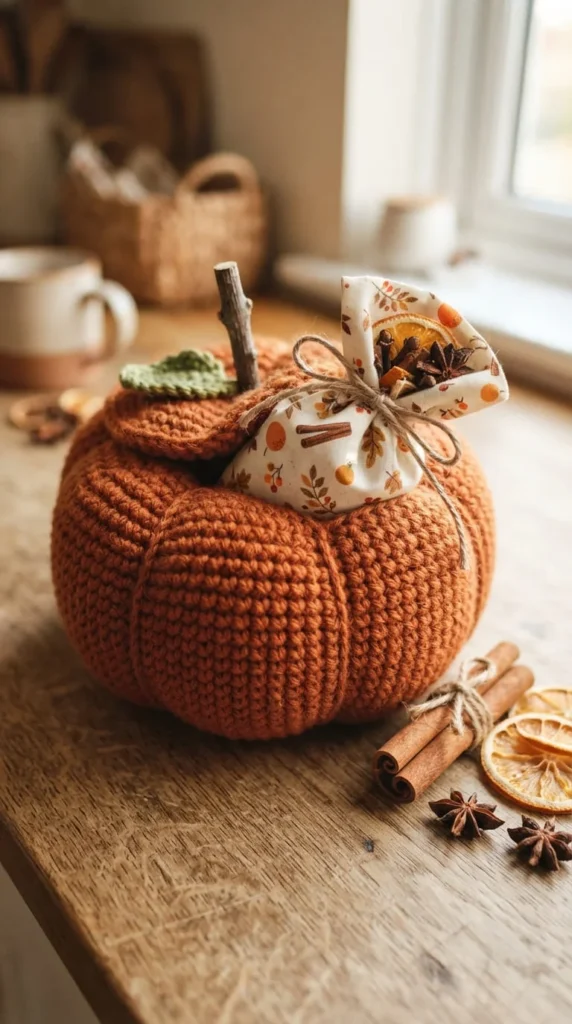
Instead of trying to work fragrance directly into your yarn, which doesn’t hold up well through repeated handling or eventual washing, build a small opening into your pumpkin where a separate fabric sachet can be tucked in and swapped out as needed.
Crochet the pumpkin as usual, but leave a small slit near the stem rather than fully closing and cinching the top. Fill a small muslin bag with a mix of cinnamon, dried orange peel, and a few cloves, then tuck it into the opening among the regular stuffing.
Because the sachet is removable, you can refresh the scent every few weeks throughout the season without needing to unstitch or rebuild any part of the pumpkin itself, and you can pull the sachet out entirely if you ever want to wash the outer piece.
This is a nice detail for a pumpkin that will sit somewhere people pass by often, like an entryway table or a bathroom counter, where a light seasonal scent adds something a purely visual piece can’t offer.
Keep the sachet contents food-safe and pet-safe if there’s any chance a curious pet might get near the piece, since some dried spices aren’t safe for animals to ingest in quantity.
20. An Oversized Statement Pumpkin
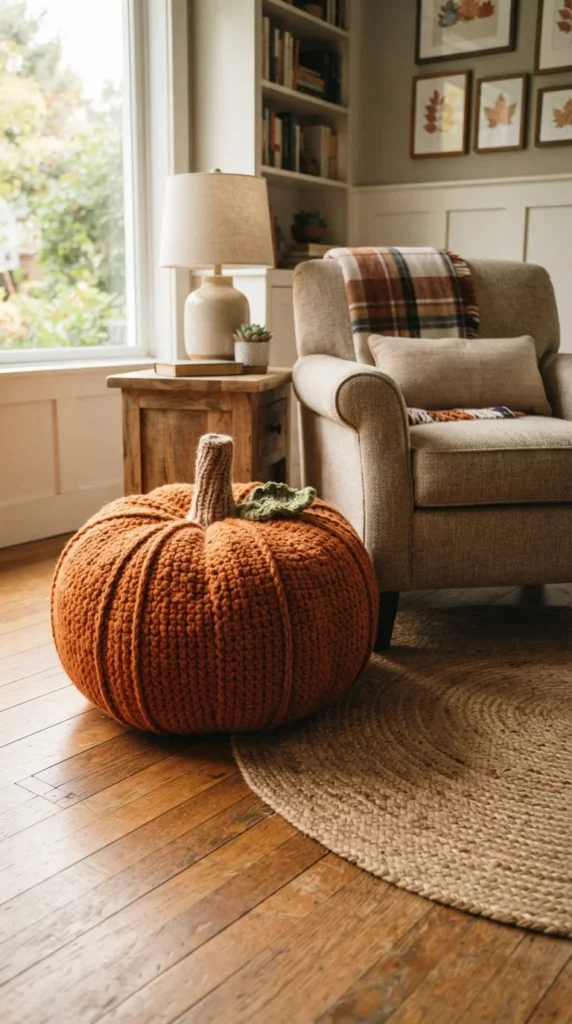
Most crochet pumpkin projects are small, which makes an oversized version — roughly the size of a large floor cushion — stand out simply because it breaks the expected scale. This works as a genuine statement piece rather than one item among a cluster of minis.
Scale up your pattern using a very bulky or jumbo yarn, or hold two to three strands of regular worsted weight together as you work, which builds volume much faster than switching to a true jumbo yarn that can be harder to find and more expensive per skein.
Stuffing an oversized pumpkin evenly takes more attention than a small one. Work in sections, checking firmness and shape from multiple angles as you go, rather than stuffing the whole thing at once and hoping it settles evenly.
A single flattened or star-shaped stem, made from a folded scrap of felt or a thicker crocheted piece rather than a delicate branch, suits the larger scale better than a small natural twig, which can look undersized next to a pumpkin this large.
Place it on the floor beside a chair or at the base of a staircase, where its scale can actually register in the room instead of getting lost on a crowded shelf.
21. A Storage System for Reusing Pumpkins Every Year
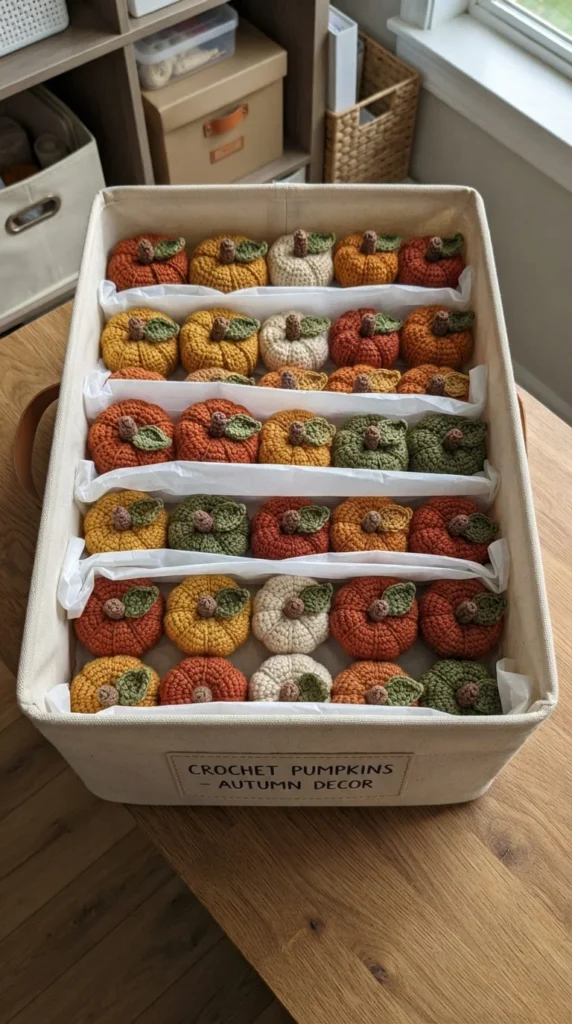
The whole appeal of crochet pumpkins over fresh ones is that they last for years, but only if you store them properly between seasons instead of shoving them into a random box where they get crushed or misshapen.
Store pumpkins in a breathable fabric bin or a cotton pillowcase rather than a sealed plastic bag, which can trap moisture and lead to a musty smell developing over the off-season months. Add a layer of tissue paper or a soft cloth between pumpkins if you’re stacking several together, which helps prevent any texture, like bobbles or ribbing, from flattening against another piece over many months of storage.
Label bins by size or by color scheme — farmhouse neutrals in one bin, Halloween-specific pieces in another — so you’re not unpacking everything just to find one specific pumpkin next fall.
Check pumpkins for loose stems or slightly worked-out stuffing before storing them for the season, and make any small repairs while the piece is already out and easy to work with, rather than discovering the issue the following year when you’re trying to set up decor quickly.
This small habit is really what makes handmade pumpkins a genuinely reusable investment rather than a one-season project.
22. A Mixed Harvest Centerpiece
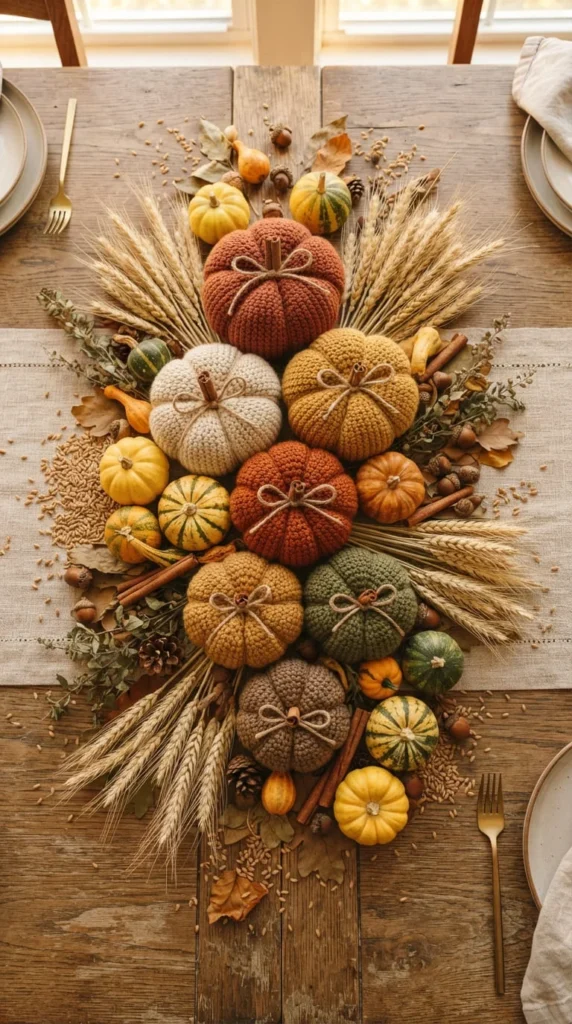
Rather than displaying crochet pumpkins as a set on their own, mix a handful of different sizes and textures — a ribbed mini, a bobble pumpkin, one jewel-tone piece — together with a few real dried elements for a centerpiece that reads as a full harvest tablescape rather than a single craft project.
Anchor the arrangement with your largest pumpkin slightly off-center rather than dead in the middle, then build outward with smaller pieces, real dried wheat stalks, a few actual small gourds, and maybe a scattering of acorns or pinecones if you have them on hand.
Keep the color palette loosely coordinated rather than perfectly matched — a mix of rust, cream, and deep green pumpkins sits comfortably alongside natural wheat and gourd tones without needing to match exactly.
This kind of mixed centerpiece is also a practical way to showcase several different projects from this list in one place, so you get the benefit of trying different textures and techniques without needing an entire room to display them all separately.
Keep the arrangement low enough that it doesn’t block sightlines across a dinner table, especially if it’s going to be the centerpiece for an actual meal rather than just a shelf display.
Conclusion
Crochet pumpkins earn their place in a fall decorating rotation because they solve a real problem — fresh pumpkins rot, cost money every single year, and rarely fit a specific color scheme the way a handmade piece can. Start with one quick ribbed mini if you’re new to the shape, then build out from there into texture variations, a garland, or a full harvest centerpiece as your confidence grows. Keep a small stash of autumn-toned yarn on hand so a pumpkin project is always within reach on a free evening, and store your finished pieces properly so they’re ready to come back out again next September without any repair work. Pick one idea from this list, grab a hook, and start building a collection you’ll actually use year after year.