
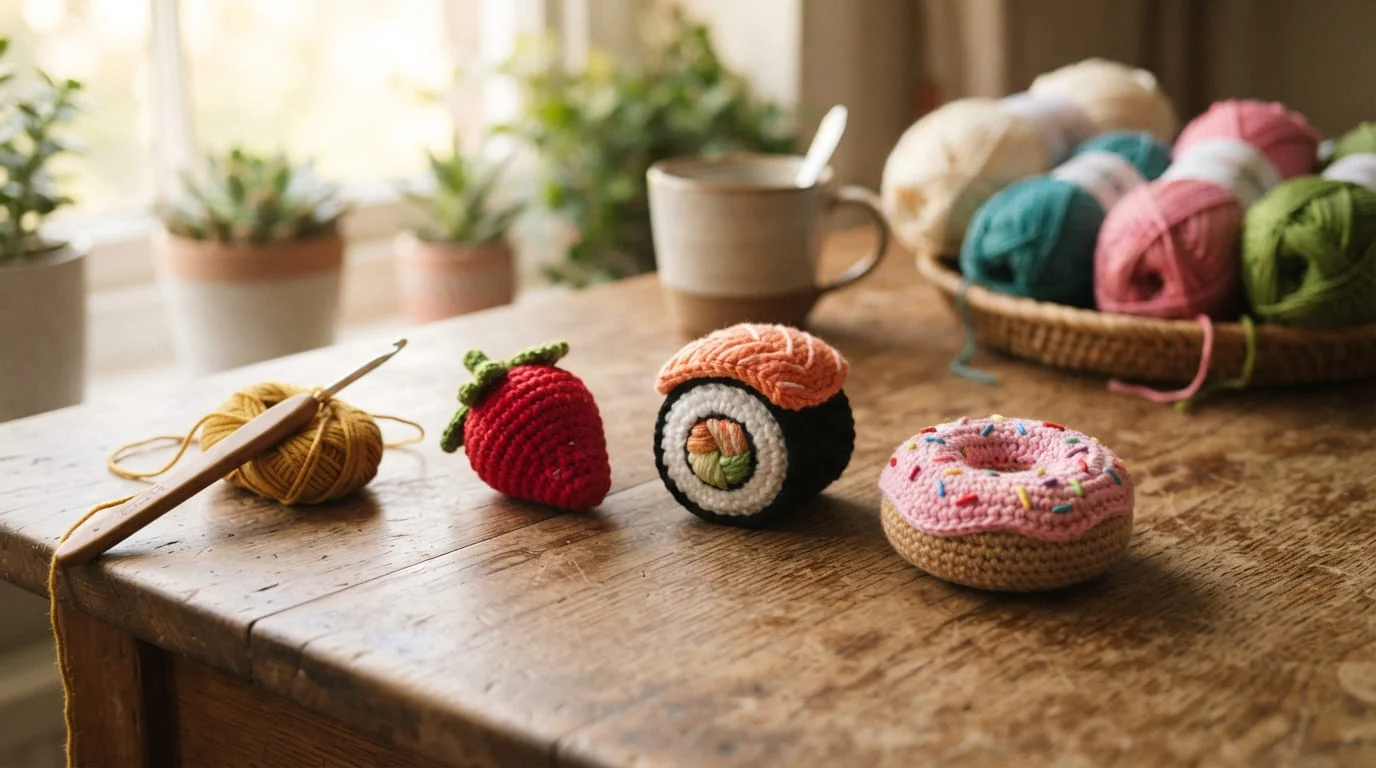
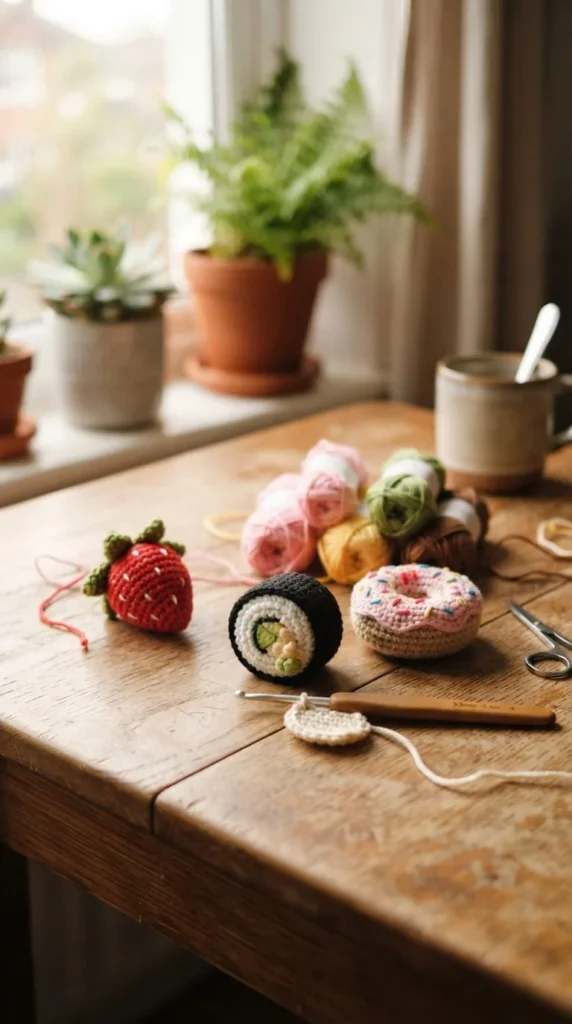
If you’ve ever wanted a hobby that turns leftover yarn into something you can actually display, gift, or sell at a weekend market, crochet food amigurumi might be the most satisfying rabbit hole you fall into this year. These tiny stitched snacks and treats are forgiving for beginners, quick enough to finish in an evening, and endlessly customizable once you know a few core shapes. Below are 22 project ideas that cover everything from five-minute keychains to bigger plush centerpieces, along with the yarn, stitch, and finishing choices that make each one work.
1. Sushi Roll Keychain With Layered Color Rounds
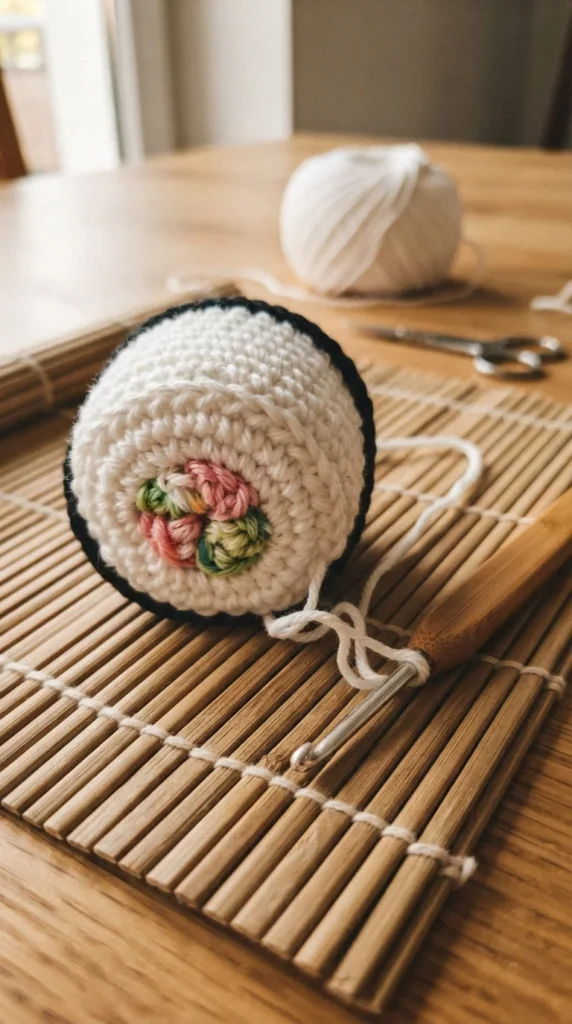
A sushi roll is one of the most rewarding food shapes to crochet because the color-blocking does most of the visual work for you. You start with a white cylinder for the rice, switch to black for the nori wrap, and finish with a bright pink or orange center to mimic salmon or tuna.
The trick to a clean look is working your color change on the same side of the cylinder every round, so the transition line stays straight instead of spiraling.
- Use cotton DK yarn for crisp stitch definition
- Keep the cylinder short and wide rather than tall
- Attach a small jump ring and clasp for an instant bag charm
Because the shape is just a plain tube, this project barely needs any shaping math, which makes it a great confidence-builder before you try anything with legs, ears, or curves. Once you’ve made one roll, you can vary the filling color to create a whole matching set — cucumber green, egg yellow, avocado — without changing the pattern structure at all.
2. Avocado Toast With Textured Seed Detail
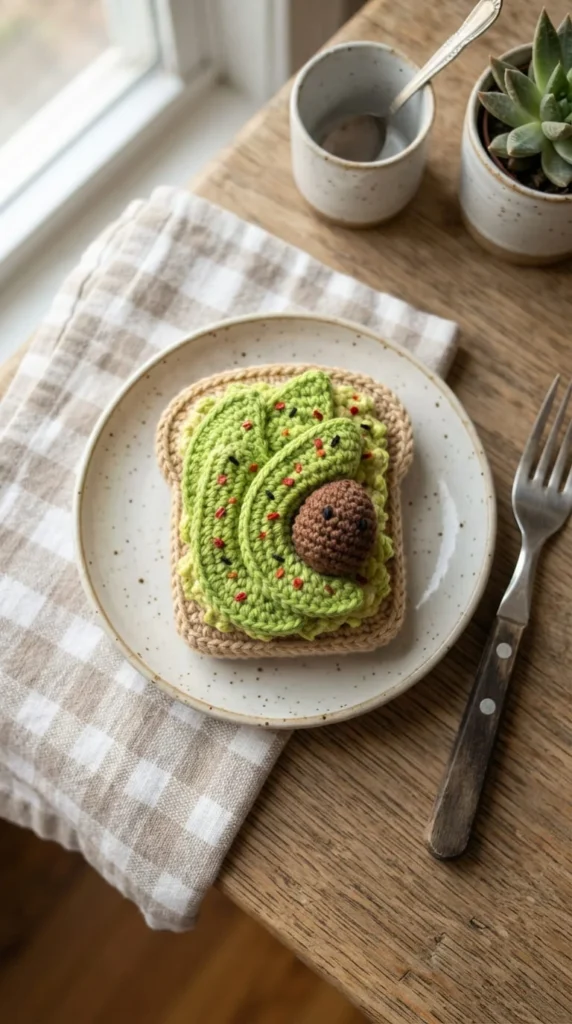
Avocado toast translates beautifully into amigurumi because the shapes are simple, but the surface details give you a chance to practice embroidery. The bread base is a flattened oval, and the avocado slices sit on top as two shallow half-domes.
For the seed, work a French knot in dark brown or black right in the center of each avocado piece — it takes seconds but makes the whole thing read instantly.
- Add tiny embroidered chili flake dots in red thread
- Use a slightly stiffer stuffing for the bread so it holds a flat shape
- Sew the avocado pieces on with a whip stitch so the edges stay smooth
This project also teaches you how to work flat pieces instead of the usual round amigurumi ball, which is a skill you’ll reuse for pizza slices, pancakes, and other layered food designs later in this list. It photographs well too, since the green-and-tan color contrast pops against almost any backdrop.
3. Mini Ramen Bowl With Wavy Noodle Strands
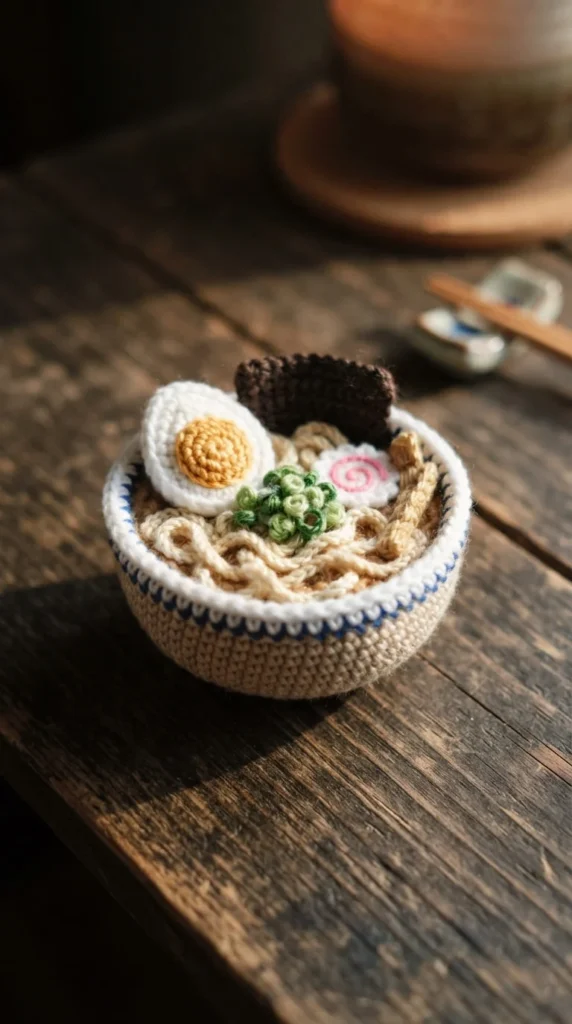
A ramen bowl is a slightly more advanced project because it combines several separate pieces — the bowl, the noodles, the egg, and the toppings — into one scene rather than a single stitched shape.
Crochet the bowl as a shallow, wide cup shape using single crochet rounds without increases once you reach your desired diameter. For the noodles, chain long strands of yellow or cream yarn and coil them loosely inside the bowl before tacking them down with a few hidden stitches.
- Make the egg from a small white oval with a yellow yolk sewn on top
- Use a strand of green yarn wrapped in a spiral for the onion garnish
- Glue or stitch the finished bowl onto a wooden coaster for a display piece
This design works well as a desk decoration rather than a keychain, since the loose noodle strands need a stable surface to sit on. It’s also a fun one to personalize — swap the broth color, add a slice of pork, or make a spicy version with tiny red chili pieces scattered on top.
4. Boba Tea Cup With a Straw That Actually Pokes Through
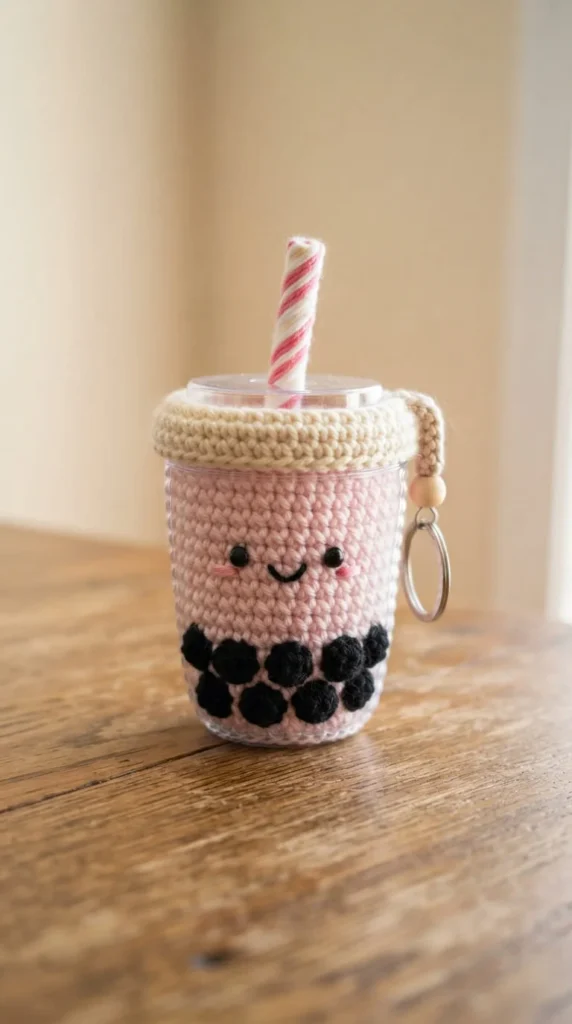
Bubble tea amigurumi has become one of the most requested keychain styles, and it’s easier to build than it looks. The cup is a simple tapered cylinder, wider at the top than the bottom, worked in a pale pink, brown, or taro-purple shade.
The tapioca pearls are the fun part — crochet several tiny black balls (or use black pom-poms) and stuff them loosely near the bottom of the cup before closing it, so they shift slightly like real boba.
- Crochet a thin striped tube for the straw and insert it through a small gap in the lid
- Leave the top rounds slightly looser to mimic a plastic lid seal
- Attach a keyring at the top of the straw for hands-free carrying
This project is a great way to practice tapering, since the cup shape requires gradual decreases rather than the sudden decreases used on rounder foods. Once you’ve nailed one flavor, making a whole lineup of different bubble tea colors takes very little extra time.
5. Ice Cream Cone With a Swirled Scoop Shape
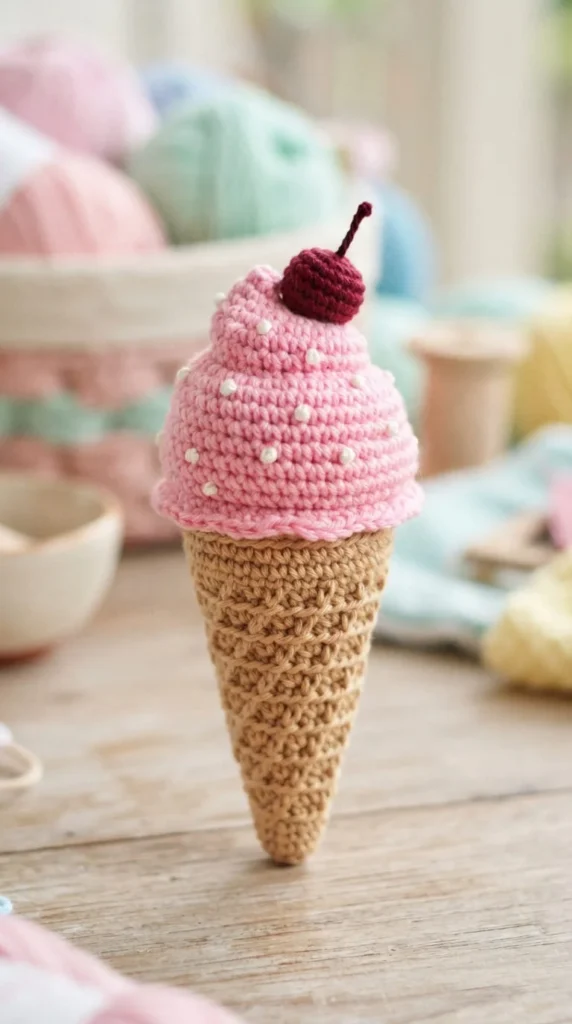
The classic swirl on top of an ice cream cone is achieved with a technique called front-post or back-post stitching, which raises certain stitches to create a spiral ridge instead of a smooth ball.
Start with the cone as a simple triangle worked in rows, then switch to a textured stitch pattern to build the waffle grid before moving to the scoop itself.
- Work the scoop in continuous rounds, tapering to a rounded point at the top
- Add embroidered “chocolate chip” dots using French knots in a contrasting color
- Stuff the scoop lightly so the swirl shape holds without looking overinflated
This is one of the more visually striking projects on this list because the textured stitching does so much of the work. It also pairs well with a matching sprinkle-covered version, giving you two different finishes from a single base pattern — just swap the topping details and keep everything else the same.
6. Folded Taco With Layered Filling Strands
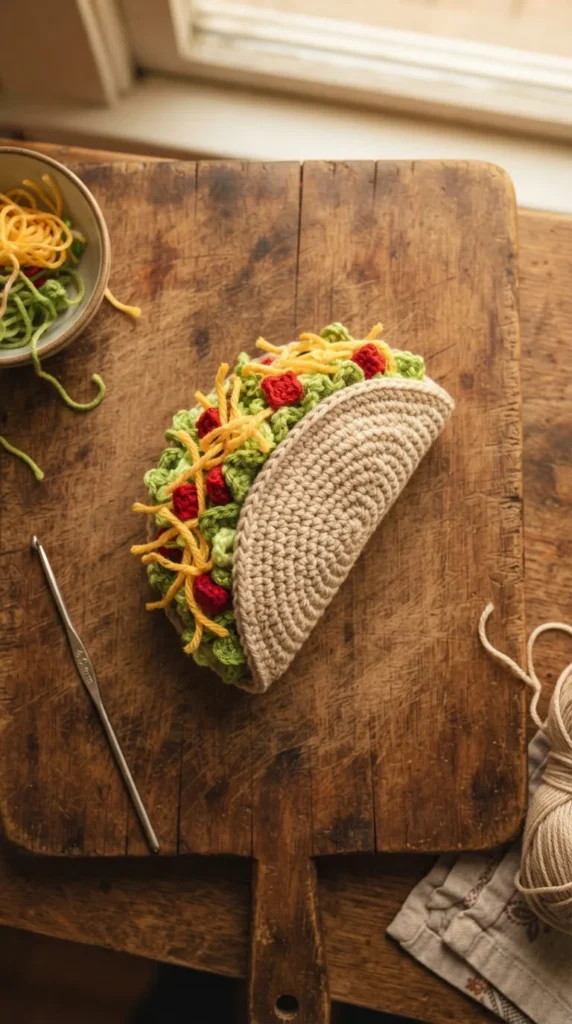
A taco is one of the more advanced shapes on this list because the tortilla needs to hold a folded, open form rather than sitting flat or closing into a sphere.
Crochet the shell as a semicircle, then use pipe cleaners or a bent piece of craft wire inside the seam to keep the fold in place permanently.
- Layer thin strips of felt-like crochet chains for lettuce shreds
- Add small red diamond shapes for diced tomato
- Use a fringe technique (cut loops) for the shredded cheese on top
Because the shell needs internal support, this project is better suited to display pieces than to keychains that get handled often. Once you’ve built the wire-supported fold once, though, you can reuse the same trick for tortilla wraps, taco shells for other fillings, or even a folded pancake design later on.
7. Pizza Slice With Puffy Cheese Texture
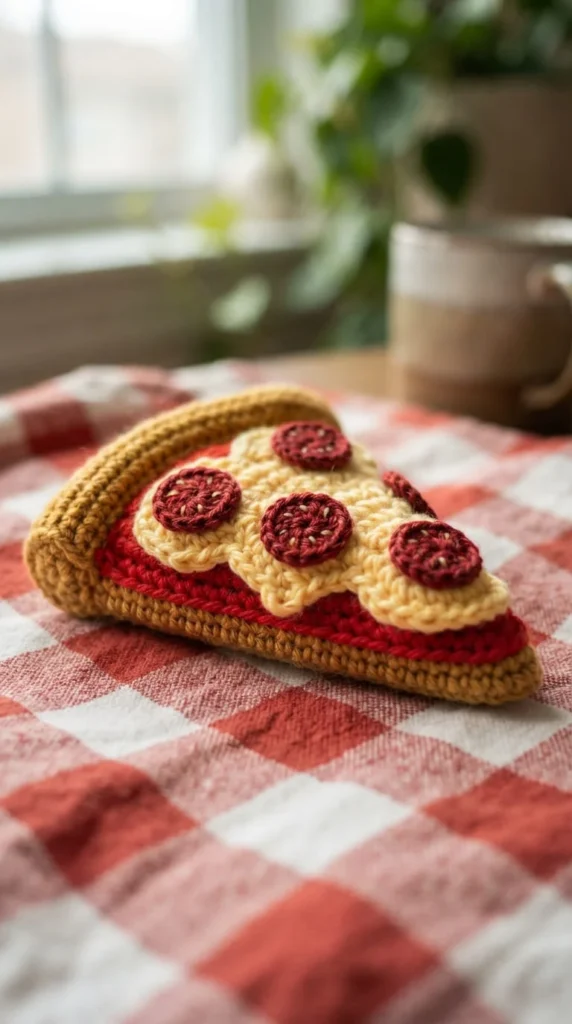
Pizza slices are worked flat, similar to the avocado toast piece, but the layering here is thicker since you’re stacking crust, sauce, cheese, and toppings on top of each other.
For a puffy cheese effect, use a bobble or popcorn stitch across the surface instead of plain single crochet — it creates raised bumps that mimic melted, bubbly cheese far better than a flat surface would.
- Crochet the crust edge in a slightly thicker yarn for contrast
- Add tiny red circles for pepperoni, sewn on after the cheese layer
- Round the crust corner and taper the tip for an authentic slice shape
This project is a good introduction to bobble stitching if you haven’t tried it before, and the technique transfers directly to other bumpy foods like popcorn, cauliflower, or textured bread crusts. Because it lies flat, a finished slice also works well as a coaster or a flat ornament rather than a stuffed toy.
8. Pleated Dumpling With a Pinched Seam
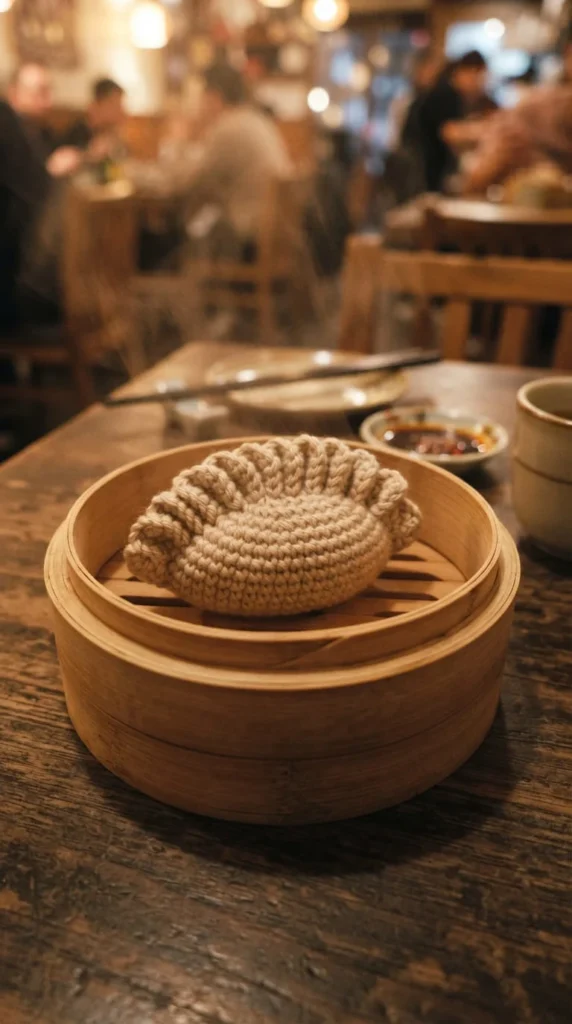
Dumplings have become a favorite in the amigurumi community because the pleated top seam is surprisingly easy to fake with a simple sewing technique, even though it looks intricate.
Crochet the dumpling body as a rounded, flattened pouch shape, then use a needle and thread to gather small pinches along the top seam in a repeating pattern, cinching each one down before moving to the next.
- Leave the bottom slightly flat so the dumpling can sit upright
- Use a pale, slightly shiny yarn to mimic dumpling wrapper dough
- Group several finished dumplings inside a small crocheted steamer basket for a display set
This is one of the few food amigurumi projects where the finishing technique matters more than the crochet stitches themselves, so it’s worth practicing the pleating on scrap fabric first if you’re new to hand-sewing. A trio of dumplings makes a charming shelf display or a themed gift set for anyone who loves dim sum.
9. Watermelon Slice With Seed Placement Detail
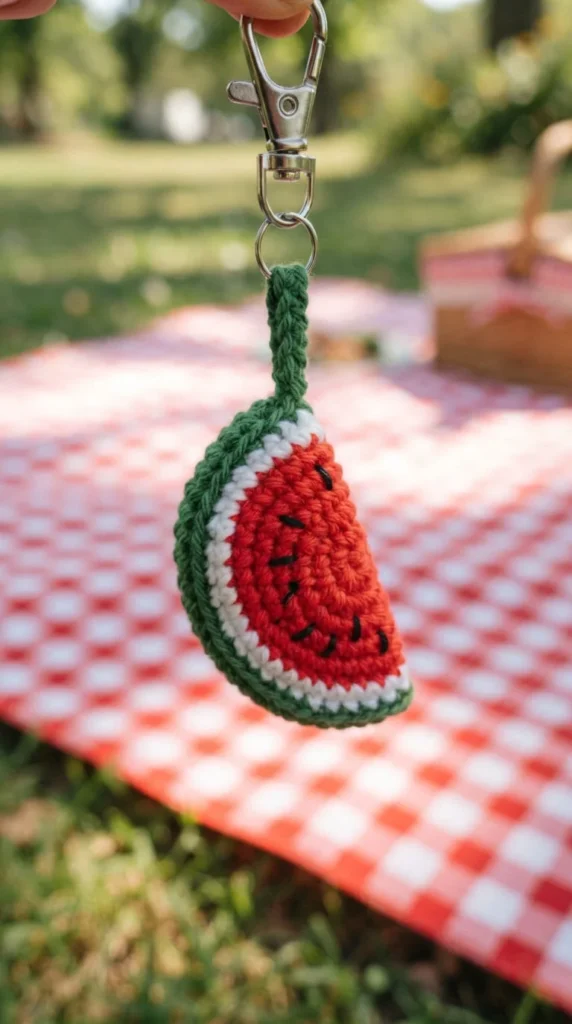
A watermelon slice is a fantastic beginner project because it’s built entirely from color-changing rounds on a simple wedge shape, with no complicated shaping required.
Work the wedge in rows rather than rounds, starting wide at the rind and narrowing toward the tip, switching from green to white to red as you go. The seeds are the detail that sells the whole design — space small black dashes randomly rather than in a perfect grid, since real watermelon seeds never line up evenly.
- Use a slightly curved edge on the green rind for a realistic bite-shaped look
- Keep the white ring thin, just one or two rounds
- Attach a clip or ring at the rind edge, which is the sturdiest point
Because this shape is flat rather than stuffed into a full sphere, it stitches up quickly, often in well under an hour once you know the color sequence. It’s also one of the easiest patterns to resize into a mini keychain version or a larger cushion-style piece for a summer-themed room.
10. Curved Croissant With Ridged Layers
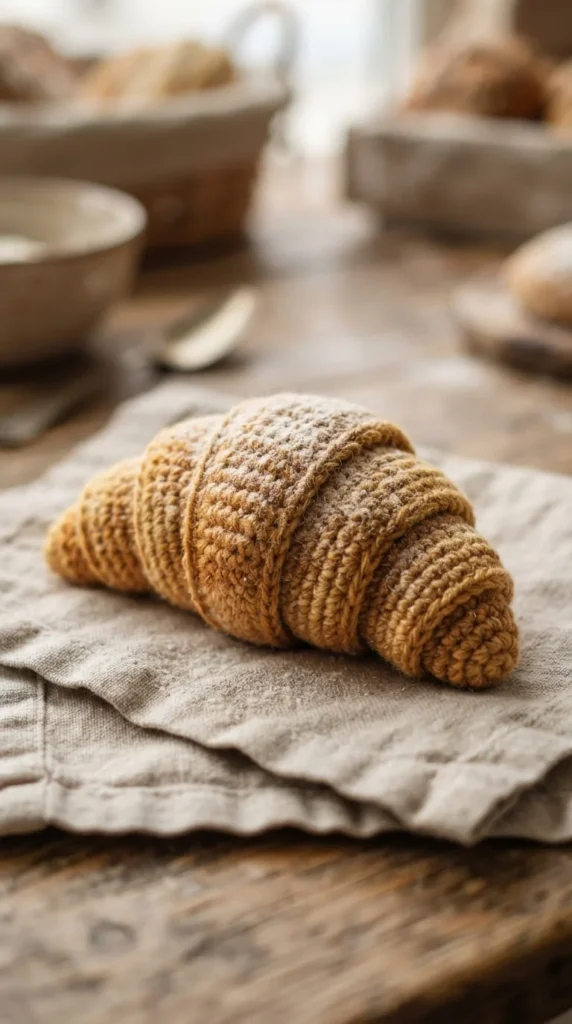
The croissant’s curved shape and visible pastry layers make it a satisfying stitch challenge once you’re past total beginner projects. You crochet the body as a tapered tube, then bend it into a crescent shape before stuffing, holding the curve with a few anchor stitches on the inside of the bend.
To fake the flaky ridges, work rows of surface slip stitches diagonally across the finished shape in a slightly darker gold thread, mimicking the way pastry layers catch the light.
- Taper both ends to a point for the classic croissant silhouette
- Use two shades of tan or gold yarn for shading depth
- Add a light dusting of white embroidery thread for a “flour dusted” finish
This project is a good next step after you’ve mastered basic tapering and curving, since the shaping techniques carry over to other pastries like pretzels or bread rolls. A batch of mini croissants also makes an appealing bakery-themed gift set when paired with other treats from this list.
11. Glazed Donut With Scattered Sprinkle Details
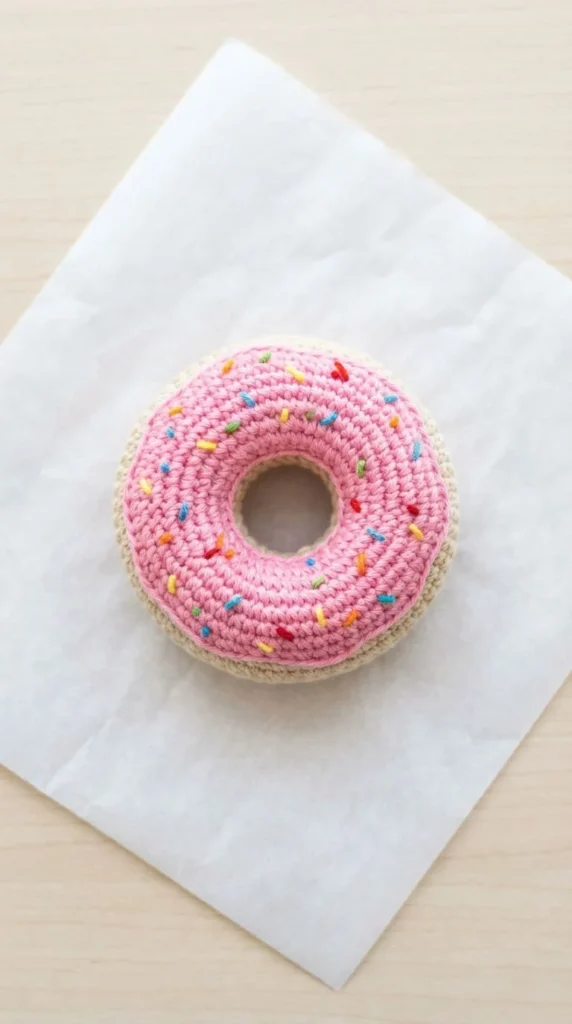
A donut is essentially a torus shape, which can trip up beginners, but the easier workaround is to crochet two flat circles with a hole in the middle and sew them together around the edge, stuffing lightly before closing.
The glaze is a separate flat circle in a contrasting color, sewn on top with a slightly uneven edge so it looks like it’s dripping rather than perfectly painted on.
- Cut short lengths of yarn in several colors for the sprinkles, then knot and trim them
- Scatter the sprinkle pieces before the glaze fully sets in place, then tack each one down
- Keep the center hole small so the ring shape reads clearly at a glance
This project is worth trying once you’re comfortable with basic shaping, since the two-circle construction method is different from the usual continuous-round approach used elsewhere in this list. It’s also endlessly variable — chocolate glaze, rainbow sprinkles, powdered sugar texture — all from the same base shape.
12. Textured Strawberry With Raised Seed Bumps
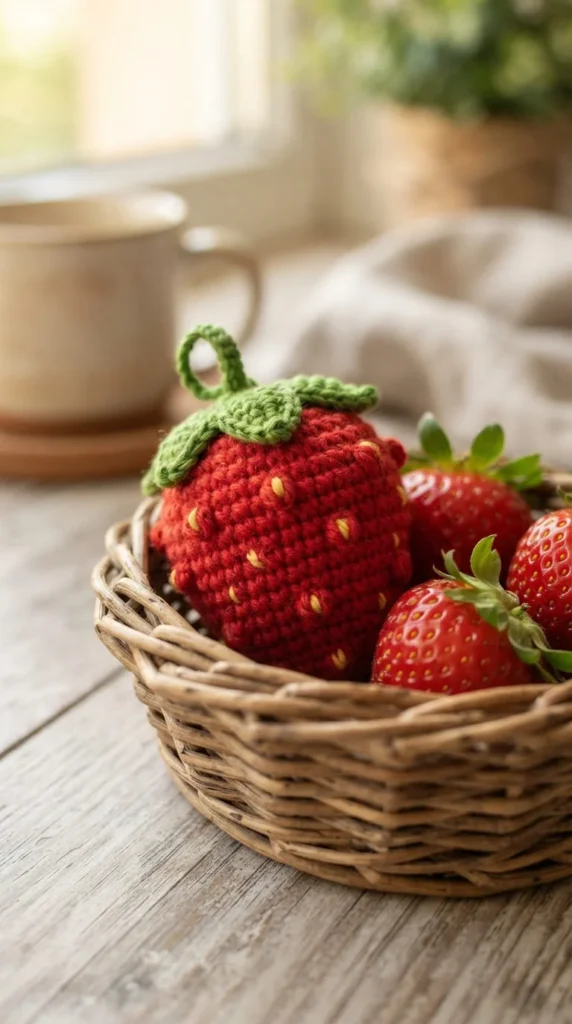
Strawberries are one of the most popular fruit amigurumi shapes because the raised seed texture is achievable with a simple embroidery trick rather than complicated stitching.
Crochet the body as a slightly elongated cone shape in red, then use small straight stitches in yellow thread scattered across the surface to mimic the tiny seeds. Pulling the stitches slightly taut gives them a raised, bumpy feel that flat embroidery can’t match.
- Crochet the green leafy top as a small flat circle with pointed edges
- Space the seed stitches in loose diagonal lines rather than a rigid grid
- Leave a small loop at the top of the leaf for hanging as an ornament or charm
Because the shape and stitch count are so simple, this is an excellent project for using up small amounts of leftover red yarn. A cluster of strawberries in slightly different reds also makes a visually interesting bunch when displayed together in a small bowl or basket.
13. Speckled Mushroom With a Sturdy Stem
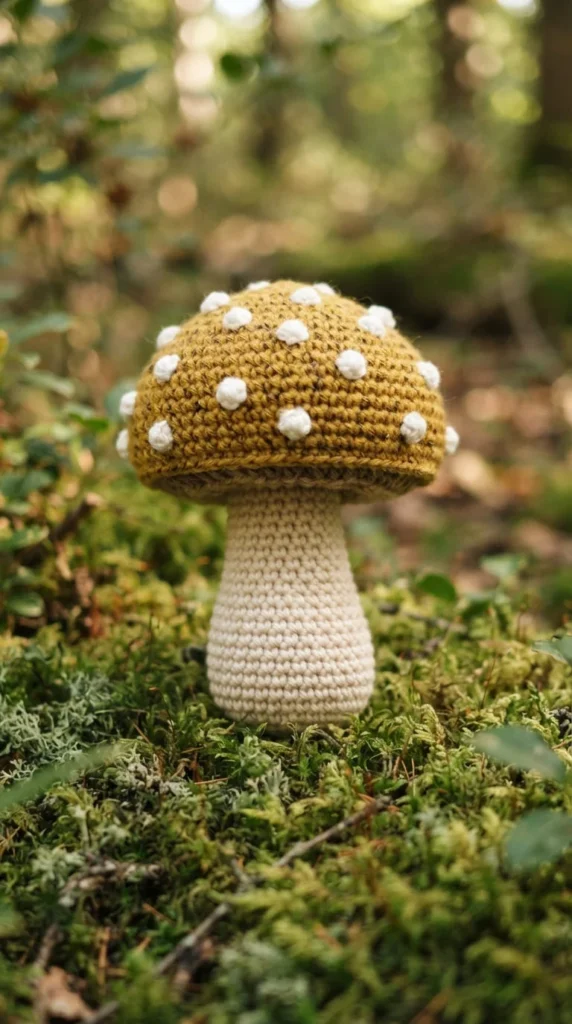
Mushrooms are a fun departure from the usual round or wedge shapes because they combine a dome-shaped cap with a separate cylindrical stem that has to stand upright on its own.
Crochet the cap as a shallow dome using standard increase rounds, then work the stem as a slightly tapered tube, wider at the base for stability. Attach the two pieces with a generous amount of stuffing in the stem so it doesn’t flop over once assembled.
- Add small white French knots scattered across the cap for the classic speckled look
- Use a slightly firmer stuffing in the stem base than in the cap
- Try red, brown, or orange cap colors for different mushroom varieties
This shape teaches a useful skill: joining two separately finished pieces at a right angle so the final toy can stand freely without support. Once you’ve built one mushroom, a cluster of different sizes and colors makes an attractive forest-themed display for a shelf or windowsill.
14. Corn on the Cob With Individual Kernel Bumps
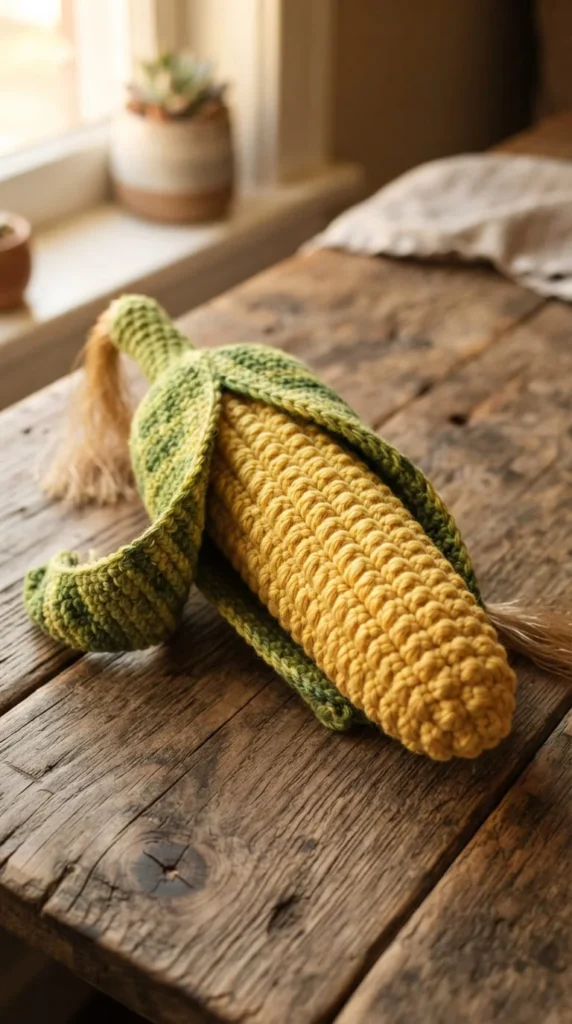
Corn is a satisfying texture project because every single kernel gets its own small bobble stitch, giving the surface a genuinely bumpy, three-dimensional feel rather than a smooth painted-on pattern.
Work the cob as a tapered cylinder, and instead of plain single crochet, use a bobble stitch in every single stitch of every round to build up the kernel texture from top to bottom.
- Crochet the husk as two or three flat leaf shapes in green, layered and sewn at the base
- Leave a section of the cob exposed by folding the husk pieces back, like a partially peeled ear
- Add small brown “silk” threads at the tip for extra realism
Because every stitch is a bobble, this project takes longer to finish than most others on this list, but the payoff is a texture that photographs beautifully and feels genuinely different to hold. It’s a good weekend project once you want something more involved than a quick keychain.
15. Sunny-Side-Up Egg With a Raised Yolk Dome
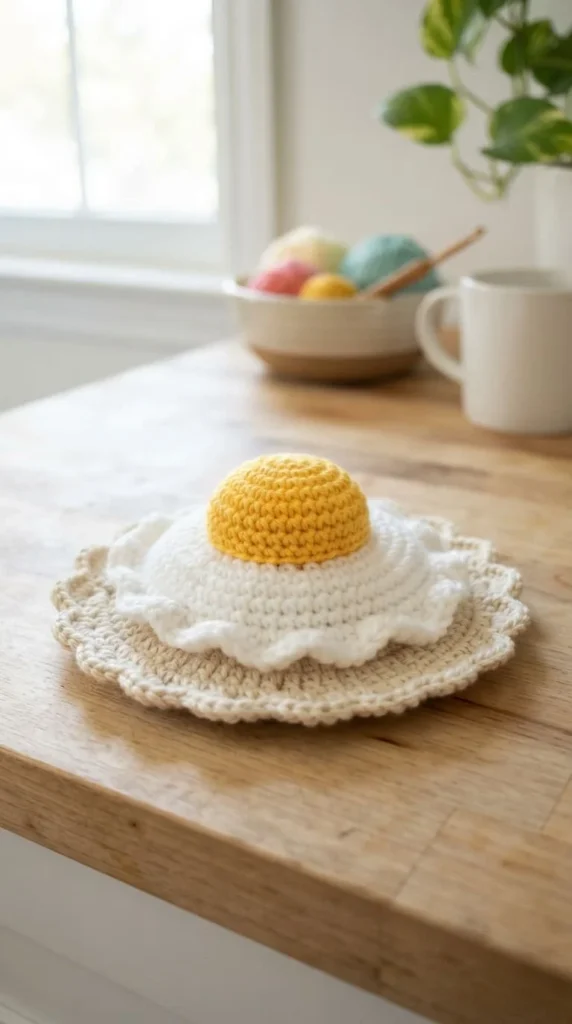
A fried egg is one of the simplest projects on this list, which makes it a great palette cleanser between more complicated pieces, but it still has a small trick worth knowing.
Crochet the white as a flat, slightly irregular oval shape, then crochet the yolk separately as a small stuffed dome and sew it onto the center, leaving the white completely flat around it for contrast.
- Make the white’s edge slightly wavy rather than perfectly round for a fried, not stamped, look
- Stuff the yolk generously so it sits noticeably raised above the white
- Add a subtle highlight stitch in pale yellow on the yolk’s top for shine
This project pairs naturally with the pancake, bacon, or toast pieces on this list to build a full breakfast-themed set. Because the shapes are so basic, it’s also one of the fastest projects here, often finishable in under thirty minutes once you’ve made your first one.
16. Coffee Cup With Latte Art on Top
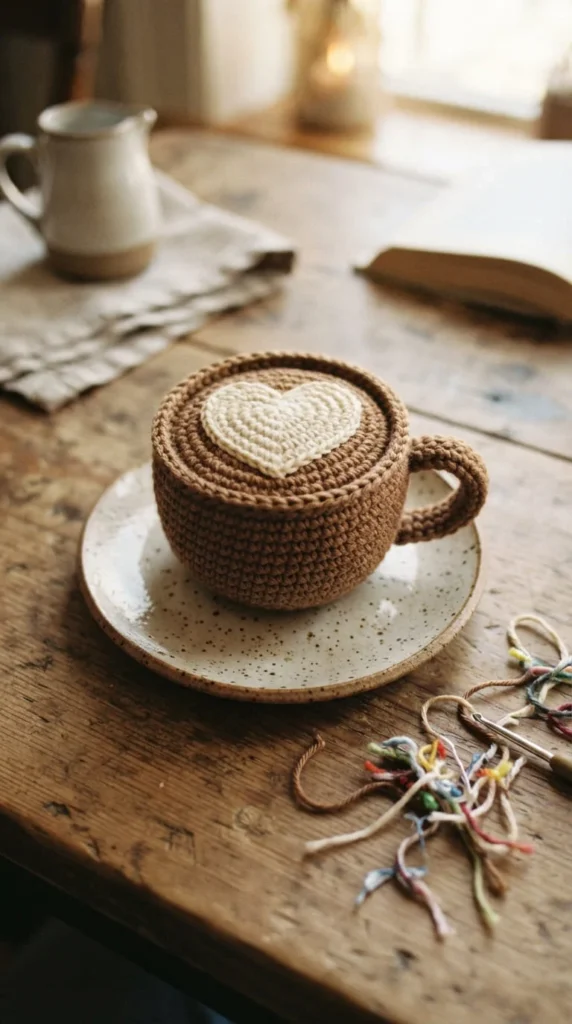
A coffee cup amigurumi is a two-part project: the cup itself, worked as a simple cylinder with a small crocheted handle attached to the side, and the “foam” top, worked as a flat cream-colored circle with a simple heart or leaf shape embroidered on.
Getting the handle to sit at the right angle takes a little patience — pin it in place before stitching so you can check the proportions look right against the cup body first.
- Use a slightly wider top round on the cup for a realistic taper
- Keep the foam layer thin so it sits flush with the rim
- Try a small crocheted saucer underneath for a complete presentation
This project is a nice one to practice attaching small functional pieces like handles, which is a skill that transfers to mugs, teapots, and baskets elsewhere in your crochet projects. A finished coffee cup also makes a thoughtful, low-cost gift for anyone who lives for their morning brew.
17. Cupcake With a Paper-Liner Textured Base
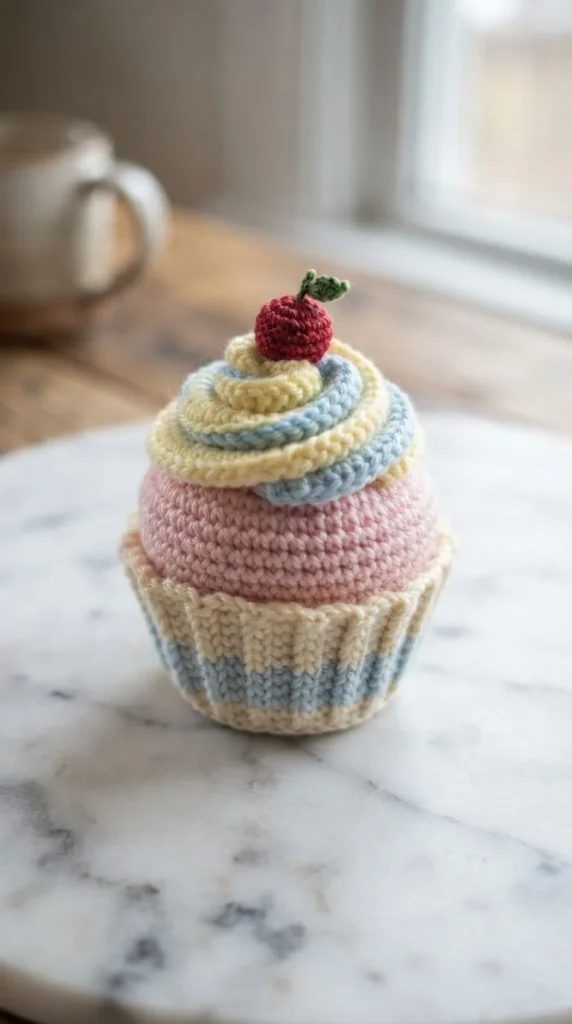
Cupcakes combine two techniques you’ve likely already practiced elsewhere on this list: a ridged base for the paper liner and a swirled top for the frosting, similar to the ice cream cone.
For the liner texture, work in the front loops only for several rounds near the base, which creates a fluted, pleated look that closely resembles a real cupcake wrapper without any extra embroidery needed.
- Switch to back-post stitches for the frosting swirl to raise it off the surface
- Add a single crocheted cherry or a scattering of tiny sprinkle knots on top
- Use pastel yarn shades for a bakery-display feel, or bold colors for a birthday theme
Because the base texture and the swirl top use two different textured stitches, this project is a good way to compare front-loop and back-post techniques side by side in one piece. Once mastered, this pattern scales easily into a full “cupcake stand” display with several flavors lined up together.
18. Twisted Pretzel With a Genuine Knot Shape
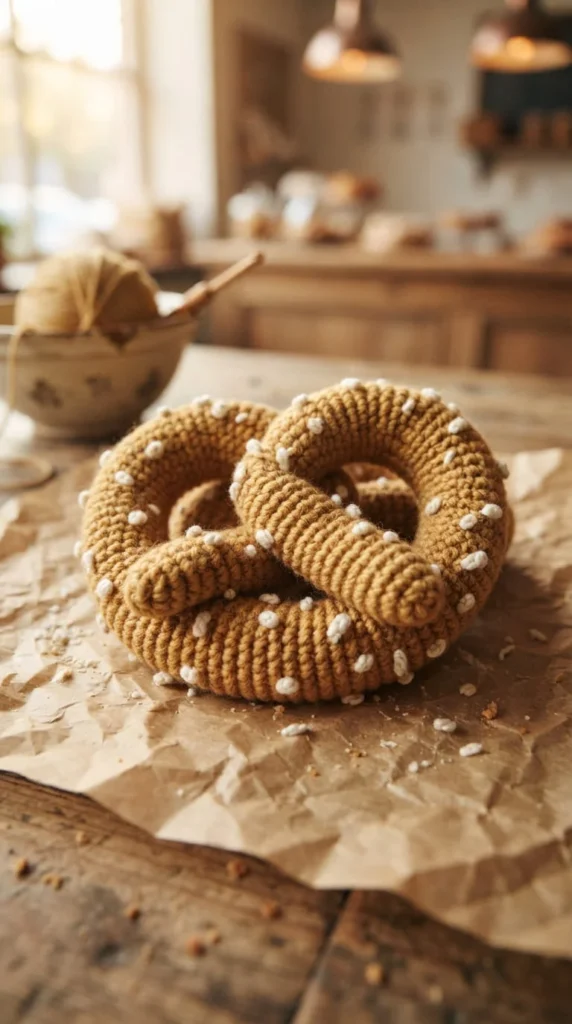
A pretzel’s twisted shape looks complicated, but it’s actually achieved by crocheting one long tapered rope and then physically folding and looping it into the classic pretzel knot before securing it with a few hidden stitches, rather than trying to crochet the twist directly.
- Crochet the rope in one continuous tube, tapering slightly at both ends
- Fold it into a loop, cross the ends, and fold them down onto the body, just like tying a real pretzel
- Stitch the crossing points together from the inside so the shape holds permanently
For the salt texture, scatter small white seed beads or tiny white French knots across the surface once the shape is secured. This project is a great lesson in “cheating” a complex shape by relying on folding and sewing rather than complicated stitch patterns, a trick that also works for shaping bread knots, bagels, and looped bracelet-style projects outside the food category entirely.
19. Curved Banana With a Peel That Actually Peels
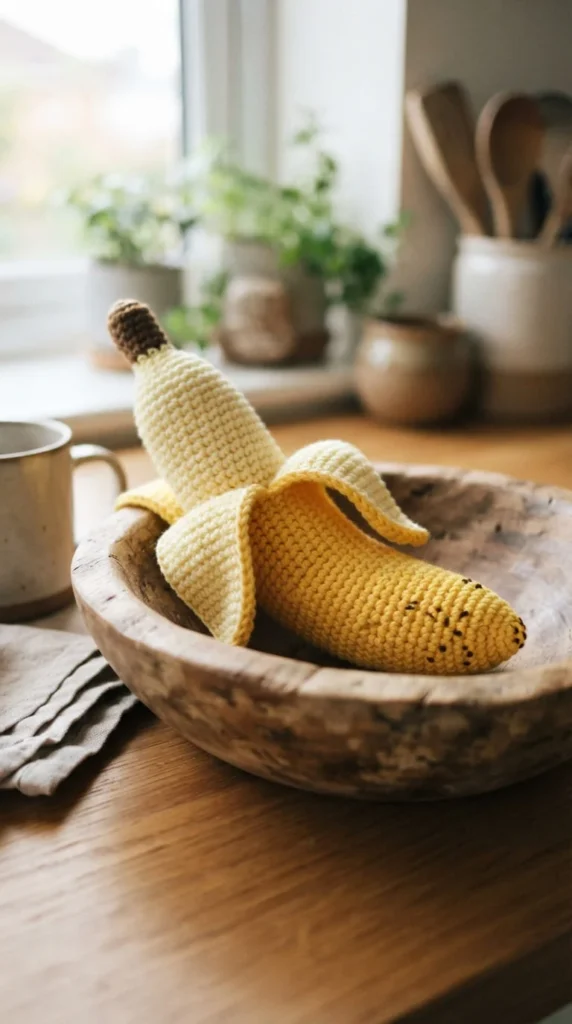
A banana is a deceptively tricky shape because it needs a natural curve rather than a straight cylinder, and getting that curve to look right takes a specific shaping trick.
Work the body as a tapered tube, but crochet slightly more stitches along one side than the other in a few key rounds — this uneven stitch count pulls the tube into a gentle arc as you go, rather than staying straight.
- Add small brown speckle stitches near one end for ripeness detail
- Crochet a separate short peel section that can fold back to reveal a pale yellow “fruit” underneath
- Use a firm stuffing so the curve holds its shape permanently
This peeling detail is what makes this project stand out from a plain curved cylinder, and it’s a fun way to practice building a toy with a moving or interactive element. A set of bananas at different ripeness stages, using yellow-to-brown gradient speckling, also makes a fun visual grouping for a fruit bowl display.
20. Chunky Gummy Bear With a Glossy Look
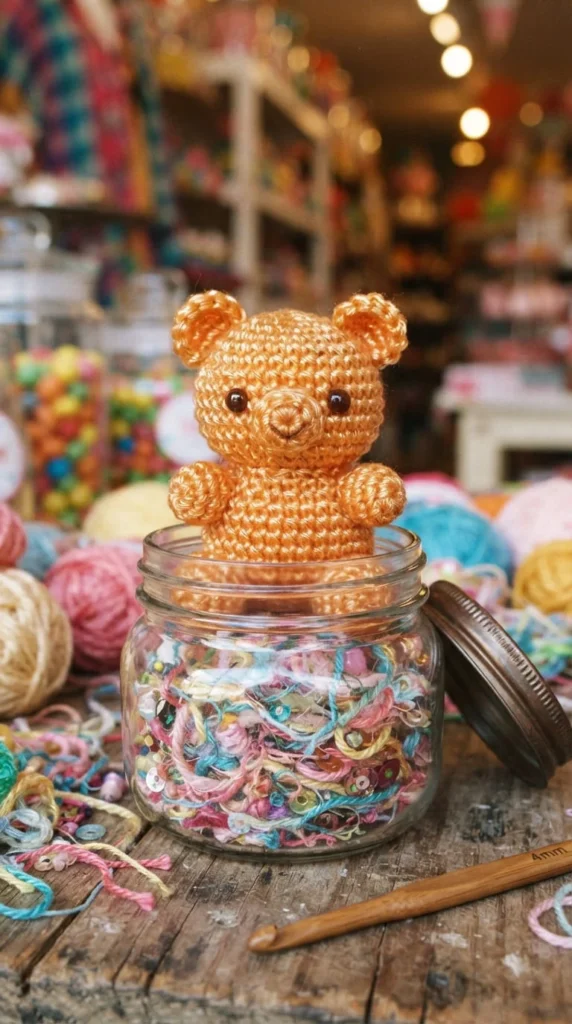
Gummy bears are a fun departure from realistic food because the goal here is a candy-like glossy appearance rather than texture accuracy, which changes your yarn choice significantly.
Choose a smooth, slightly shiny acrylic yarn in bright, saturated colors rather than the matte cotton used for most other projects on this list — the sheen reads as “candy” far more convincingly than cotton ever could.
- Keep the limbs and ears as small rounded bumps rather than separate jointed pieces
- Stuff firmly for a plump, chunky candy silhouette
- Make a small batch in different colors for a rainbow gummy bear collection
Because the shape is compact and doesn’t require much shaping precision, this is a quick project to batch out in an evening, which makes it well suited to selling as sets rather than single pieces at a craft market or online shop. Kids in particular tend to respond well to a colorful lineup of these on display.
21. Spiky Pineapple With a Diamond Texture Body
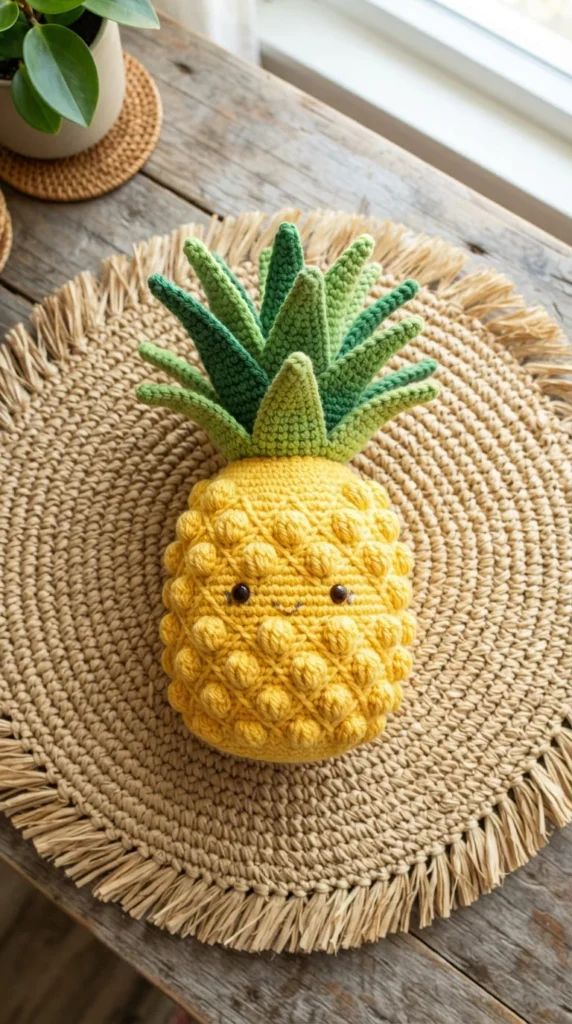
A pineapple’s crosshatched surface pattern is one of the more advanced textures on this list, but it’s achievable using a simple technique: work post stitches in a diagonal grid pattern across the surface after the base shape is complete, rather than trying to build the texture into the base rounds themselves.
- Crochet the body as a tall, slightly tapered cylinder in golden yellow
- Add the diamond texture afterward using surface slip stitches in a slightly darker shade
- Build the leafy crown from several pointed leaf shapes of varying length, layered and sewn into the top
The crown is where most of the visual character comes from, so don’t rush it — uneven leaf lengths and a slightly messy arrangement actually look more realistic than a perfectly symmetrical crown. This project takes longer than most food items here because of the surface texture step, but it stands out as a centerpiece project rather than a quick keychain.
22. Pastel Macaron With a Piped Cream Filling
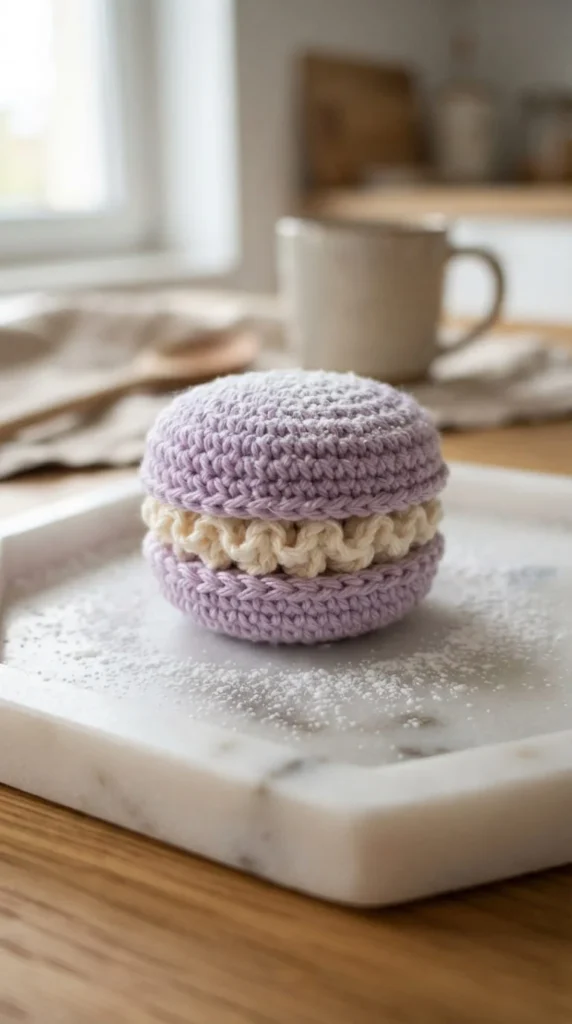
Macarons are built from two flat, smooth discs joined by a filling layer, and the challenge here is getting the classic ruffled “foot” edge that real macarons have along the seam.
Crochet each shell as a flat circle, then work one extra round of small picot stitches around the very edge before joining — this creates the delicate ruffled texture along the seam line that distinguishes a macaron from a plain cookie shape.
- Choose soft pastel colors like lavender, mint, or blush pink for an authentic bakery look
- Crochet the filling as a slightly wider disc than the shells so it peeks out around the edge
- Keep the shells lightly stuffed so they stay flat rather than puffing into a ball
This project is one of the more delicate builds on this list, and it’s a satisfying one to master since the picot-edge technique transfers directly to lace trims, doily edges, and other decorative crochet work outside the food category. A tray of mixed-color macarons also makes an appealing gift box arrangement.
Conclusion
Crochet food amigurumi gives you a huge amount of creative range packed into small, quick projects — from five-minute fruit slices to weekend-long textured centerpieces like the pineapple or corn on the cob. The real value in working through a list like this is the variety of techniques you pick up along the way: color changes, surface texture stitches, folded shapes, and two-piece construction all show up in different combinations across these 22 ideas. Pick one that matches your current skill level, keep a stitch marker handy, and let the smaller mistakes teach you as you go. Once you’ve built a few of these, mixing and matching details between patterns becomes second nature, and your own original food designs won’t be far behind. Grab some scrap yarn and start with whichever project caught your eye first.