
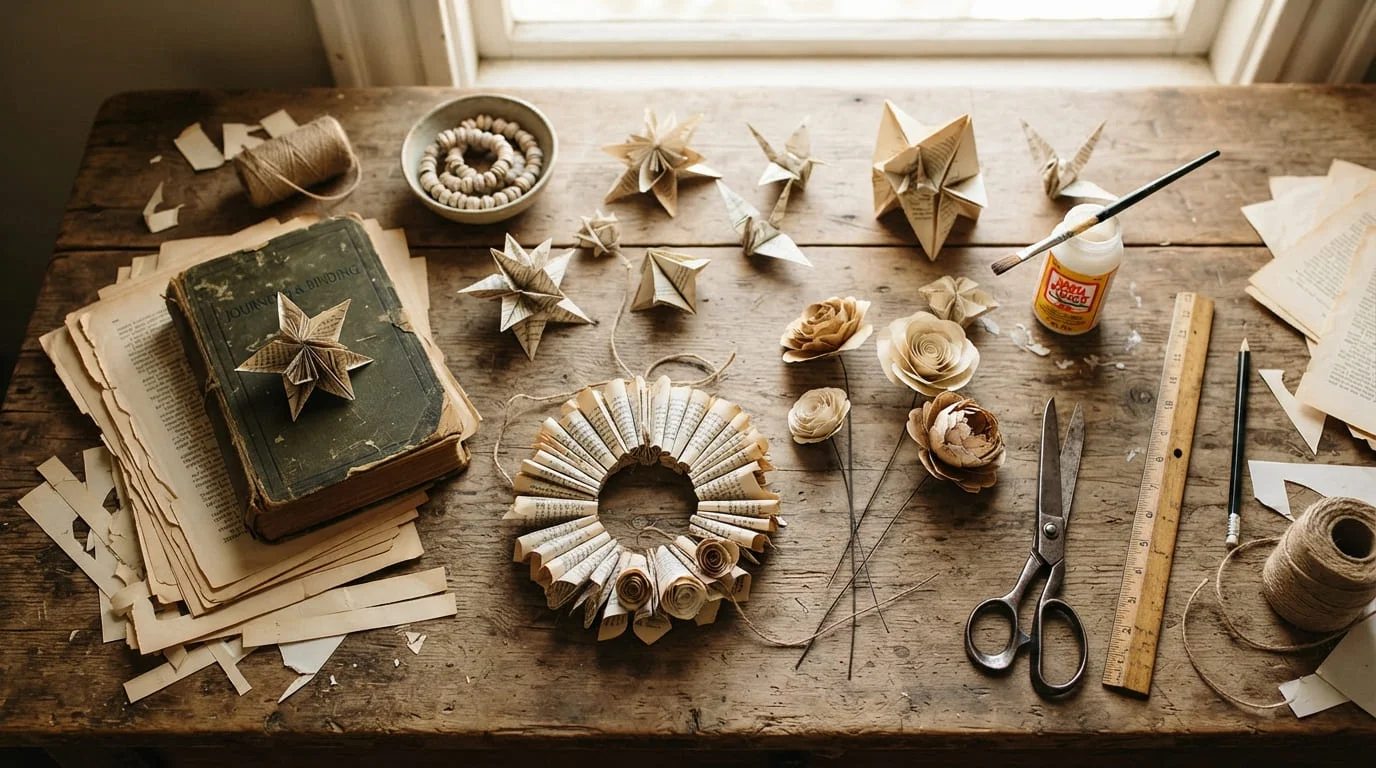
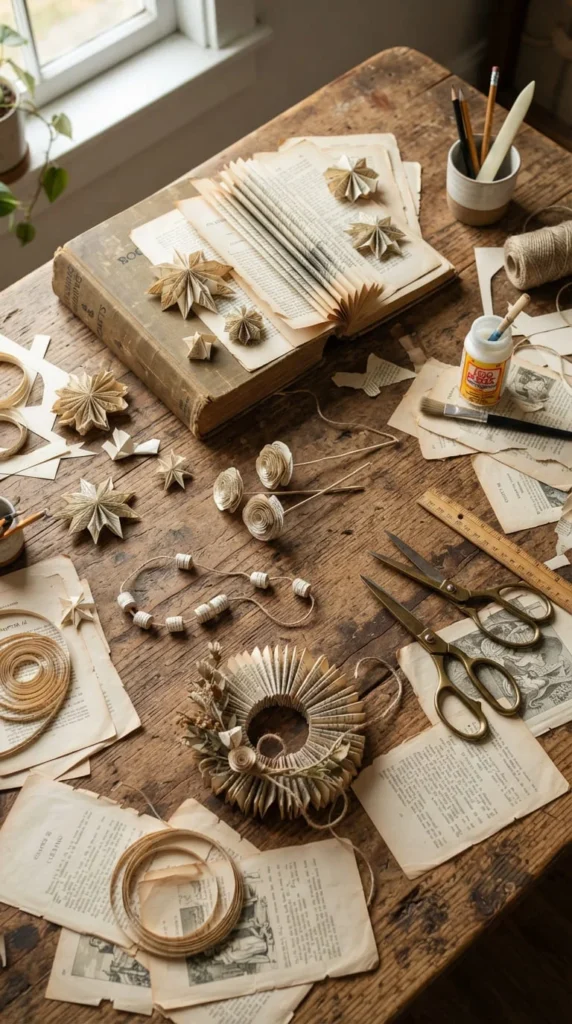
Old books can become far more than shelf clutter. Their pages, covers, spines, and sturdy bindings offer inexpensive material for handmade decorations, gifts, journals, and practical projects. If you have damaged books that are no longer readable, recycled book crafts can give them a second life while adding vintage character to your home.
The key is choosing books that are genuinely suitable for crafting. Avoid rare, collectible, signed, or potentially valuable editions, and check whether a book could be donated, sold, or repaired before cutting it apart. For craft projects, thrifted paperbacks, outdated manuals, damaged novels, and books with missing pages can be useful starting points.
1. Fold an Old Book Into a Geometric Sculpture
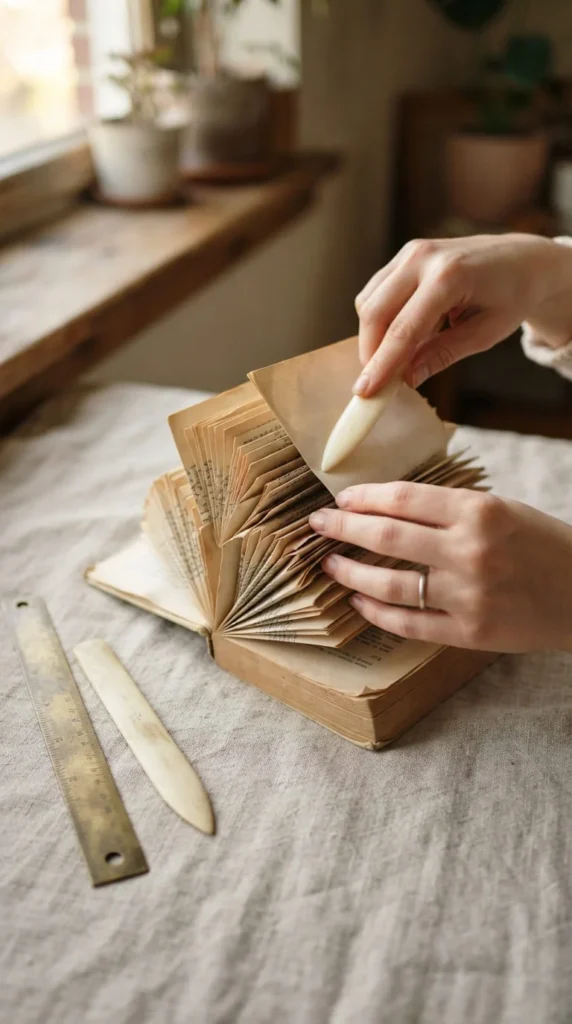
Book folding turns ordinary pages into a three-dimensional decorative object without requiring paint or complicated materials. Instead of removing pages, you fold them repeatedly according to a pattern, allowing the closed book to form a recognizable shape when viewed from above or from the side.
For a beginner project, start with a simple heart, star, leaf, or geometric design. A thick book with several hundred pages gives you more folding opportunities, although the exact page count depends on the pattern.
Use a ruler to make consistent creases. A bone folder can help create sharp folds, but the back of a spoon can work for simple projects.
Keep the cover attached while folding so it supports the finished sculpture. Work slowly and mark your starting and ending pages before you begin.
Helpful tip: practice the first few folds with a spare book. Book folding becomes much easier once you get comfortable making the same crease repeatedly.
The finished piece works beautifully on a bookshelf, mantel, desk, or coffee table and has a sculptural quality that makes an ordinary book look completely different.
2. Make a Hollow Book Keepsake Box
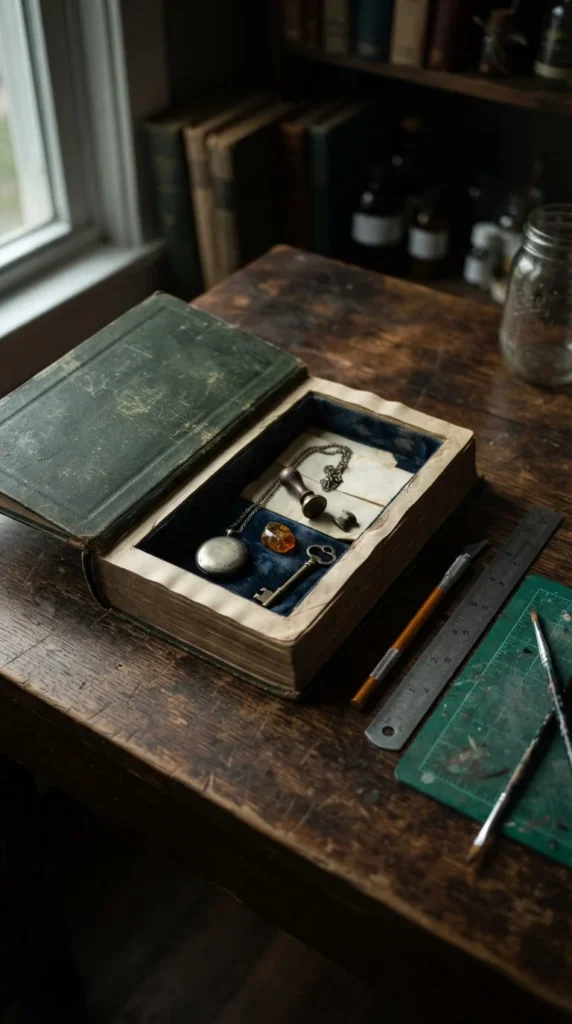
A hollow book can become a discreet storage container for small objects such as photographs, jewelry, letters, or craft supplies. The basic concept involves cutting a cavity into the interior pages while keeping the cover and outer edges intact.
Choose a book that has little resale or reading value. Hardcover editions are generally easier to work with because their covers provide a firm exterior.
Mark a rectangular area several pages in from the front. Carefully cut through a small number of pages at a time rather than forcing a blade through a thick stack. A sharp craft knife and metal ruler are useful, and protective cutting equipment should be used appropriately.
Once the cavity reaches the desired depth, adhesive can be used to stabilize the page edges. Let the book dry completely before storing anything inside.
This project takes patience, so it is better suited to older children with adult supervision or adults rather than very young crafters.
Use the finished book as a decorative storage piece on a shelf. It can hold private letters, spare keys, keepsakes, or tiny mementos while still looking like an ordinary book.
3. Shape Book Pages Into Vintage Roses
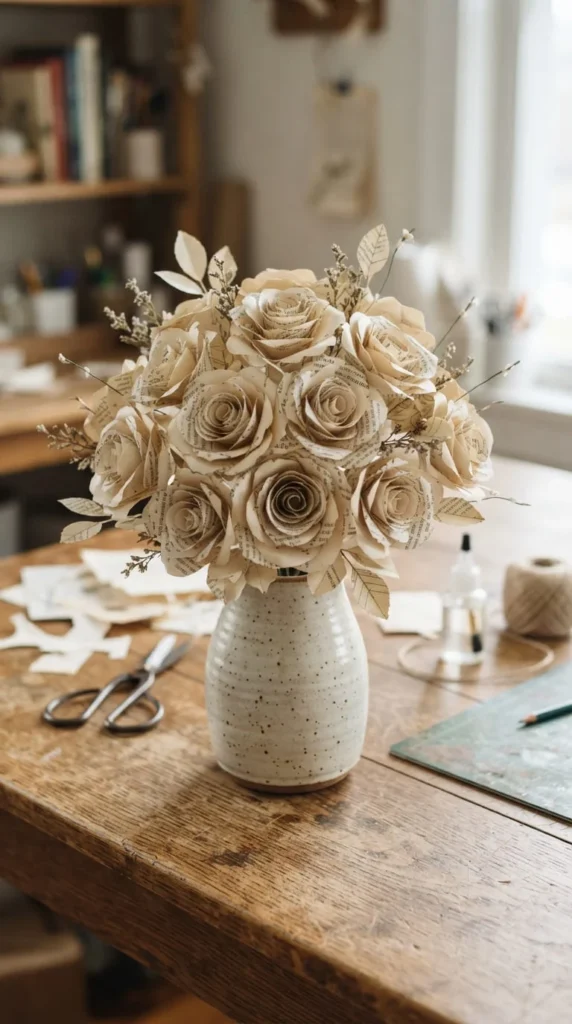
Book-page flowers are among the easiest ways to turn old paper into home decor. Roses can be made by cutting petals into slightly different sizes, curling their edges, and attaching them around a central base.
For a natural look, vary the petal shapes instead of making every piece identical. Gently roll the outer edges around a pencil or thin dowel before gluing them together.
You can leave the paper in its original cream or ivory shade for a clean vintage appearance. For darker results, lightly brush diluted coffee or tea over selected petals and let them dry before assembly.
Several small roses can be grouped into a bouquet, wreath, gift topper, or centerpiece. A single oversized paper flower also works as wall decor.
Material idea: combine old book pages with kraft paper or sheet music from an unwanted music book to create contrast.
Hot glue works well for assembling thicker paper flowers, while craft glue can be useful when you have more time for drying.
Keep finished flowers away from open flames, fireplaces, and areas where moisture is common.
4. Build a Book-Page Wreath for Your Wall
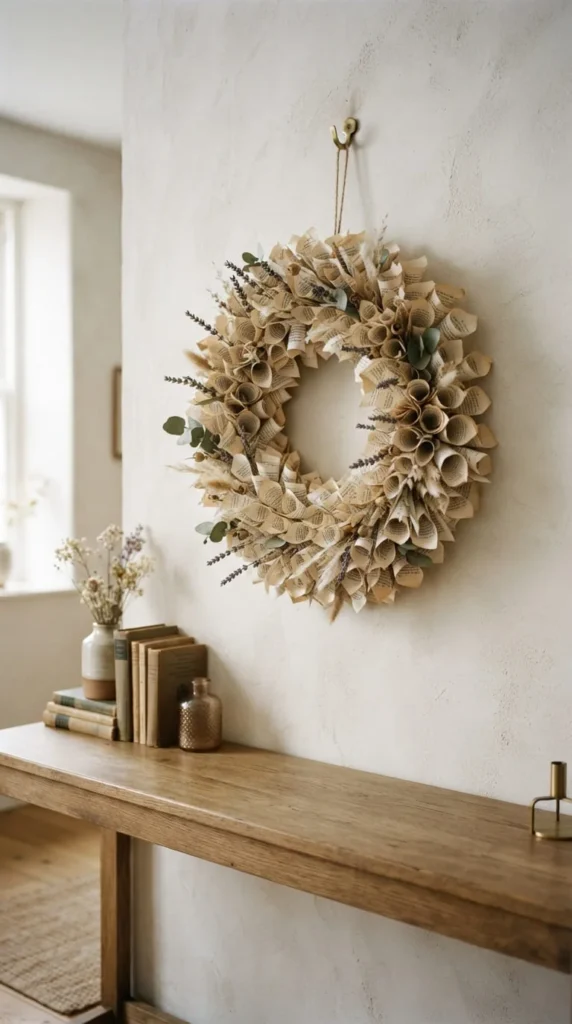
A paper wreath can bring texture to a blank wall without the cost of traditional seasonal decor. Start with a lightweight wreath base made from cardboard, foam, grapevine, or another suitable craft material.
Cut book pages into leaf, oval, or pointed shapes. Fold some pieces down the center to give them dimension. Arrange the paper pieces around the base, alternating directions so the wreath does not look flat.
For a minimalist home, use only natural paper. For holidays, add small fabric ribbons, dried foliage, paper flowers, or seasonal shapes.
A wreath can also become a year-round decoration when you keep the colors neutral. For autumn, warm paper tones pair nicely with dried leaves. During winter, white paper snowflakes can create a soft effect.
Before gluing anything permanently, lay all the pieces around the base and adjust the spacing. This simple step helps prevent bare patches.
If the book pages are thin, attach two pieces together before shaping them. The extra layer creates a sturdier leaf and helps the wreath retain its form.
5. Turn a Page Into Blackout Poetry
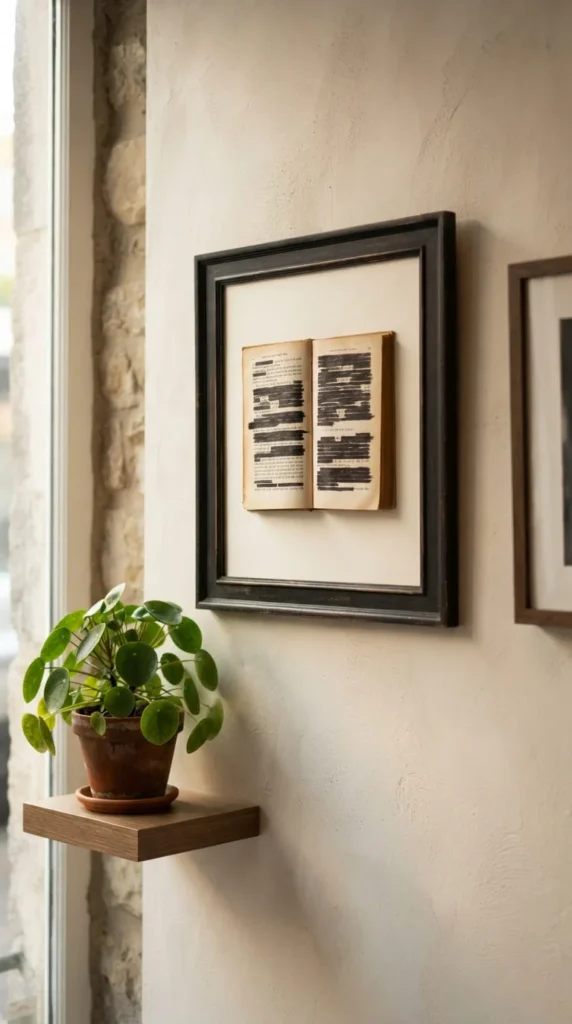
Blackout poetry is a creative way to reuse a page without cutting or folding it. Instead, you select individual words from an existing page and cover the surrounding text with a dark marker, pencil, paint, or ink.
The remaining words form a short poem or message. Because the original page already provides the word choices, the process can feel like discovering a hidden piece of writing.
Choose pages with dense text and enough words to create several possible combinations. Read the page several times before marking anything. Lightly circle words with pencil first so you can change your mind.
For display, place the completed page behind glass in a simple frame. You can create a small collection using pages from different sections of the same discarded book.
This project is also suitable for classrooms, creative writing sessions, or quiet afternoon crafting.
If you are using an especially old or fragile page, scan it first so you have a digital copy before adding ink.
Blackout poetry offers a low-cost project for anyone who wants to work with old books but does not enjoy cutting, folding, or complex assembly.
6. Assemble a Mixed-Media Junk Journal
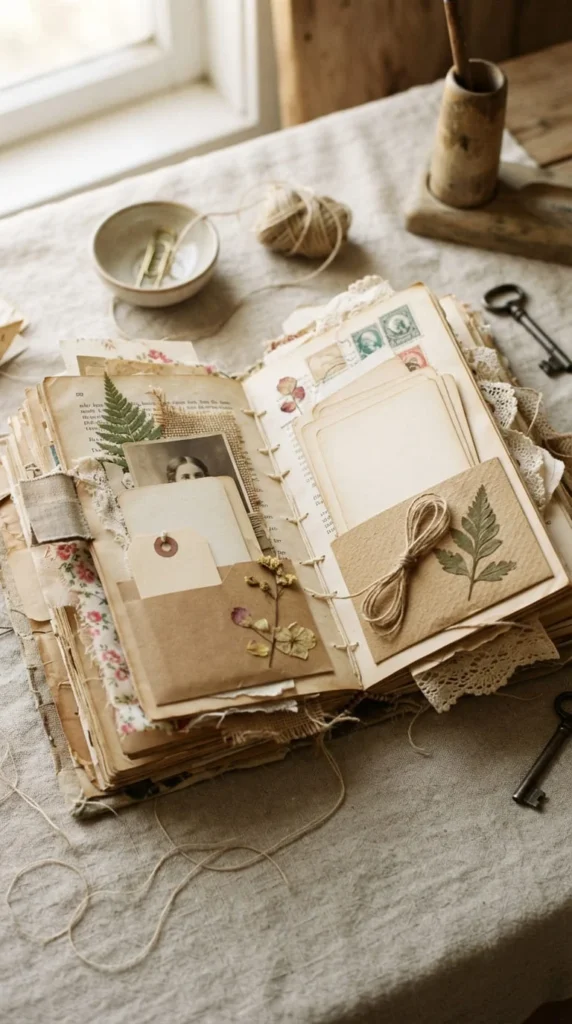
Old book pages make excellent foundations for junk journals because their printed texture adds character before you add anything else. Combine them with envelopes, kraft paper, fabric scraps, tags, postcards, pockets, and blank writing sheets.
You can remove selected pages from a damaged book and punch holes along one edge. Bind the pages with ribbon, embroidery thread, binder rings, or another suitable journal-binding method.
Add pockets to hold small items such as pressed leaves, photographs, receipts, or sketches. Fold a book page into an envelope and glue only three sides, leaving the fourth side open.
Do not worry about making every page match. The appeal of a junk journal comes from the mixture of textures and materials.
For a useful everyday journal, reserve some pages for notes and others for creative collages. A travel journal can include maps and ticket pieces, while a gardening journal could use botanical images and handwritten observations.
This project also gives you a practical way to use small paper scraps that would otherwise be thrown away.
7. Roll Paper Beads for Handmade Jewelry
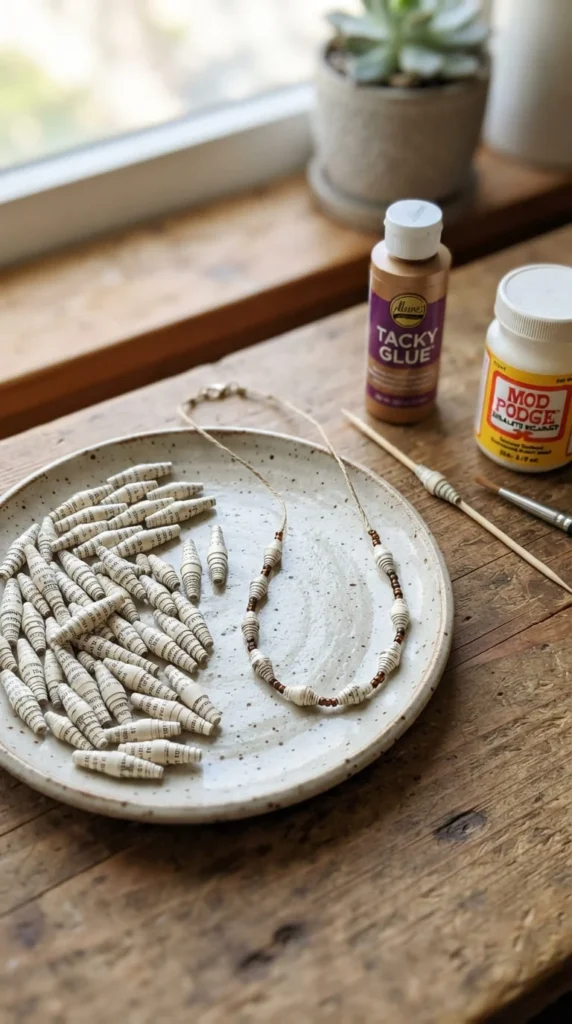
Paper beads are a smart way to use narrow leftover strips from other book crafts. Cut long triangular or rectangular strips from old pages, add a thin layer of adhesive, and roll each strip tightly around a skewer or bead-making tool.
Different strip shapes create different bead profiles. Long triangles usually create tapered beads, while rectangular strips can form more uniform cylinders.
Once the beads dry, seal them with a suitable clear craft finish. This adds protection and gives the paper a smoother surface.
String the beads onto cord to create necklaces, bracelets, keychains, or decorative garlands. Combine book-page beads with wooden or ceramic beads for a more varied design.
If you want a vintage appearance, leave the pages natural. For a colorful project, paint the edges after the beads have dried.
Paper jewelry is lightweight, inexpensive, and easy to customize. It can also make a thoughtful handmade gift because each bead contains a little piece of an old book.
Keep finished jewelry away from prolonged moisture so the paper remains in good condition.
8. Make Simple Bookmarks for Kids
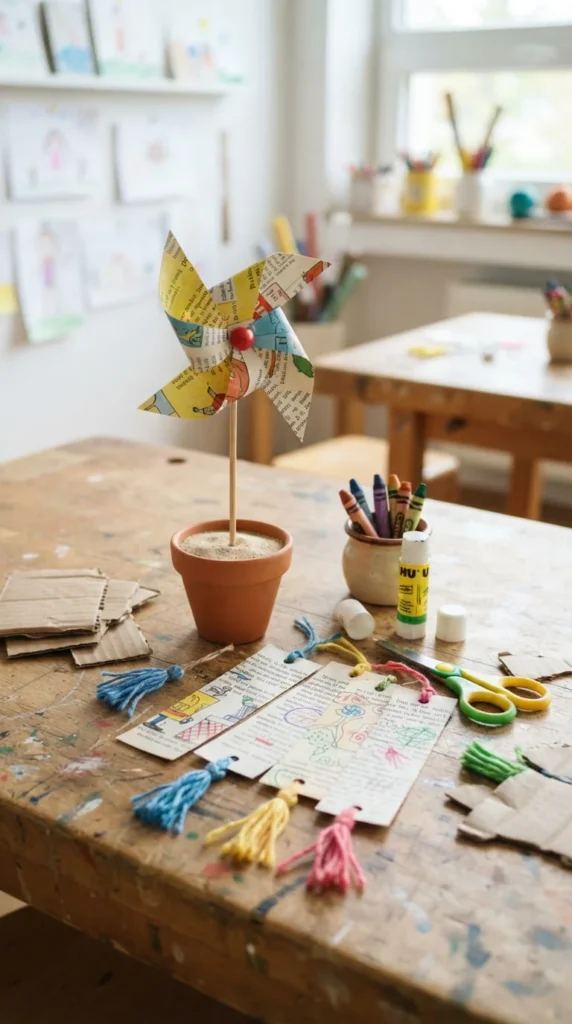
Bookmarks are one of the easiest recycled book crafts for children because they require very few materials. Cut sturdy strips from unwanted book covers or several layers of paper pages.
Children can decorate the bookmarks with crayons, colored pencils, stickers, simple drawings, pressed leaves, or paper shapes. For added durability, cover the finished bookmark with clear adhesive film or laminate it using an appropriate laminating machine.
If the book pages contain interesting illustrations, use those sections instead of plain text. Old children’s books with damaged covers can be especially useful for this project, provided they are not valuable editions.
Punch a hole near the top and add yarn or ribbon as a tassel. For younger children, keep the shapes simple and supervise cutting and gluing.
Bookmarks also work well for library activities, reading clubs, birthday parties, and classroom craft sessions.
You can create several from a single damaged book, making this a practical project when you have many old volumes that are no longer suitable for reading.
9. Fold Seasonal Ornaments From Book Pages
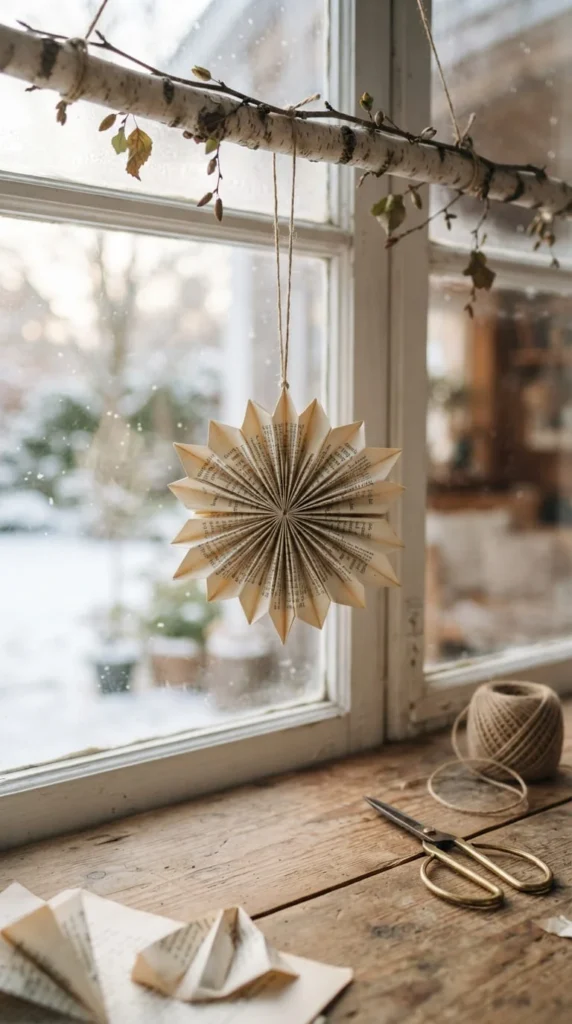
Old book paper can become lightweight seasonal ornaments for trees, garlands, windows, or gift packages. Snowflakes, stars, trees, pumpkins, leaves, and simple geometric forms all work well.
For a three-dimensional ornament, cut several matching shapes and attach them along their center folds. Open the pieces slightly so they form a dimensional object.
Add a small loop of thread or ribbon at the top for hanging. If the paper feels too thin, glue two sheets together before cutting.
You can change the appearance without paint by choosing books with different paper tones. Older pages often have a naturally warm color, while newer discarded books may be closer to white.
Store the ornaments flat or in a shallow container between seasons to prevent crushing.
For holiday crafting with children, prepare the shapes in advance and let them handle the decorating and assembly. This keeps the activity simple while still allowing plenty of creativity.
10. Create Eco-Friendly Gift Wrap and Tags
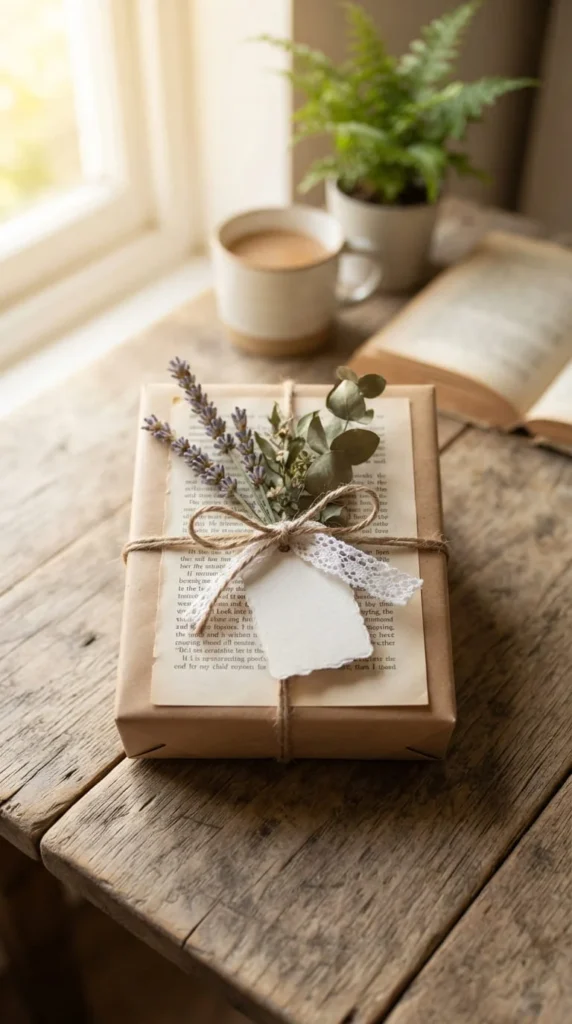
A beautiful gift does not always require expensive wrapping paper. Clean, undamaged book pages can become decorative wrapping for small presents, especially when paired with simple natural materials.
Use pages for small boxes, candles, handmade soaps, notebooks, or other gifts that fit their size. If the pages are fragile, reinforce the inside with plain kraft paper.
For tags, cut rectangles, circles, or decorative shapes from thicker pages or old covers. Punch a small hole and attach the tag with twine.
Layer different paper tones to create depth without adding much material. A dried leaf, tiny paper flower, or simple ribbon can finish the package.
Avoid wrapping food directly in old printed pages because the paper is not designed as food packaging.
This approach is especially useful when you have leftover pages after another craft project. Rather than throwing away small sections, turn them into gift tags, envelope liners, or decorative bands around packages.
11. Turn Pages Into Decorative Coasters

Coasters can be made from layered book paper, but durability depends on proper sealing. Start with a sturdy base such as cork, MDF, or thick cardboard.
Cut book pages to fit the base and attach them smoothly, working from the center outward to reduce wrinkles. Once the adhesive has dried, apply several suitable protective coats according to the product instructions.
Round shapes are forgiving because small alignment differences are less visible. Squares can create a cleaner modern appearance.
Try arranging several small page fragments into a collage instead of using one complete page. You can combine text-heavy pieces with illustrations or decorative margins.
The finished coasters should be treated as decorative surfaces rather than waterproof kitchenware unless the entire construction has been properly sealed with a finish designed for that purpose.
Let each layer cure fully before applying another. Rushing the drying stage can trap moisture and cause paper to wrinkle.
This project works particularly well with books that have attractive diagrams, illustrations, or typography.
12. Repurpose the Book Cover as Wall Art
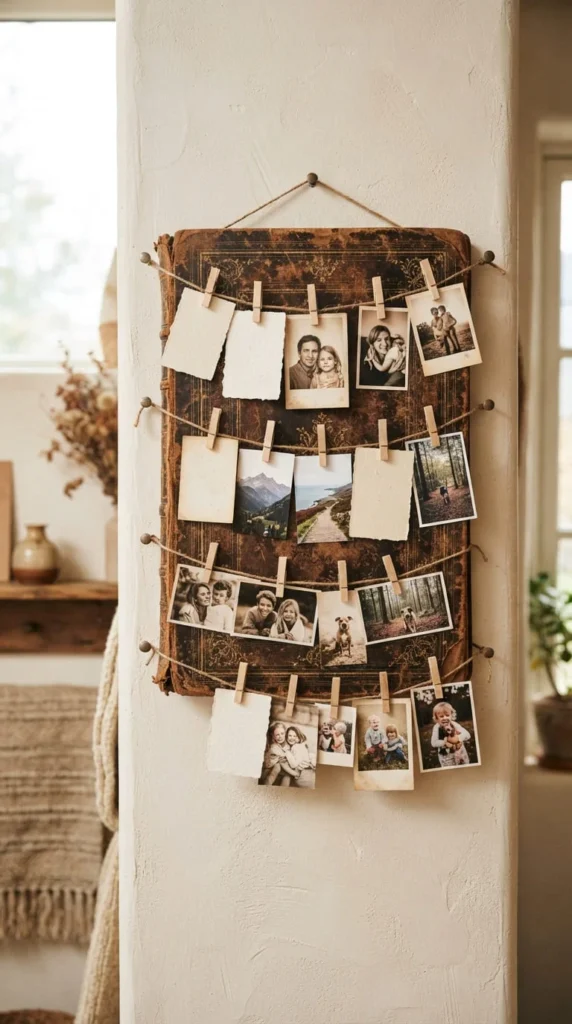
Do not automatically discard the cover after removing useful pages. Hardcover covers are often strong enough to become the base for another craft.
Wrap the cover with fabric, scrapbook paper, wallpaper remnants, or several carefully arranged book-page fragments. Add a photo, pressed botanical specimen, illustration, or small collage.
For a simple display board, attach clips or pockets to the front. You can use it to hold photographs, cards, sketches, or changing seasonal artwork.
If the original cover has an attractive color or texture, keep it visible and add only a small decorative feature.
Old covers can also become miniature signs, trays, desk organizers, or backing boards for wall displays. Avoid heavy objects unless the cover has been reinforced.
Before cutting or gluing, inspect the cover for loose layers and repair them with an appropriate adhesive if necessary.
This idea makes use of a part of the book that many paper crafts leave behind, helping reduce leftover waste from larger projects.
13. String Together a Paper Garland
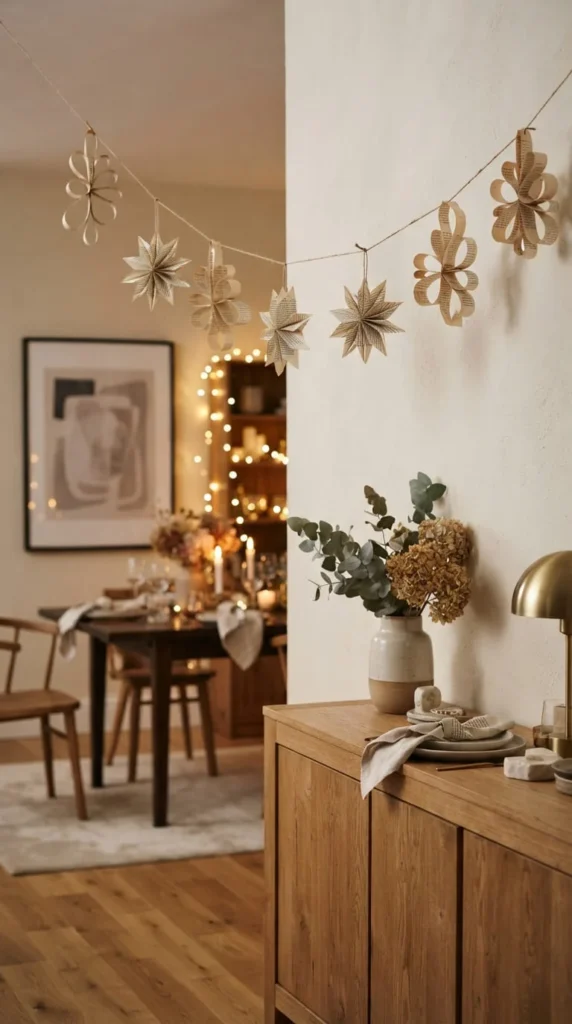
A book-page garland can decorate a mantel, party table, reading corner, or bedroom without requiring many supplies. Cut the pages into circles, diamonds, leaves, strips, or triangles depending on the style you want.
Fold some shapes down the center to create a three-dimensional effect. Others can remain flat to keep the garland lightweight.
Thread the pieces onto cotton cord, twine, ribbon, or strong string. Leave small gaps between shapes so each section remains visible.
For a party, alternate book paper with colored cardstock. For everyday home decor, natural paper and simple twine create a quieter appearance.
A garland is also a useful group project because several people can prepare shapes at the same time. Give each person one task—cutting, folding, decorating, or threading.
When hanging the finished decoration, use suitable removable hooks or another support designed for the wall surface.
14. Make Vintage Botanical Wall Art
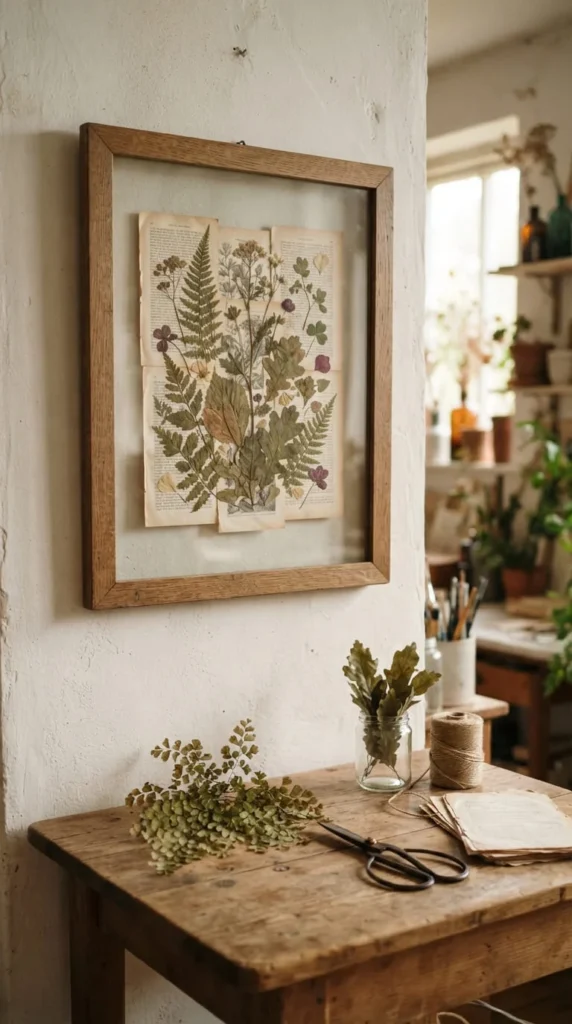
Old book pages create a natural background for botanical art. Their muted tones work especially well with dried leaves, pressed flowers, fern shapes, and botanical illustrations.
Start with a sturdy sheet of paper or cardboard as the backing. Arrange your botanical elements before gluing so you can experiment with spacing.
For a simple design, place one pressed leaf in the center of a book page. For a richer composition, create a small collection of leaves with different shapes and textures.
Use acid-free materials when preserving delicate botanical specimens for long-term display, especially if you care about maintaining their appearance.
Frame the finished artwork behind glass and keep it away from direct sunlight and high humidity. Strong sunlight can fade both paper and natural plant material over time.
You can create a coordinated set of three small frames using different page layouts and botanical specimens. This gives a wall a collected, vintage feel without requiring complicated illustration skills.
15. Give a Lampshade a Paper Makeover
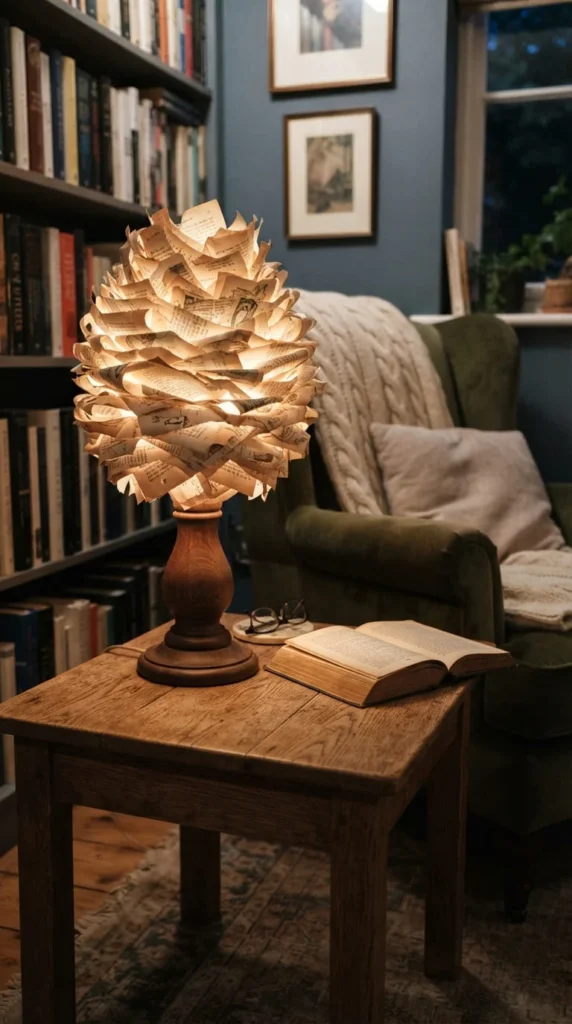
A plain lampshade can become a decorative feature with carefully attached recycled book pages. This project works best when you decorate an existing lampshade frame rather than building an electrical fixture from scratch.
Use pages as narrow panels, overlapping strips, or small decorative shapes. Attach them to the shade with an adhesive compatible with the shade material.
Safety matters here: paper is flammable, so keep it away from bulbs that generate substantial heat and never place loose paper near an exposed flame. LED bulbs that remain cool are generally a better choice, but the lamp manufacturer’s safety instructions should always take priority.
Do not cover ventilation openings on a shade if doing so could interfere with the fixture’s safe operation.
For a softer look, use thin pages and leave some gaps between layers so light can pass through. The printed text creates subtle shadows when illuminated.
Test the finished shade carefully before regular use and discontinue use if it becomes unusually hot.
16. Turn a Book Into a Faux Plant Display
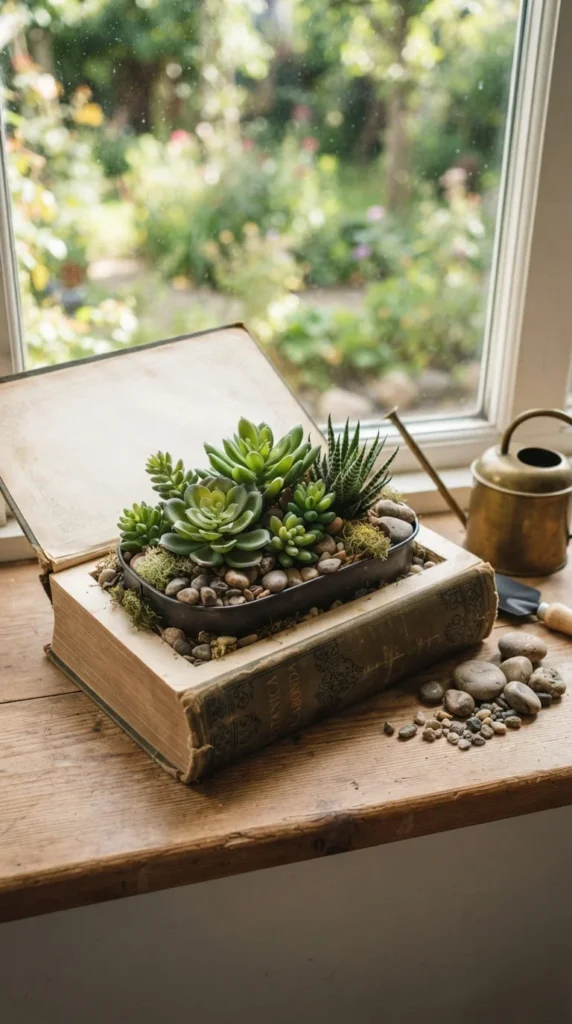
A hollow book can become an attractive planter-style display, but real soil and water can damage paper and bindings quickly. A faux succulent or small removable plant container is a safer approach for a decorative version.
Create or use a hollow compartment large enough to hold a small waterproof container. Keep the actual plant pot separate from the book whenever possible.
Fill the container with decorative pebbles and a small artificial succulent, moss arrangement, or another lightweight faux plant.
The contrast between aged pages and green foliage gives the display a library-inspired look. Place it on a bookshelf, entry table, or reading nook.
Avoid placing water directly inside the book. Even a small leak can spread through the pages and damage furniture beneath it.
For a more permanent display, use a removable container that can be taken out for cleaning or replacement.
17. Fold a Heart-Shaped Book Sculpture
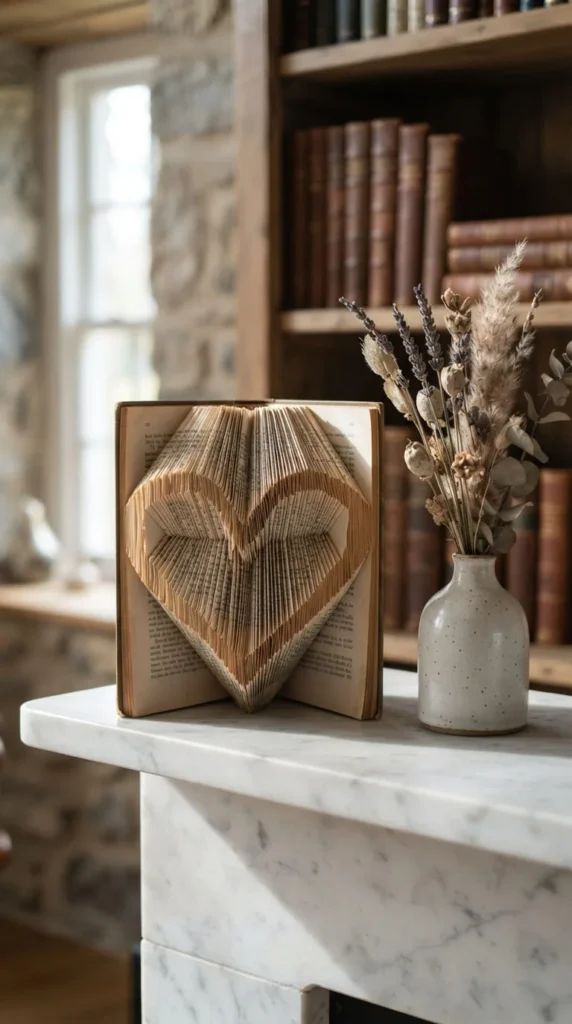
A folded paper heart makes a thoughtful decoration for a bedroom, wedding display, anniversary table, or reading corner. It uses the existing thickness of a book to create a recognizable silhouette.
Choose a book with a flexible binding and enough pages for your selected pattern. Mark the pages according to a heart template, then fold each page consistently toward the center.
The accuracy of the folds determines the final outline. Take your time around the curved sections because uneven folds can make the shape look jagged.
You can leave the heart standing naturally on a shelf or add a small base if the book does not balance well.
For a wedding or anniversary display, pair two folded books with small dried flowers. For everyday decor, a single neutral paper heart works beautifully against a dark bookshelf.
18. Experiment With an Altered Book Artwork
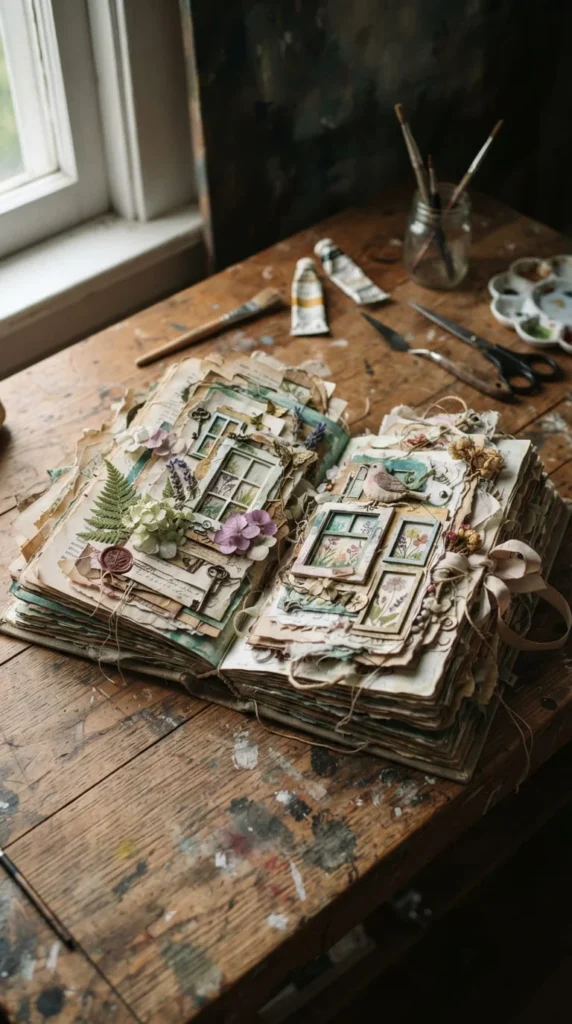
Altered books take recycled book crafts into a more artistic direction. Instead of making one simple object, you transform selected pages into a layered visual composition.
You might cut windows into several pages, attach small pockets, add fabric, create raised paper elements, or combine photographs and found materials.
Start with one clear theme. Nature, travel, memories, dreams, and imaginary rooms can all provide direction. Without a theme, it is easy to add too many unrelated materials.
Use lightweight elements so the binding does not become excessively strained. Adhesive should be applied sparingly, especially when working with thin pages.
This project is best treated as an art piece rather than a functional book. It gives you room to experiment with texture, depth, shadows, and unusual materials.
Keep your first altered book simple. A few carefully placed dimensional details can have more visual impact than covering every page.
19. Build a Holiday Tabletop Collection
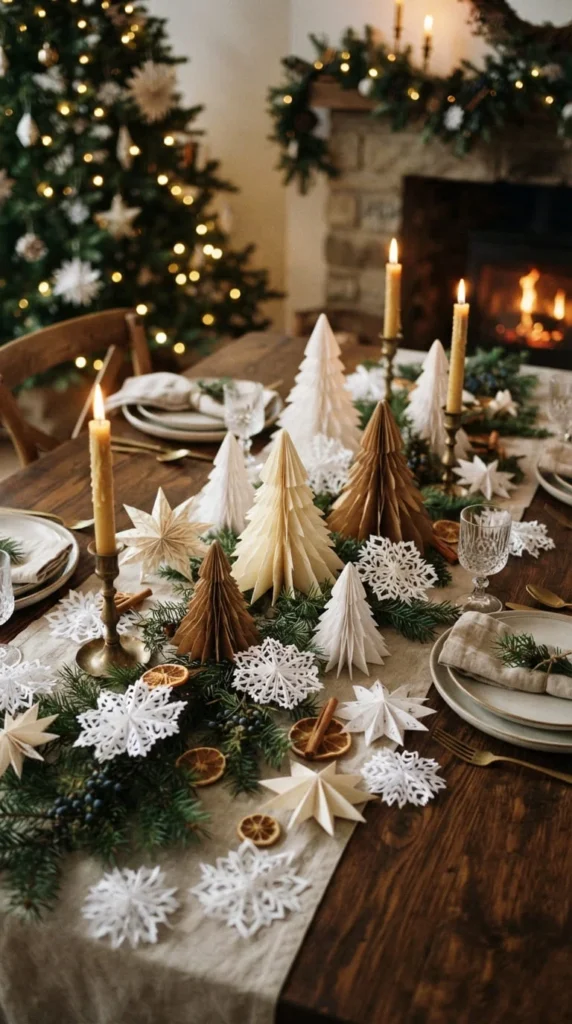
Instead of creating one large decoration, use old books to make a coordinated set of small holiday pieces.
Cut or fold pages into miniature trees, stars, snowflakes, cones, or folded ornaments. Place them together on a tray with natural branches and simple fabric ribbon.
Vary the heights so the display feels layered. Small paper trees can stand beside taller folded forms, while flat snowflakes can be scattered around the base.
The natural cream color of old paper pairs nicely with wood, greenery, linen, and neutral ceramics. If you prefer color, add a few painted paper elements rather than covering everything.
This collection can be changed throughout the year. Replace snowflakes with paper leaves in autumn or simple flowers in spring.
Because each piece is lightweight, storage is easy. Stack flat ornaments between sheets of plain paper and keep three-dimensional forms in a shallow box.
20. Fold Mini Envelopes for Tiny Keepsakes
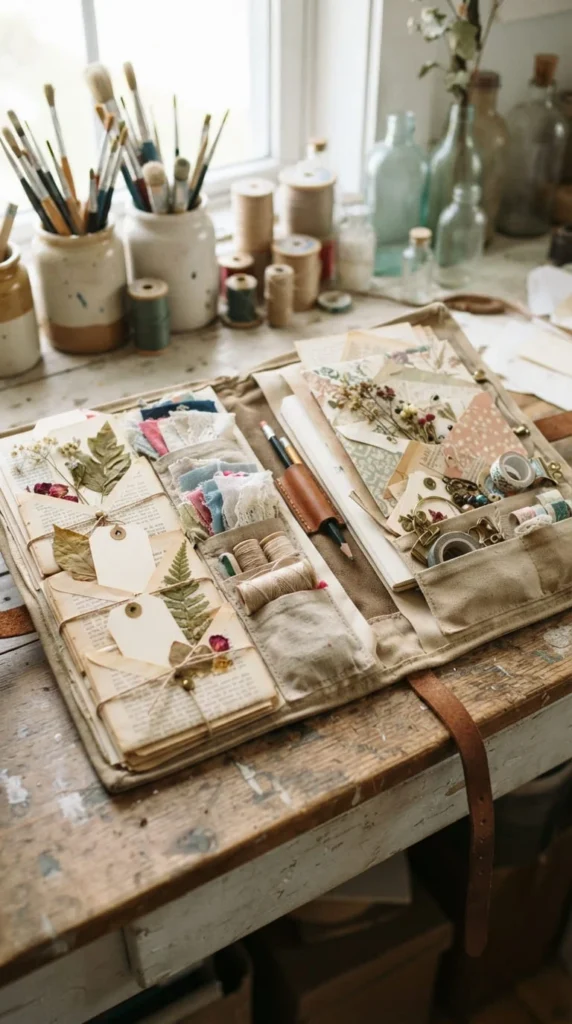
Small envelopes are useful in journals, memory albums, gift boxes, and craft organizers. Book pages already have a naturally aged appearance, so they can look decorative without extra treatment.
Cut a square or rectangle from a page and fold the corners toward the center. Secure the side flaps while leaving the top flap open.
For stronger envelopes, glue the book page onto thin cardstock before folding. This also makes the finished pocket less likely to tear.
Use them to store pressed flowers, small photographs, handwritten notes, stickers, paper scraps, or tiny memorabilia.
You can attach several envelopes to a junk journal page, creating hidden storage throughout the book. Alternatively, mount them on a craft board and use each pocket for a different category.
Avoid storing objects that are heavy, wet, sharp, or bulky because they can damage the paper.
21. Create a Lightweight Paper Mobile
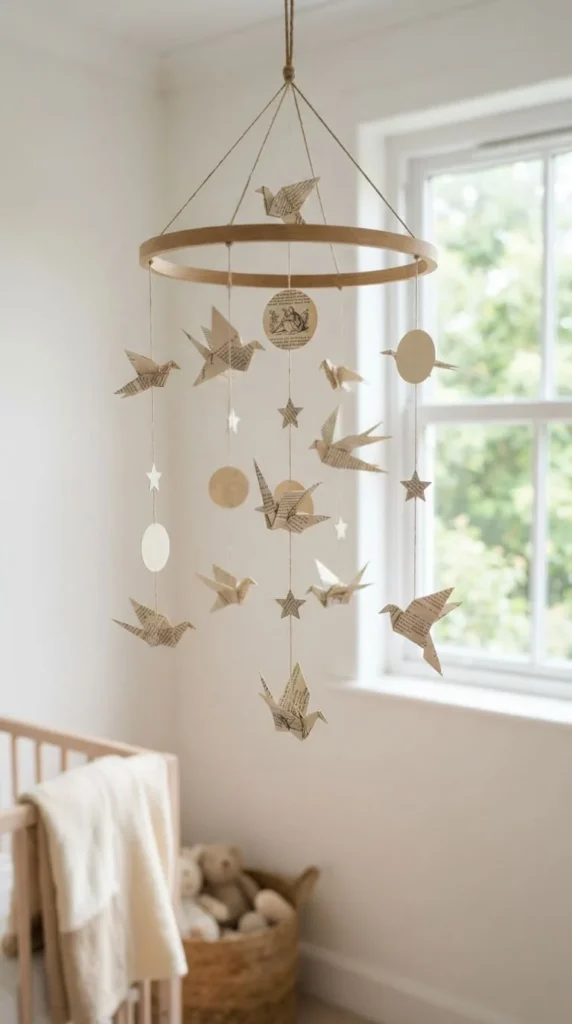
Paper mobiles are a creative way to use old pages without requiring a large amount of material. Cut or fold lightweight shapes such as birds, leaves, stars, butterflies, or simple geometric forms.
Attach the shapes to several lengths of thread and suspend them from a wooden hoop or crossed sticks. Keep the pieces light so the structure remains balanced.
For a reading corner, use folded pages with simple natural shapes. For a child’s room, use colorful paper layered over recycled pages.
Keep the mobile securely out of reach of young children and away from fans, heaters, lamps, and other hazards.
The movement of the paper catches changing light and creates gentle shadows on nearby walls. It is particularly attractive beside a window where natural air movement can make the pieces shift slightly.
22. Decorate a Small Tray With Book Pages
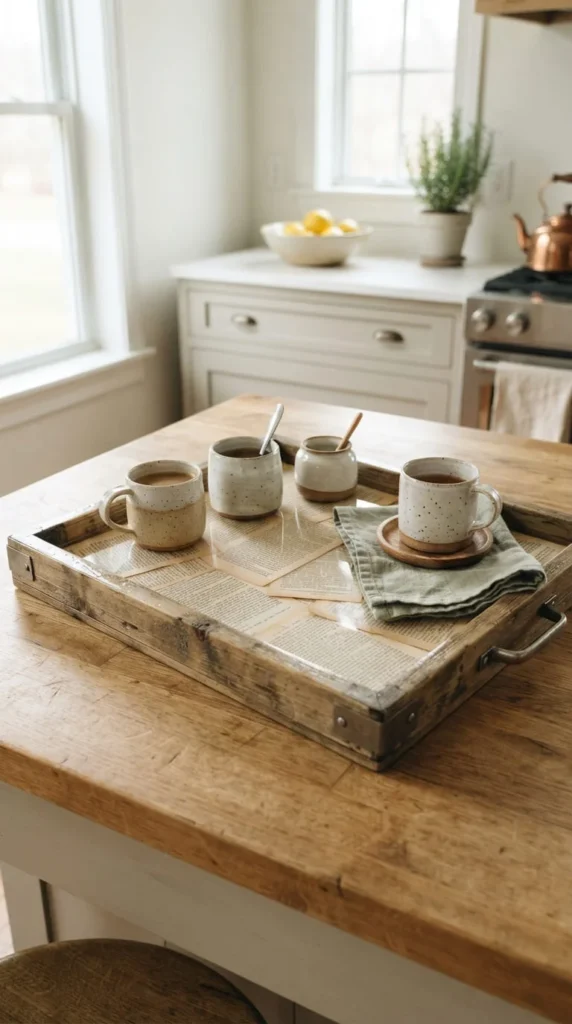
A plain wooden or MDF tray can become a decorative serving piece when its base is covered with recycled book pages.
Measure the inside surface carefully before cutting. Arrange the pages first so you can decide whether you want one continuous sheet, overlapping pieces, or a collage.
Attach the paper smoothly and allow it to dry fully. Then apply a suitable protective finish designed for the tray’s intended use.
Keep in mind that decorative paper trays are not automatically food-safe. If you plan to place food directly on the surface, use a finish and construction method specifically rated for that purpose, or use a removable food-safe liner.
For a decorative tray, books with maps, illustrations, diagrams, or interesting margins can create more visual variety than ordinary text pages.
Add simple handles or keep the original handles if they are sturdy.
23. Stack Books Into a Desktop Organizer

Old hardcover books can become a practical organizer when stacked and modified carefully. One simple approach is to use books as raised platforms beneath containers rather than cutting deeply into their structure.
For example, stack two or three sturdy books and place a small tray, pencil cup, or storage container on top. Secure the stack if it will be used in a location where it could tip.
Another option is to turn selected books into shallow storage compartments, provided the books are not valuable and the construction is strong enough for the intended use.
This idea works well in home offices, craft rooms, and reading areas. The books add height while keeping supplies visually connected to the room’s reading theme.
Avoid placing heavy objects high on unstable stacks. A low, wide arrangement is safer and more practical than a tall tower.
24. Fill a Memory Jar With Paper Stars
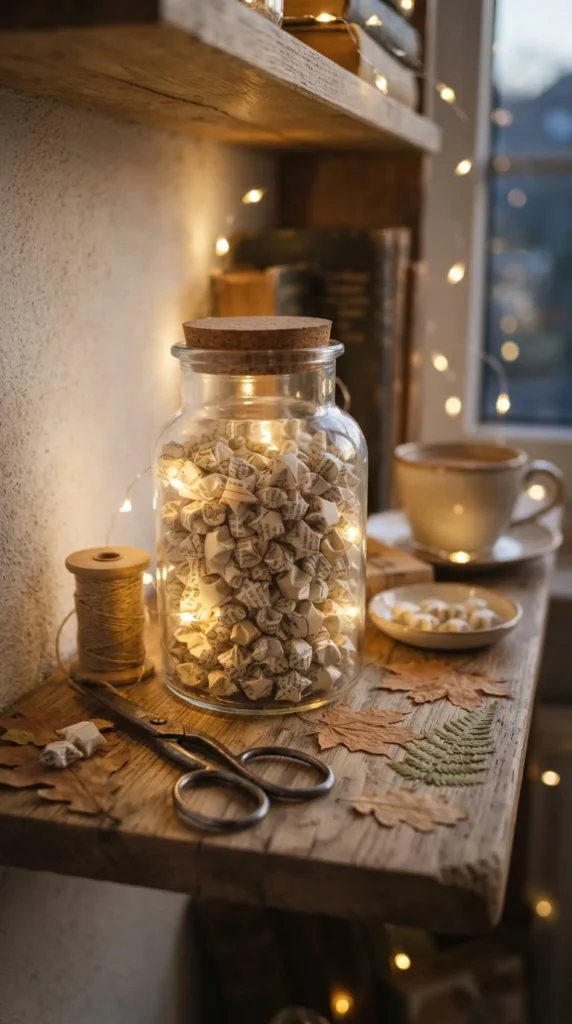
A memory jar gives tiny scraps of old book pages a second purpose. Cut pages into narrow strips, fold them into small stars, and place the finished pieces inside a glass jar.
You can write short memories on the reverse side before folding, although keeping the stars blank creates a simple decorative look.
For a relationship gift, use pages from a damaged novel and combine them with small handwritten notes on plain paper. For a birthday, write short wishes or favorite moments.
A jar filled with paper stars also works as desk decor, party decoration, or a handmade gift.
Use a clean, dry glass jar with a secure lid. Keep the finished piece away from moisture and direct heat.
If you have very small paper scraps left after other projects, this is an easy way to collect them rather than throwing them away.
Conclusion
Old books offer plenty of material for creative projects, from folded sculptures and paper flowers to journals, ornaments, organizers, and wall art. The best recycled book crafts start with an unwanted book that has little practical or resale value, then turn its pages or covers into something useful or decorative.
Before cutting, folding, or gluing, check whether the book could be donated or reused as a book. When crafting is the right choice, save your scraps for smaller projects such as beads, stars, tags, and envelopes.
Choose one project that matches your skill level, gather a few basic supplies, and give an overlooked book a completely new purpose.