
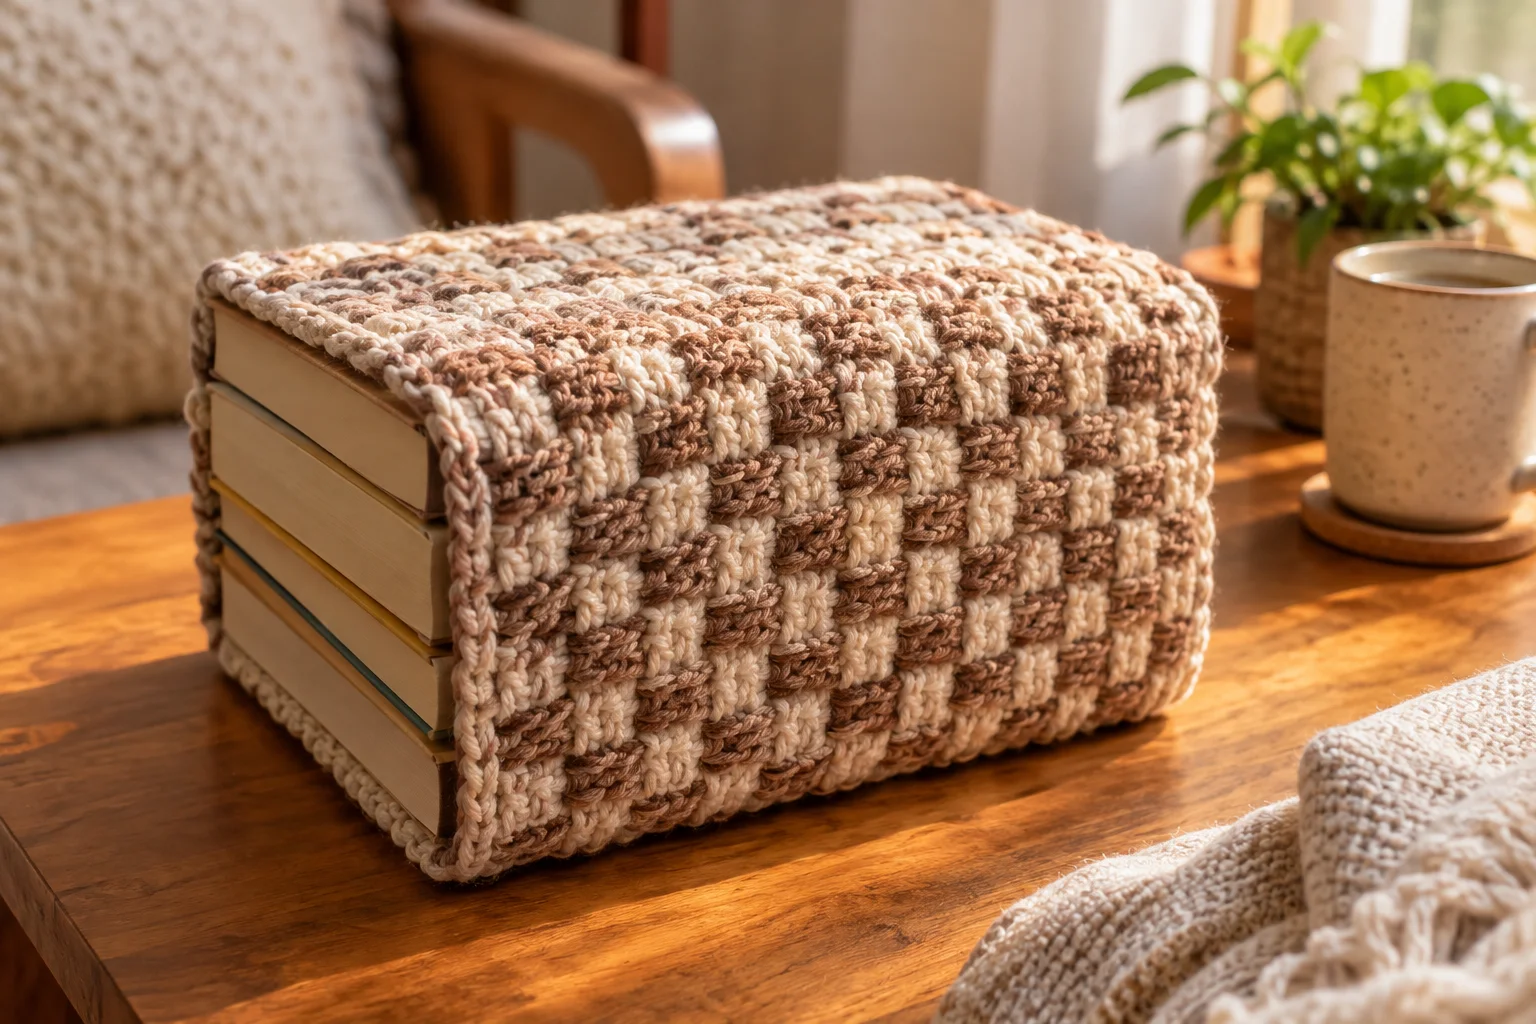
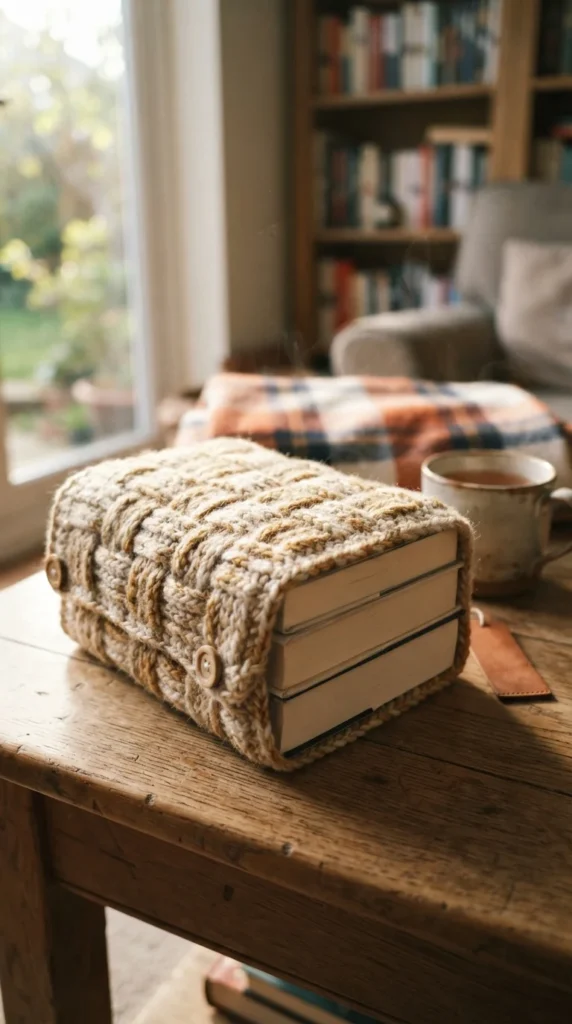
If you’ve ever tossed a paperback into a tote bag and pulled it out with a bent spine or a torn cover, you already know why crochet book covers have become such a popular project. They protect your books, add a personal touch to your reading routine, and give you a genuinely satisfying way to use up leftover yarn. This list walks through 21 crochet book cover ideas, from beginner-friendly granny-square wraps to more detailed appliqué and colorwork designs, so you can find one that matches your skill level, your yarn stash, and the book you’re trying to protect.
1. Diagonal Granny-Square Envelope Sleeve
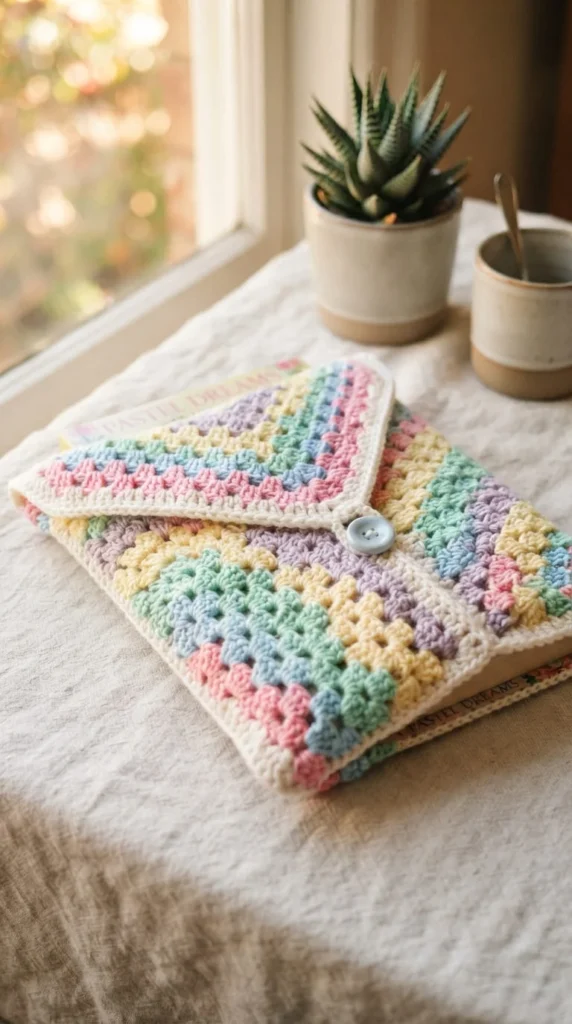
An envelope-style sleeve made from a single diagonal granny square is one of the most popular crochet book cover projects, and it’s easier than it looks. You work one large square, fold two corners in to form flap pockets, and whip-stitch the diagonal edges together to hold the book snugly.
Start by measuring your book’s height and full wrap — front, spine, and back — then work your square until it’s large enough to cover that wrapped measurement with about an inch of ease. Fold the piece around the book itself to mark exactly where your flaps should start, rather than guessing.
This style works well for paperbacks and journals of similar thickness, and it looks especially good in a five-color rotation where each round of the square changes shade. A small button and chain loop at the top flap keeps everything closed without needing a zipper or snap.
Because the whole thing starts from one square, it’s also one of the more portable projects on this list if you like to crochet during a commute.
2. Two-Square E-Reader Sleeve
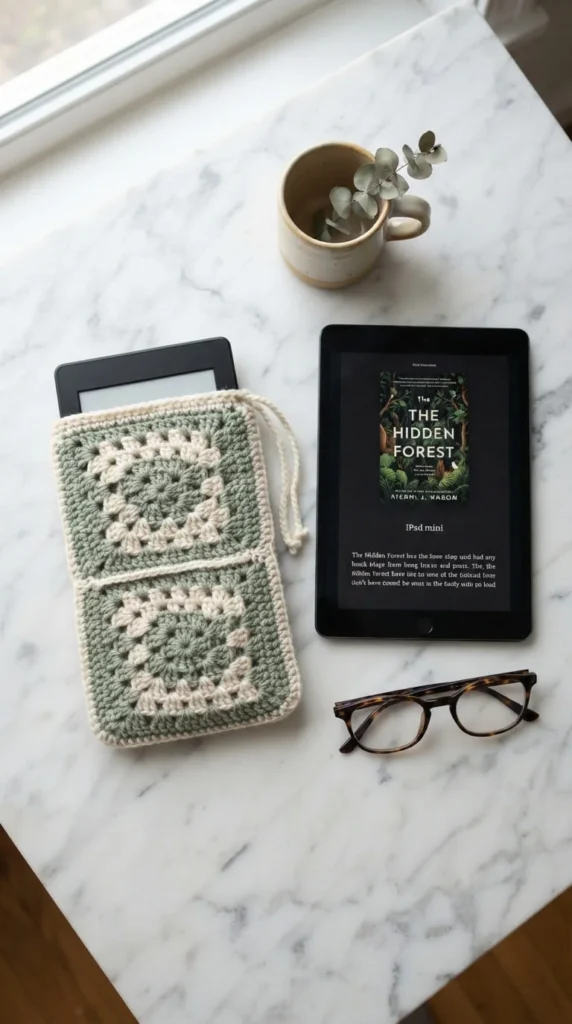
If you’re covering a Kindle or similar e-reader rather than a paperback, you don’t need a full-size cover. Two granny squares joined along three sides make a simple pouch that slides on and off easily.
Work two squares to match your device’s height and width, adding a small seam allowance so the device isn’t tight against the stitches. Join them along the bottom and two sides using a whip stitch or slip stitch, leaving the top open for sliding the device in and out.
This is one of the fastest projects on this list, often finishable in a single evening, which makes it a good option if you want to test a new stitch pattern or color combination before committing to a larger book cover. A cotton or cotton-blend yarn works particularly well here since it protects the screen without adding much bulk.
Add a small loop and button at the top opening if you want extra security, especially if the sleeve will spend time in a bag with other items that could push the device out.
3. Corner-to-Corner Pixel Motif Cover
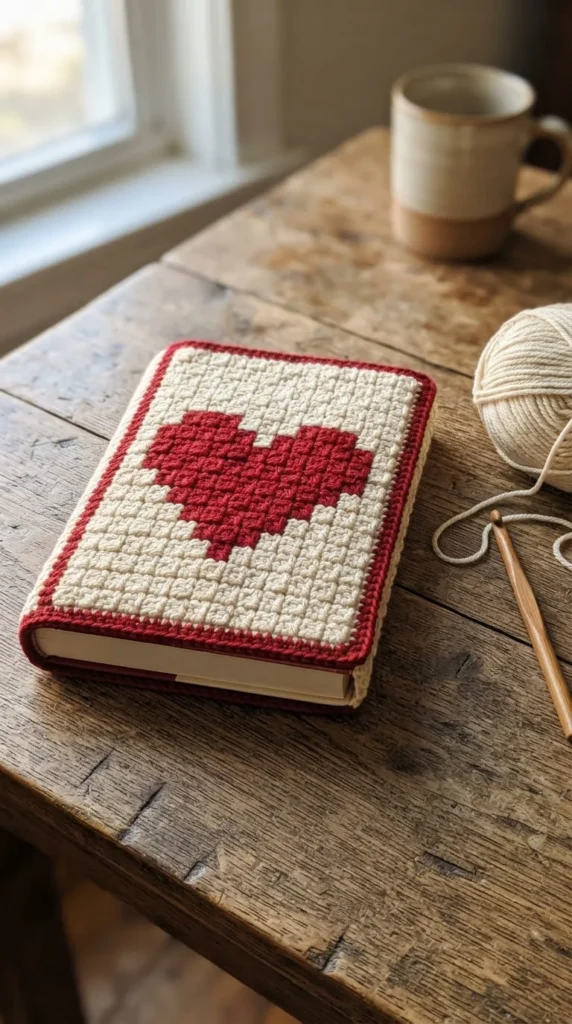
Corner-to-corner crochet, often shortened to C2C, builds a design out of small color blocks that read like pixel art from a short distance. It’s a great technique for book covers because you can work a simple shape — a heart, a star, a small flower — directly into the fabric instead of sewing on a separate appliqué later.
Plan your motif on graph paper first, keeping it small and simple. A cover only needs a handful of rows to fit a motif clearly, so an overly detailed design tends to blur together at that scale. Stick to two or three colors for your first attempt.
Once your panel is finished, fold it around your book the same way you would a granny-square wrap, adding flap pockets on each side. C2C fabric tends to be a bit more flexible than solid granny squares, so it drapes nicely around thicker books like hardcovers or notebooks.
This is a solid project if you enjoy following a chart and want a cover that looks graphic and modern rather than traditional.
4. Checkerboard Color-Block Cover
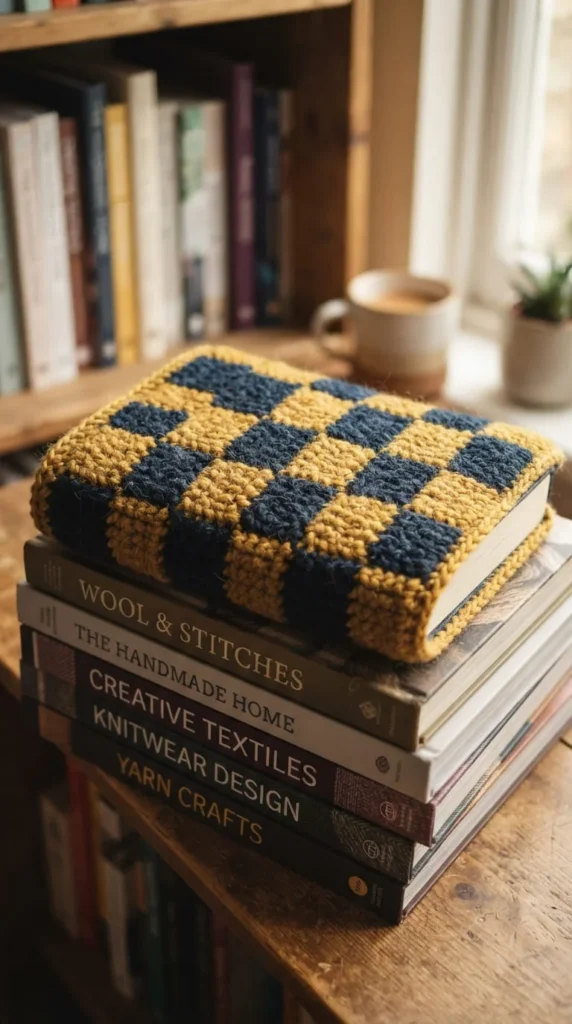
A checkerboard pattern is one of the simplest ways to get a bold, graphic look without following a full chart. You alternate two colors in a grid of small squares, which reads clearly even from across a room.
Work your panel in rows, switching colors at set stitch intervals to keep your squares even — most patterns use blocks of four or five stitches per color change. Carrying your unused yarn color along the back of the work as you go keeps the fabric from getting too many loose ends to weave in later.
Navy and mustard, or cream and terracotta, both give this style a slightly retro feel that suits journals and notebooks particularly well. Because the pattern relies on contrast rather than fine detail, it’s forgiving if your tension varies slightly row to row.
Finish the edges with a simple single-crochet border in one of your two main colors to frame the checkerboard cleanly. This cover style also makes a great gift for anyone who prefers bold, modern patterns over florals or pastels.
5. Daisy Appliqué Jacket Cover
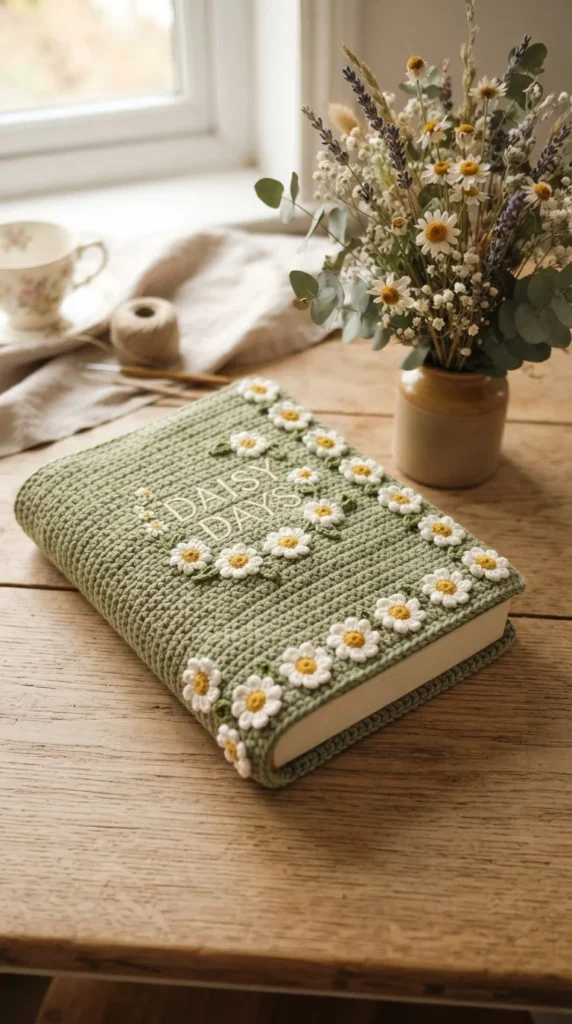
If plain granny squares feel a little flat, small crochet flowers sewn onto a solid base panel add texture and personality without much extra effort. Daisies are one of the easiest motifs to make, usually just a small center round with five or six simple petals worked around it.
Crochet your base cover first in a solid, muted color like sage or cream, then make three or four small daisies separately. Block the daisies flat before sewing them on so they lie neatly instead of curling at the edges — this step gets skipped often, and it’s the difference between a tidy cover and one that looks a little messy.
Arrange your daisies in a loose cluster near one corner rather than spacing them evenly across the whole cover. Asymmetrical placement tends to look more natural and less like a repeating pattern.
This idea works well as a gift for a specific person, since you can swap the flower type or color to match their taste — sunflowers, poppies, or simple five-petal blooms all use a similar basic technique.
6. Scalloped Edge Finish
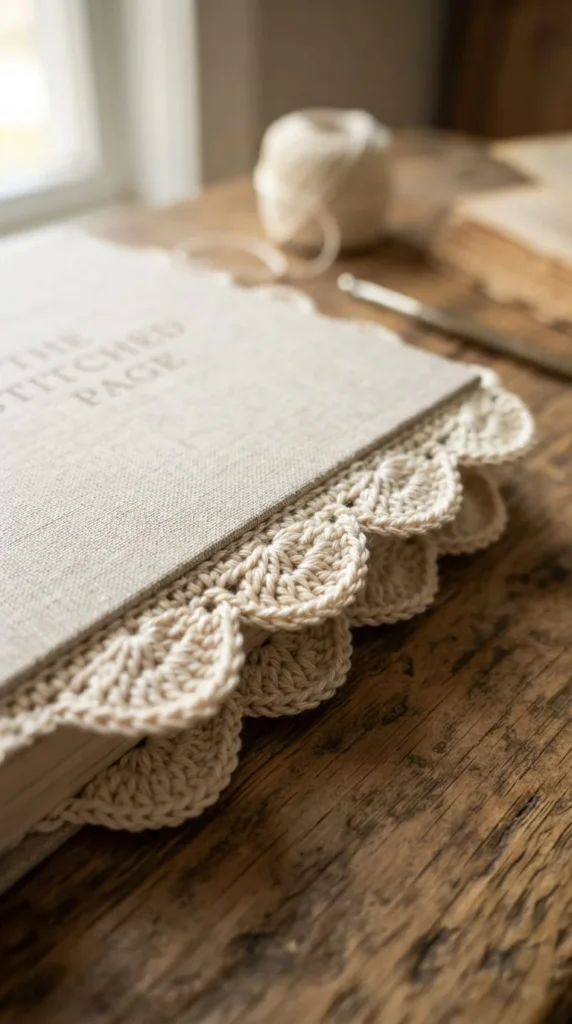
A scalloped border is a small detail that makes a huge difference in how finished a cover looks. Instead of ending your work with a plain single-crochet row, a shell-stitch border creates a soft, wavy edge that reads as intentional and polished.
Work your base cover as usual, then add a final round using a simple shell pattern — typically a group of four or five double crochets into the same stitch, skipping a stitch, and repeating around the edge. This creates the scalloped look without needing a separate pattern chart.
Scalloped edges also solve a common problem with crochet fabric: curling. A well-worked shell border adds enough structure along the edge to keep flat panels lying flatter, especially on covers made with lighter yarn weights.
This finish pairs particularly well with pastel or cream-based covers, since the scallop shape has a slightly vintage, doily-like quality. It’s a small addition, usually only one extra round, but it consistently gets noticed as the detail that makes a handmade cover look store-bought.
7. Button-and-Loop Closure Cover
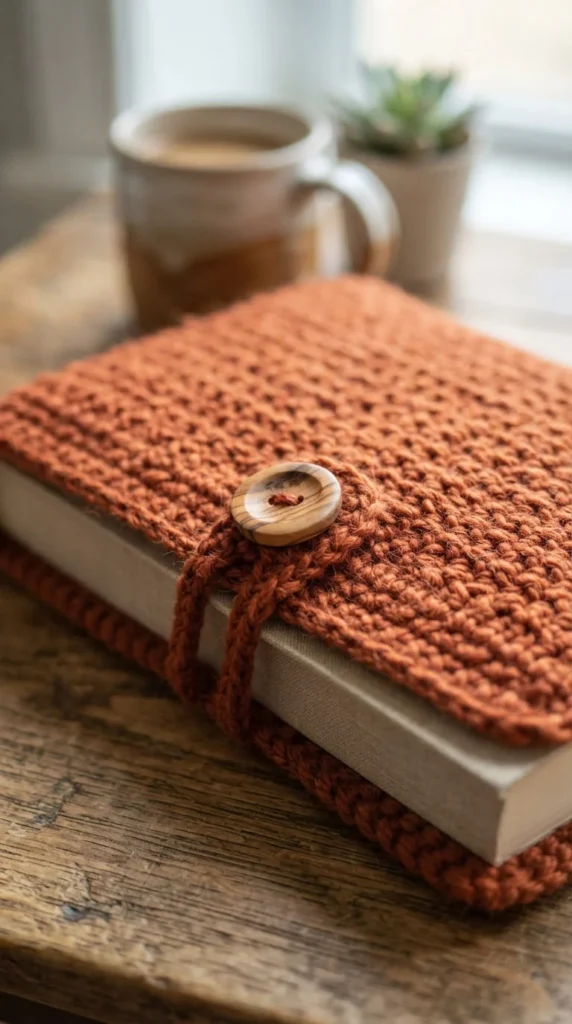
A secure closure is what actually keeps your book inside its cover during daily use, and a button-and-loop is one of the sturdiest options available to crocheters. A small chain loop at the top flap catches over a button sewn onto the body of the cover, holding everything shut without a bulky clasp.
When sizing your loop, make a chain slightly smaller than your button’s circumference so it has to stretch a little to fasten — too loose, and the closure will pop open in a bag. Test the fit before weaving in your ends so you can adjust the chain length if needed.
Wooden or shell buttons tend to suit crochet covers better than plastic ones, both in durability and in how well they photograph. Choose a button color that either matches your yarn closely or contrasts sharply — a middle-ground color often ends up looking accidental rather than chosen.
This closure style works on almost any cover shape on this list, so it’s worth practicing even if your first project uses a different flap style.
8. Front Pocket for Pens and Bookmarks
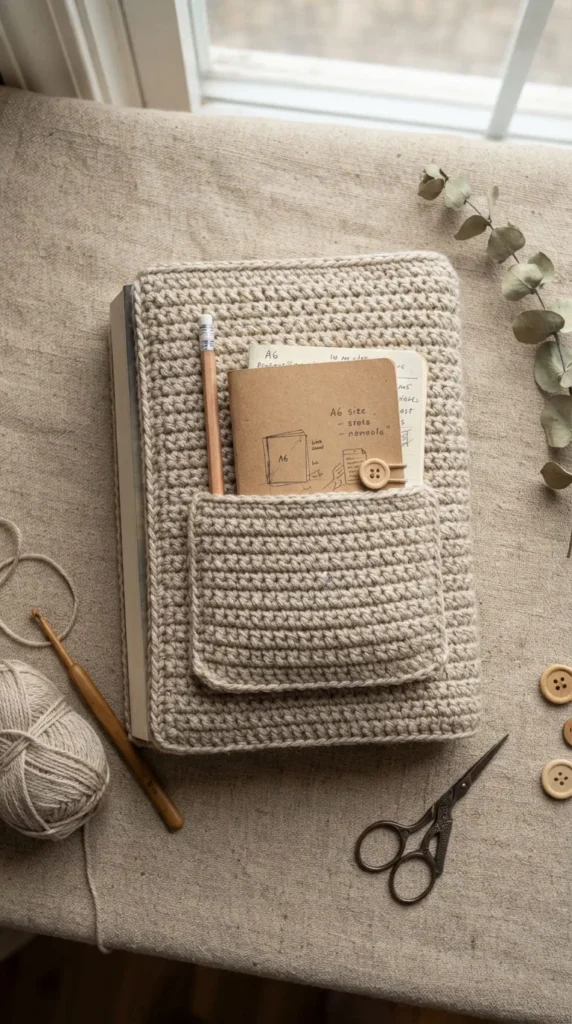
A small pocket sewn onto the front of a book cover turns it into something genuinely useful beyond just protection. It gives you a spot to keep a pencil, a bookmark, or a folded note card without digging through your bag.
Crochet a small rectangle sized to fit your pencil or bookmark, then sew it onto the front panel along three sides, leaving the top open. Position it slightly off-center rather than dead-center, since a corner placement tends to interfere less with how the flap folds shut.
This addition works particularly well on covers meant for daily use, like a planner or a book you’re actively reading and annotating. If you’re making the cover as a gift, consider tucking a small paper note or a spare crochet hook into the pocket before giving it, so the pocket has a purpose from the very first use.
Keep the pocket yarn in the same color family as the base cover so it reads as a built-in feature rather than a patched-on addition.
9. Rainbow Color-Rotation Cover
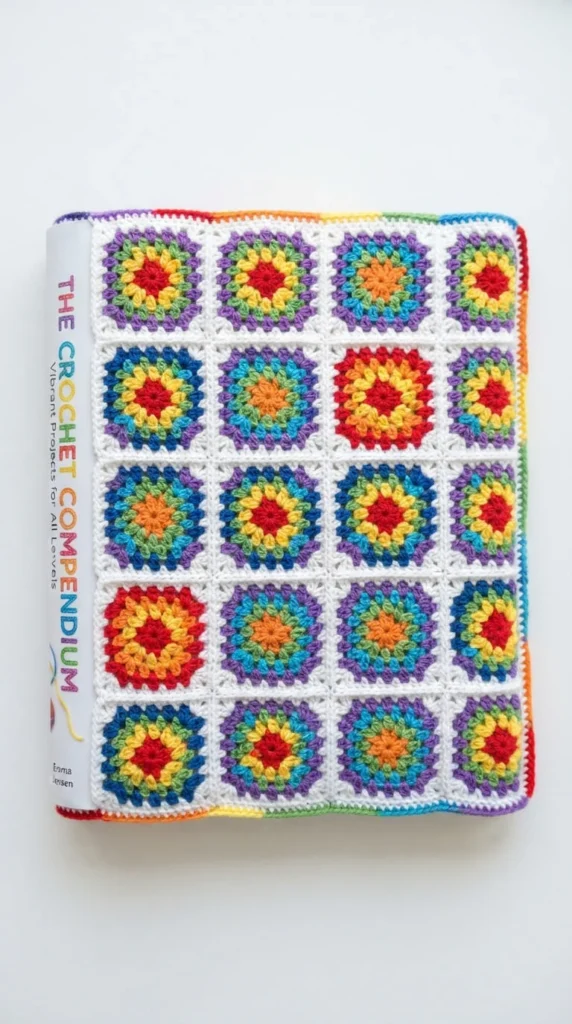
Rotating through a sequence of colors on each round of a granny square creates a rainbow effect that’s genuinely satisfying to watch come together as you work. It’s also a good project for using up small leftover balls of yarn that aren’t enough for anything larger.
Pick five or six colors and decide on an order before you start, rather than grabbing colors at random as you go. A planned sequence — even a simple light-to-dark gradient — looks more deliberate than scattered color changes.
Work your square as usual, switching colors at the end of each round and weaving in ends as you go rather than leaving them all for the finishing stage. This saves a surprising amount of time later, since a rainbow project can generate a lot of loose ends.
This idea suits kids’ books, gift covers, or anyone who wants a project that feels playful rather than restrained. It’s also one of the more forgiving designs here, since slightly uneven tension is far less noticeable across so many color changes.
10. Chunky Textured Cover
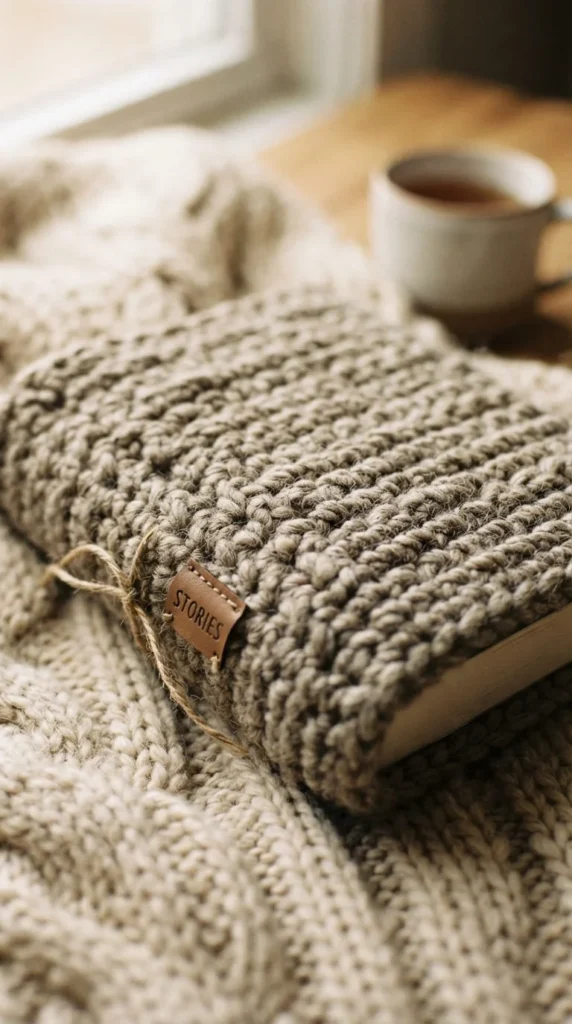
Most book covers use worsted or aran weight yarn, but a chunky or bulky yarn creates a noticeably different result — thicker, softer, and quicker to work up. A chunky cover finishes in a fraction of the time a standard-weight project takes, which makes it a good option if you want a finished gift quickly.
Use a larger hook, typically in the 6 to 8mm range, and expect your fabric to feel padded rather than flat. This extra thickness actually adds real protection for a book that gets tossed around a lot, since the yarn itself absorbs small bumps better than a thinner fabric would.
Because chunky stitches are so visible, keep the design simple — a solid color or a basic two-color stripe shows off the texture better than a detailed motif would at this scale. Skip fussy appliqués here; the yarn itself is the main visual interest.
This style suits larger books, like hardcovers or oversized journals, where a thinner fabric might feel flimsy in comparison to the book’s own weight.
11. Ombre Gradient Cover
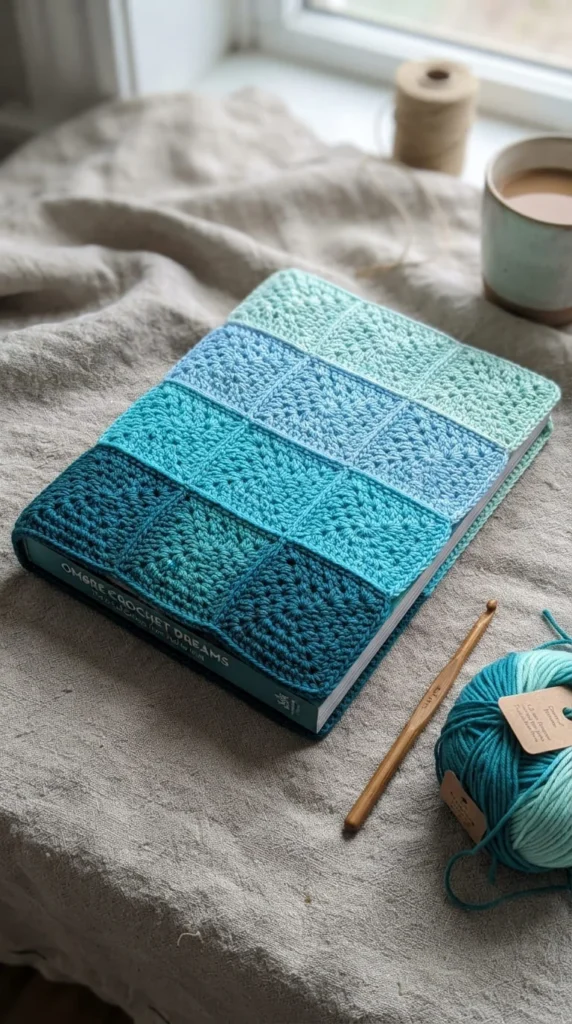
An ombre effect uses several shades of the same color family, arranged from darkest to lightest, to create a smooth gradient rather than distinct color blocks. It reads as more sophisticated than a standard color-block cover and works particularly well for gifts.
Choose four or five shades within one color family — teal to mint, or plum to blush — and work them in order from darkest to lightest as you build your rounds. Because the transitions are gradual, slight variations in yarn dye lots are much less noticeable than they would be in a high-contrast design.
This technique suits solid granny squares or simple striped panels better than intricate motifs, since the gradient itself is the main visual feature. Adding a busy appliqué on top tends to compete with the color transition instead of complementing it.
If you’re new to selecting yarn shades, lay your chosen balls in a row before starting and check the transition in natural daylight rather than indoor lighting, since artificial light can make similar shades look more different than they actually are.
12. Paisley Motif Appliqué
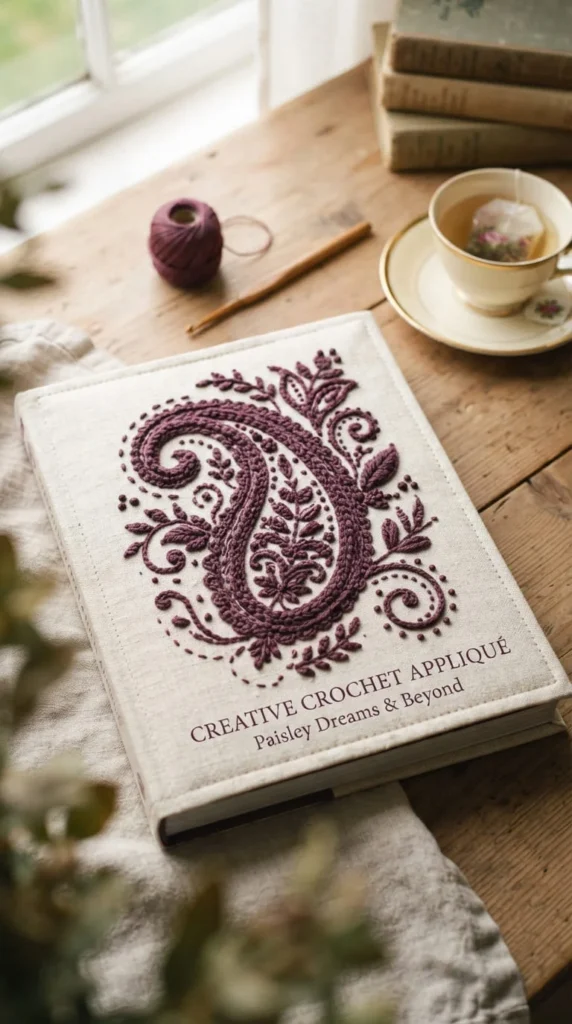
A paisley shape gives a book cover a more elegant, established feel compared to simpler round motifs like flowers or hearts. It takes a bit more patience to crochet since the shape curves rather than following straight rows, but the result looks distinctly more detailed than a basic appliqué.
Work the paisley as a separate flat piece using increases along one edge and decreases along the other to create the curved teardrop shape, then block it thoroughly before attaching it. Blocking matters more here than with simpler shapes, since an unblocked paisley tends to curl at the pointed end.
Sew the finished motif onto a solid base cover using a color that contrasts gently rather than sharply — deep plum on cream, or rust on charcoal, both work well. Center it slightly off the middle of the front panel for a more considered, less symmetrical look.
This idea is a good next step once you’re comfortable with basic granny squares and want to try a shape that requires more shaping and patience.
13. Leaf and Vine Trailing Design
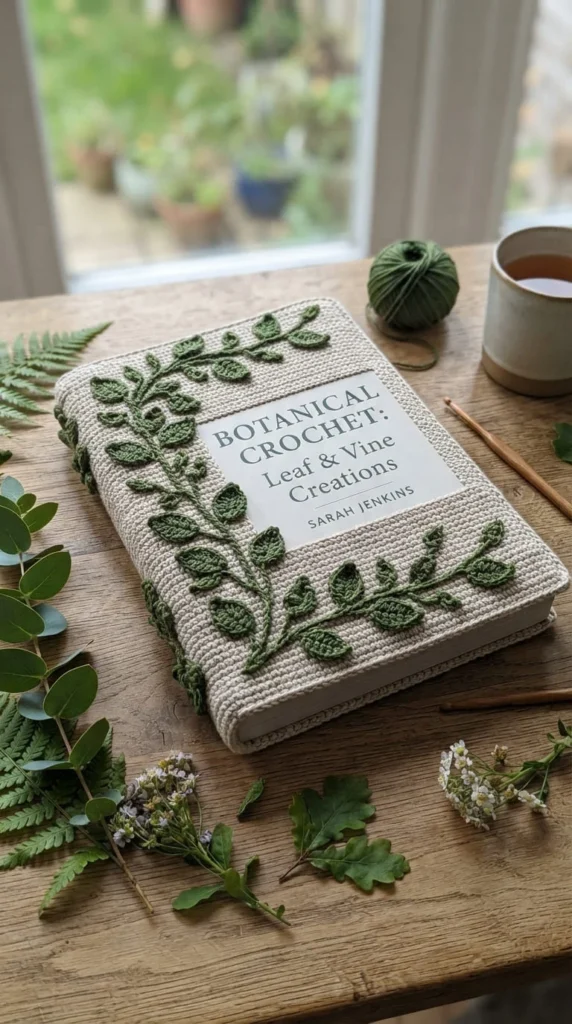
A trailing vine of small crochet leaves gives a book cover an organic, botanical feel without needing a full floral motif. It’s also a flexible design, since you can make as many or as few leaves as you like depending on how full you want the trail to look.
Crochet a simple chain for your vine, then work small leaf shapes at intervals along its length using basic increases to form the leaf points. Attach the whole vine along one side or corner of your base cover, letting it curve naturally rather than pinning it into a perfectly straight line.
This idea pairs especially well with an oatmeal, sage, or soft cream base, since the muted background lets the green leaf color stand out without looking overly bright. It’s a good option for nature journals, garden planners, or any book with an outdoorsy theme.
Because the vine is a single attached piece rather than several separate motifs, it’s also one of the faster appliqué ideas on this list once your base cover is finished.
14. Drawstring Tie Closure Cover
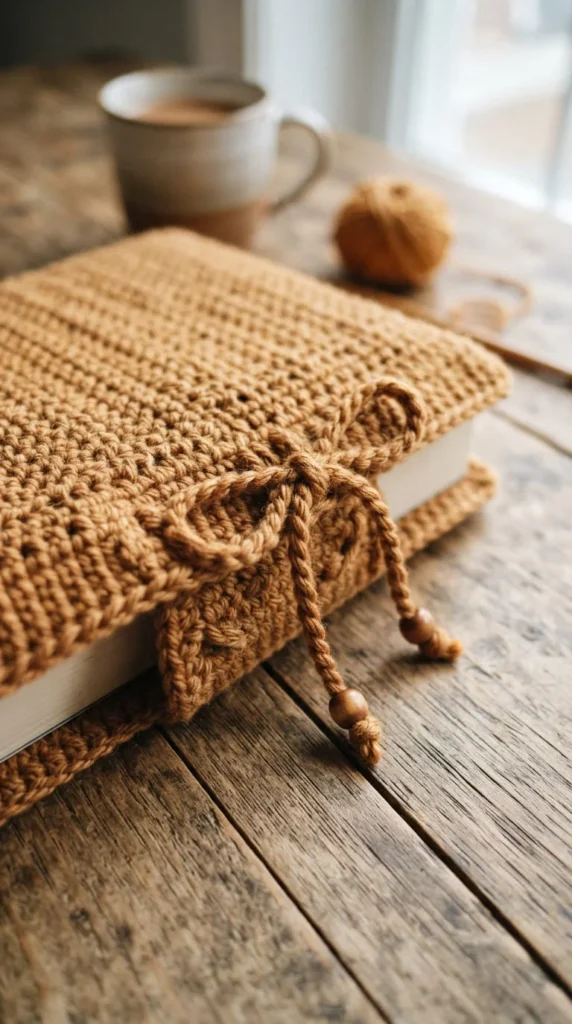
A drawstring closure gives a book cover a slightly more rustic, tied-package look compared to a button or snap. Instead of a flap that folds over, the cover cinches shut with a crocheted or twisted cord threaded through small eyelet gaps near the opening.
Work a row of evenly spaced eyelets — small gaps created by chaining one or two stitches and skipping the next — near the top edge of your cover, then make a simple chain or twisted cord long enough to thread through and tie in a bow. A cord about twice the width of your cover usually leaves enough length for a secure knot or bow.
This closure style is one of the more forgiving options if you’re not confident about button placement or snap sizing, since a cord simply cinches to whatever tightness you need. It also suits gift-wrapped presentation nicely, since the finished cover already looks a little like a wrapped package.
Caramel, rust, or warm brown tones suit this rustic style particularly well, especially paired with a plain stockinette-style base.
15. Magic-Circle Center Squares
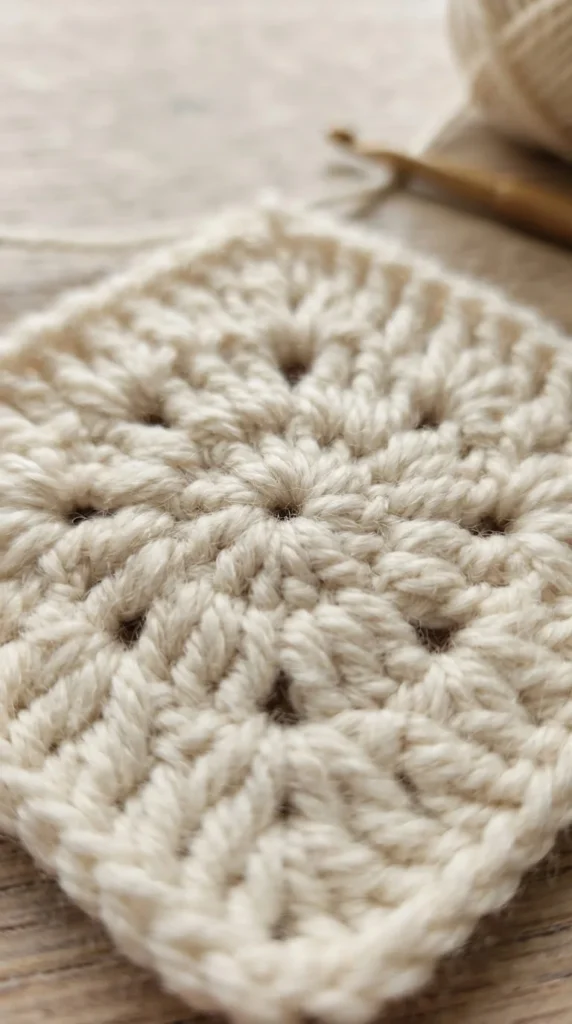
The center of a granny square matters more than beginners usually expect. A magic circle — an adjustable loop you tighten after your first round — creates a neat, closed center with no small hole, unlike a traditional chained ring which can leave a visible gap.
If your current covers all use a chained center ring, try switching to a magic circle for your next project and compare the two side by side. The difference is subtle but noticeable, especially in solid or light-colored yarn where a small center gap tends to stand out more.
This technique takes a little practice to get comfortable with, since you’re working stitches into a loop rather than a fixed chain, but most crocheters pick it up within one or two attempts. It’s worth learning specifically for book covers, since the front panel’s center square is usually the most visible part of the entire design.
Once you’re comfortable with magic circles, this small technique upgrade applies to nearly every granny-square idea on this list, not just this one.
16. Antique Leather-Look Cover
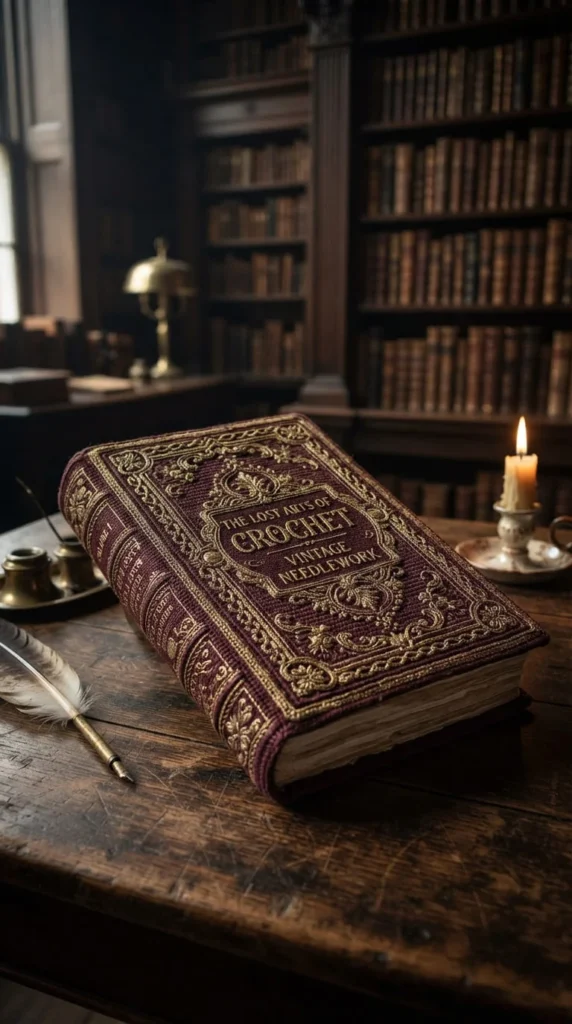
If you want a book cover that looks like it belongs on an old library shelf, deep jewel tones and a slightly raised stitch texture can mimic the look of antique leather binding. Burgundy, forest green, or deep gold worked in a textured stitch pattern, like a basic bobble or post stitch, gives the fabric visible depth similar to embossed leather.
Keep the design itself simple — this style relies on color and texture rather than appliqués or motifs to read as vintage. A single decorative round near the spine edge, worked in a contrasting metallic or gold thread, adds a finishing touch similar to gilt lettering on an old book spine.
This idea suits classic novels, poetry collections, or any book you want to feel a bit more formal and collected rather than casual. It also makes a strong gift for book lovers who appreciate a more literary aesthetic over bright, playful colors.
Because the raised stitch pattern takes slightly longer to work than plain single crochet, expect this project to take a bit more time than a basic granny-square cover.
17. Striped Ribbed Cover
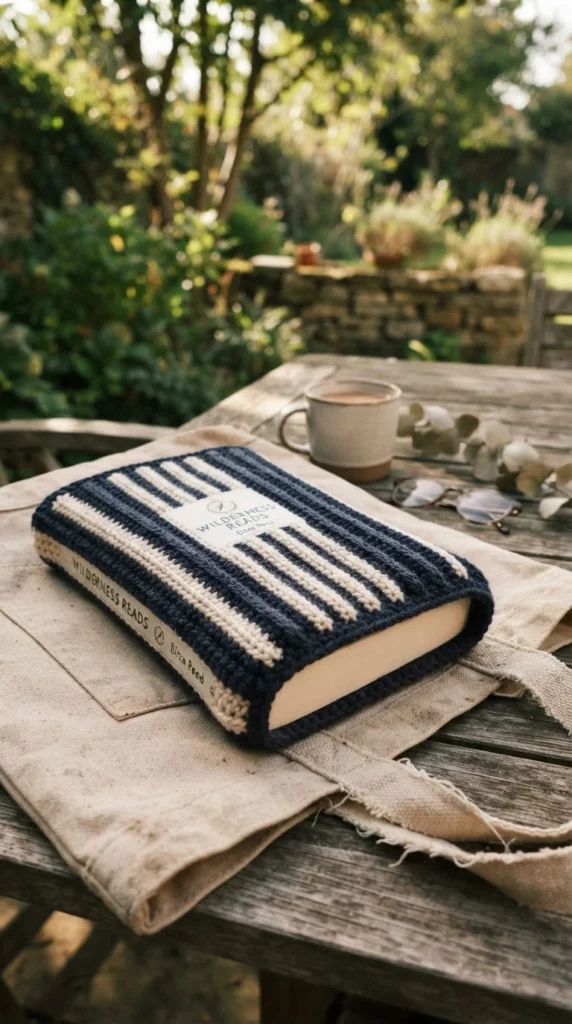
A ribbed stitch pattern, worked in the back loops only for a subtle textured stripe effect, gives a cover a sturdier, slightly stretchy feel compared to standard granny squares. It’s a good option for books that get handled roughly, since the ribbing holds its shape well over repeated use.
Alternate two colors every few rows to create clean horizontal stripes, working each row into the back loop only to build the ribbed texture. Navy and cream, or forest green and mustard, both give this style a casual, everyday look suited to a book you carry daily rather than display.
This cover style works up as a flat rectangle rather than a square, so it’s a straightforward project if you’re more comfortable with simple rows than granny-square construction. Fold the finished rectangle around your book and seam the sides, adding flap pockets the same way you would with any other panel-style cover.
The ribbed texture also does a nice job of hiding minor tension inconsistencies, making this a solid choice if you’re still building confidence with even stitch work.
18. Snap Closure Travel Cover
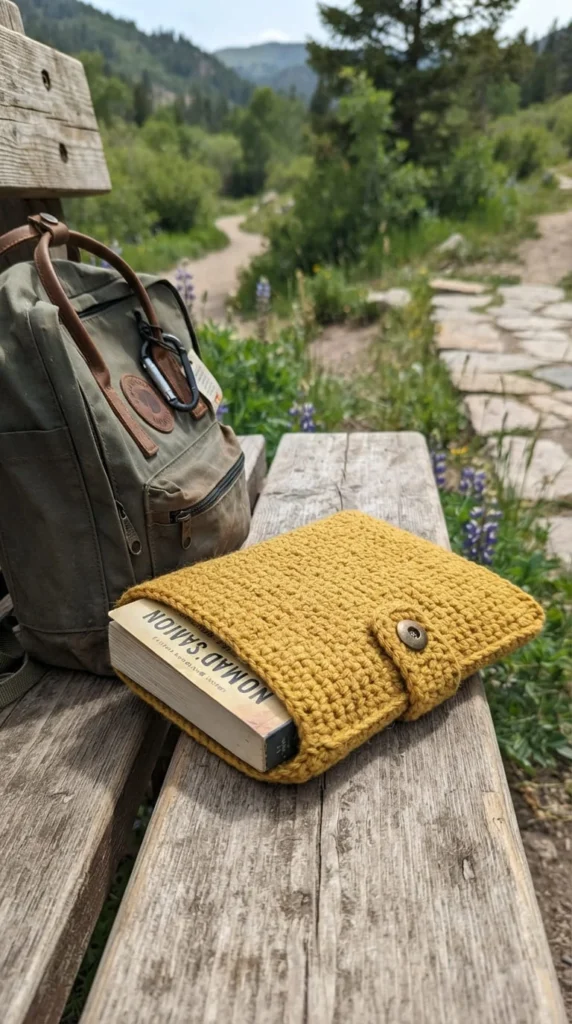
For books that travel with you often — commuting, hiking, flying — a metal snap closure holds up better under repeated opening and closing than a tie or loose button. Snaps also close faster, which matters if you’re pulling your book out and putting it away frequently throughout a day.
Sew a snap set onto the inside of your flap and the corresponding point on the cover body once your crochet work is finished, positioning them so the flap sits flat when closed rather than pulling at an angle. Test the placement with pins before stitching the snap permanently in place.
A sturdier yarn, like a cotton-acrylic blend, pairs well with this closure style since it holds its shape better around the extra weight and tension a snap adds compared to lighter closures. Mustard, olive, or rust tones suit a travel-ready, slightly utilitarian look.
This is a practical choice over a decorative one, so keep the rest of the design simple — a solid color or basic stripe lets the snap closure’s reliability be the main selling point of the cover.
19. Oversized Textbook Cover
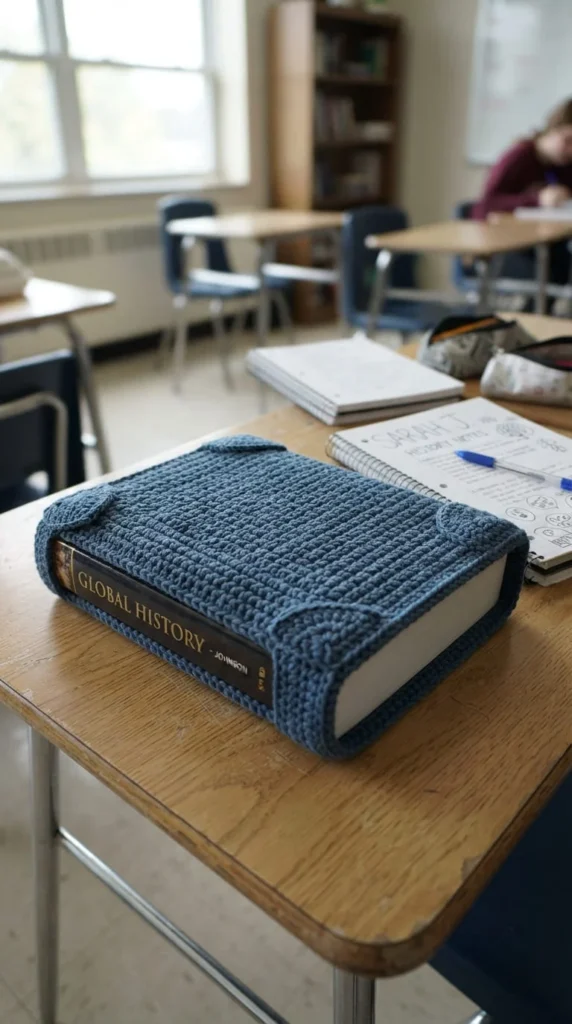
Standard book cover patterns often assume a paperback-sized book, but textbooks need a different approach. Extra width and flap depth keep a thicker book secure, and reinforced corners on the flaps prevent the stitches from stretching out of shape under the added weight.
Measure your textbook’s full wrap plus at least two inches of ease, since textbooks tend to be considerably thicker than novels. Work your panel a few rows longer than you think you’ll need, then fold it around the closed book before finishing to check the fit.
Reinforce your flap corners with an extra round of single crochet or a doubled strand of yarn at the stress points, since these areas take the most pulling force every time the cover goes on or comes off. A sturdier yarn weight, like worsted or aran, holds up better here than a lighter option.
Deep, solid colors like denim blue or charcoal tend to hide daily wear better than pastels for a cover that’s getting stuffed into a backpack five days a week.
20. Personalized Initial Gift Cover
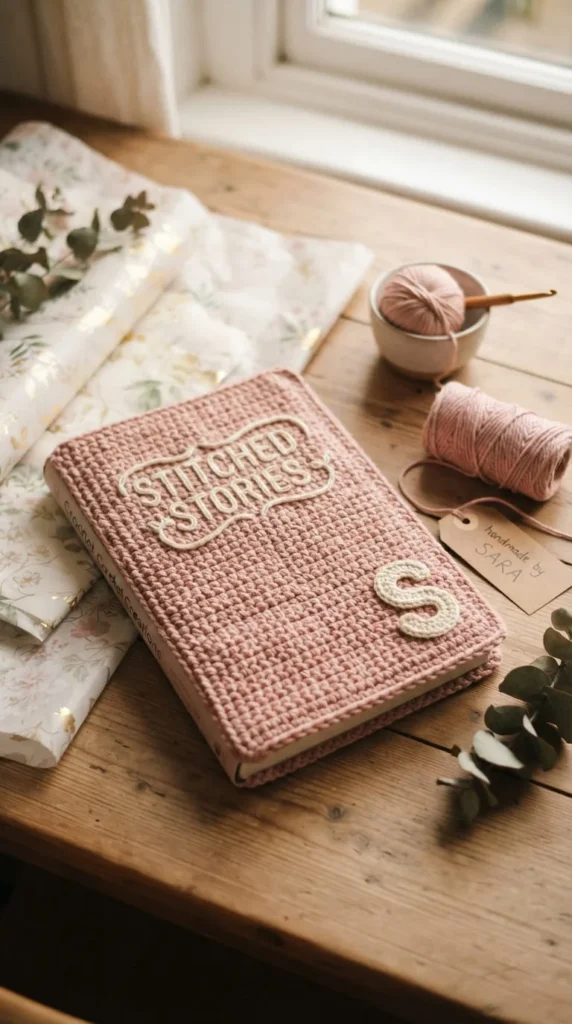
A single crocheted initial in one corner turns a basic cover into a genuinely personal gift without requiring a full appliqué scene. Letters are usually worked flat using a simple graph or chart, similar to a small C2C panel, then sewn onto the corner of a solid base cover.
Keep the letter to about two inches tall so it reads clearly without overwhelming the rest of the design. A contrasting but complementary color combination, like cream on blush or gold on navy, keeps the initial legible from a short distance.
This idea works well as a last-minute gift upgrade too, since you can crochet a simple solid cover ahead of time and add the personalized initial closer to the gifting date once you know the recipient’s preferred colors. It also makes matching gift sets easy if you’re making covers for several people at once, since the base pattern stays identical and only the letter changes.
Pair the initial with a plain button closure rather than anything decorative, so the monogram stays the clear focal point of the design.
21. Attached Notions Pouch
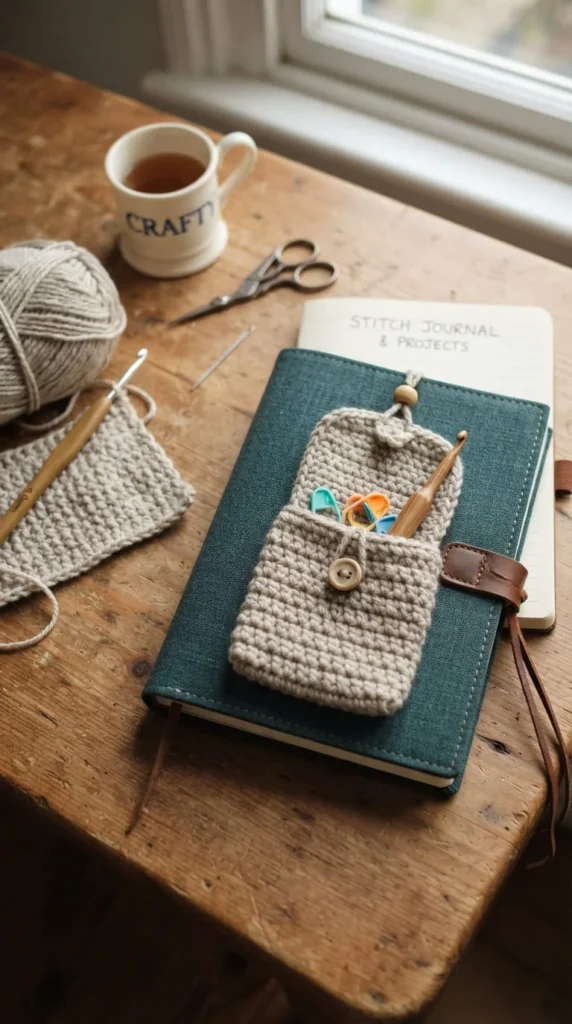
If you’re someone who always seems to misplace a spare hook or a handful of stitch markers, a small attached pouch solves that problem directly. A tiny drawstring or button-top pouch, sewn onto the inside flap of your book cover, gives your crochet supplies a home that travels with your current project.
Make the pouch separately as a small rectangle folded in half and seamed on two sides, then attach it to the inside of your cover’s back flap so it doesn’t interfere with the book itself. A drawstring top keeps small items from falling out when the cover is tossed into a bag.
This idea is especially useful if your book cover doubles as your on-the-go crochet project bag — keeping a spare hook, a yarn needle, and a couple of stitch markers zipped away means you’re never caught without your tools.
Match the pouch yarn to your main cover for a cohesive look, or use a contrasting scrap color if you’d rather it stand out as a distinct, functional add-on rather than blend into the overall design.
Conclusion
There’s no single “correct” way to crochet a book cover, and that’s really the appeal of this project. A quick two-square e-reader sleeve takes an evening, while a paisley appliqué or antique-style cover gives you something to work on over a few weekends. Pick an idea that matches the book you’re protecting, the yarn you already have on hand, and how much time you want to spend on closures and finishing details. Once you’ve made one cover, adjusting the measurements for your next book becomes second nature, and you’ll likely find yourself planning your next color combination before the current project is even off the hook. Grab your yarn and hook, pick one idea from this list, and give your favorite book the cover it deserves.