
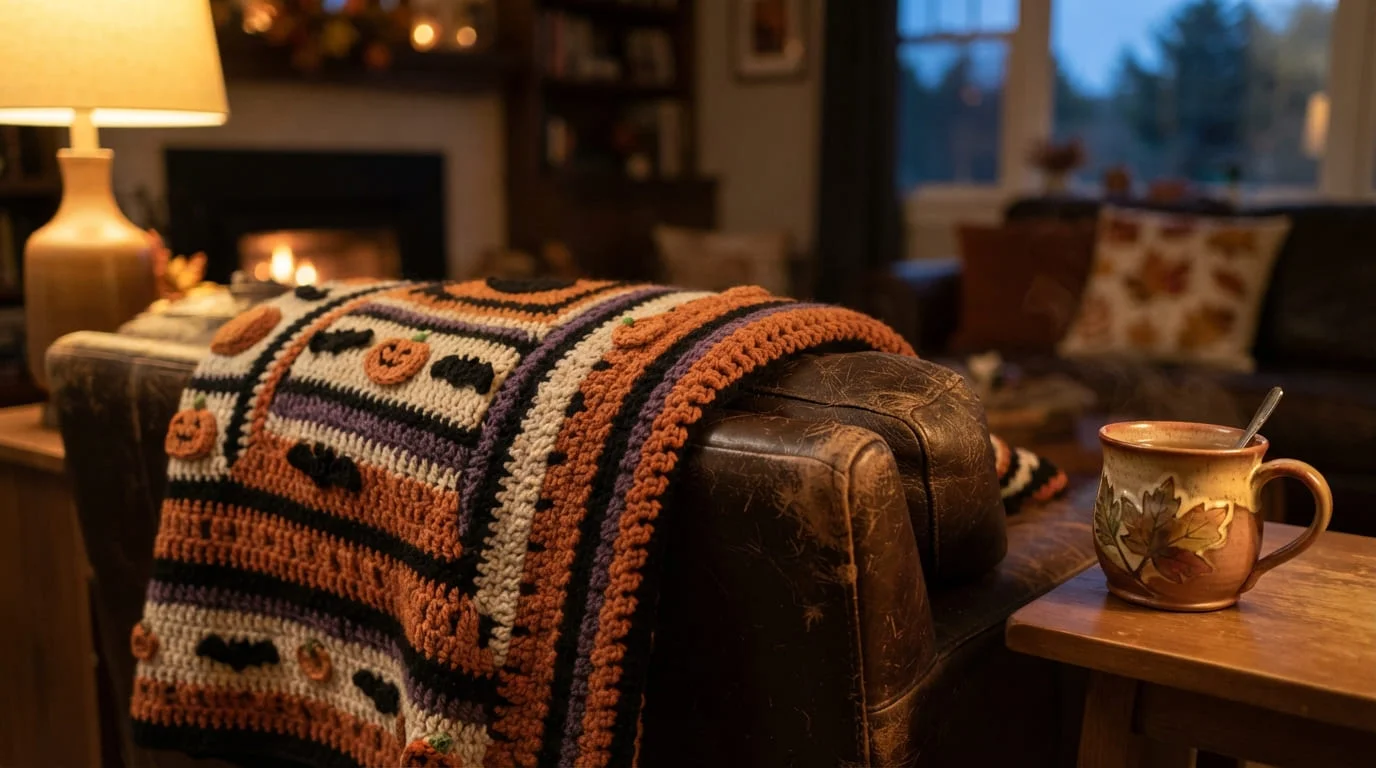
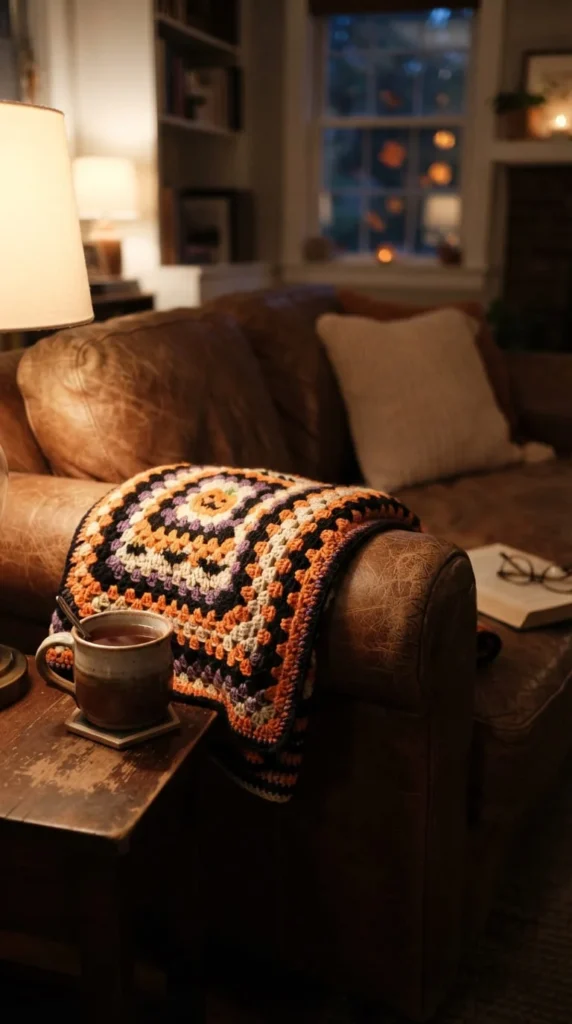
A crochet Halloween blanket sits in that rare spot between seasonal décor and something you’ll actually use every night on the couch, which is why so many crocheters come back to this project year after year. This list walks through crochet Halloween blanket ideas across every construction method you’re likely to run into — graphgans, granny squares, appliqué, stripes, mosaic, and Tunisian work — along with the practical details that most roundups skip, like finished size, gauge, and how to handle yarn tails in a busy colorwork chart. Whether you want a weekend stripe pattern or a full skull graphgan that takes a few weeks, you’ll find a version here that matches your time, skill level, and taste for how spooky you actually want your living room to look.
1. Haunted House C2C Graphgan for a Bold Statement Piece
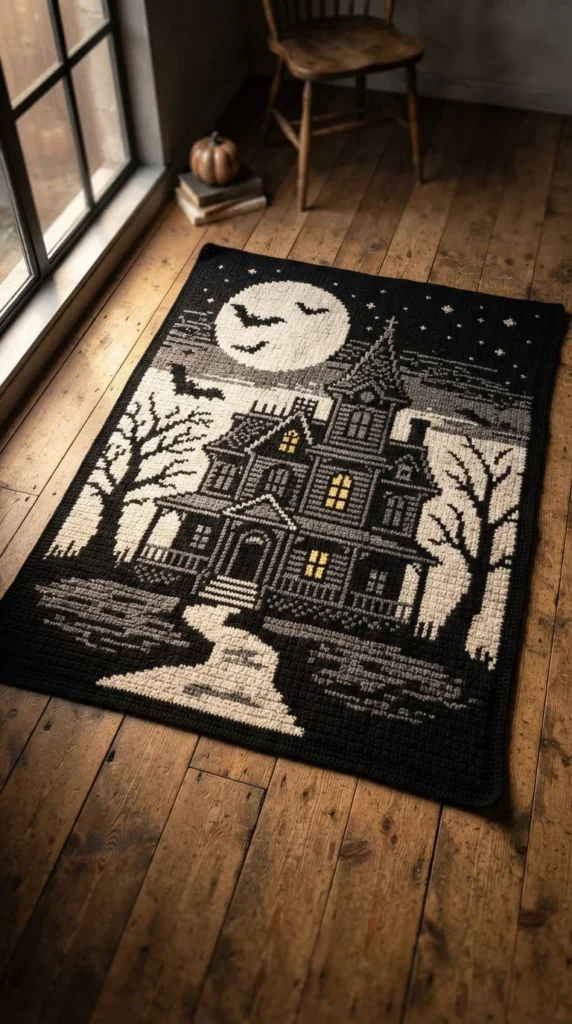
Corner-to-corner, or C2C, crochet builds an image out of small pixel-like blocks, which makes it the most natural technique for a graphic scene like a haunted house against a full moon. Each block of color becomes one “pixel” in the final picture, so the more blocks in your chart, the more detail your silhouette can hold.
This project rewards patience more than skill. The stitch itself — a simple double crochet block repeated across a diagonal row — is easy to learn in an afternoon. What takes longer is managing the yarn changes as the haunted-house silhouette shifts against the black night sky and pale moon.
Keep a small bobbin or yarn butterfly for each color block rather than cutting and rejoining yarn constantly, since that alone will save hours of finishing work. Chart software or a printed grid helps you track your row position, since it’s easy to lose your place in a large C2C image.
Plan for a throw-sized finish, roughly four to five feet square, if you want this to double as a couch blanket rather than pure wall art. This is one of the more advanced projects on this list, so budget several weeks rather than a single weekend.
2. Granny-Square Skeleton Blanket for a Modular Build
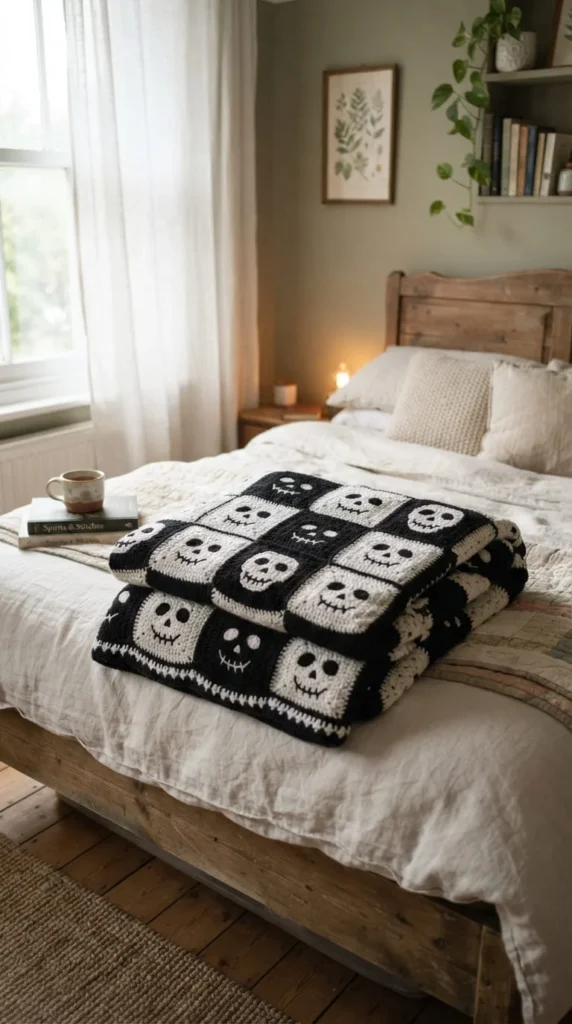
If a full graphgan feels intimidating, a granny-square approach gives you the same skeleton-and-skull mood without one giant chart to follow. Work a batch of black-and-white granny squares, then sew or embroider simple skull faces onto a portion of them before joining everything together.
This construction has a real practical advantage: you can work on one square at a time rather than committing to hours in a single sitting. Squares are portable, easy to bring along in a project bag, and simple to set aside if you need a break from the pattern for a few days.
Alternate plain black or white squares with the skull squares so the faces feel like an accent rather than overwhelming the whole design. A simple running-stitch mouth and two French-knot eyes are usually enough detail — you don’t need elaborate embroidery for the motif to read clearly from across a room.
Join squares with a flat slip-stitch seam to keep the front smooth, then finish with a single round of double crochet in black to hide any uneven edges. This method suits crocheters who like steady, repeatable progress over a long, uninterrupted colorwork chart.
3. Griddle-Stitch Stripe Blanket for Total Beginners
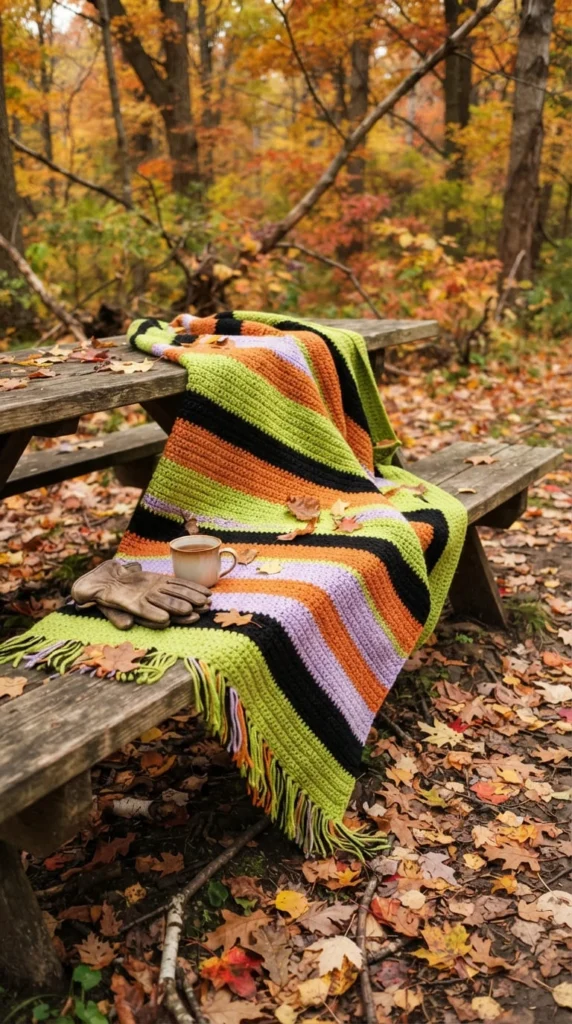
Stripes are the fastest route into a Halloween-themed blanket if you’ve never worked colorwork before. A griddle-stitch pattern — alternating single and double crochet stitches in a simple repeat — creates enough texture to look intentional without demanding any chart reading at all.
Choosing four colors instead of the usual two — lime green, black, orange, and a soft lilac — gives the finished blanket a slightly more current, monster-party feel rather than the expected orange-and-black default. Rotate the four colors in a consistent sequence every few rows so the pattern reads as deliberate rather than random.
A typical gauge for this style runs around eleven stitches and ten rows per four inches, which is a helpful reference point if you’re checking your own tension before committing to a full blanket size. Since there’s no picture to track, this project is easy to pick up and set down in short sessions.
This is also one of the more forgiving projects if your yarn brand or weight varies slightly from a pattern’s suggestion, since small tension differences in a stripe blanket are far less noticeable than in a charted image.
4. Appliqué Ghost and Candy Blanket for Non-Chart Crocheters
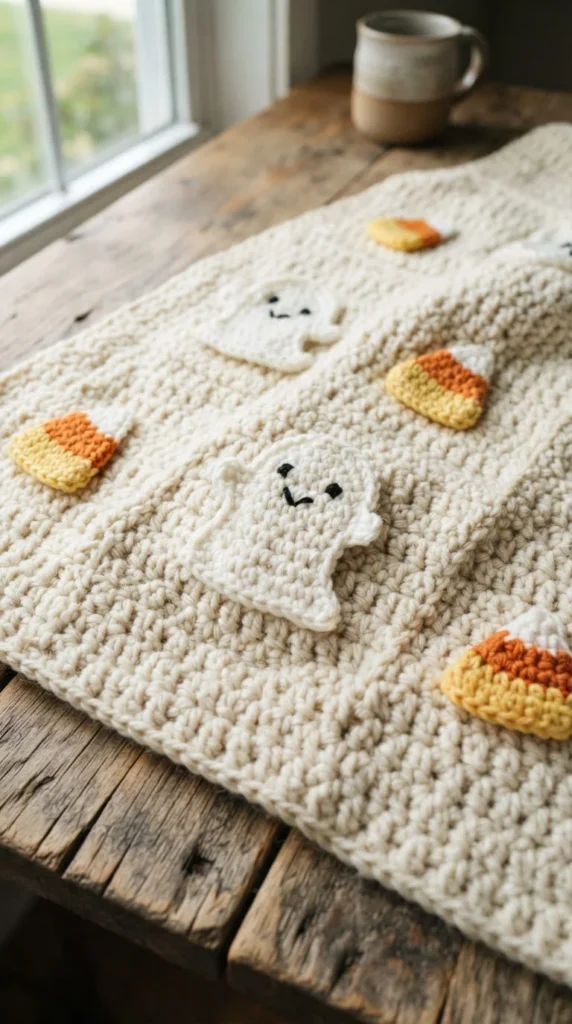
Some crocheters simply don’t enjoy following a colorwork graph, and this method sidesteps that entirely. Start with a plain single-color base blanket — cream, gray, or a deep charcoal work equally well — then sew individual ghost and candy motifs onto the surface once the base is finished and blocked.
This approach separates two skills that usually get tangled together in a graphgan: making the blanket itself, and creating the picture on it. You can crochet the base in front of the television without much concentration, then treat the appliqué stage as a separate, more detailed project once the bulk of the work is done.
Space your motifs asymmetrically rather than in a strict grid — a scatter of ghosts drifting toward one corner, with a cluster of candy shapes near the opposite edge, tends to look more natural than a perfectly even layout. Secure each appliqué with small, even stitches around its full edge rather than a few anchor points, since loose corners are the most common failure point on this style of blanket.
5. Pumpkin Patch Blanket for Fall-Long Display
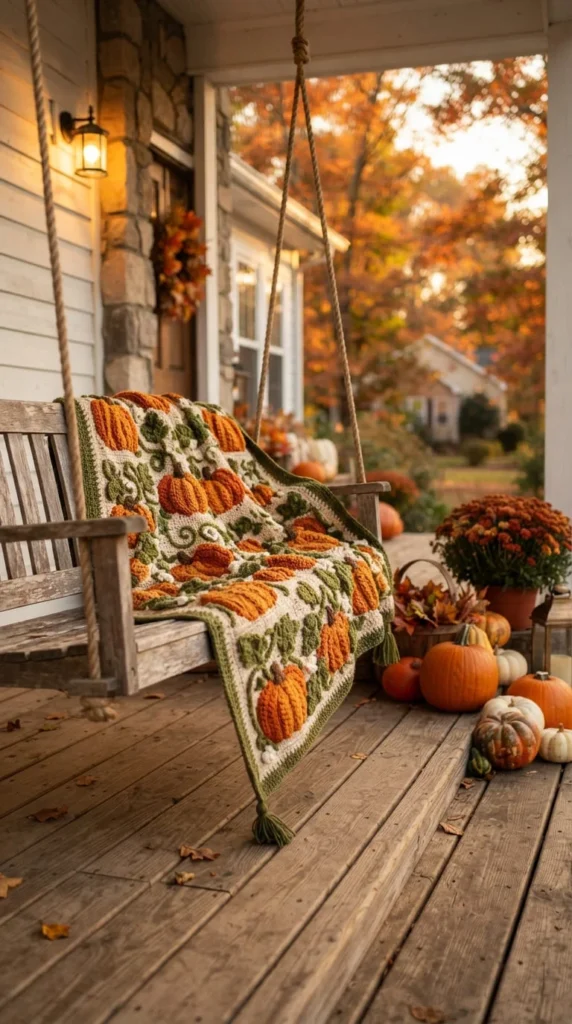
A pumpkin patch design — rows of orange pumpkin shapes worked into a green vine-like background — sits closer to general autumn décor than strict Halloween, which means you can leave it out well past October 31st without it looking dated.
This design usually combines a textured stitch for the vines with simple round or oval pumpkin motifs worked separately and joined into the main body, or charted directly into a C2C-style grid if you prefer a more graphic look. Either construction method gives you a recognizable, cheerful image rather than anything that leans gothic or scary.
Because this blanket reads as fall décor first and Halloween second, it’s a smart choice if you’re making something for a shared living space where not everyone wants overt Halloween imagery on the couch, or if you want one project that carries you from September through Thanksgiving.
Consider a simple two-tone approach if a full charted design feels like too much commitment: solid orange pumpkin blocks against a plain green or cream background still reads clearly as a pumpkin patch without requiring precise pixel-level detail.
6. Frankenstein Monster Graphgan for a Playful Twist
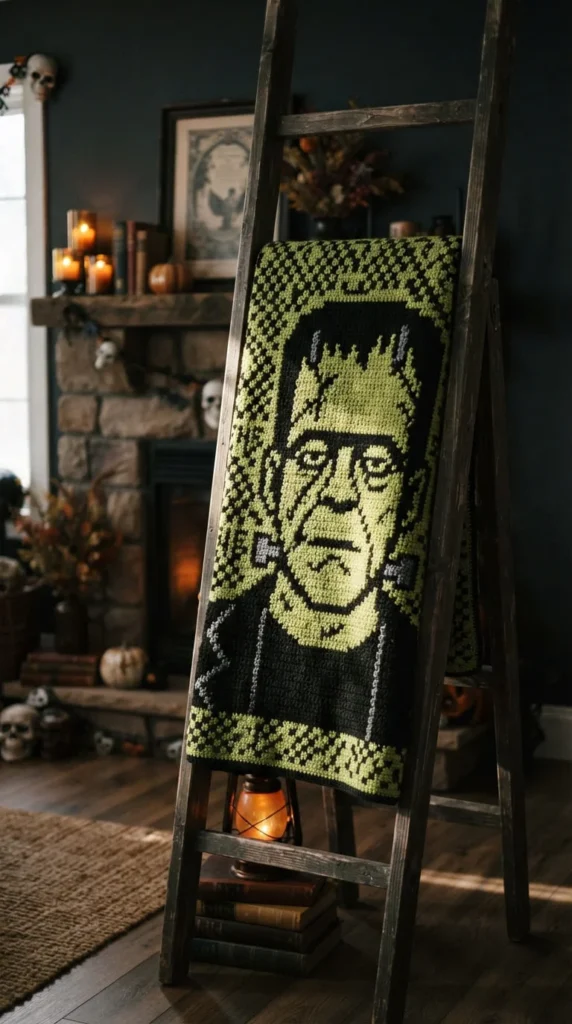
Monster motifs give Halloween crochet projects a lighter, more cartoonish feel compared to skulls or haunted houses, and a Frankenstein face worked in lime green and black is one of the more recognizable options in this category. The green base color alone signals the theme before any facial detail is even added.
Work this as a C2C or single crochet graphgan depending on how much detail you want in the final face. A simplified, blocky version with just the eyes, stitched scars, and flat-top hairline reads clearly even at a smaller chart size, which keeps the project more manageable than a fully detailed portrait would be.
Because green is an unusual base color for a blanket, pair it with black borders and maybe a small orange accent stripe to tie the piece back into a broader Halloween palette rather than leaving it feeling like an isolated novelty print. This motif tends to appeal particularly to younger crocheters or anyone making a gift for a monster-movie fan, since it carries more humor than horror.
7. Black Cat and Jack-o’-Lantern Combination Blanket
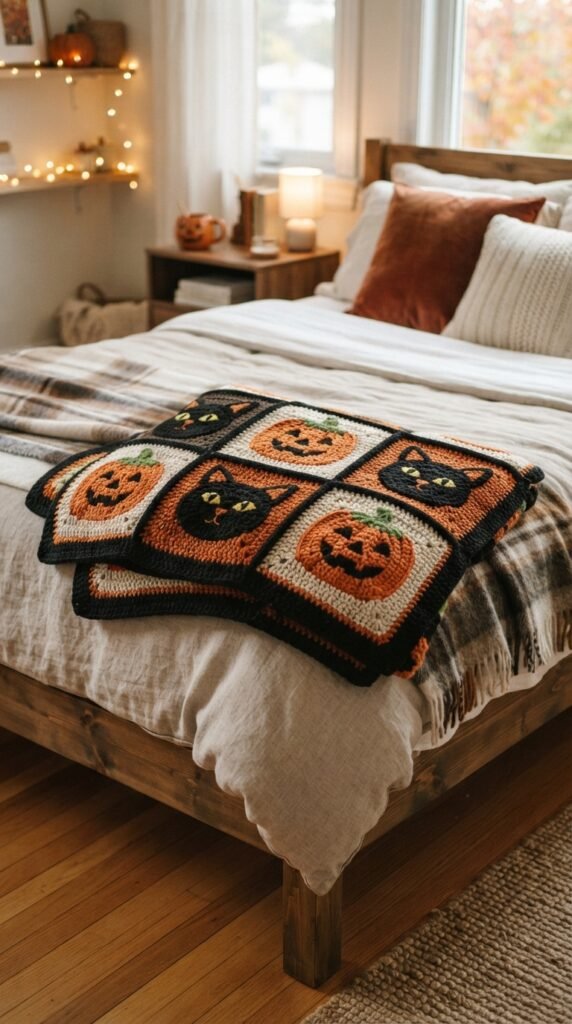
Pairing a black cat silhouette with a classic jack-o’-lantern face gives you two of the most instantly recognizable Halloween icons in a single design, without needing a full scene or background detail to make the theme obvious. This combination also works well as an alternating repeat rather than a single central image.
Chart the cat as a simple arched-back silhouette and the pumpkin as a rounded shape with a triangle-eyed face, then repeat the pair across the width of the blanket in a consistent rhythm. This repeat structure is more forgiving for beginners than a single large graphgan image, since a mistake in one repeat doesn’t throw off the whole design the way an error in a large single picture would.
Orange and black remain the obvious color choice here, but a deep purple background behind the black cat silhouette adds a bit more depth than plain black on black, which can otherwise lose definition depending on your yarn’s sheen and lighting.
8. Halloween Sparkle Stitch-Mix Crochet-Along for Staged Progress
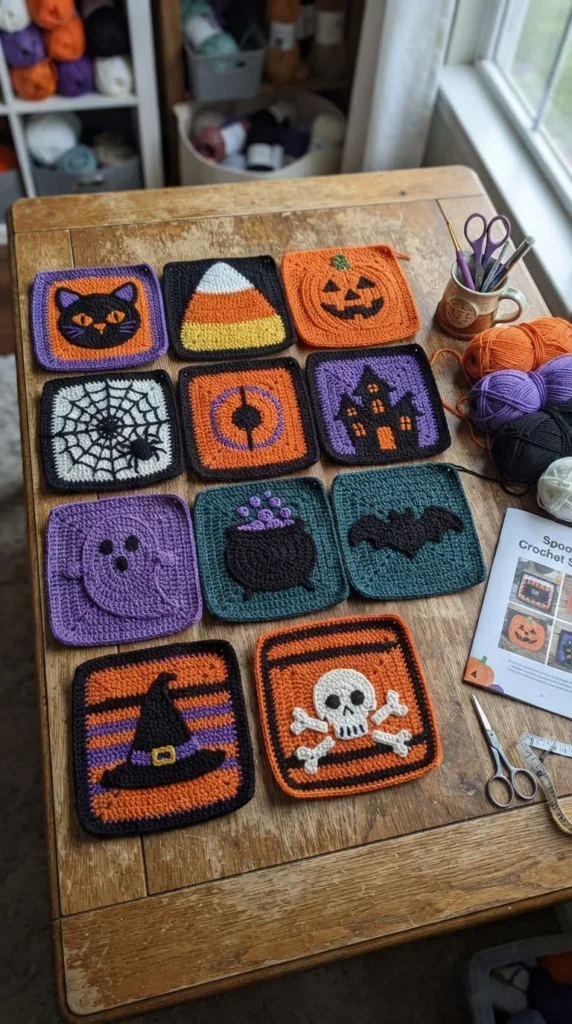
A crochet-along, or CAL, breaks a full blanket into smaller staged pieces released over a set period, which suits anyone who works better with deadlines and community accountability than an open-ended solo project. A typical Halloween-themed CAL might use ten individual 12-inch squares, each with a different stitch pattern or motif, joined together at the end with a planned border.
This format solves one of the biggest hurdles in blanket-making: staring down a full-size project before you’ve made real progress. Ten manageable squares feel far less daunting than one continuous piece, and each square typically only takes an evening or two to finish.
Label your squares as you complete them, either with a small tag or a simple written key, so you remember the order you planned before joining day arrives. Store finished squares flat in a labeled envelope or folder rather than loose in a project bag, since squares can shift out of shape if left folded unevenly for weeks.
A CAL also gives you a natural stopping point if your schedule changes mid-project — a partial set of squares can become a lap blanket or a set of pillow covers instead of the full intended size.
9. Mosaic Crochet Blanket for Graphic Detail Without a Grid Chart
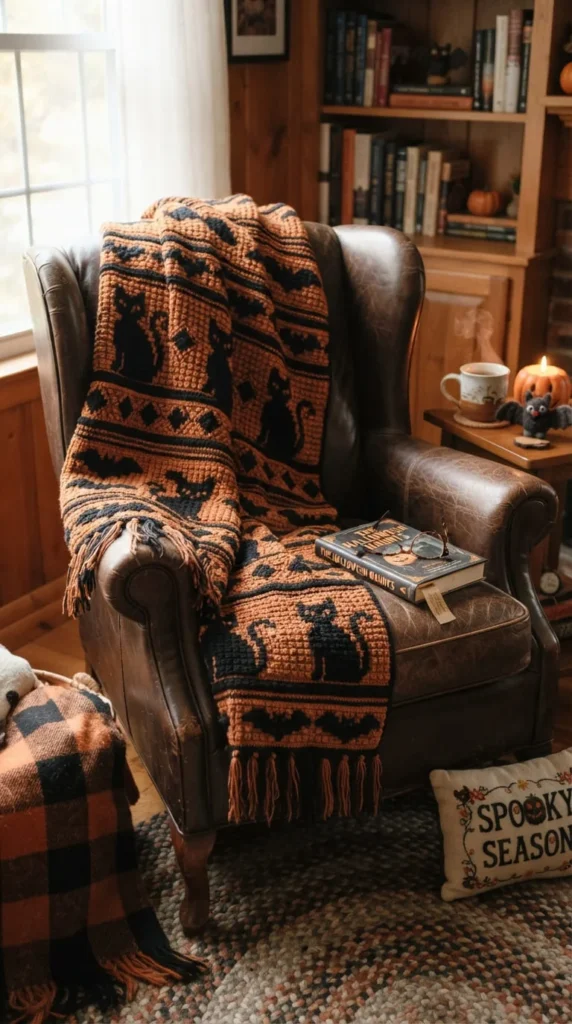
Mosaic crochet creates a picture using slip stitches and simple color changes worked over two rows at a time, rather than the block-by-block construction of a C2C graphgan. The technique produces a slightly raised, layered look that reads as more textured than a flat graphgan image.
This method works particularly well for silhouette-style Halloween motifs — a black cat, a witch’s silhouette, or a simple bat shape — since mosaic crochet handles bold, high-contrast shapes more easily than fine detail. You’re essentially “hiding” one color behind slip stitches while the other color forms the visible motif.
Because only two colors are active in any given section, yarn management stays simpler than a multi-color graphgan, even though the visual result can look just as detailed. This makes mosaic crochet a good middle ground if you want a graphic Halloween image without managing a dozen bobbins of different shades.
Expect a slower row count than plain single crochet, since mosaic patterns typically work two rows for every one row of visible progress. Budget your project timeline accordingly rather than judging progress purely by row count.
10. Tunisian Crochet Blanket with Cat or Moon-Phase Motifs
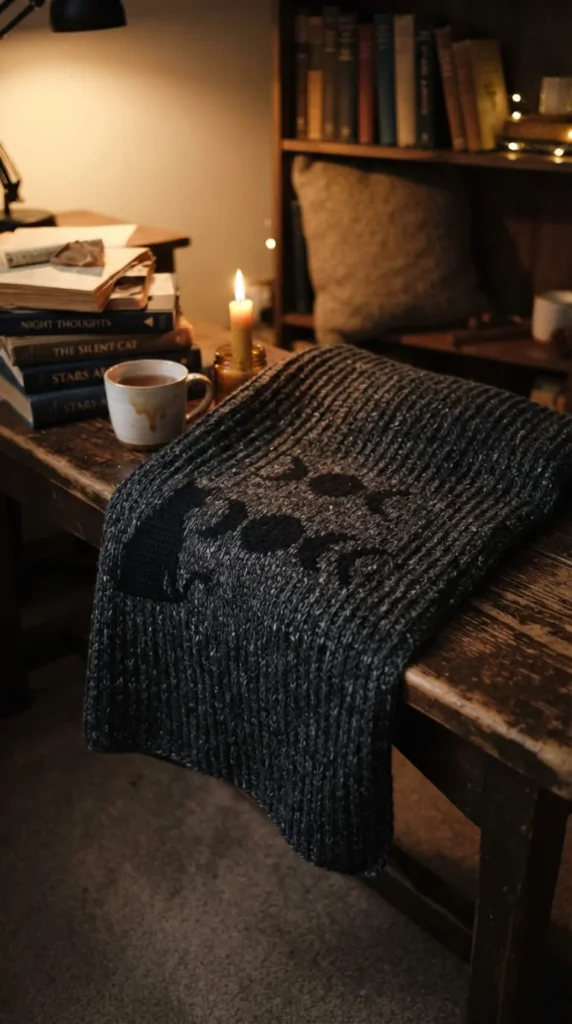
Tunisian crochet uses a longer hook and a forward-and-return stitch pass, producing a dense, woven-looking fabric that suits subtler Halloween themes better than bold, cartoonish ones. A moon-phase sequence or a simplified cat silhouette worked in Tunisian simple stitch has a quieter, more textile-like presence than a typical graphgan.
This technique holds color changes cleanly along its ridged structure, which makes it a solid option for anyone who wants a charted image but finds standard graphgan construction visually flat. The resulting fabric also has more natural drape resistance, so a Tunisian blanket tends to feel slightly heavier and warmer than a plain single crochet piece of the same size.
Because Tunisian crochet can curl at the edges if not blocked properly, plan for a wider border than you might use on a granny-square or C2C project, since a solid border row helps counteract the curling as the piece dries after blocking.
This is a good project for an intermediate crocheter who already knows basic Tunisian simple stitch and wants a design more understated than a full skull-and-cobweb print, but still clearly seasonal once you know what to look for in the pattern.
11. Neutral Halloween Blanket for Minimalist Homes
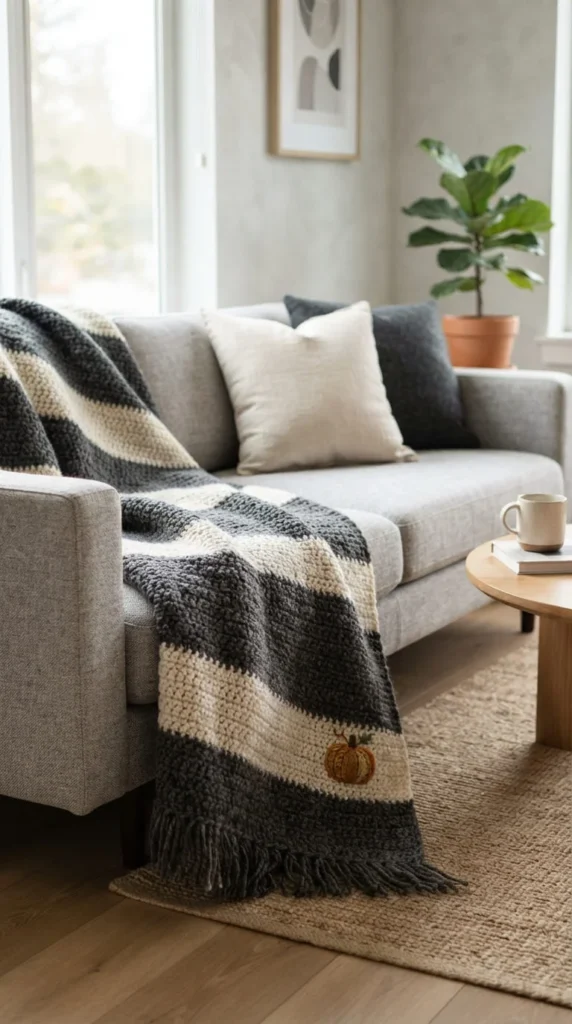
Not every home wants bright orange and black on the couch, and a neutral palette — charcoal, cream, taupe, muted olive — gives you seasonal texture without the loud color contrast typical of most Halloween patterns. A single small embroidered pumpkin or bat in one corner is often enough to signal the season without dominating the design.
Build this blanket using a plain stitch pattern in your neutral base colors, then add the Halloween detail as a single small embroidered or appliquéd accent rather than a full chart. This keeps the project quick relative to a full graphgan while still giving it a seasonal identity.
This style works particularly well if you’re decorating a shared or rented space where a full skull-and-cobweb blanket might feel out of place, or if you simply prefer a quieter aesthetic that still nods to the holiday. It also transitions more naturally into a general autumn or winter throw once November arrives, since nothing about a charcoal-and-cream palette screams “pack this away on November first.”
12. Baby-Safe Halloween Blanket for Nurseries
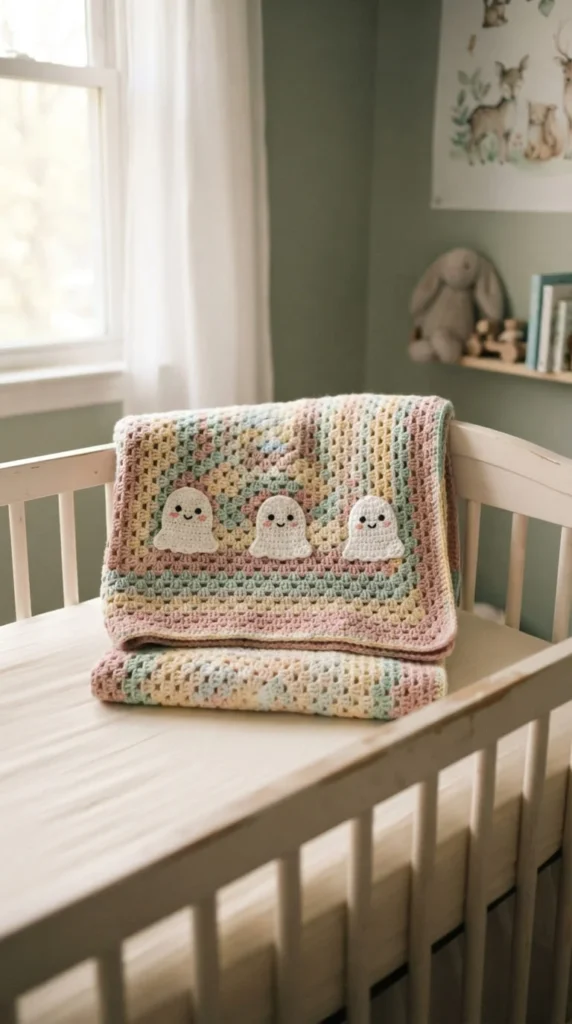
A baby blanket needs a different approach than an adult throw, and safety should shape every decision here. Skip loose buttons, beads, or plastic eyes entirely, and use embroidered facial details instead so nothing can come loose and become a choking hazard.
Soft pastel colors — lavender, blush, mint, or cream — work better in a nursery than traditional orange and black, and they let a Halloween-themed piece double as general nursery décor for months rather than a single season. A simple friendly ghost or a single small pumpkin motif is usually enough detail without overwhelming a small blanket.
Choose a washable, soft acrylic or cotton blend yarn rather than anything scratchy or delicate, since baby blankets get washed often and need to hold up to repeated laundering without pilling or losing shape. Keep the stitch pattern relatively open and breathable rather than extremely dense, since babies need blankets that won’t overheat.
This is one of the more meaningful gift ideas on this list, particularly for a baby due in September or October, since a well-made baby blanket often gets kept far longer than most other handmade gifts.
13. Reversible Halloween-to-Autumn Blanket
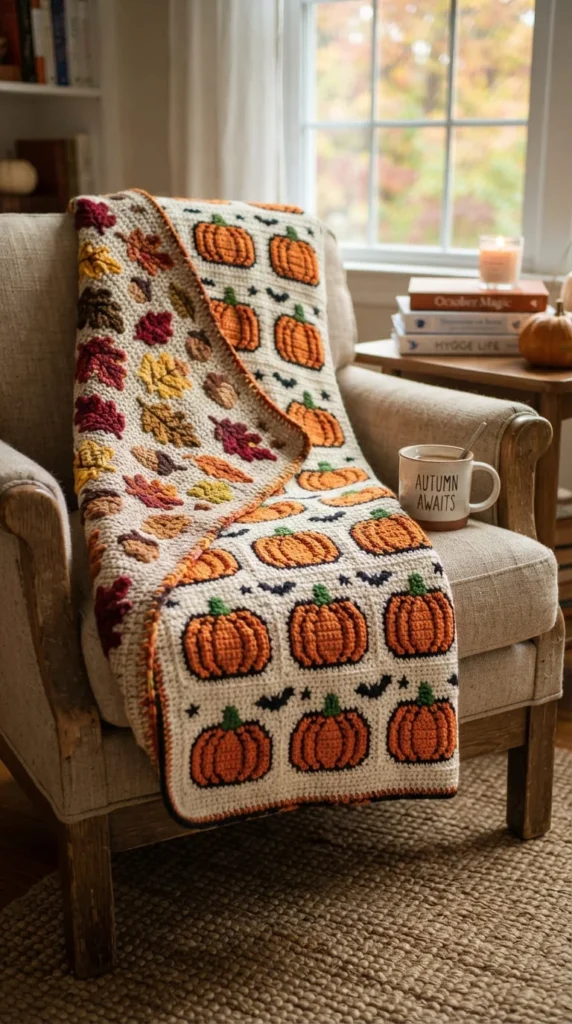
If you want a project with a longer shelf life than a single season, a reversible design gives you two blankets in one. Work each square or panel with a Halloween motif on one face and a general autumn motif — a leaf, an acorn, or a plain pumpkin — on the reverse, so flipping the blanket changes its seasonal identity entirely.
This works most cleanly with a modular construction like granny squares or panels rather than a single continuous graphgan, since modular pieces can be joined with the seams hidden between two right-side faces. A double-sided join takes a bit more planning than a standard one-sided seam, but it isn’t a difficult technique once you’ve tried it on a single test square.
Once Halloween passes, flip the blanket over and it reads as a plain autumn throw straight through Thanksgiving instead of going into storage on November first. This is a practical answer for anyone who wants their handmade projects to earn a longer season of actual use, and it also makes a thoughtful gift for someone who decorates for fall generally rather than Halloween specifically.
14. Personalized Name or Initial Graphgan
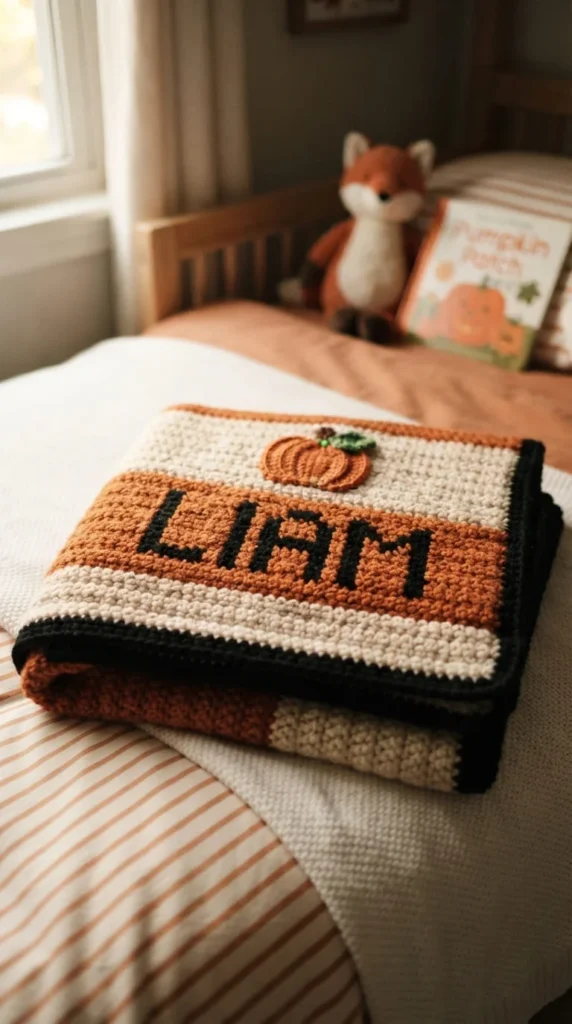
Adding a name, initial, or birth month turns a generic Halloween blanket into something clearly made for one specific person, and it’s a strong option if you’re making this as a gift rather than general home décor. Chart a short name in simple block letters using the same C2C or single crochet grid method you’d use for any other graphgan motif.
Balance the lettering with a small seasonal motif on either side — a pumpkin, a bat, or a simple star — so the piece reads as a personalized Halloween blanket rather than a plain nameplate. Keep the name short if this is your first lettering project, since longer names require a wider chart and more color-change management across each letter.
This idea works particularly well for a child’s birthday falling near Halloween, a family member who collects Halloween-themed décor, or a baby’s first fall. A personalized blanket also tends to get kept and displayed for years rather than packed away after one season, which makes the extra charting effort worth it for a meaningful one-time gift.
15. Vintage Halloween Truck Blanket for a Retro Look
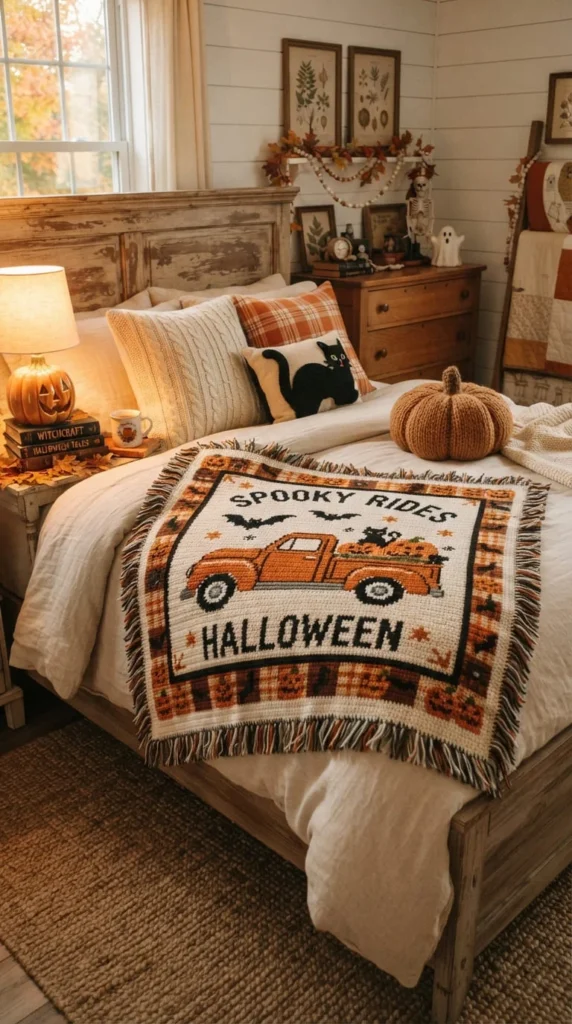
Vintage Halloween imagery — pickup trucks hauling pumpkins, retro postcard-style moons, old-fashioned black cats — has grown into its own decorating niche separate from typical horror motifs, and it translates well into a charted crochet blanket. This style tends to use muted, slightly faded colors rather than the bright, saturated orange and black of a typical modern pattern.
A truck silhouette hauling a few round pumpkin shapes works well as a C2C or mosaic design, since the shapes are simple and geometric enough to read clearly even at a smaller chart resolution. Adding a plain crescent moon or a scattering of small stars in the background gives the piece a nostalgic, postcard-like feel without overcomplicating the chart.
This motif tends to appeal to a slightly different audience than skull or monster designs — people drawn to farmhouse or cottagecore-style seasonal decorating rather than anything spooky or gothic. It’s worth considering if your usual home décor already leans toward a vintage or rustic look and you want your Halloween blanket to match rather than stand apart from everything else in the room.
16. Stash-Buster Blanket for Leftover Halloween Yarn
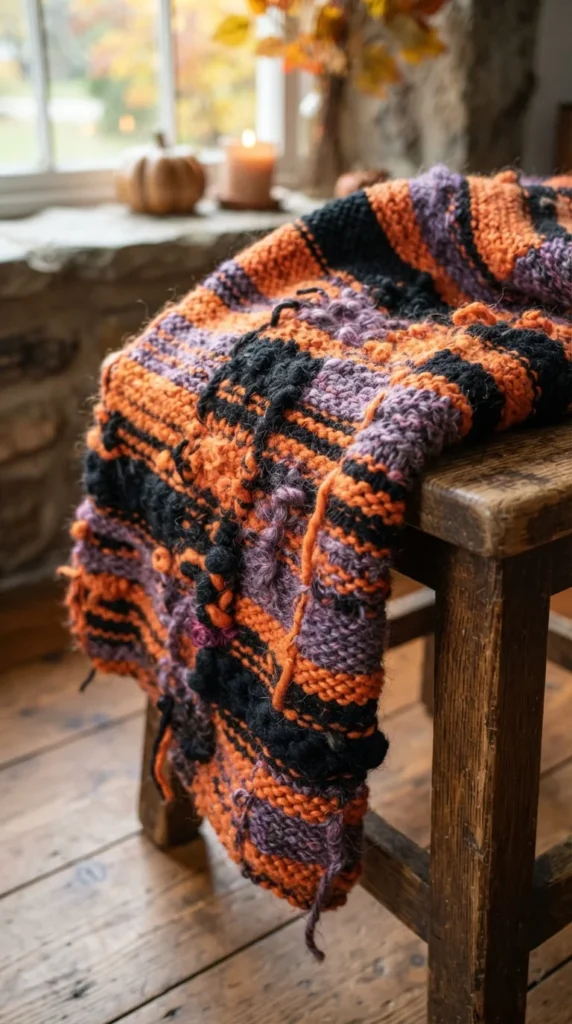
If you’ve made several Halloween projects already — garlands, appliqués, smaller motifs — you likely have partial skeins in orange, black, and purple sitting in a project bin. A stash-buster blanket uses those leftovers rather than buying new yarn for an entirely fresh project.
Work simple granny squares or basic striped panels using whatever quantities you have on hand, then unify the mismatched colors and yarn weights with a consistent neutral background color — black or cream tends to work best — that ties the varied scraps together into one coherent design.
This approach won’t give you the precise, planned look of a charted graphgan, but it has its own kind of charm, and it’s genuinely useful for reducing a growing yarn stash rather than letting partial skeins sit unused for years. Keep a rough tally of your yardage as you go so you know roughly how large a blanket your available scraps can realistically support before you start.
This is also a low-pressure project if you want to practice new stitch patterns or techniques without worrying about matching a specific chart or committing full skeins of yarn to something that might not turn out as planned.
17. Matching Blanket, Pillow, and Garland Set
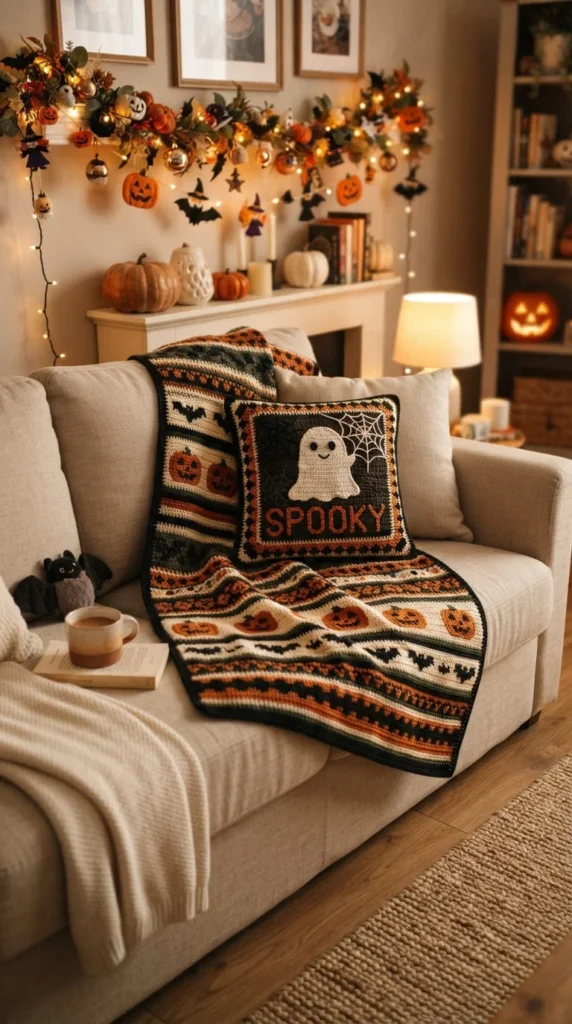
Once you’ve settled on a color palette and motif style you like, repeating it across a small coordinated set — a blanket, a pair of throw pillow covers, and a simple garland — creates a more finished, styled look than any single piece on its own. This also gives you flexibility to start with just the blanket and add matching pieces later as time allows.
Reuse the same motif at a smaller scale for the pillow covers, since a single pumpkin or ghost that reads clearly at blanket size will usually still work shrunk down to a twelve-inch pillow front. A simplified version of the same motif strung along a garland ties the whole seasonal display together across your couch and mantel at once.
This approach also makes an appealing gift set if you’re making Halloween décor for a friend or family member, since a coordinated set feels more considered than a single standalone item. Plan your yarn purchase around the full set from the start if you know you want all three pieces, since buying matching dye lots later can be difficult once a particular colorway sells out.
18. Getting the Border Right on a Modular Blanket
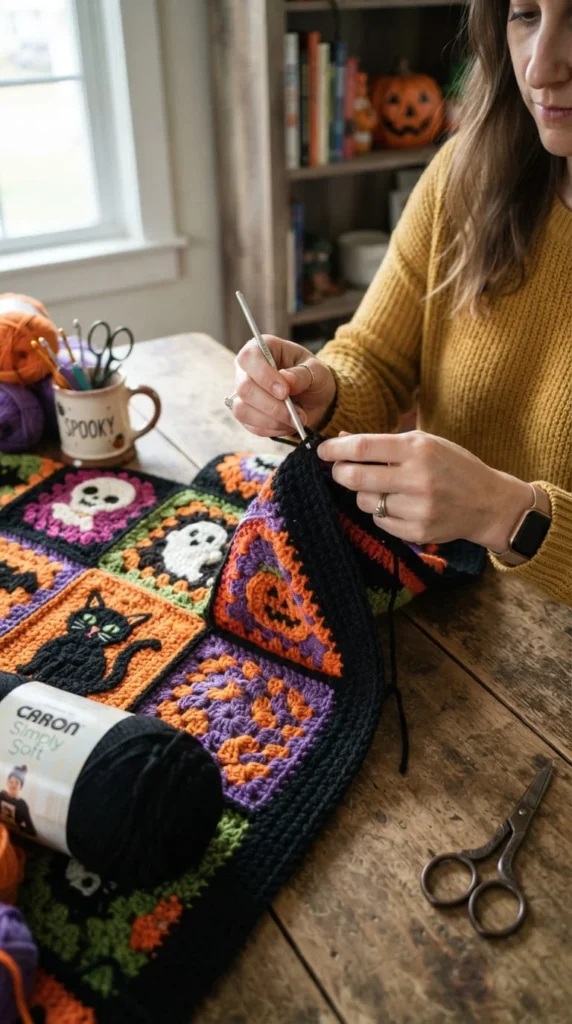
A strong border does more work than most crocheters expect, especially on a modular design built from separate squares or panels. A chunky, contrasting border — solid black or deep purple worked several rounds deep — visually unifies squares that might have slightly different tensions or shades of the same color.
Beyond appearance, a solid border round also corrects minor sizing inconsistencies between squares, since a firm border row can pull slightly uneven edges into a straighter final line. Work your border in a stitch pattern with good structure — double crochet or half double crochet — rather than a loose, airy stitch that won’t hold the edge firm.
Consider a scalloped or picot edge if you want something more decorative than a plain straight border, since either option adds visual interest without much extra time investment. A spiderweb-inspired lace border is worth trying if your blanket already leans toward a more delicate, less bulky construction like mosaic or Tunisian crochet.
Always measure and block your assembled squares before adding a border, rather than after, since a border worked over uneven panels will simply preserve those inconsistencies rather than fixing them.
19. Managing Color Changes Without the Tangled-Yarn Headache
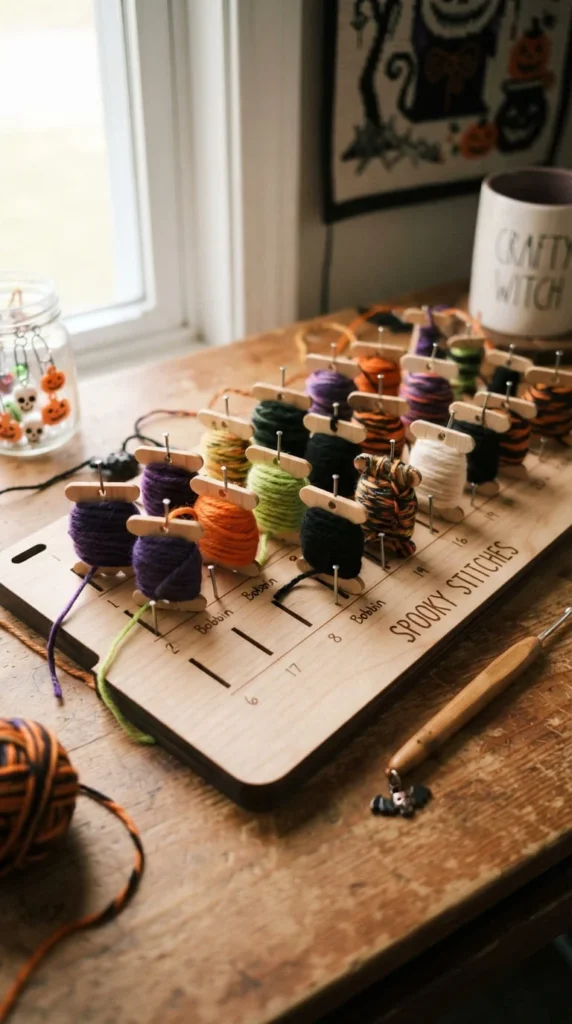
Multi-color projects like graphgans and mosaic blankets come with a hidden challenge that beginner crocheters rarely expect: keeping several strands of yarn organized without them tangling into a knot behind your work. Small yarn bobbins or butterflies, one for each active color in a row, solve most of this problem before it starts.
Wind just enough yarn onto each bobbin for a few rows at a time rather than a full skein, since a smaller working length tangles less and is easier to manage as you shift between colors. Keep your bobbins loosely organized in the order they’ll appear across the row, rather than in a random pile, so you’re not hunting for the right color mid-row.
Weave in ends as you go rather than saving them all for the end of the project. A large graphgan can accumulate dozens of loose tails, and tackling them in small batches throughout the project is far less overwhelming than facing a mountain of ends once the blanket is otherwise finished.
Estimate your yardage by color before starting a large multi-color project, adding roughly ten to fifteen percent extra per shade, since running short on a specific color mid-blanket is one of the most frustrating problems to solve partway through.
20. Halloween Blanket Ideas Made Specifically as Gifts
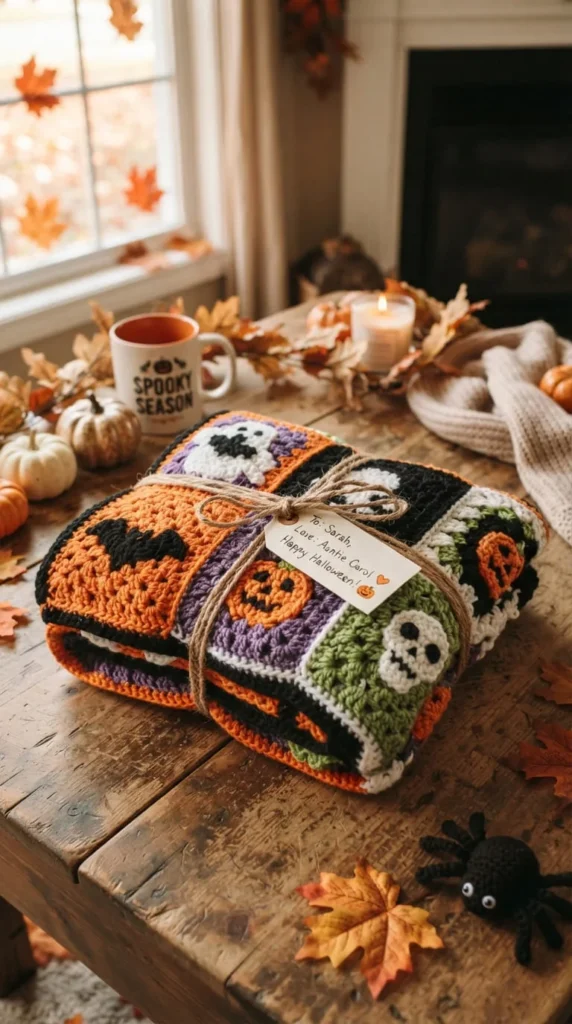
A handmade blanket carries more weight as a gift than almost anything else on this list, simply because of the time and intention behind it. If you’re making one specifically to give away, choose a design based on the recipient’s actual taste rather than defaulting to whatever pattern you personally find most interesting.
A Halloween-obsessed friend who decorates their whole house every October will likely appreciate a bold graphgan or a full skull-and-cobweb design more than a subtle neutral piece. A coworker or more casual friend might prefer something closer to the pumpkin patch or vintage truck designs, which read as seasonal rather than overtly spooky.
Consider the recipient’s living space, too. A large graphgan throw makes sense for someone with a big couch to fill, while a lap-sized granny-square version suits a smaller apartment or a reading chair better. Pair the finished blanket with a simple washing-instruction card, since handmade gifts are more likely to be cared for properly if the recipient knows what fiber they’re working with and how to clean it safely.
Conclusion
Between graphgans, granny squares, appliqué designs, and quieter neutral options, there’s a construction method here that fits almost any skill level and any amount of free time you actually have this season. Start with a project that matches your available hours honestly — a stripe blanket if you want something finished by the weekend, a full graphgan if you’re happy to work on something for a few weeks.
Keep gauge, finished size, and yarn estimates in mind before you start a larger project, since those planning details tend to matter more to the final result than the motif itself. If you’re new to colorwork, a smaller stash-buster or a modular CAL-style project is a gentler entry point than diving straight into a full skull graphgan.
Pick one idea from this list that matches your space, your time, and who you’re making it for, then gather your yarn and start with a small swatch before committing to the full pattern. Once you’ve confirmed your gauge and color placement on a test piece, the rest of the blanket tends to come together at a steady, satisfying pace.