
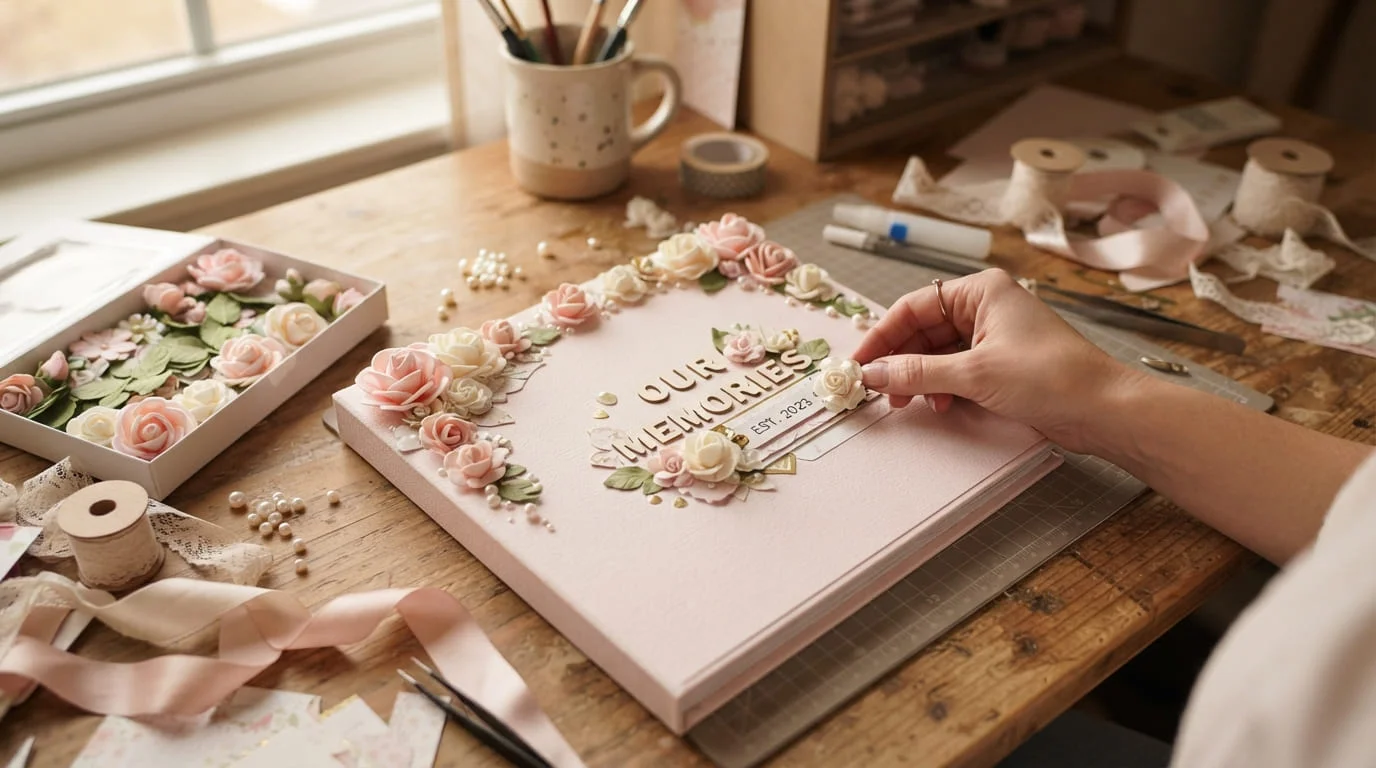
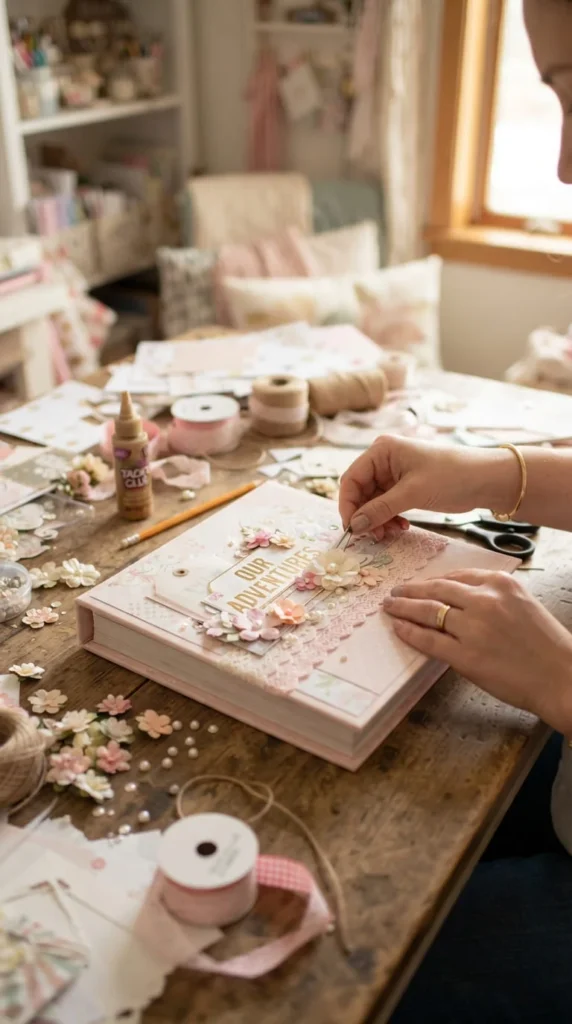
Not every scrapbook cover needs to be moody or minimal — sometimes you just want something soft, playful, and genuinely sweet to look at every time you pick the album up. Cute scrapbook cover ideas lean into exactly that: pastel colors, tiny flowers, bows, pearls, and little clustered details that make a cover feel like a small gift rather than a plain notebook front. Whether you’re putting together a Mother’s Day album, decorating a school project cover, or just want your memory book to look as warm as the photos inside it, the ideas below cover a full range of budgets, skill levels, and occasions. Each one comes with the practical details — materials, placement, and a few things that commonly go wrong — so you can actually finish the project looking the way you pictured it.
1. Cluster Three To Five Flowers Instead Of Scattering Them
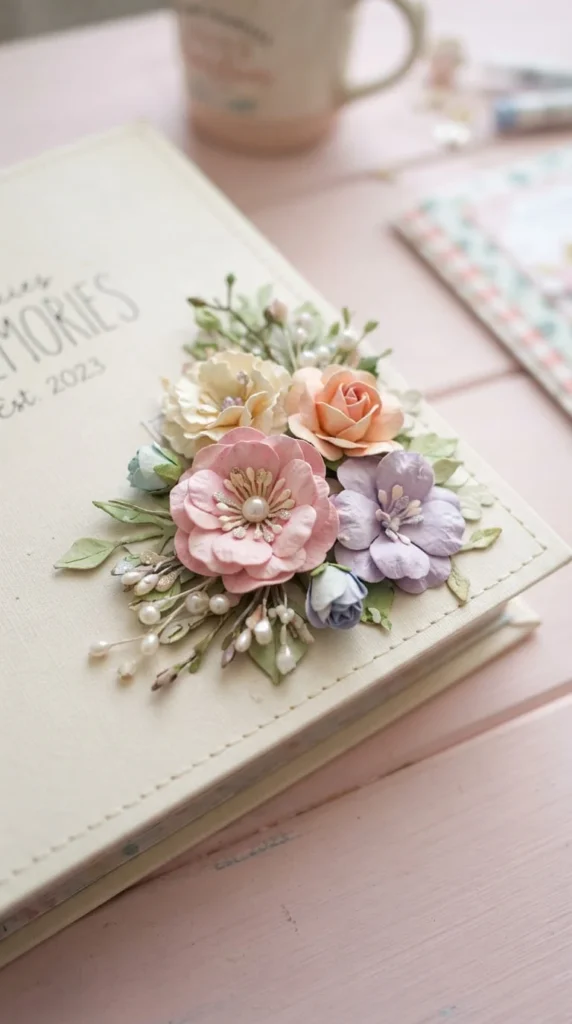
One of the fastest ways to make a cute cover look accidentally messy is spreading flowers evenly across the whole surface — grouping them instead almost always looks more finished, even with the exact same materials.
Pick three to five flowers in varying sizes, and place them together in one corner or along one edge rather than dotting them around the whole cover. Start with the largest flower as your anchor, then tuck smaller ones around and slightly behind it so the cluster has some depth instead of sitting flat in a single layer.
Adding one or two small leaves or a thin ribbon tail threaded through the base of the cluster fills in gaps without needing another full flower. If you’re using foam or paper flowers rather than real dried ones, a small dab of hot glue at the center of each keeps them from shifting when the album gets picked up and handled.
This clustering approach works for almost any cute theme — pastel florals, vintage roses, or bright rainbow blooms — and it’s a good habit to carry into every other embellishment on this list, since grouped details consistently read as more intentional than scattered ones.
2. Wrap The Base In Soft Fabric Before You Decorate
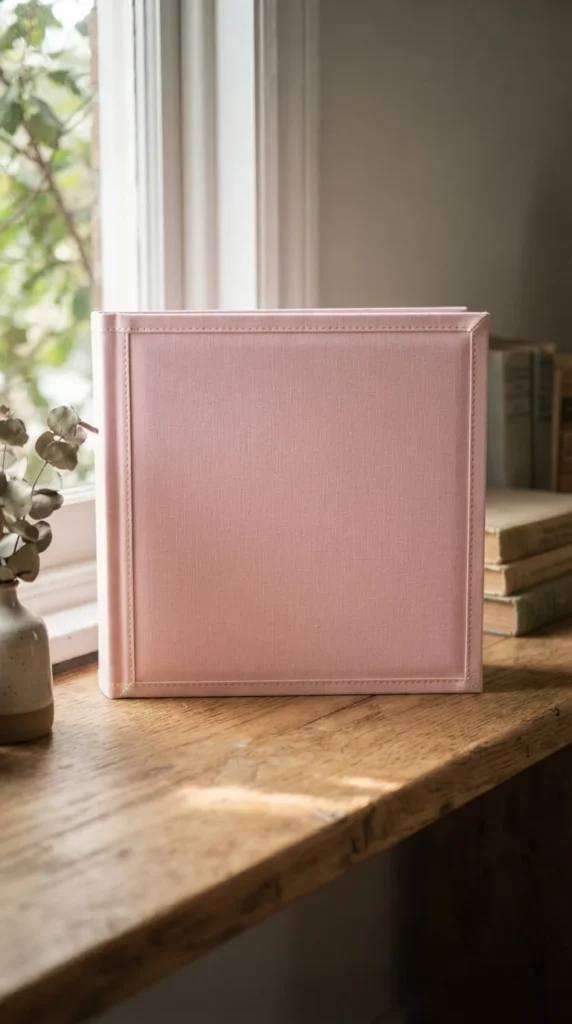
Starting with a fabric-covered base instead of plain cardstock gives the whole project a softer, more giftable feel right from the first step, before you’ve added a single embellishment.
Choose a cotton or felt fabric in a soft pastel or pattern, and stretch it over your album’s front cover, wrapping the excess around to the back and securing it with fabric glue or a few discreet staples. Smooth out the fabric from the center outward as you go to avoid trapped wrinkles, which are much harder to fix once the glue sets.
Once the fabric base is dry, everything else — flowers, bows, ribbon, a title — sits on top of a surface that already feels warm and tactile rather than stiff and papery. This matters more than it might seem, since a fabric base changes how the whole cover feels in your hands, not just how it looks.
This approach works particularly well for Mother’s Day gifts, baby books, and anniversary albums, where a soft, huggable texture fits the sentiment better than a flat printed cover. It also gives heavier embellishments something more forgiving to grip onto than smooth cardstock.
3. Frame A Photo With A Paper Window
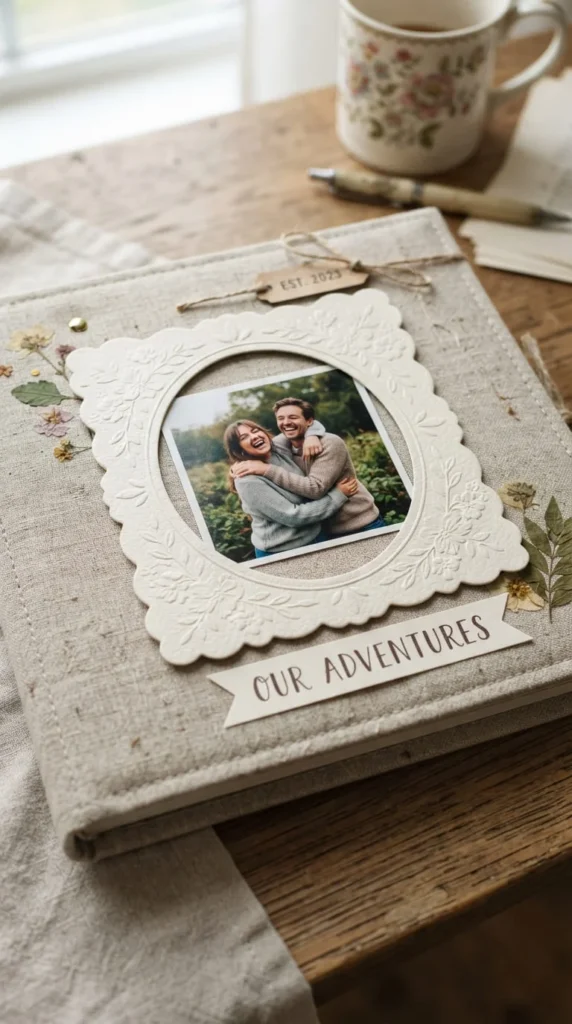
A simple cut-paper frame around your main photo gives the whole cover structure, and it’s one of the easiest ways to make a cute design look deliberate rather than just decorated around the edges.
Cut a window shape — a scalloped oval, a soft rounded rectangle, or a simple circle — from a contrasting piece of cardstock, then mount it directly over your photo so the frame’s edge overlaps the photo slightly rather than leaving a gap between them. Layering the frame on foam adhesive rather than gluing it flat adds a bit of visible depth against the background.
A thin border of tiny pearls, small dots of glitter glue, or a single ribbon loop at the top of the frame finishes the look without needing much else on the rest of the cover. Keeping the space around the frame relatively open lets the photo and frame stay the clear focal point rather than competing with other decoration.
This technique suits almost any occasion — birthdays, first-day-of-school photos, or a favorite family picture — and it’s forgiving for beginners, since a slightly imperfect cut window still reads as a design choice rather than a mistake once the photo is in place.
4. Build A Pastel Kawaii Cloud-And-Heart Cover
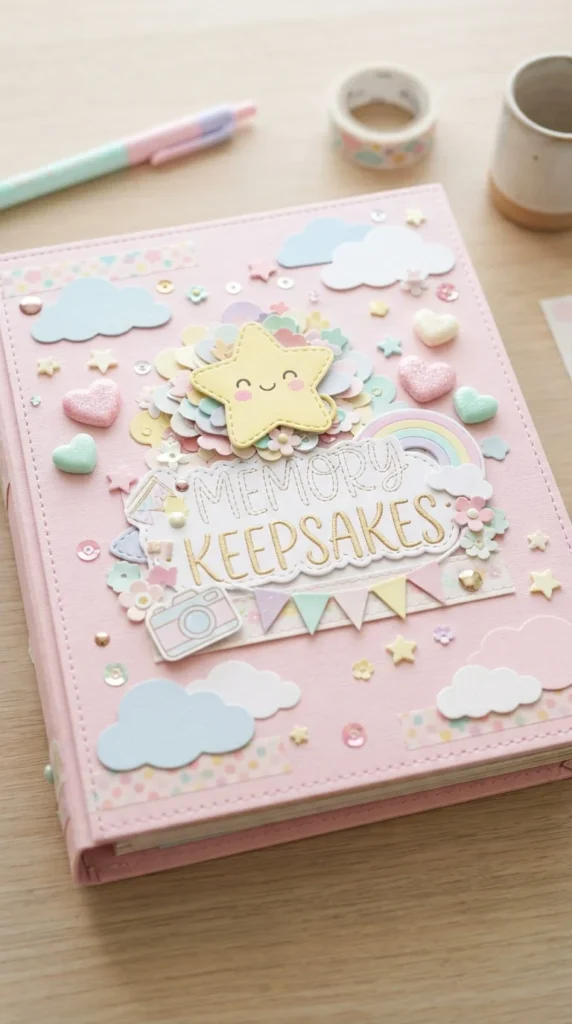
If your idea of cute leans playful rather than romantic, a kawaii-inspired cover built from clouds, hearts, and simple smiling shapes gives you a completely different mood using the same basic paper-craft skills.
Cut a few soft, rounded cloud shapes from pastel blue or white cardstock, and scatter two or three small hearts and stars between them, keeping the overall composition light rather than crowded. Simple stick-on eyes or a small drawn smile on one shape adds personality without needing any advanced drawing skill.
A rounded, bubbly font for the title fits this style far better than a formal script or serif, since the whole aesthetic leans toward soft and friendly rather than elegant. Pastel blue, pink, mint, and lavender work especially well together here, and sticking to just two or three of those colors keeps the cover from feeling overwhelming.
This style works particularly well for kids’ memory books, school-year albums, or a lighthearted friendship scrapbook, and it’s genuinely quick to put together — most of the shapes here can be cut freehand without a template, which makes it a good weekend project with a child.
5. Add A Ribbon Bow As The Centerpiece
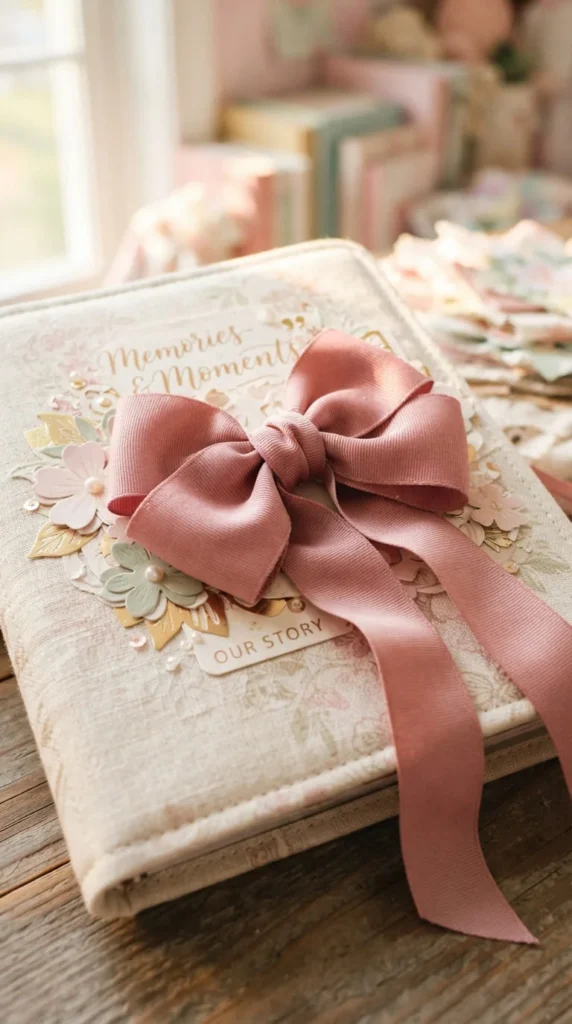
A single well-made bow can carry an entire cover design on its own, which makes it a good option if you want something that looks polished without needing a dozen small embellishments.
Use a wider ribbon — around one to two inches — for a bow with enough presence to act as a focal point rather than a small accent. Fold and wrap the ribbon into a classic bow shape, securing the center with a small strip of matching ribbon or a dab of hot glue, then mount it slightly off-center rather than dead center for a more natural, less rigid look.
Trailing the ribbon tails at a slight angle, rather than trimming them perfectly straight, gives the bow a softer, more relaxed shape. A small cluster of pearls or a single flower tucked at the base of the bow adds detail without competing with it for attention.
This idea works well when you want a cover that looks finished with very little else added — a bow, a simple title, and some open space around it is often enough on its own, especially for a gift album or a bridal shower scrapbook where an elegant, uncluttered look suits the occasion.
6. Try A Butterfly Cluster In Foam Or Paper
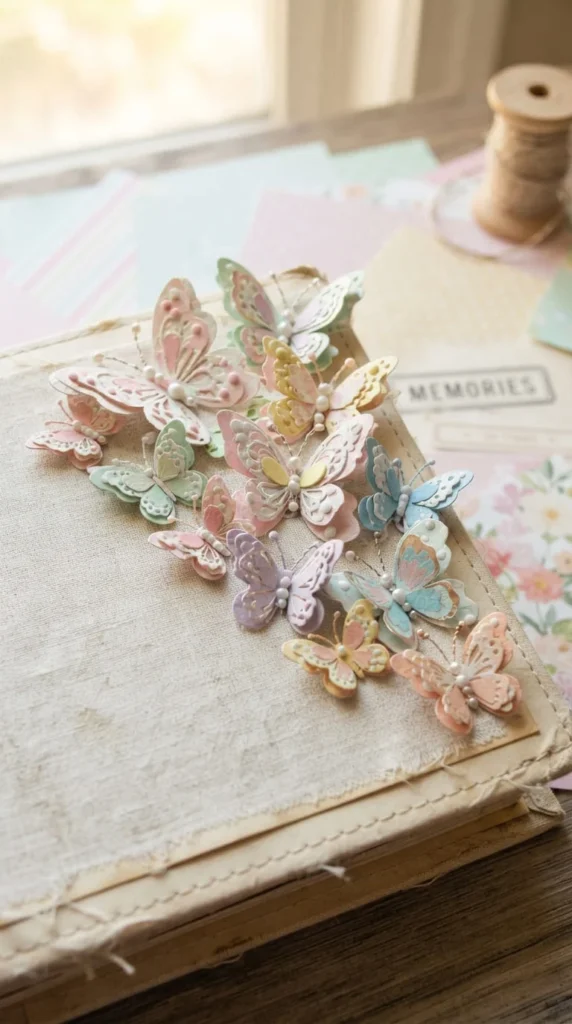
Butterflies bring movement and a slightly whimsical feel to a cover, and grouping several different sizes together in one area gives the impression of a small swarm rather than a few random shapes.
Cut or punch butterfly shapes from foam sheets or patterned cardstock in three or four different sizes, then fold each one gently along the center to lift the wings slightly off the flat surface. Mount them using foam adhesive dots rather than flat glue, which creates just enough of a gap to cast a small shadow and make the wings look like they’re genuinely lifted rather than glued flat.
Arrange the cluster so the butterflies appear to be flying in one general direction — angled slightly upward and to one side — rather than facing every which way, which reads as more intentional and less random once it’s finished.
This idea pairs naturally with garden-themed albums, spring and summer memory books, or a nature-focused scrapbook, and it’s a nice complement to the flower clustering idea covered earlier if you want to combine both into a single, fuller corner design.
7. Make A Mother’s Day Fabric Cover With Pressed Blooms
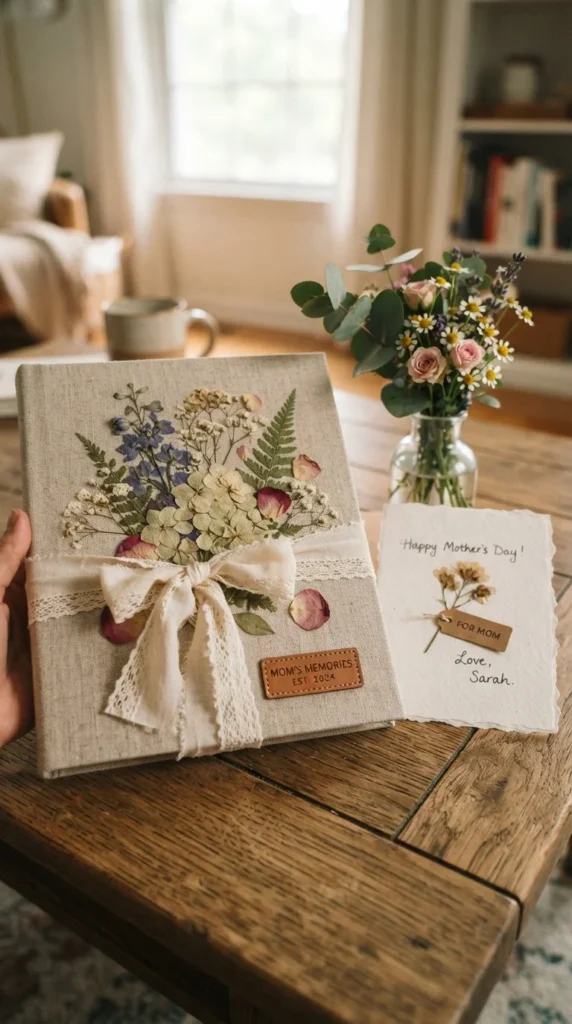
Mother’s Day albums call for something that feels genuinely handmade rather than store-bought, and combining a fabric base with pressed flowers hits that note without requiring advanced skills.
Start with the fabric-wrapped base covered earlier, then add real pressed flowers rather than paper or foam ones — the slightly imperfect, organic shapes of pressed blooms suit this occasion better than a uniform craft-store flower would. Arrange them in a loose cluster near the title rather than scattered across the whole cover.
A short handwritten message — a date, a nickname, or a single meaningful word — fits better here than a long printed title, since the whole project is meant to feel personal rather than polished like a commercial product. A thin ribbon tied around the spine or through a small hole in the corner adds a finishing touch without much extra work.
Because pressed flowers are delicate, a thin protective layer of vellum or clear acetate over the finished cluster keeps the blooms from crushing once the album starts getting picked up and handled, which matters if this is a gift meant to last for years rather than just look nice on the day it’s given.
8. Design A Valentine’s Cover With Lace And Tiny Hearts
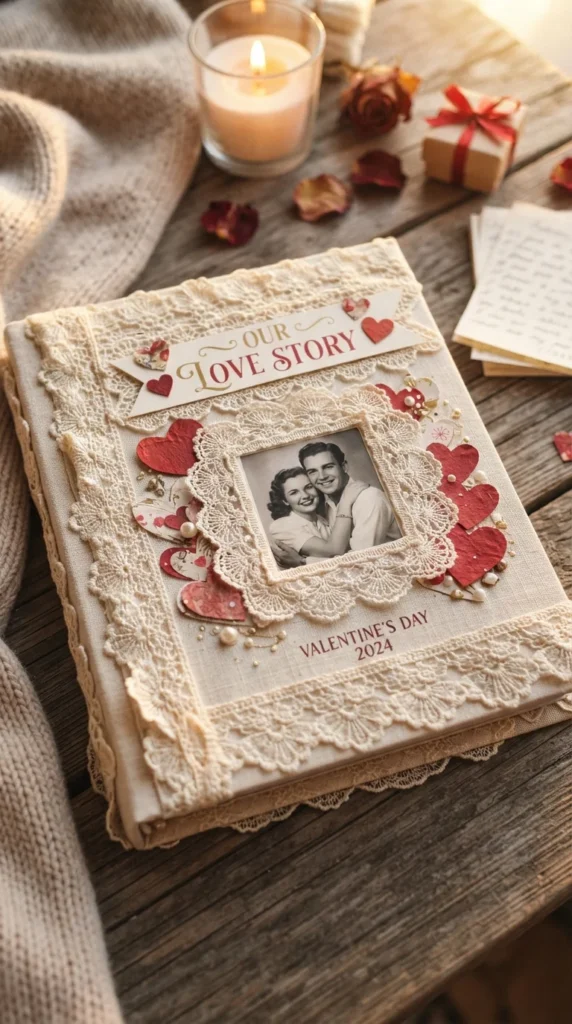
Lace and small paper hearts together create a romantic, slightly vintage feel that suits a Valentine’s or anniversary album without needing anything more elaborate than basic cutting and gluing.
Add a strip of lace along one edge of the cover — the bottom or a diagonal corner both work well — then scatter a handful of small paper hearts in two or three different sizes near the lace rather than evenly across the whole surface. Punching the hearts from a deep red or soft blush cardstock keeps the palette cohesive rather than reaching for too many different shades of red and pink at once.
A small photo, if you’re including one, works well nestled just above the lace trim, giving the whole composition a natural bottom-to-top flow rather than feeling like separate unrelated pieces glued onto the same page.
This combination works for a couple’s memory album, a Valentine’s gift scrapbook, or an anniversary book, and the lace-and-hearts pairing is flexible enough to dial up or down — a single small heart cluster feels understated, while a fuller arrangement across a larger area leans more toward a bold, romantic statement piece.
9. Build A Pop-Up Flower Cover For A Birthday Album
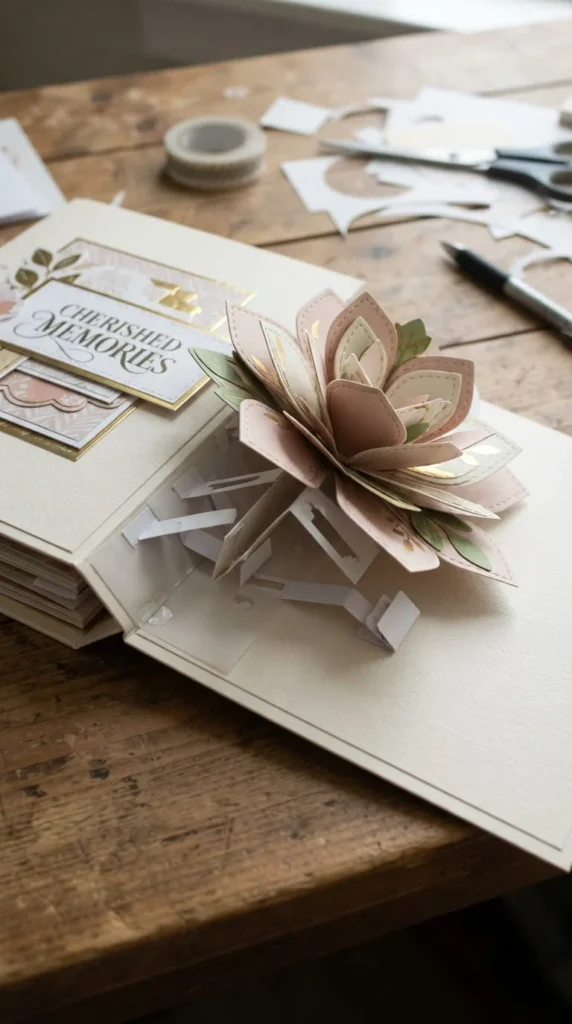
A pop-up element takes a cute cover from something you look at to something you actually interact with, which makes it a memorable choice for a birthday gift album someone will open more than once.
Cut a simple V-fold or accordion-fold mechanism from cardstock, gluing one side to the base cover and the other to the back of a paper flower or small cluster, so the flower lifts up slightly when the cover opens and folds flat again when it closes. Testing the fold’s movement several times before adding any decoration prevents a frustrating redo later if the mechanism sticks or doesn’t fold evenly.
Keep the pop-up element relatively small and centered rather than covering the entire inside of the cover, since a mechanism that’s too large can catch, tear, or fail to close properly over time. A simple “Happy Birthday” tag glued beside the mechanism, rather than on top of it, keeps the moving part clear to function properly.
This project takes more patience than most ideas on this list, but the payoff — a cover that does something rather than just sitting flat — makes it worth the extra folding practice for a special birthday gift.
10. Try A Waterfall Card Element For Hidden Photos
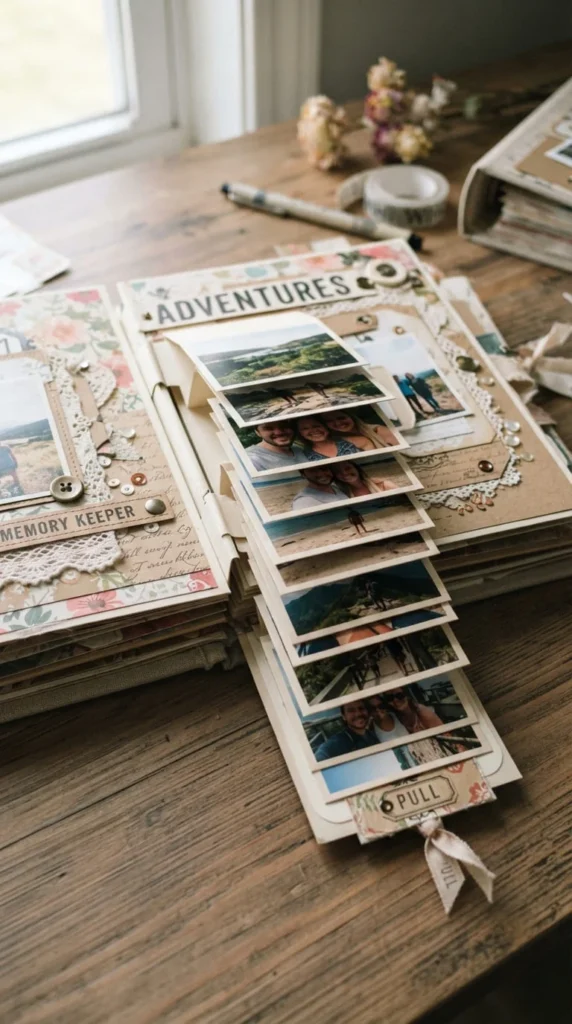
A waterfall card is a small mechanism that lets several photos cascade out from behind the cover in a fan shape when pulled, which packs a surprising amount of personality into a fairly small hidden space.
Cut a stack of small photo-sized cards, each attached to the next by a short strip of ribbon or paper at a slightly offset point, so pulling the top card causes the whole stack to fan out in sequence rather than all at once. Practicing the offset spacing with plain scrap paper first helps you get the cascade effect right before committing to your actual photos.
Tuck the folded stack into a pocket or behind a decorated flap on the cover, secured just enough to stay in place until pulled. A small ribbon tab peeking out from the pocket signals to whoever’s holding the album that there’s something to pull, rather than leaving it as a hidden surprise nobody discovers.
This mechanism works well for a set of related photos from one event — a birthday, a trip, or a milestone — that deserve more visibility than a single flat photo would give them on the cover alone.
11. Add A Rotating Frame Window
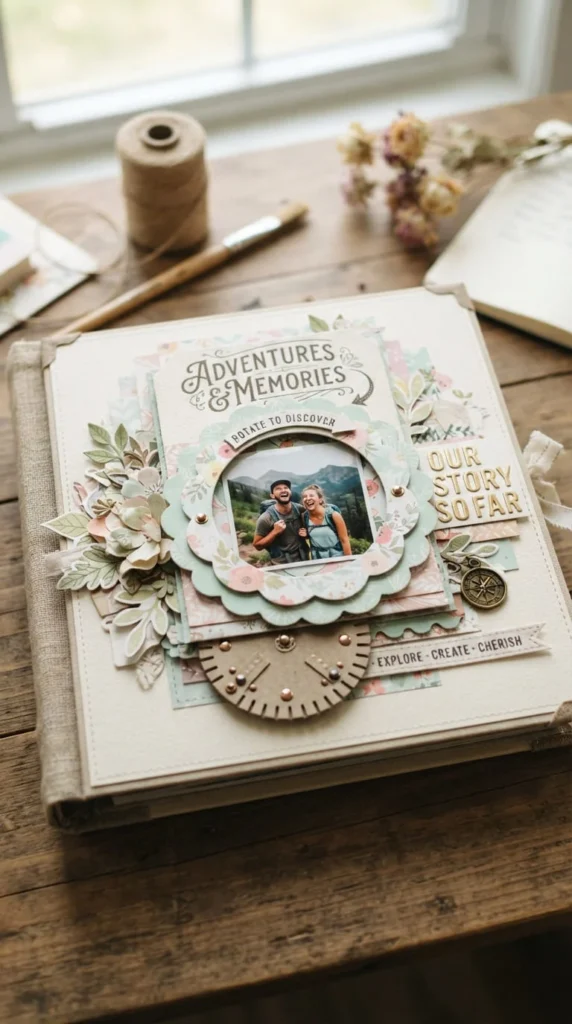
A rotating frame lets you display more than one photo in the same small space on the cover, spinning to reveal a different picture each time — a fun bit of interactivity that still keeps the overall cover fairly clean and uncluttered.
Cut two circles of the same size — one as a fixed base with a window cut out, and one as the rotating layer with two or three photos arranged around its edge. Attach the rotating circle to the base with a brad or eyelet through the center, loose enough to spin freely but snug enough not to wobble excessively.
Test the rotation a few times before gluing any decorative border around the edge, since a border applied too early can catch on the moving layer and jam the mechanism. A small arrow or dot marking one edge helps whoever’s using the album line each photo up with the window cleanly.
This idea works particularly well for a themed cover — best friends, siblings, or a series of yearly photos — where seeing more than one image in rotation adds more value than a single static photo ever could.
12. Fill A Shaker Window With Sequins And Confetti
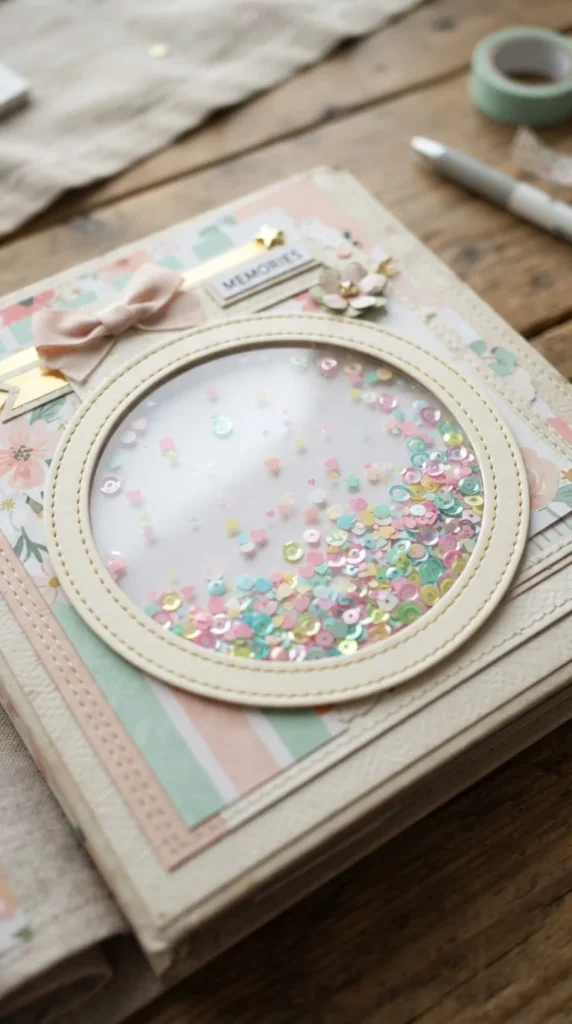
A shaker window adds a bit of sparkle and movement to a cute cover without needing anything more advanced than a craft knife and some clear acetate.
Cut a small window into the cover, build a shallow frame around the opening with foam tape or a thin spacer, then seal the front with a piece of clear acetate, leaving the contents free to shift inside. Fill the pocket loosely with small pastel sequins, paper confetti, or tiny beads before sealing the back closed — packing it too full stops anything from actually moving when the album is shaken or tilted.
Positioning the shaker window as one accent within a larger design, rather than the entire cover’s focal point, tends to look more balanced — pair it with a photo or a title elsewhere on the cover so the sparkle reads as a fun detail rather than the sole design element.
This works especially well for kids’ scrapbooks, birthday albums, or any project where a bit of playful sparkle fits the mood, and it’s a satisfying small project even on its own, without needing to build a full elaborate cover design around it.
13. Go Low-Bulk With Stickers And Flat Die-Cuts
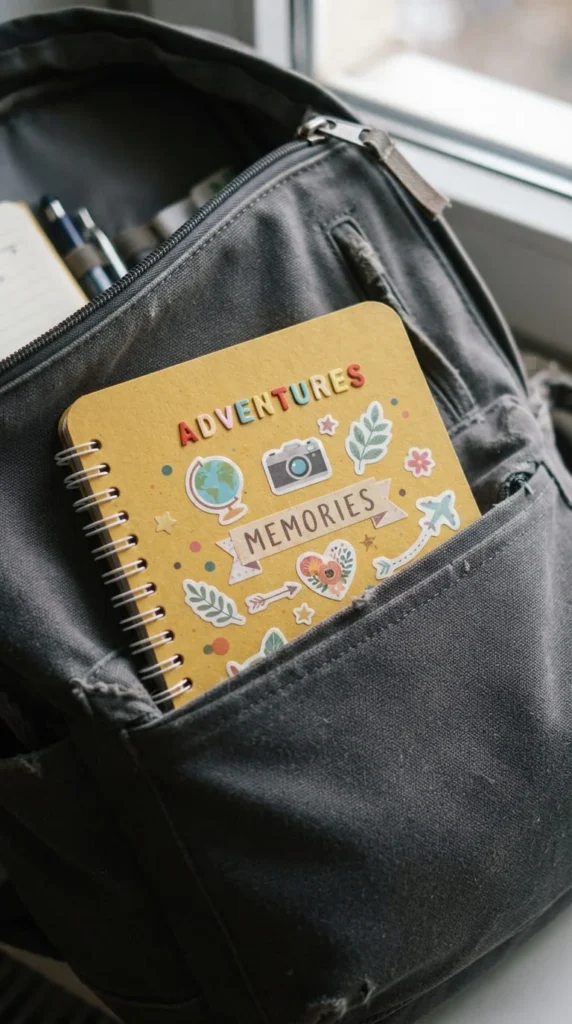
If your scrapbook is going to travel — tucked into a bag, carried to school, or handled often — raised, dimensional embellishments are more likely to get crushed or snagged than flat ones, so a low-bulk approach makes practical sense here.
Stick to flat stickers, printed patterns, and thin die-cut shapes glued completely flush against the cover rather than raised on foam tape. A cute cover doesn’t have to mean a bulky one — bright colors, a cheerful pattern, and a clear title can still look playful and finished without a single three-dimensional element.
Layering two or three flat stickers slightly overlapping still creates visual interest without adding physical thickness, which matters if the album needs to close cleanly or fit into a pocket or bag without embellishments catching on the zipper or lining.
This approach suits school-project covers, travel journals that get tossed in a backpack, or any album that’s handled frequently rather than displayed on a shelf, and it’s often the fastest option on this whole list, since there’s no drying time to wait through for hot glue or dimensional adhesive.
14. Build A School File Cover In 30 Minutes
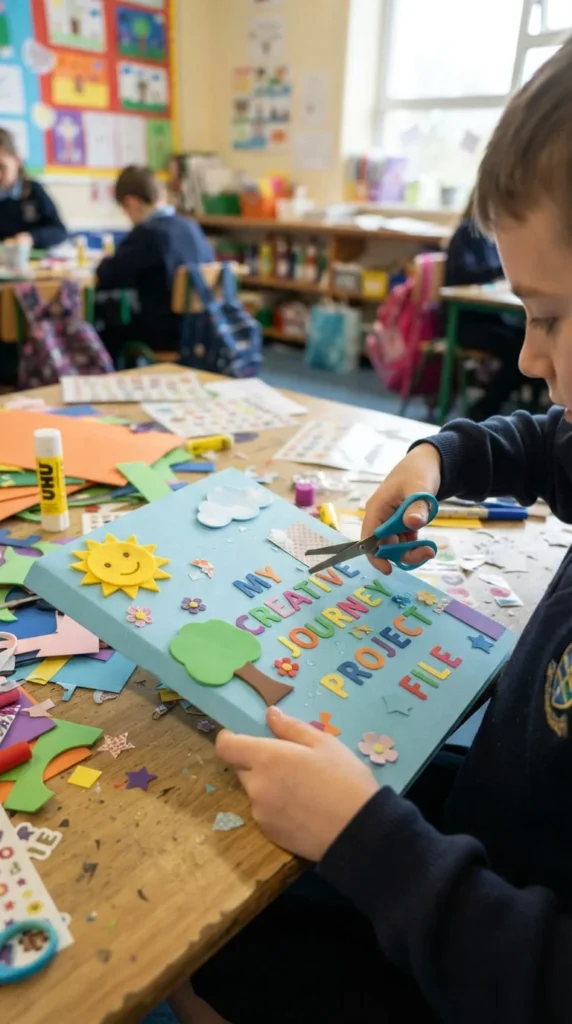
Not every cute cover needs to be a long weekend project — sometimes you need something finished fast for a school assignment, and this approach gets a genuinely nice-looking result in about half an hour.
Cut a base layer of bright cardstock to fit the file or notebook cover, then add two or three simple foam sheet shapes — a flower, a star, or a simple name label — glued flat rather than layered. A strip of washi tape along the top or bottom edge adds a finished border in seconds without needing any cutting at all.
Writing the title directly in bold marker, rather than cutting individual letters, saves a significant amount of time while still looking deliberate if you keep the lettering neat and evenly spaced. A single small sticker cluster in one corner rounds out the design without adding extra steps.
This approach works well for kids doing a school project themselves, since the materials and steps stay simple enough to manage without much adult help, and the fast turnaround means the cover gets finished the same evening it’s assigned rather than dragging out over several days.
15. Try A Pen-Pal Stationery Themed Cover
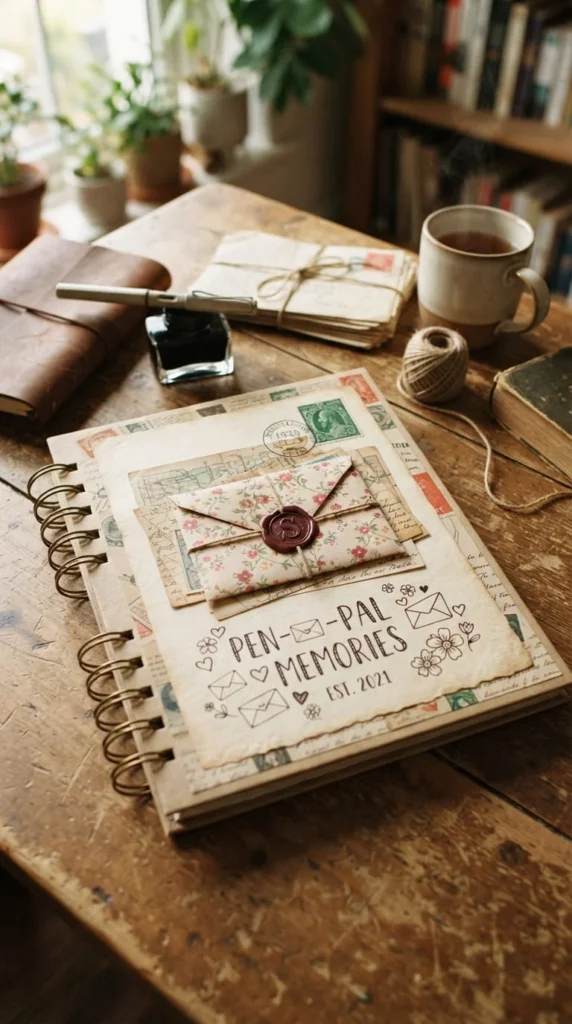
Letter-writing and stationery details bring a nostalgic, cozy feel to a cover, and this theme works especially well if the scrapbook itself is going to hold letters, cards, or handwritten notes from friends and family.
Glue a small decorative envelope onto the cover, tucked at an angle rather than centered, and add a vintage-style postage stamp sticker or a real canceled stamp if you have one saved. A wax seal — either a real melted seal or a printed sticker version — adds a nice tactile detail near the envelope flap.
A handwritten address or a short quote in a cursive font fits the theme better than a bold printed title, since the whole aesthetic leans toward something that feels like it was mailed rather than manufactured. Small twine details, tied in a simple bow near the envelope, tie the stationery theme together without adding much bulk.
This idea suits friendship scrapbooks, long-distance memory books, or any album built around correspondence and keepsakes, and it pairs nicely with actual letters or cards tucked inside the album’s pages, giving the cover and contents a consistent, cohesive feel.
16. Create A Book-Log Cover With Mini Spines
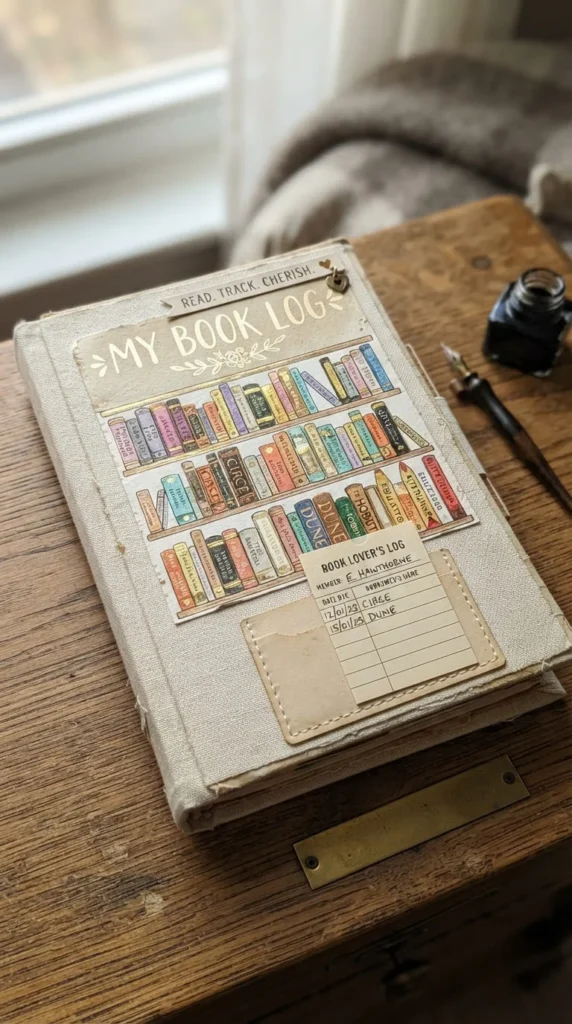
For a reading journal or book-log scrapbook, a cover styled after a small bookshelf gives an immediate visual cue about what’s inside, and it’s a fun project if you enjoy tiny, detailed paper crafting.
Cut a row of narrow rectangular strips in varying heights and colors to mimic book spines, and glue them standing side by side along the bottom third of the cover, like a miniature shelf. A few tiny handwritten titles on the thinner strips add detail without needing to be legible from a distance — the impression of a bookshelf matters more than reading each one clearly.
A small library-card-style pocket, holding a tiny card where you jot down books read that year, adds a functional and slightly nostalgic touch. A single quote or a small reading-related icon near the top balances out the visual weight of the spine cluster below.
This theme suits avid readers, book clubs, or a personal yearly reading tracker, and it’s distinct enough from typical floral or bow-based cute covers that it stands out nicely on a shelf full of otherwise similar-looking scrapbooks.
17. Build A Capsule Kit Cover With One Palette And One Motif
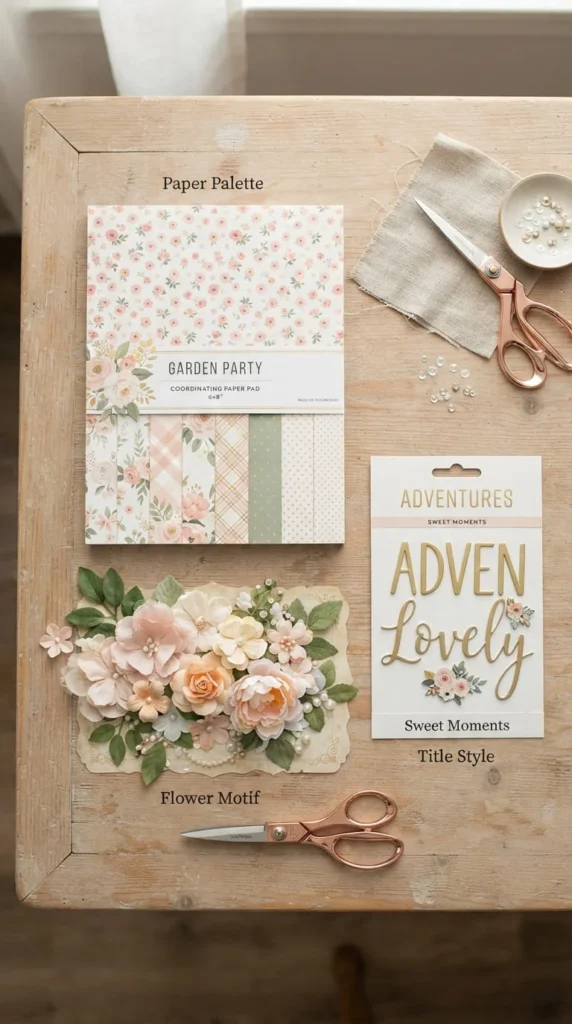
If choosing among dozens of cute ideas feels overwhelming, narrowing everything down to a small, fixed set of materials before you start actually makes the finished cover look more cohesive, not less creative.
Pick one color palette (three to four shades that work together), one main motif (flowers, butterflies, or hearts, for example), and one title style (printed, handwritten, or die-cut), and commit to using only those choices throughout the whole design. This kind of constraint sounds limiting, but it consistently produces a more polished result than reaching for every cute material you own at once.
Lay your chosen materials out together before gluing anything down, checking that the palette and motif genuinely work in the same space rather than assuming they will. If something feels off once it’s all together, it’s much easier to swap one piece out now than to redo a finished, glued cover later.
This approach is especially useful for beginners or anyone prone to over-decorating, since the limited toolkit does a lot of the design work for you, leaving room to focus on clean execution rather than juggling too many decisions at once.
18. Reuse Old Greeting Cards For An Eco-Cute Cover

Old birthday cards, holiday cards, or leftover fabric scraps often already have cute, coordinated designs built in, which makes them a genuinely useful — and low-cost — starting point for a new cover.
Sort through saved cards for ones with colors or patterns you like, and cut out just the section you want — a printed flower, a soft pattern, or a small illustration — rather than trying to use a whole card unmodified. Layering these cutouts with a small fabric scrap or a leftover ribbon from gift-wrapping ties everything together into a cohesive collage.
Tearing edges slightly rather than cutting everything into perfectly straight lines gives the collage a softer, more gathered look that suits reused materials better than a rigid, symmetrical layout would. A thin coat of sealant over the finished piece protects the different paper weights evenly, since cards and scraps often vary in thickness and finish.
This approach costs almost nothing beyond glue and sealant, and it gives the album a personal history before you’ve even started filling it with new memories — the cover itself is already made from ones you’ve kept.
19. Protect Photos With The Right Sleeve And Adhesive
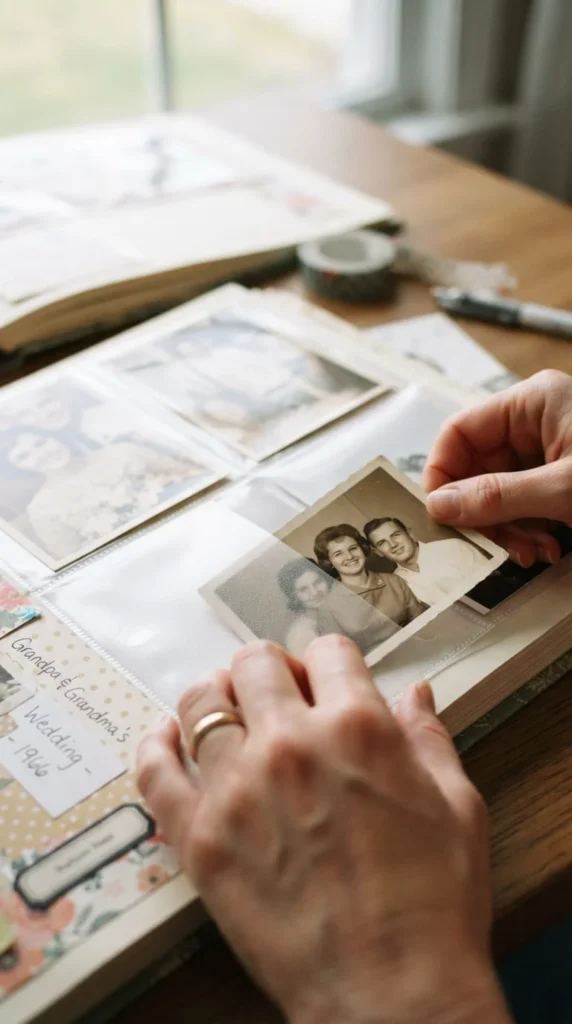
A cute cover loses its charm fast if the photo at its center starts curling, yellowing, or sticking to whatever’s glued near it — so getting the protection right matters just as much as the decoration around it.
Use photo corners or a small amount of photo-safe adhesive rather than a regular glue stick directly on the photo itself, since standard craft glue can cause discoloration or warping over time. If the photo sits under a paper frame or a shaker element, a thin sheet of acetate between the photo and any embellishment keeps glue, glitter, or loose sequins from ever touching the picture directly.
Storing the finished album somewhere away from direct sunlight and consistent humidity extends the life of both the photo and the surrounding paper decoration, since both fade and warp faster with regular light and moisture exposure.
This step matters most for gift albums and long-term memory books meant to last for years rather than a single school term, and it’s worth the extra minute of care, since a beautifully decorated cover doesn’t mean much if the photo at its center doesn’t hold up over time.
20. Refresh An Old Cover Without Starting Over
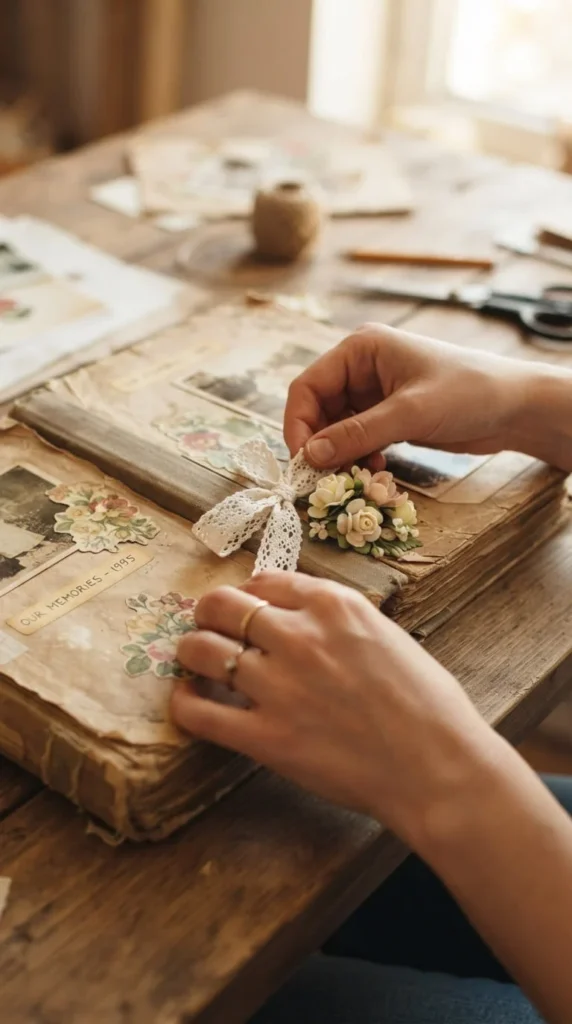
If an existing scrapbook cover has started looking dated or worn but the album itself still holds good memories, a refresh is often a better option than tearing everything off and starting from scratch.
Look at what’s already there and identify which elements still work — a faded flower might just need a fresh one added beside it rather than removed, and a slightly curling ribbon can often be re-glued rather than replaced entirely. Adding one or two new embellishments in a complementary color, rather than matching the original exactly, gives the cover a gentle update without erasing its history.
A light layer of sealant over any newly added elements helps them blend with the slightly aged look of the original materials, rather than looking obviously newer and mismatched. If the title has faded or become hard to read, a small new label placed beside — rather than over — the original preserves the sense of history while improving legibility.
This approach works well for family albums passed down or added to over many years, where the goal is to keep the cover feeling loved and lived-in rather than pristine and freshly made.
Conclusion
A cute scrapbook cover comes together through small, deliberate choices — a clustered flower arrangement instead of a scattered one, a fabric base instead of plain cardstock, one clear motif instead of five competing ones. Pick whichever idea here matches the occasion you’re working toward, whether that’s a quick school project, a Mother’s Day gift, or a long-term family memory book, and don’t feel like you need to combine every technique into a single cover. Grab whatever ribbon, paper, or old greeting cards you already have around the house, pick one starting point from this list, and give yourself an evening to put it together — the sweetest covers are usually the ones that came from actually sitting down and making something rather than waiting for the perfect idea to strike.