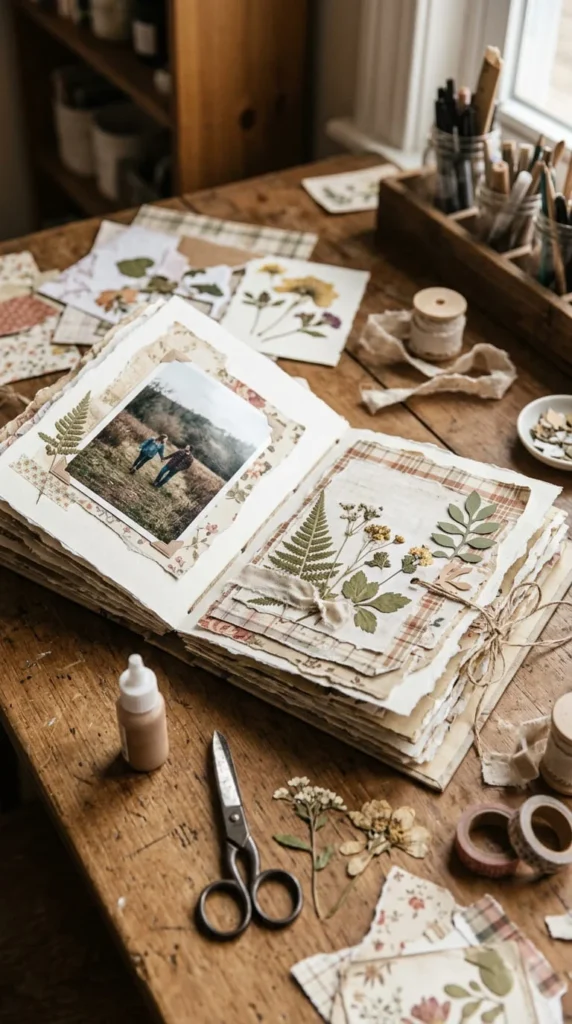
Creating a scrapbook cover is a simple way to make a memory book feel personal before anyone turns the first page. The cover can reflect a vacation, friendship, wedding, graduation, family milestone, birthday, or everyday collection of favorite moments. The best DIY scrapbook cover ideas do not require expensive supplies. Cardstock, photographs, patterned paper, fabric scraps, stickers, ribbons, pressed flowers, and recycled materials can all become part of a meaningful design.
The main trick is to choose a cover style that matches the story inside. A photo-heavy album may suit a clean collage, while a nature journal can work beautifully with botanical details. If you are making a gift, interactive elements such as pockets and envelopes can add another personal touch. The 24 ideas below cover minimalist, colorful, vintage, romantic, travel-inspired, and beginner-friendly approaches so you can create a cover that feels connected to your memories.
1. Create a One-Photo Focal Point
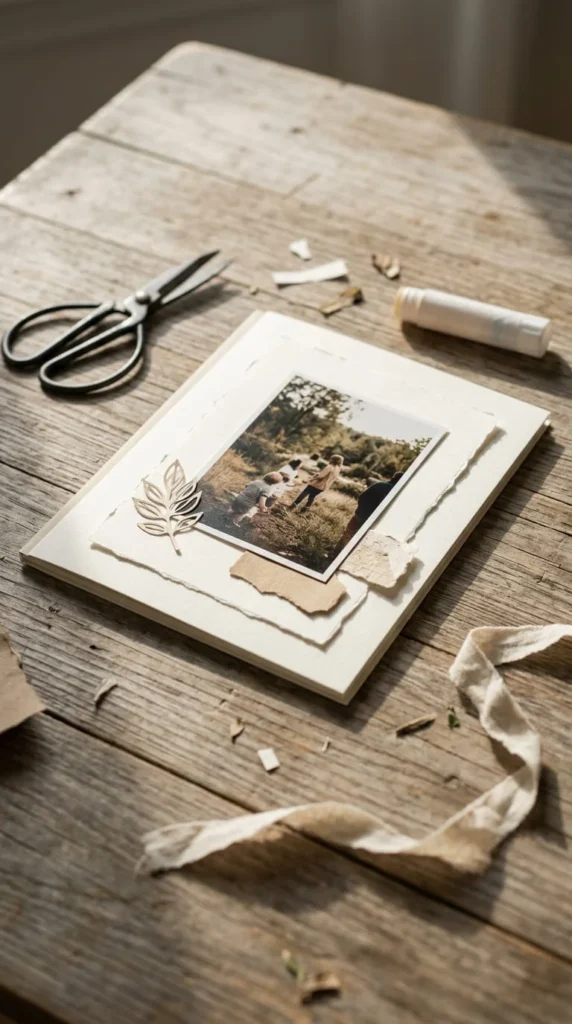
A scrapbook cover can look polished without being covered in decorations. Start with one meaningful photograph and let it become the main feature of the design.
Choose an image that represents the entire album. A favorite vacation view can introduce a travel scrapbook, while a candid family photograph can work for a collection of yearly memories.
Print the photo slightly smaller than the cover. Mount it on cardstock that is a little larger than the photograph. This creates a simple frame and gives you room for one or two decorative layers.
You can add a narrow strip of patterned paper underneath the frame or place a small ribbon along one edge.
Try keeping the palette to two or three colors. If the photograph is colorful, neutral cardstock can help it stand out. If the photograph is mostly neutral, use a stronger accent color around it.
Before gluing anything, arrange the pieces on the cover. Check that the main photograph remains easy to see.
This approach is especially useful for beginners because there are fewer elements to balance. It also gives the scrapbook a clean appearance that can work for almost any memory-book theme.
2. Build a Photo Mosaic
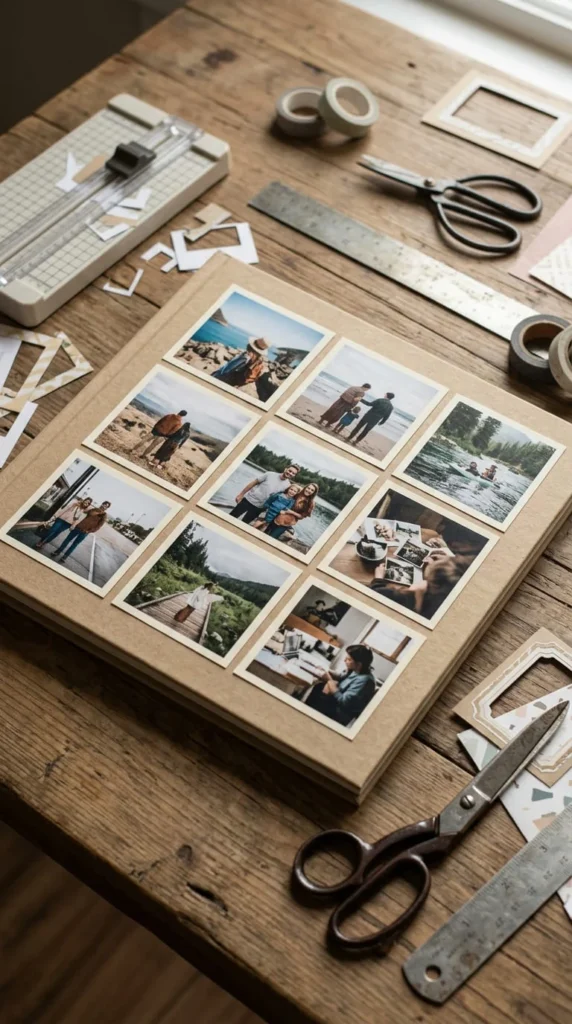
When a scrapbook contains many important memories, a photo mosaic lets several moments appear on the front at once.
Select six to twelve photographs that share a theme. They could show different parts of a vacation, family gathering, birthday celebration, or school year.
Crop the photographs to similar dimensions. Matching proportions will make the cover look organized even when the pictures have different subjects.
Arrange them on a sheet of paper before attaching them. Try a traditional grid with small spaces between each photograph. Another option is to overlap two or three images while keeping faces and important details visible.
For a softer appearance, mount each photo on cream cardstock first. For a modern cover, place the photographs directly against a solid background.
You can add one small decorative feature, such as:
- A ribbon strip
- A paper circle
- A tiny heart
- A narrow washi tape border
Avoid adding too many decorations around a photo-heavy cover. The photographs already provide plenty of visual detail.
A mosaic works particularly well when the scrapbook tells a story through several moments rather than one central event.
3. Layer Coordinated Patterned Papers
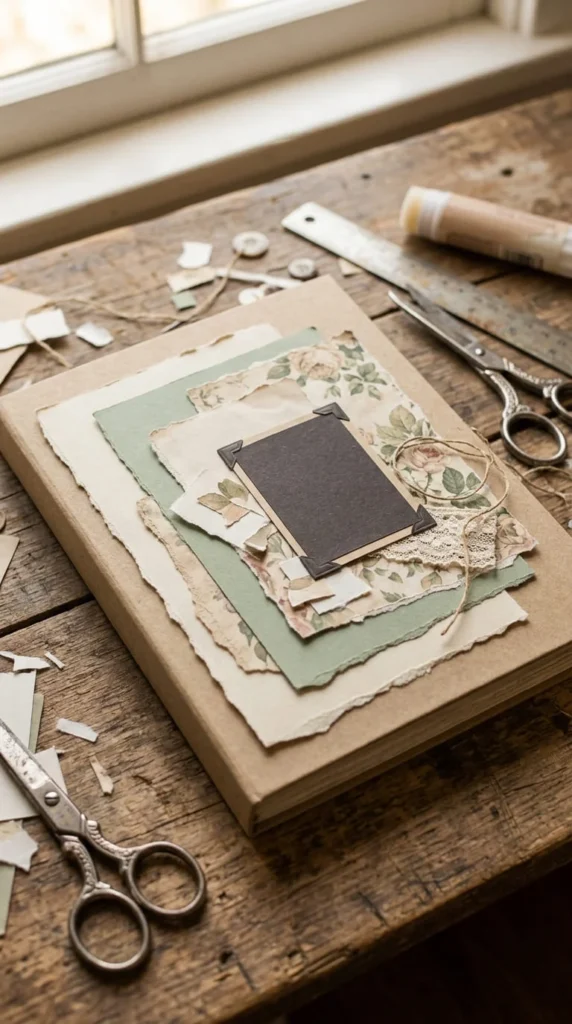
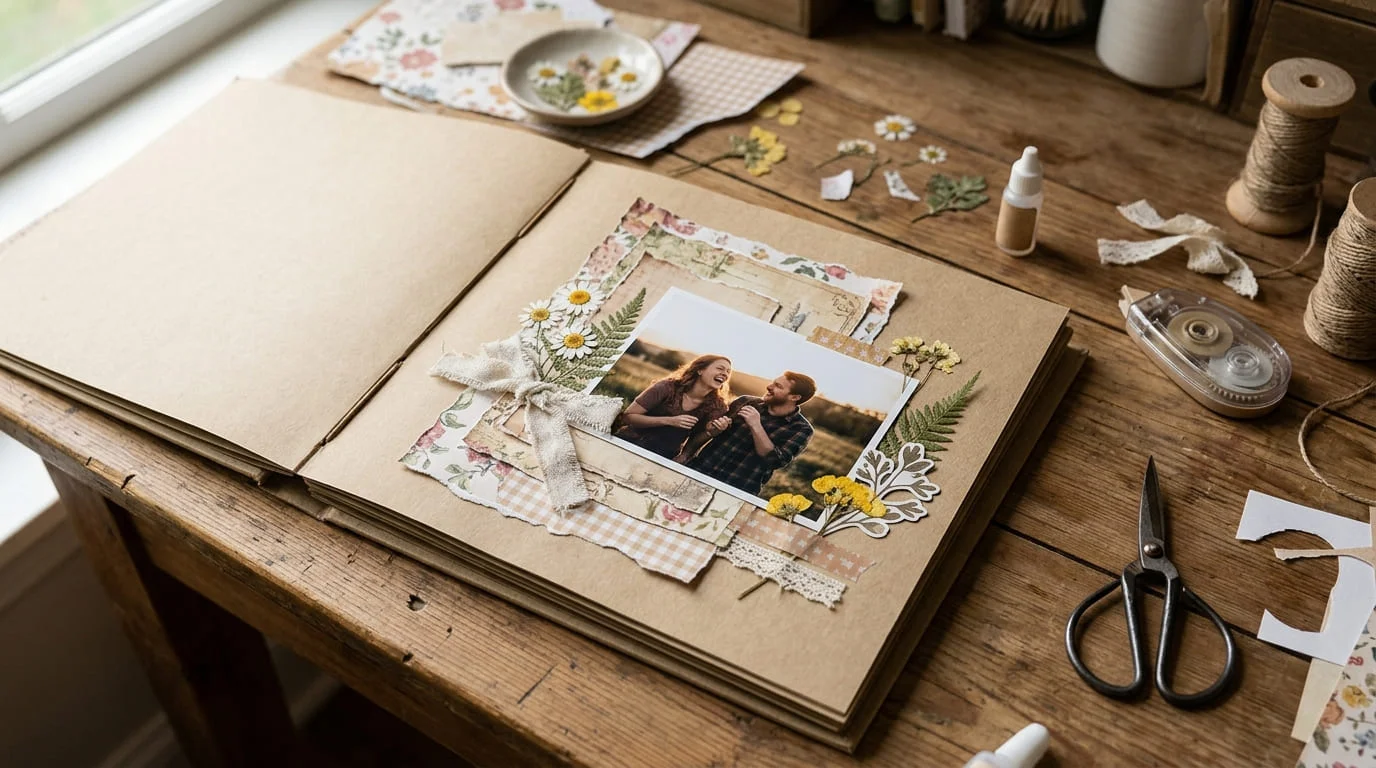
Patterned paper can turn a plain album into a decorative memory book with very little effort. The key is choosing patterns that share a similar color family.
Begin with one large sheet as the background. Add a smaller rectangle of another pattern, followed by a narrow strip or torn paper section.
For example, a floral paper could sit behind a geometric paper panel, while a solid cardstock frame provides a visual resting area for the photograph.
A useful layering order is:
- Full cover background
- Large cardstock panel
- Smaller patterned paper
- Photograph or focal decoration
- Two or three small accents
Try mixing one busy pattern with quieter designs. Using three highly detailed patterns can make the cover difficult to read.
Torn paper edges create a relaxed handmade appearance. Straight edges feel more structured.
You can also reuse leftover scrapbook paper from previous projects. Small pieces are often enough for borders, corners, tabs, and photo frames.
This approach works nicely for family albums, travel books, birthday scrapbooks, and creative journals because the paper itself becomes part of the visual story.
4. Design a Vintage Paper Cover
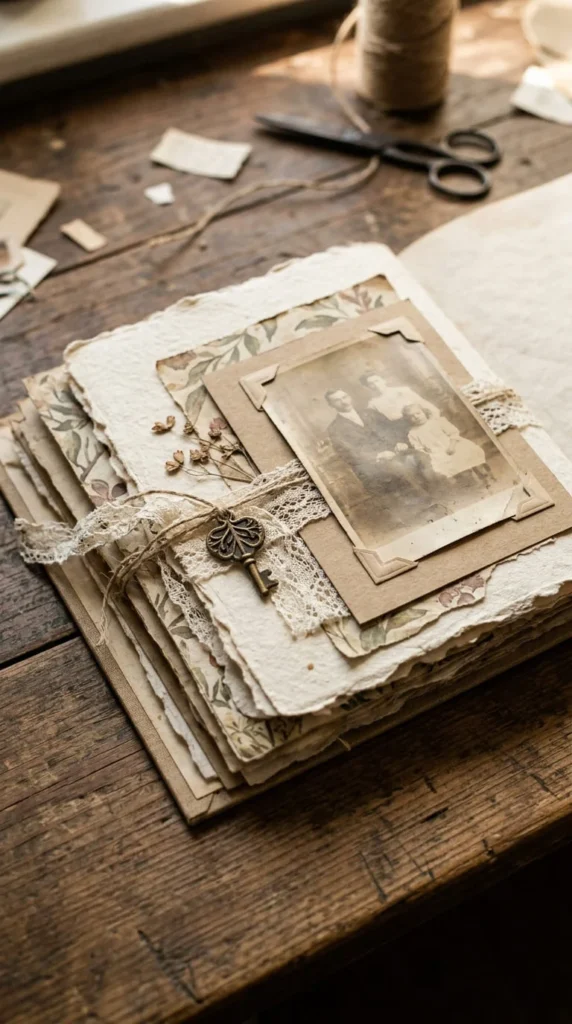
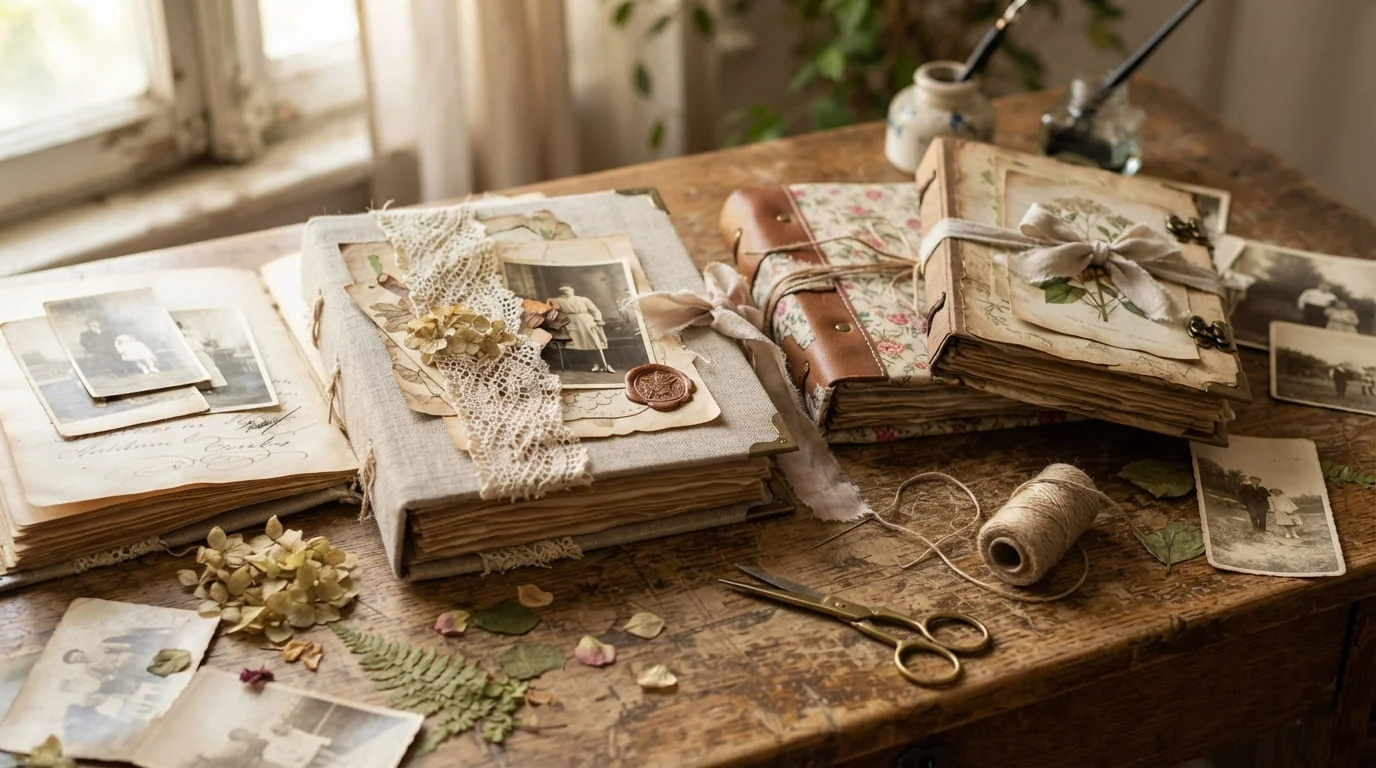
A vintage scrapbook cover can make modern memories feel connected to an older visual style. You can create the effect with muted colors, textured paper, lace, and aged-looking details.
Start with cream, tan, kraft brown, dusty blue, or muted green. Layer handmade paper with old-style patterned paper or recycled stationery.
A small photograph can sit inside a distressed cardstock frame. Add a lace strip along one side instead of covering the whole cover.
Other useful details include:
- Botanical paper cutouts
- Fabric scraps
- Paper pockets
- Ribbon
- Small metal-style charms
Keep the decorations relatively flat so the album remains easy to close.
If you are working with original old photographs, avoid applying adhesive directly to the image. Photo corners or archival-friendly mounting methods can help keep the photograph separate from the cover adhesive.
You can also scan an old photograph and print a copy for the cover. This lets the original remain protected inside the album.
The vintage style suits family-history scrapbooks, anniversary albums, old-photo collections, and memory books that focus on heritage.
5. Make a Sticker-Collage Cover
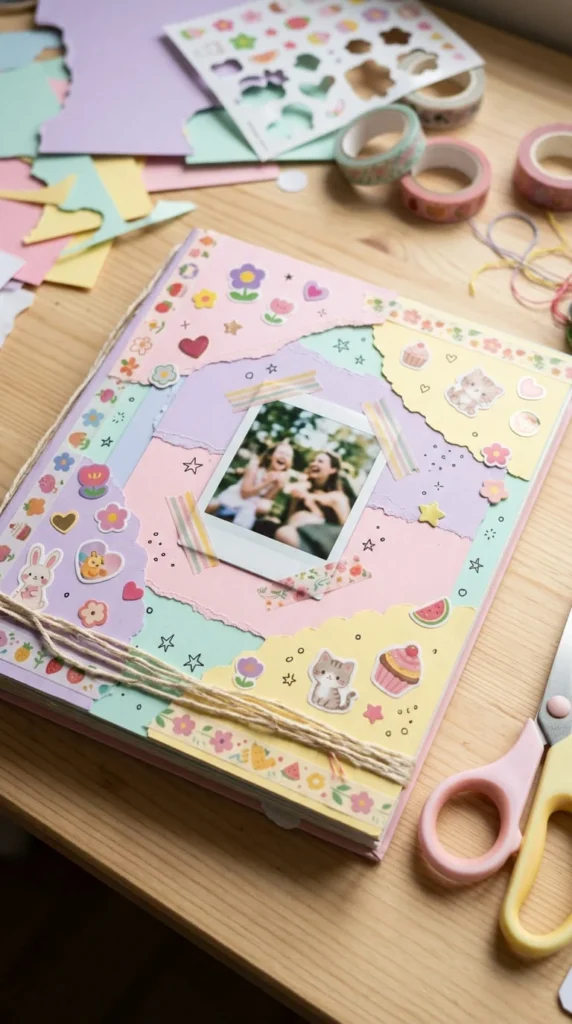
Stickers are a simple way to decorate a scrapbook cover without advanced cutting or drawing skills. They work especially well for colorful friendship albums, children’s memory books, birthday scrapbooks, and playful journals.
Start with a solid cardstock background. Choose a sticker collection that follows a recognizable theme or color palette.
Place one larger sticker or paper illustration near the center. Arrange smaller stickers around it while leaving some open space.
If the stickers contain many colors, choose a neutral background. Cream, white, kraft, or pale gray can keep the composition balanced.
You can combine stickers with:
- Small photographs
- Washi tape
- Paper circles
- Die-cut shapes
- Ribbon
- Decorative cardstock
Try not to cover every available space. A few empty areas help the main decorations remain visible.
For a child’s scrapbook, animal or food stickers can create a cheerful appearance. For an adult friendship album, botanical or geometric sticker collections can create a more restrained design.
Before sticking everything down, photograph your arrangement. This gives you a reference if pieces move while you work.
6. Paint a Soft Watercolor Background
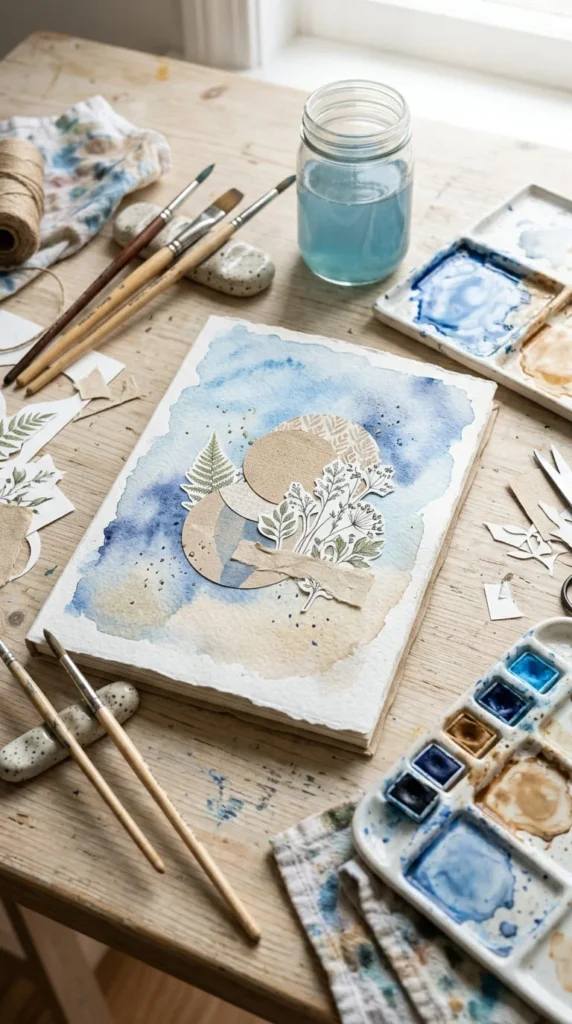
A watercolor background can add color without requiring detailed painting. Loose washes work well for travel albums, spring memory books, friendship journals, and artistic scrapbooks.
Use thick watercolor paper or heavy cardstock. Pick one or two related colors and apply a light wash. Allow the surface to dry fully before adding photographs or paper decorations.
A coastal scrapbook might use blue and sandy beige. A garden album could use pale green and soft pink. A sunset travel journal might use peach and muted purple.
After the paint dries, add simple shapes such as:
- Circles
- Leaves
- Stars
- Arches
- Small hearts
Keep the area behind your main photograph relatively light. This makes the photograph easier to see.
If the watercolor paper curls, place it beneath a clean, flat weight after it has dried. Once the paper is stable, mount it onto sturdier cardstock.
You do not have to cover the entire surface with paint. A partial wash can create an interesting background while leaving enough open space for photographs and other details.
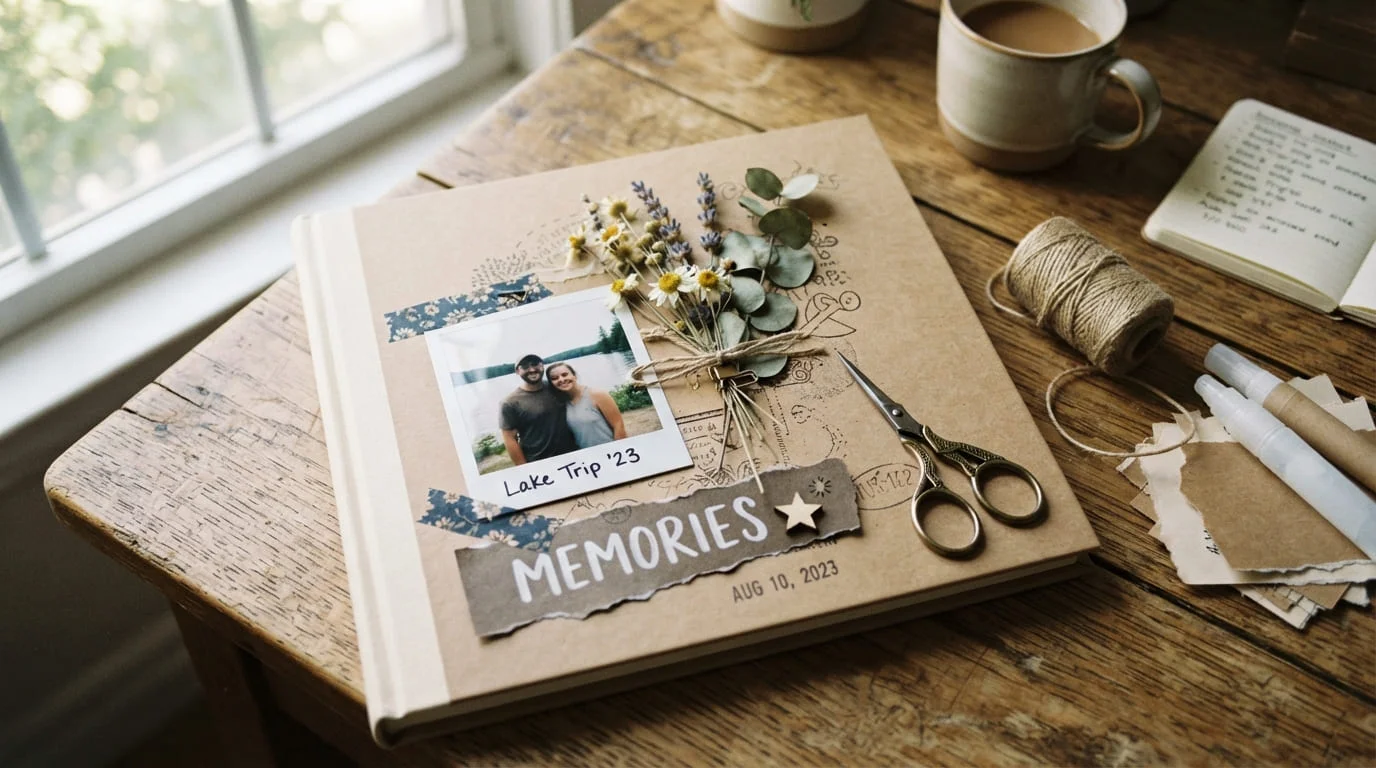
7. Decorate With Pressed Flowers
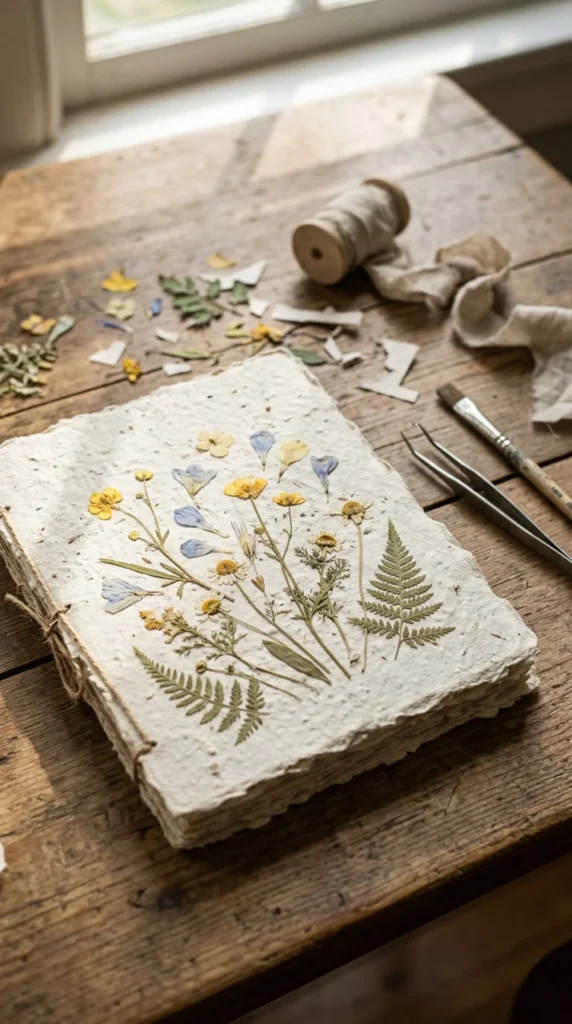
Pressed flowers can turn a scrapbook cover into a small botanical display. They suit garden journals, wedding albums, spring memories, nature trips, and romantic keepsakes.
Choose flowers that are completely dry and flat. Arrange them on the cover before attaching them so you can test the composition.
An asymmetrical arrangement often feels natural. Place one larger flower toward one side and use smaller flowers and leaves to create visual balance.
You can pair real pressed flowers with paper leaves or botanical cutouts. This gives you more shapes without requiring many natural specimens.
For a durable cover, protect delicate botanical pieces with an appropriate transparent covering or place them beneath a suitable protective layer.
Keep thicker flowers away from the spine and corners. Very bulky pieces may interfere with closing or become damaged when the album is stored.
A simple arrangement might contain:
- One larger flower
- Three small flowers
- Several narrow leaves
- Cream cardstock
- One ribbon accent
The natural materials make the cover feel personal, especially when the flowers came from a meaningful garden, event, or season.
8. Create a Washi Tape Frame
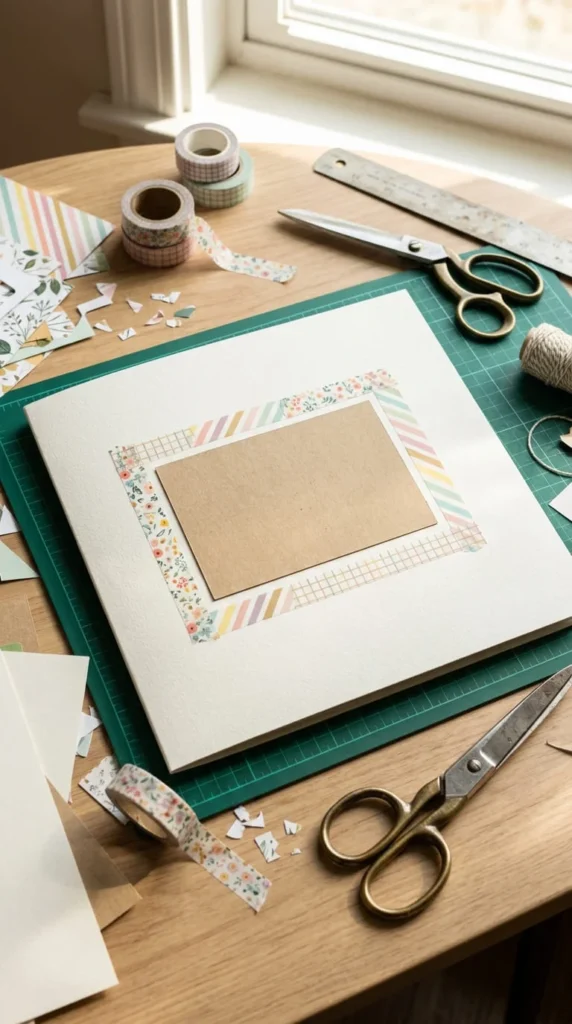
Washi tape can create borders and geometric details without requiring complicated cutting. A framed design is one of the easiest ways to use it on a scrapbook cover.
Choose several tape patterns that share one or two colors. You can create a rectangular frame around a photograph or make parallel strips along one edge.
Before attaching the tape, test the layout on scrap paper. This lets you check spacing and color balance.
For a clean cover, combine washi tape with:
- Solid cardstock
- One photograph
- A small paper shape
- A narrow ribbon
- One decorative sticker
You can also cut tape into small pieces and arrange them as geometric blocks.
If the cover material is delicate, test the tape on a hidden section first. Some adhesives can affect certain paper finishes.
A travel scrapbook might use map-patterned tape. A floral memory book could use botanical designs. A child’s album could use colorful shapes.
Washi tape is also useful when you want to change the cover later because many varieties can be removed more easily than permanent adhesive.
9. Cut a Modern Geometric Design
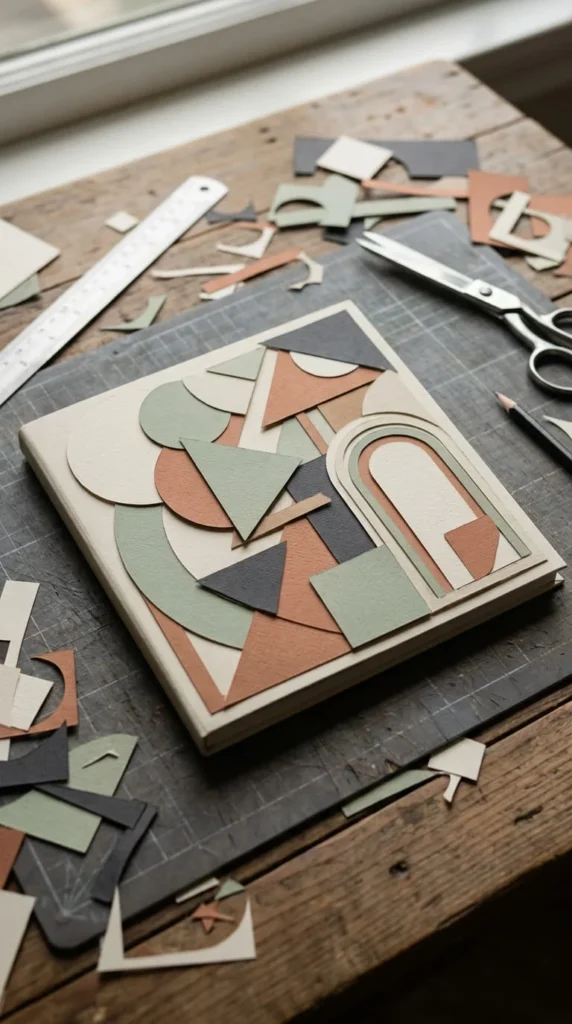
Geometric paper shapes can give a scrapbook a modern appearance. This approach works especially well when the interior pages contain colorful photographs and you want a more structured front.
Choose two or three colors. Cut shapes in different sizes and arrange them before gluing.
Circles can soften a design, while triangles and rectangles create sharper lines. Arches can add a softer architectural shape.
A simple composition could use:
- One large central circle
- Four small circles
- Two narrow strips
- One contrasting square
- A small photograph
You can trace household objects to create circles if you do not have a circle punch.
Use a ruler for straight lines and check the spacing before applying adhesive. Slightly uneven handmade shapes can also look attractive, especially when the scrapbook has a casual craft style.
Keep thick layers away from the spine. A flat geometric design is easier to store and handle.
This style works for travel albums, graduation books, friendship scrapbooks, and personal journals where you want the cover to feel clean and contemporary.
10. Combine Fabric and Lace
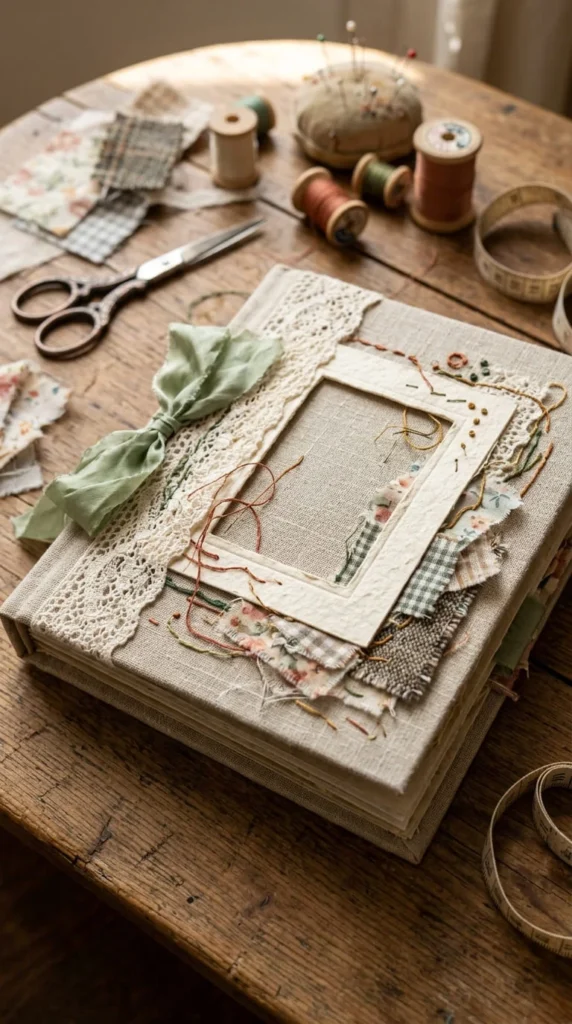
Fabric gives a scrapbook cover a different texture from ordinary paper. Cotton, linen, lace, burlap, and ribbon can all become decorative elements.
You can cover the entire front with fabric or use a smaller fabric panel as the focal area. Measure carefully before cutting so the edges can be finished neatly.
Lace works well as a narrow border. A ribbon can frame a photograph or mark one side of the cover.
For a simple mixed-media design, combine:
- Linen fabric
- Cream cardstock
- Lace
- Ribbon
- One small photograph
If you do not sew, use a suitable fabric adhesive and test it on a small scrap first. Different fabrics can react differently to adhesives.
Keep the spine relatively flat. Thick fabric folds or layered embellishments can interfere with the album’s movement.
This style works particularly well for wedding albums, baby memory books, family keepsakes, and handmade gifts. The combination of soft fabric and paper creates a tactile cover that feels different when handled.
11. Add Raised Chipboard Shapes
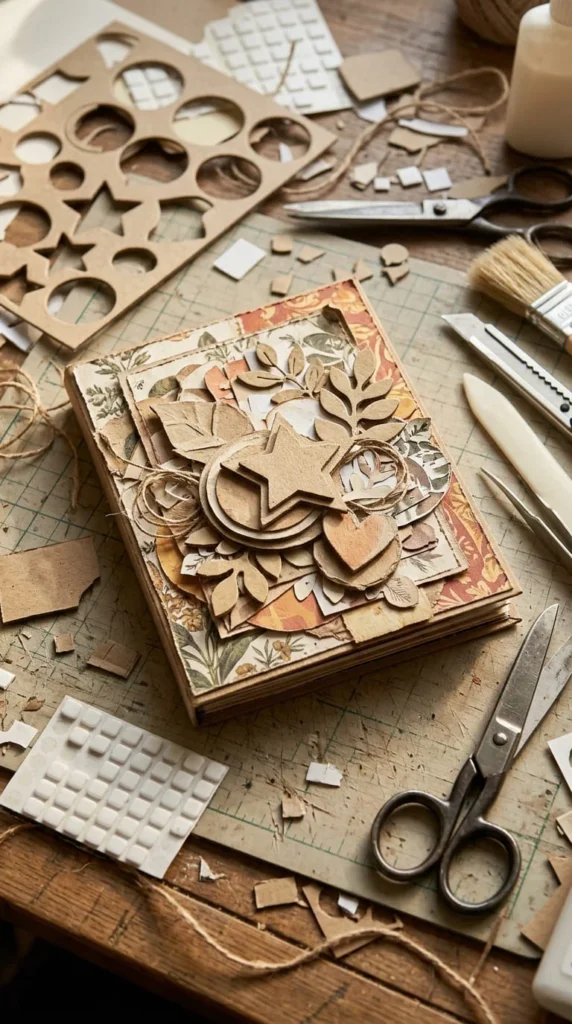
Raised chipboard pieces can give a flat scrapbook cover more depth. They are available in many shapes, including stars, flowers, hearts, circles, leaves, and geometric designs.
Start with a flat background made from cardstock or patterned paper. Choose one larger chipboard shape as the main feature, then add smaller pieces around it.
Foam adhesive can raise selected elements. Use it on only a few pieces so the cover does not become too thick.
Think of the cover in layers:
- Flat background
- Paper or photo layer
- Raised chipboard accents
A graduation album could use stars and a graduation-cap shape. A children’s scrapbook might use animals or clouds. A nature journal could use leaves and flowers.
Before finishing, close the scrapbook and check the thickness. Pay particular attention to the spine and corners.
Raised decorations are best used where the album will be handled carefully. If the scrapbook will travel frequently, flatter embellishments may last longer.
12. Personalize the Cover With Vinyl
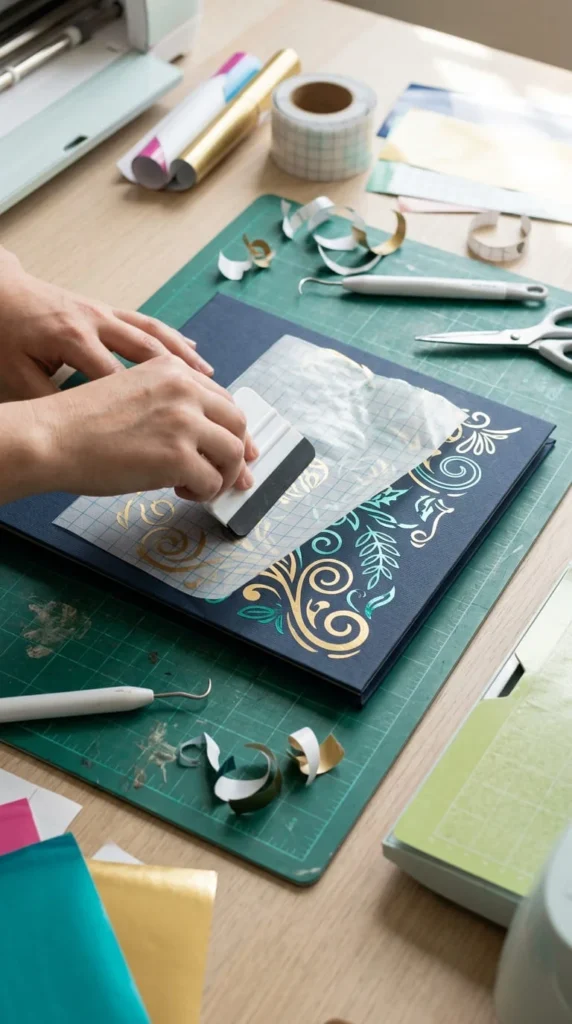
Vinyl can add a clean personalized detail to a scrapbook cover. A person’s name, year, date, or short album title can make the memory book feel specific to its story.
If you own a cutting machine, prepare the lettering digitally and cut it from adhesive vinyl. Weed away the unwanted material, place transfer tape over the design, and press it firmly onto the prepared surface.
Before applying it, check:
- Cover size
- Letter spacing
- Surface cleanliness
- Vinyl type
- Transfer tape compatibility
If you do not have a cutting machine, you can create hand-cut cardstock lettering using printed letters as templates.
Vinyl works particularly well with minimalist covers because the lettering can provide the main identifying feature without adding many decorative layers.
For a travel album, a destination name can work as the main detail. For a family album, use the family name or year. For a graduation scrapbook, the graduation year can sit beneath a photograph.
Keep the lettering away from highly textured areas where the adhesive may not sit evenly.
13. Build a Celestial Moon-and-Stars Theme
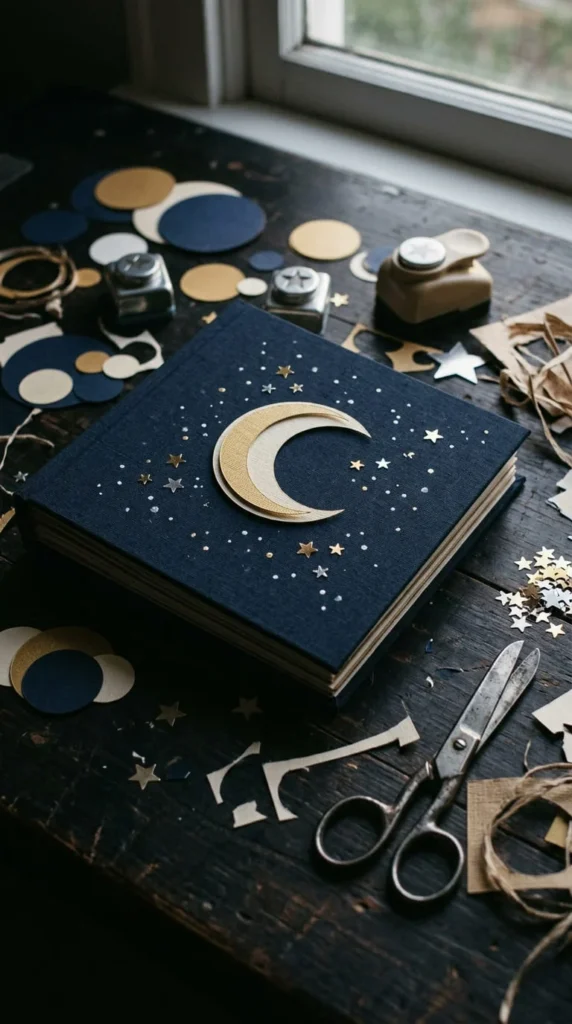
A moon-and-stars cover works well for night photography, dream journals, birthday albums, astronomy-themed books, and personal memory collections.
Use a dark cardstock background such as navy, charcoal, or deep plum. Cut a large crescent moon from cream or metallic paper.
Add small stars in different sizes. A few tiny painted dots can fill the background without requiring dozens of individual paper pieces.
A simple palette might include:
- Navy
- Cream
- Metallic gold
For a softer appearance, replace metallic paper with pale blue or silver.
You can place a circular photograph beneath the moon or keep the cover purely decorative and let the photographs appear inside.
Arrange the stars in groups instead of distributing them evenly. This creates more natural visual movement.
Keep the moon and stars relatively flat if the scrapbook will be stored on a shelf. A thin paper design will be easier to handle than many thick embellishments.
14. Turn Travel Maps Into the Background
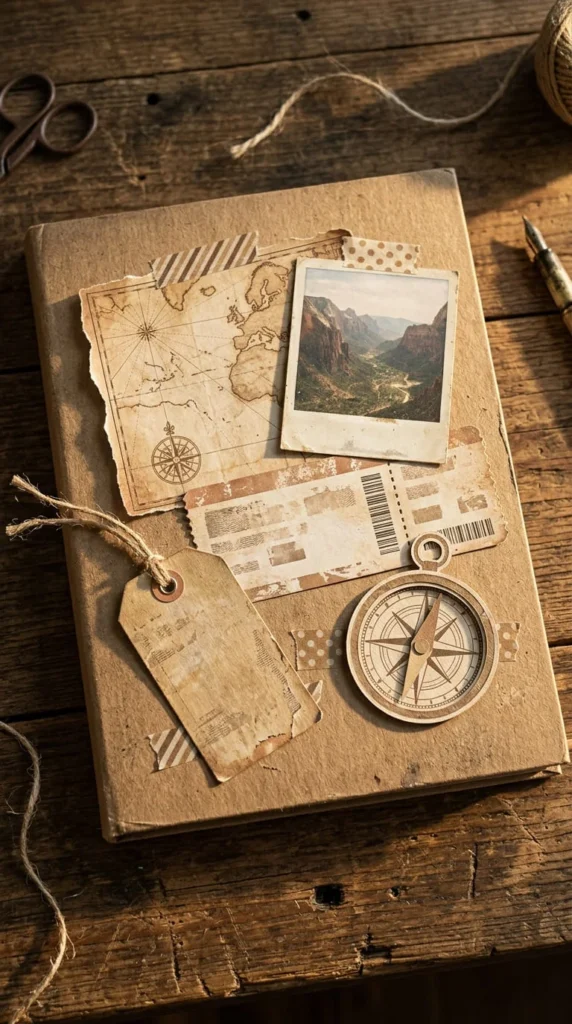
Travel memories often come with paper materials that already tell part of the story. Maps, tickets, postcards, luggage tags, and brochures can become meaningful cover decorations.
Use a map section as the background or as one large layered panel. Place a favorite travel photograph on top.
A useful arrangement is:
- Map background
- Photograph
- Ticket or tag
- Small paper compass
- Narrow decorative strip
If an original ticket or map is fragile, scan it and print a copy. This lets you preserve the original while still using its visual character.
Choose colors that connect with the destination. Coastal trips can use blue and sandy tones, while city trips can use neutral gray, cream, and one bright accent.
Do not cover every map detail. The map itself provides visual information and can make the destination feel present on the cover.
This approach is particularly effective for vacation albums because the front immediately signals that the scrapbook contains travel memories.
15. Create a Graduation Memory Cover
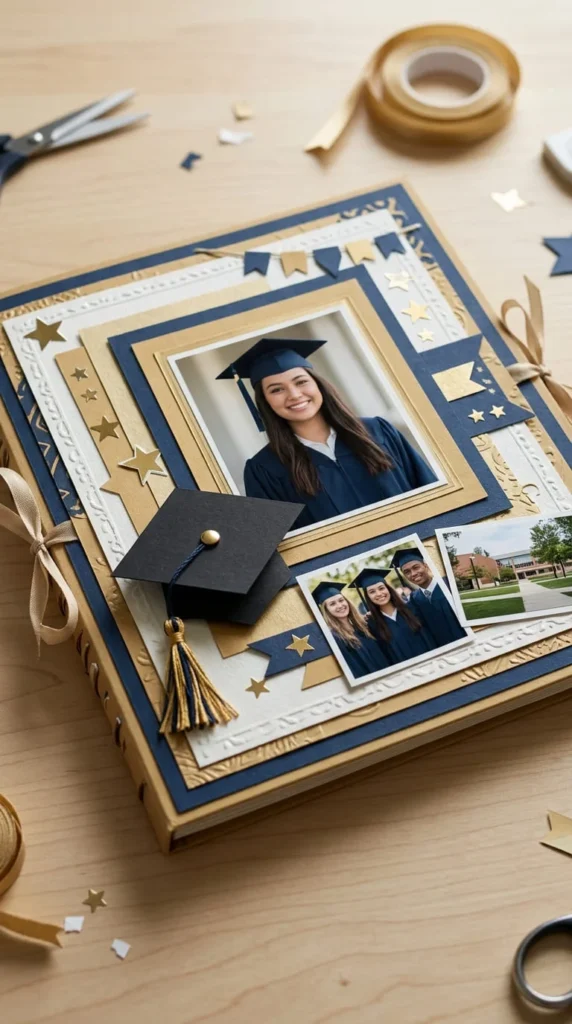
A graduation scrapbook cover can celebrate the milestone while keeping the design practical. Start with the graduate’s main photograph or a background made from school colors.
Choose two main cardstock colors. Add a paper graduation cap, ribbon tassel, stars, or a few supporting photographs.
One possible layout uses a large portrait in the center with two smaller photographs beneath it. Another can place the portrait toward one side and use paper decorations on the opposite side.
Keep the decorations relatively flat if the album will be carried to a graduation party.
You can personalize the cover with:
- Graduation year
- School colors
- Small paper stars
- A photograph from the ceremony
- A ribbon tassel
Hand-cut cardstock letters can work well if you do not have vinyl tools.
For a cohesive gift, use the same colors on the first interior pages. This makes the album feel like one connected project.
16. Make a Romantic Memory Cover
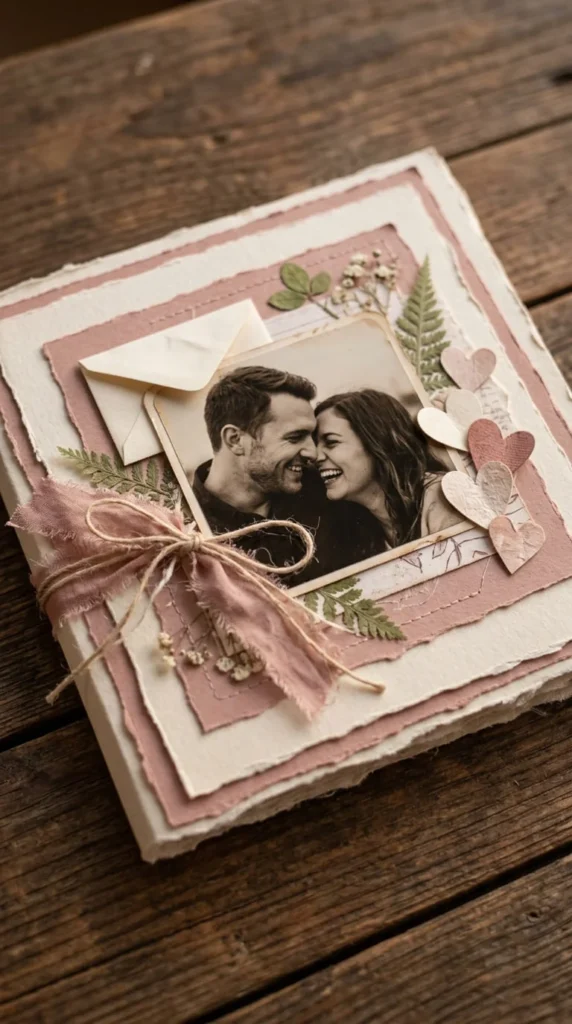
A romantic scrapbook can tell a personal story through a few carefully selected elements. Instead of filling the cover with hearts, choose one photograph and several details with meaning.
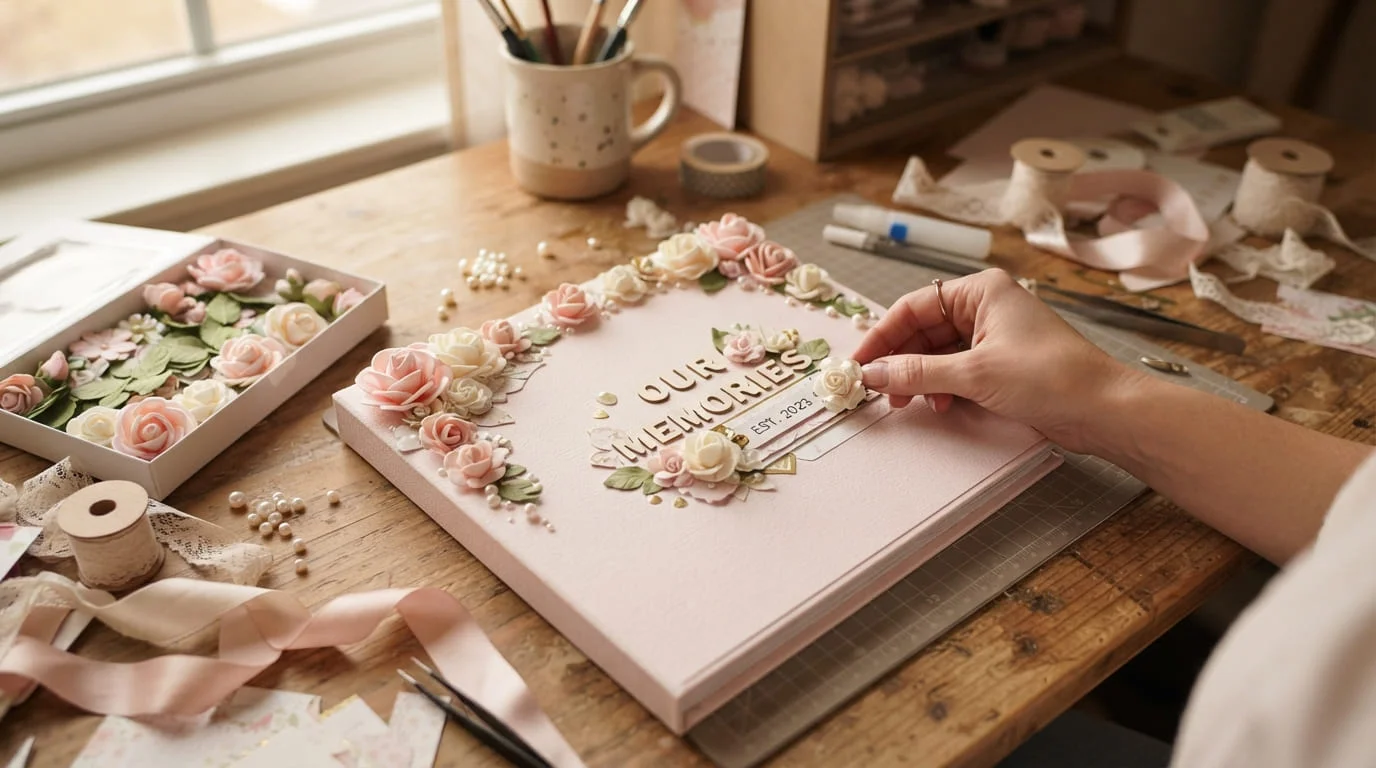
Frame the photograph with cream or blush cardstock. Add a small paper heart near one corner and a ribbon strip along the edge.
A tiny envelope can hold a private note that the recipient can discover when opening the scrapbook.
For a softer appearance, use:
- Cream
- Dusty rose
- Warm brown
For a brighter cover, use red, pink, and white.
You can also include two or three smaller photographs beneath the main image. Keep their arrangement simple so the cover does not become crowded.
If the scrapbook is a gift, consider placing it inside a protective box or tying it with ribbon.
The most meaningful romantic covers usually contain details connected to the relationship rather than generic decorations. A favorite place, shared hobby, or memorable photograph can provide the central idea.
17. Add a Kraft Envelope Pocket
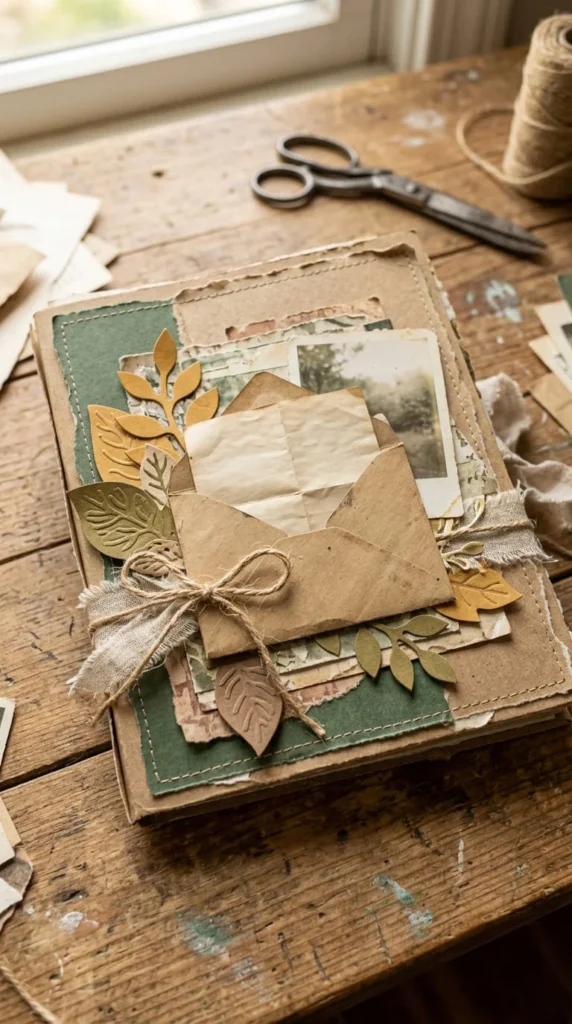
An envelope pocket turns a scrapbook cover into an interactive piece. It gives you a small space for a note, ticket, photograph, or other flat keepsake.
Attach a kraft envelope to the front cover while keeping the opening accessible. Decorate the outside with a paper strip, ribbon, botanical cutout, or small photograph.
Possible contents include:
- Handwritten note
- Ticket stub
- Small photograph
- Paper tag
- Short memory list
Keep the items inside relatively flat. Bulky objects can make the scrapbook difficult to close.
For a friendship scrapbook, the pocket could hold a private message. A travel album could contain the final ticket from the journey. A wedding album could include a ceremony card.
You can buy ready-made envelopes or make one from cardstock. If you create your own, use an existing envelope as a size reference.
This idea is particularly useful when you want the scrapbook to offer a small surprise before the reader reaches the first page.
18. Repurpose Greeting Cards and Gift Wrap
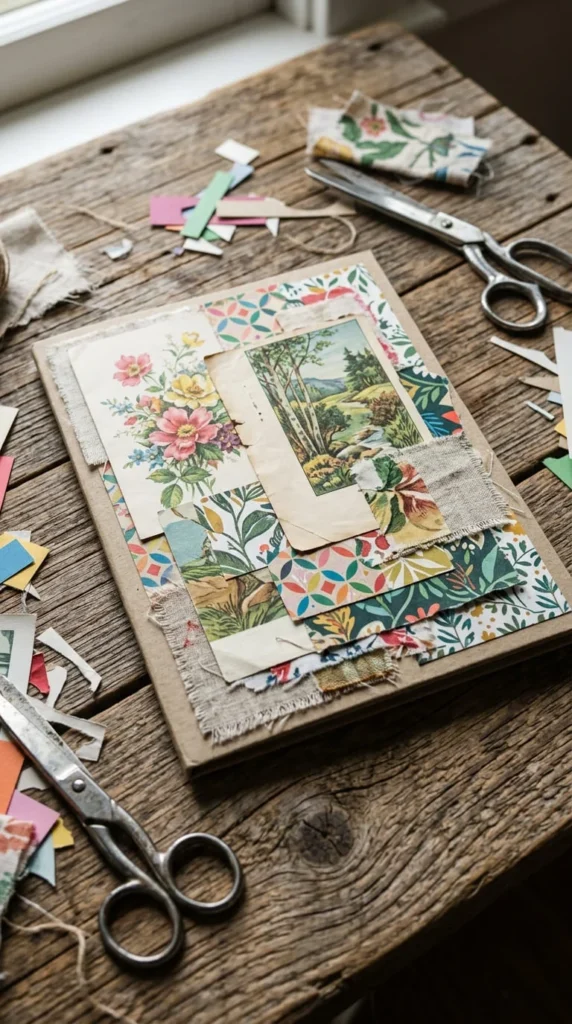
A craft drawer may already contain many materials that can become scrapbook-cover decorations. Greeting cards, gift wrap, calendar pages, packaging, brochures, and fabric scraps can all provide interesting patterns and illustrations.
Look for sections that are clean and sturdy. Cut out the most attractive areas and arrange them on cardstock.
For example:
- Gift wrap can become the background.
- A greeting-card illustration can become the focal point.
- A calendar page can provide a secondary pattern.
- Fabric can become a narrow accent.
If the paper is thin, mount it onto cardstock before attaching it to the album.
For fragile original materials, scan or photograph them and print copies. This allows the memory to remain preserved while still giving you a decorative cover.
This approach can also reduce waste because small leftover pieces become useful instead of being discarded.
The style works especially well for nostalgic scrapbooks because the materials themselves may carry memories from previous occasions.
19. Use a Printable Digital Cover
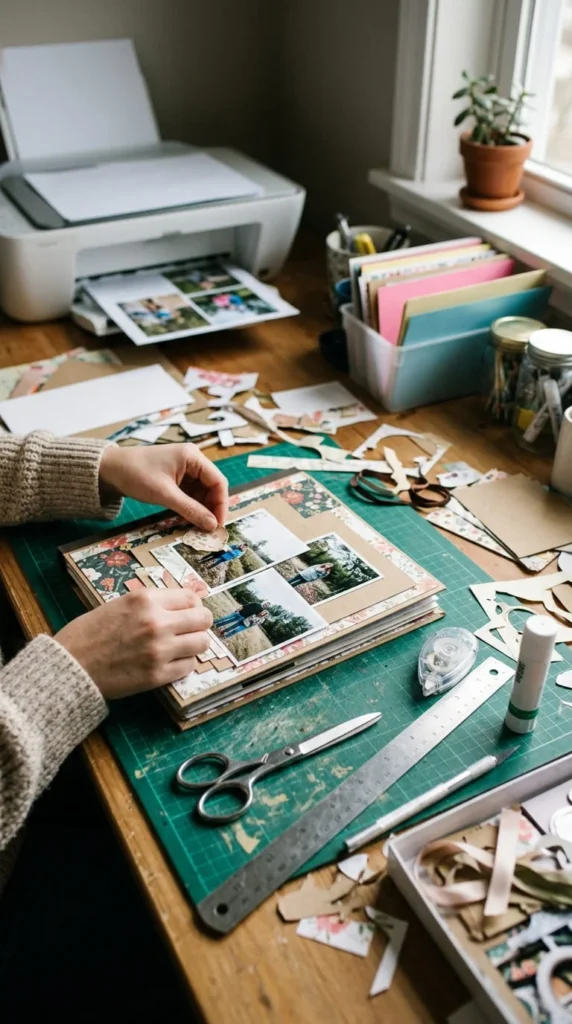
A printable design can save time when you want clean shapes and consistent spacing. You can create the artwork digitally and print it onto cardstock before attaching it to the album.
Begin by measuring the cover. Create your digital canvas to match those dimensions as closely as possible.
Add photographs, shapes, patterns, and decorative elements. Print a test copy before producing the final version.
A useful workflow is:
- Measure the cover.
- Create the digital layout.
- Add photographs.
- Adjust colors and spacing.
- Print a test.
- Attach the final print to cardstock.
If your printer cannot handle the full cover size, divide the design into smaller sections and assemble them carefully.
You can also print individual decorative pieces rather than the entire cover. This creates a combination of digital precision and handmade assembly.
A printable approach is useful for beginners who like organized layouts but do not want to draw or cut every decorative shape themselves.
20. Continue the Design Across the Spine
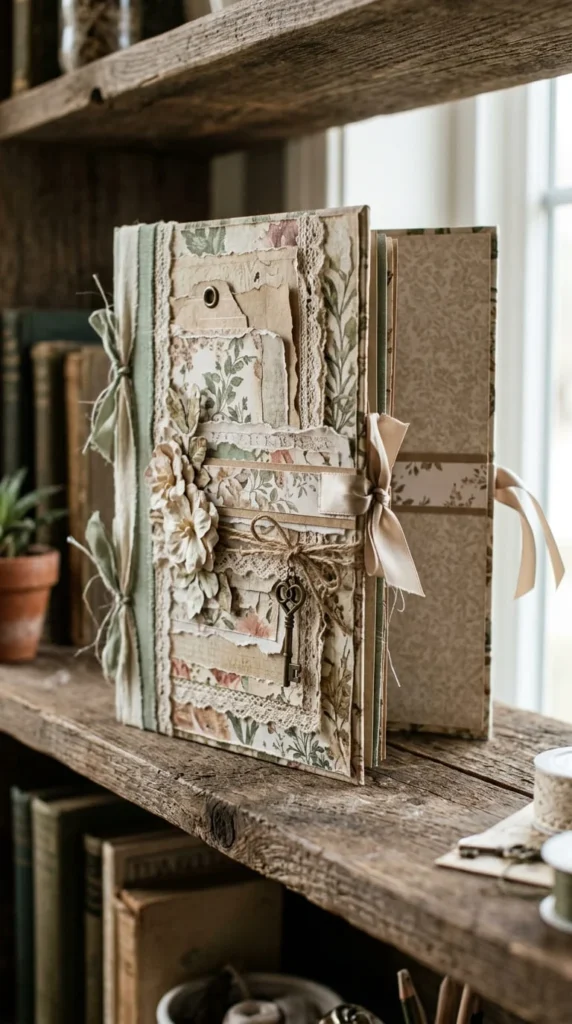
The spine is easy to overlook, but it becomes visible whenever a scrapbook sits on a shelf. Connecting the front and spine can make the album look more complete.
Measure the front, back, and spine separately. Choose one decorative feature that can continue across all three areas.
A patterned paper strip can run from the front toward the spine. A ribbon can provide another connection, as long as it does not interfere with the binding.
Keep the spine relatively flat. Thick chipboard pieces or large charms may rub against neighboring books.
You can coordinate:
- Patterned paper
- Ribbon
- Botanical motifs
- Geometric shapes
- Fabric strips
The back cover does not have to be as decorated as the front. A small matching detail may be enough.
This approach is especially useful for albums that will be displayed upright. The coordinated surfaces can make the scrapbook feel like a finished book rather than a decorated album front.
21. Choose a Neutral Minimalist Style
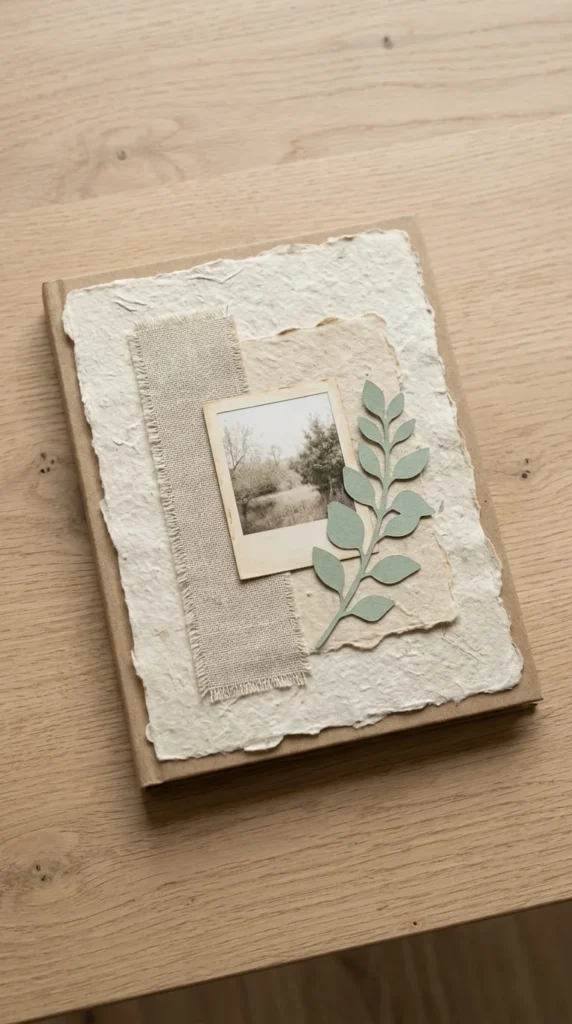
A neutral cover can feel calm and timeless. Instead of using many colors, work with cream, beige, kraft brown, gray, or muted green.
Choose one photograph or paper illustration as the main feature. Add a thin frame and perhaps one piece of textured paper.
When the color palette is restrained, texture becomes more noticeable. Handmade paper, linen, kraft cardstock, and lightly patterned paper can provide enough detail without many embellishments.
A simple palette might use:
- Warm cream
- Kraft brown
- Soft gray
- One muted accent
Leave some empty space around the main photograph. The open area helps the cover feel organized.
This style is suitable for family archives, travel journals, wedding albums, and adult memory books.
It can also work well when the interior pages are colorful. The neutral cover creates a calmer first impression while allowing the photographs inside to provide most of the color.
22. Add Handmade Paper and Natural Fibers
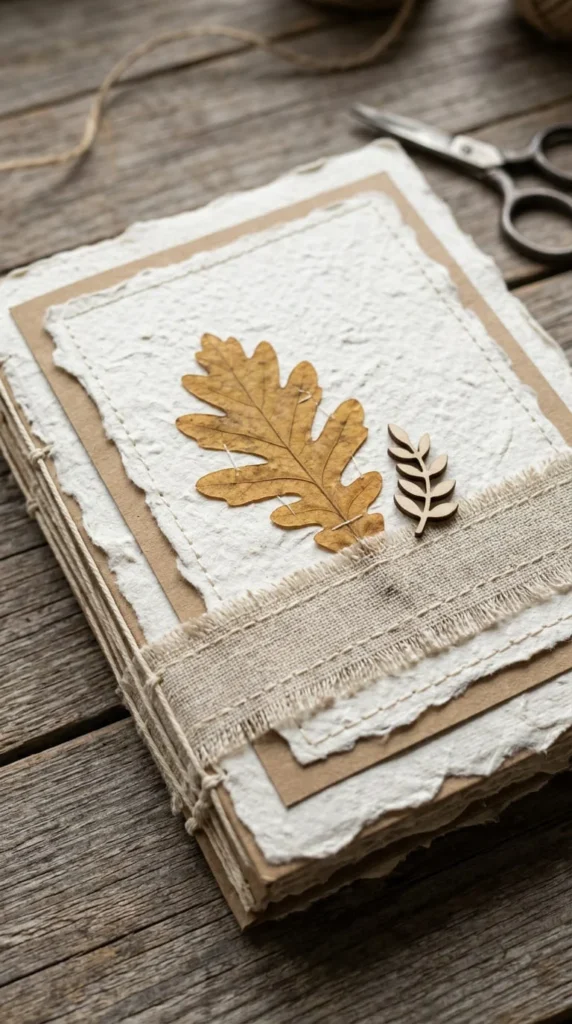
Handmade paper can give a scrapbook cover a naturally textured surface. Combine it with cotton thread, linen, kraft paper, pressed leaves, or a small wood veneer element.
Choose a sturdy handmade paper or mount delicate paper onto stronger cardstock. This creates a more stable surface for the album.
A simple composition might place a large handmade-paper panel behind a small photograph. A linen strip can cross one edge, while cotton thread adds a subtle handmade detail.
For a nature scrapbook, add a pressed leaf or small botanical paper shape. For a travel album, pair the natural paper with a small map section.
Keep thick materials away from the spine. The cover still has to open and close comfortably.
This approach is useful when you want the materials themselves to become part of the decoration. It also works nicely with recycled-craft projects because handmade paper can be paired with leftover fabric and paper pieces.
23. Create a Seasonal Holiday Cover
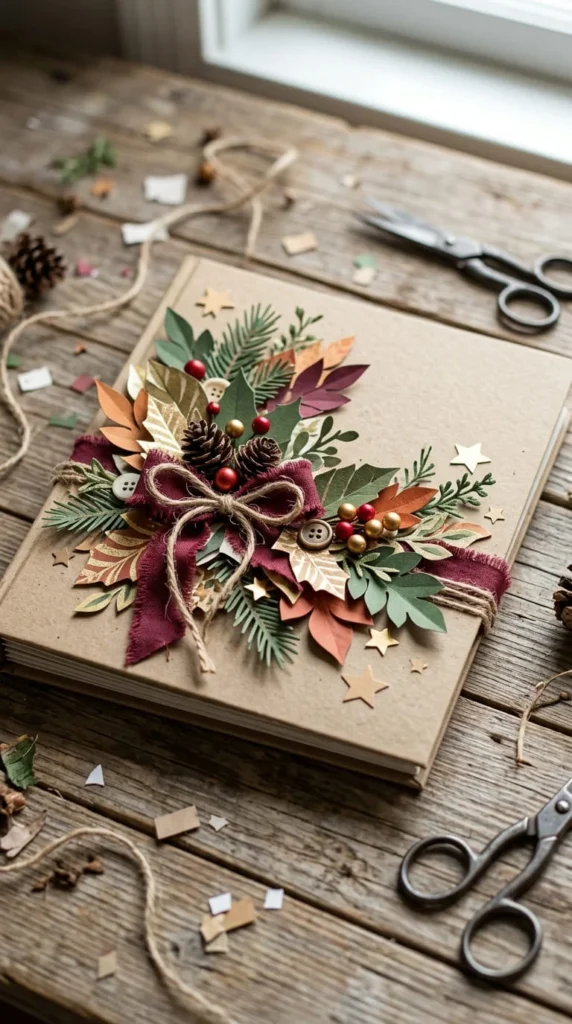
A seasonal scrapbook cover can reflect the time of year represented by the memories inside. Christmas, autumn, spring, summer vacation, and Halloween albums can each have their own visual language.
For a Christmas album, use evergreen shapes, red ribbon, cream cardstock, and small paper stars. An autumn scrapbook could use leaves, warm brown cardstock, and orange paper accents.
A spring memory book might use pressed flowers and pastel paper. For summer, try blue cardstock, shell shapes, and sunny yellow accents.
Keep the design focused around one seasonal theme rather than mixing several holidays.
You can also create removable decorations if you plan to reuse the album for another season. Paper bands or detachable tags can change the appearance without rebuilding the entire cover.
Seasonal covers work especially well for yearly family memory books because the cover itself can immediately show which collection of memories the album contains.
24. Match the Cover With the First Two Pages
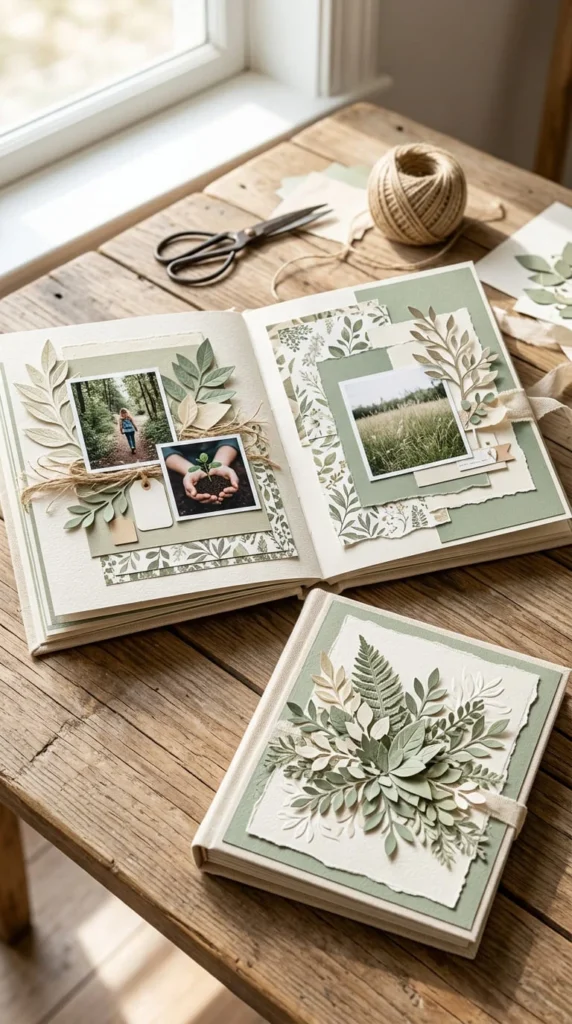
One of the strongest ways to make a scrapbook feel thoughtfully designed is to connect the cover with the opening pages.
Choose two main colors and one accent color for the cover. Carry those colors onto the first interior spread.
Repeat one decorative motif as well. If the cover uses paper leaves, place smaller leaves on the first page. If the cover uses circles, repeat a few circles inside.
A travel scrapbook could use blue cardstock and map details on the cover, then continue those elements on the opening page.
A wedding scrapbook might use cream, blush, and botanical shapes on both the cover and first spread.
You can also repeat the same photograph style. For example, a framed portrait on the cover could be followed by smaller framed photographs inside.
The goal is not to make every page identical. Instead, repeat a few visual elements so the scrapbook feels connected from the outside to the inside.
Conclusion
A memorable scrapbook cover can come from simple materials and a clear idea. Whether you prefer photographs, patterned paper, pressed flowers, fabric, stickers, maps, geometric shapes, or recycled materials, the design should connect with the memories inside the book.
Start by choosing your main focal point and a small color palette. Arrange everything before gluing, keep bulky pieces away from the spine, and check that the finished album can still open and close comfortably.
Try one of these DIY scrapbook cover ideas with materials you already have at home. A personal photograph, a few paper scraps, and thoughtful details can turn an ordinary album into a memory book that feels truly personal.